In this article we will look at how to collect a robot of Lego with your child.
The content of the article
- How to make a simple robot for children and beginners designer: Instruction, Scheme, Description
- Video: Collect a simple robot from Lego
- How to make from the designer Lego Little Robot: Instruction, Scheme, Description
- Video: Collect a small robot from Lego
- How to make a Largo Robot designer: Instruction, Scheme, Description
- Video: Collect a big robot from Lego
- How to make a lego fighting robot designer: instruction, scheme, description
- Video: Collect the combat robot from Lego
- How to make from the designer Lego Space Robot Transformer: Instruction, Scheme, Description
- Video: Assembling Robot Transformer
- Robots from Lego do it yourself: photo
- Video: Lego robots
Designer Lego loved everything - "from Mala and to Velik". The details are so thought out that you can make any of them any shape, a car or a robot. True, parents are rejoiced in their own way when they come to the lavetled detail. But the process of folding is dragging so much that it is hard to tear away even adults. In this material, information will be provided, how to make a robot from the Lego designer without a special series.
How to make a simple robot for children and beginners designer: Instruction, Scheme, Description
Children sometimes want to collect a robot without having suitable details. After all, each series is calculated to the smallest detail. Each color and each form of details has its own strict purpose. But here you have a few such series. They will definitely find suitable parts for the robot. Color is desirable to take one shade, but no one forbids to make a multicolored robot.
So begin to build a robot!
- First of all lay down the torso (Fig. 1). Take the detail into two blocks of 4 cubes. Two high cubes are attached to the back side of two squares. And the part is placed on the front for the entire length, the same height. But she should be topped with top, and in front.
- On the second floor, rear mounted high cube one square, again, high cube, but in two parts and one single cube. Note that the single cubes should have holes that will look to the sides. In them will be to attach the hand.
- Front once again put a long piece on the 4 squares with mounts at the front and top.
- Above all two plates laid, covering the entire surface. How to do this in detail shown on Figure 1.
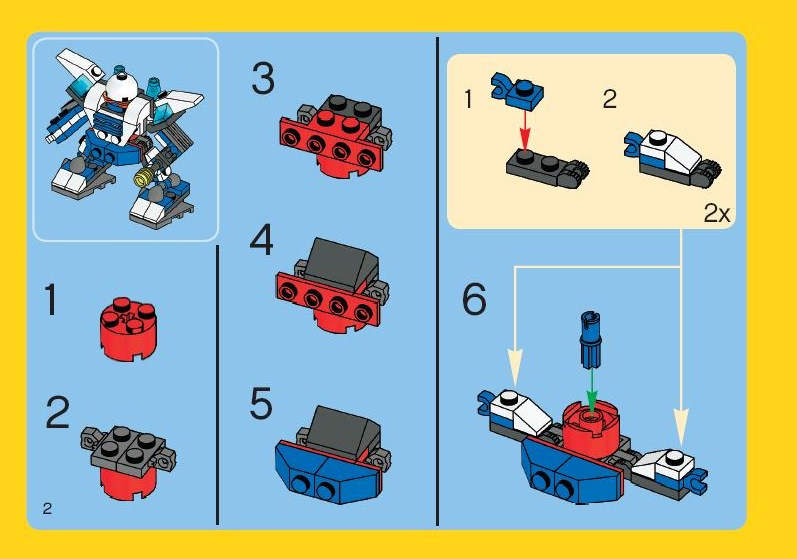
Fig.1
- Building a leg, rather their base (Figure 2). Taken part in the three blocks of 2 squares. That is, a total of 6 squares, arranged in two rows.
- Neither these three plates are attached to a fixture in the middle. They are arranged perpendicular to the main part.
- Now for the feet and the legs themselves. Take a piece of red or other distinctive color on the three squares. It is located on top of a corner member. That is, it is designed for two dice, but the top of the first cut at an angle of 45 °. As a result, you should get out detail, reminiscent of the shape of sneaker.
- For this piece is placed one square to align the shape of "sneaker." On the remaining space is placed high double cube has a different color (it is a two-square). Height will be slightly higher before the "sneaker."
- Connect the legs to the body, which was made a little earlier. For details, see Figure 2.
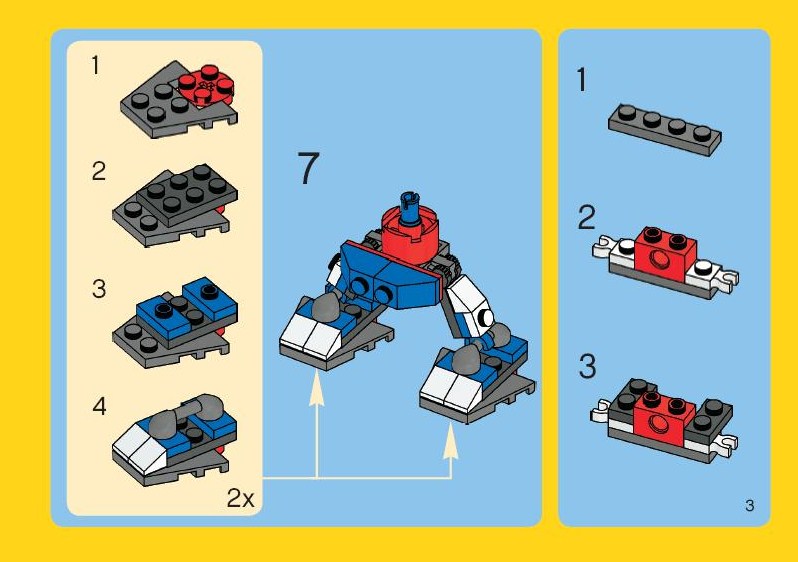
Fig.2
- Go to K. arms and shoulders (Fig.3). Insert into the holes on the sides of round parts, reminiscent of the lights. And for them already attach a narrow part 4 squares. Due to this round parts with fingers can be moved. Discussed in more detail in Figure 3.
- On top of this base mount black part one squares. Note at the end to be snapping element!
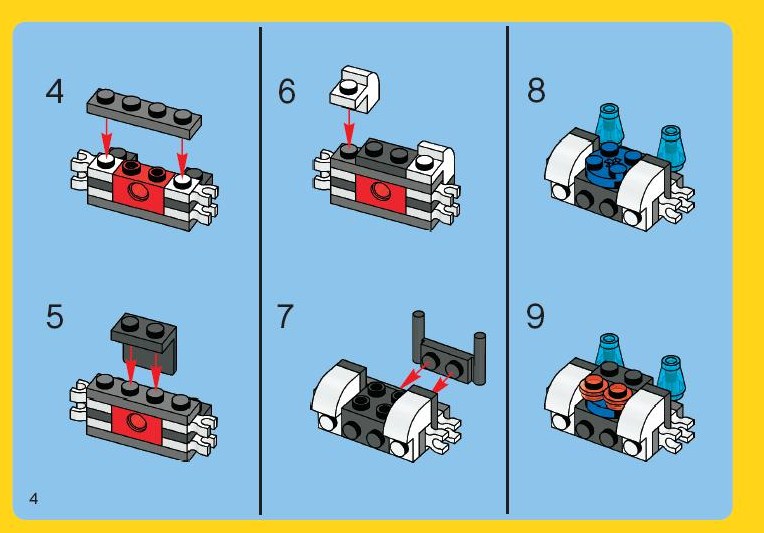
Figure 3
- We turn to the head (Figure 4). Top part of the body is secured, which will resemble the robot's head. If you want your head was spinning, take a round rotating mechanism. If you search, you are sure to find something similar. For details, refer to the instructions.
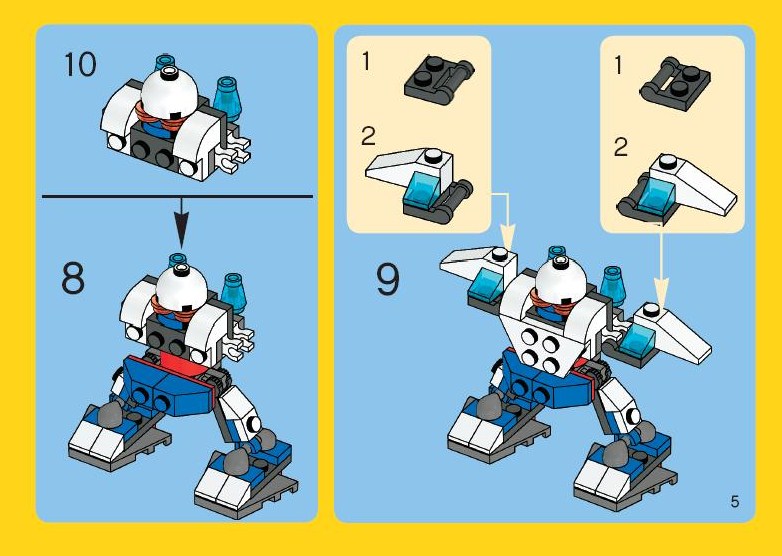
Figure 4. Making the robot head
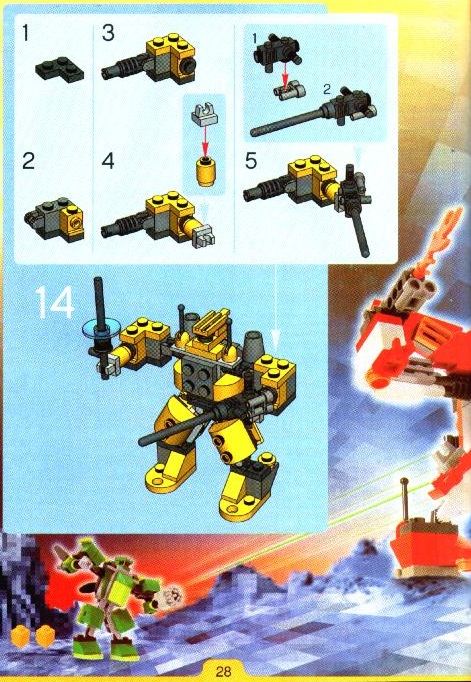
- At the end of the rib cage of the robot can be decorated in its sole discretion (Figure 5). Attach grille and multi-colored "plug" like button. You can close the flat plates. In the hand, add weapons. Refer to the instructions (Figure 5), as it can be done.
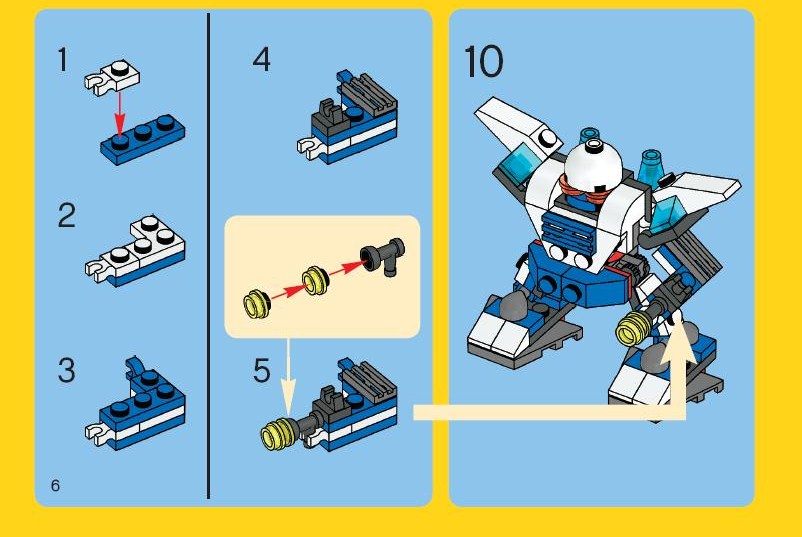
Figure 5 is arming robot
Finish the robot assembly, gathering and attaching the right hand (Figure 6).
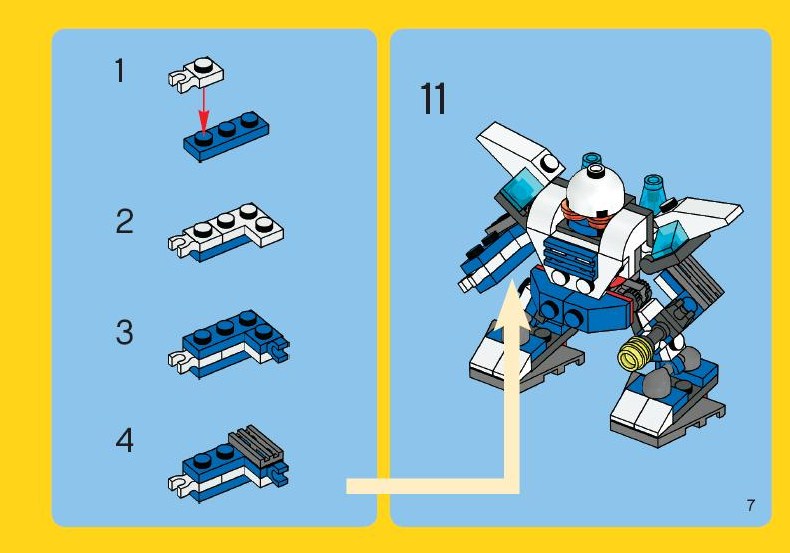
Figure 6. Finish the job
The robot is ready!
Video: Build a simple robot from Lego
How to make from the designer Lego Little Robot: Instruction, Scheme, Description
You can make a small robot, yes "delete". And you can arm a similar master class to create a quick robot of small size. Details You can choose those that have been found with you, just pick it up so that they meet the requirements.
We start the assembly of the robot.
We make legs (hunts assembly in the figure below).
- Take two fragments that will be reminded and playing the role of the feet. Attach the high cube to them, highlight the knee and at the top attach a small square.
We start work
Making legs
- Torso put on his feet, fixing them. If you have in stock Detail, which can bend, then use it at the beginning.
We form a torso
- The torso must be massive. It should be gradually increased to the chest, choosing large details. You can decorate a torso with lattices and multi-colored "plugs".
It must be massive

Krepim torso to the legs
- Make hands from the connected cylindrical details. You can at the end to attach a cone-shaped part. Do not forget to install a grabs. (Assembly scheme in the figure below)
Create a hand
- Any little man from Lego is there, so they can be abundant from each collected robot. This item is not mandatory, just then the child will not be able to insert weapons.
For a robot, the hand is important
After all, it will be a weapon
- Head can be done in the form of cubeHaving imposed one on one square details. Alternatively, you can insert the head of the man from the little man. If you wish, you can install wheels or other adorning elements near the head and on the limbs.
In each hand, create a different weapon
Video: Collect a small robot from Lego
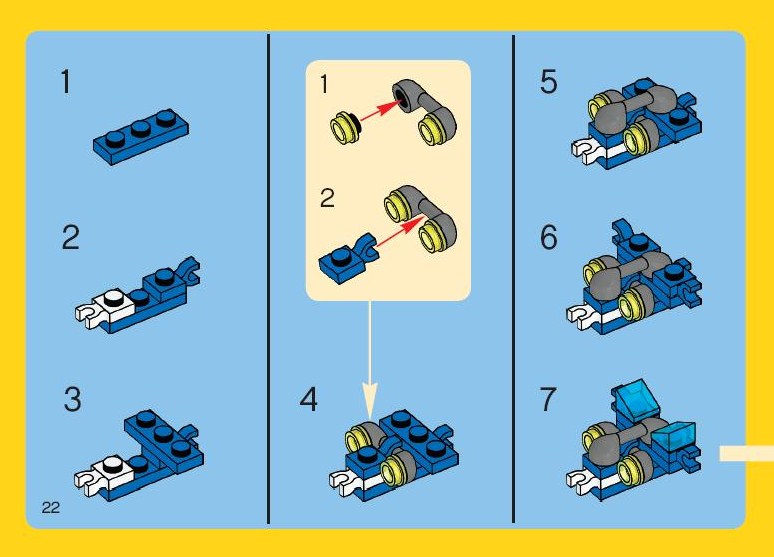
How to make a Largo Robot designer: Instruction, Scheme, Description
The big robot is not so difficult to create, because there are no special details in this matter. You can do it according to the scheme described above, using a simply more detail. But you can arma the reserves of fantasy and create an unusual robot. By the way, in this matter, trust the thoughts of the child. They still look at the world a little different eyes, trying the lacking details.
Getting started - legs.
- Take a cube with fasteners on each side. Three round "plugs" of gray and one square of blue. It must be cut on the front side. That is, have a smooth surface at an angle of 45 °. Place all the details on the sides of the cube.
Start with her legs
- On the sides you need to put another "plug". And now you will need two rounded, elongated parts, with two holes and through fastening at the end. They connect them along the edges, attaching to the "plugs". The upper holes can also be closed with them. That is, in this point you will need 4 "plugs".
- You need a long bayonet, which inserts into the through hole of the previous part, connecting the cylindrical part with it. The end of the bayonet is closed with a round "plug".
- Surrender below by continuing the leg of a gray cube. But note, the item must have a mount at the front side.
- Next, we put a square with a circle at the end. That is, the fastener. Behind the fixation is attached another simple square and triangular on the front side. That is, cut at an angle of 45 ° square.
- To this round fastening element, fasten the appropriate part, which will consist of two cubes. For additional stability, add another plate below.
Complete the creation of the leg
Go to the body.
- Top feet place a circle with four squares. In the middle secure the plate of two squares. On the sides, build high cubes, and between them one cube should have an additional mounting or hole on the front side.
- Next, spread the part from two squares on the sides, on top of another circle.
- Now, on top, secure a plate of 6 squares, and the back is a detail of 2 squares with a handle. That is, the detail must come back a little. Under it you need to put a trapezoid detail with a cut at the end. She is located topping down!
- On the opposite side, another same detail is attached. But in the middle only one circle is placed. It is covered with a gray detail of the same size.
- Nearby are cut cubes of gray, edge up.
Torchishche
Go to your hands.
- Take a small strip on 2 mounts. At the top attach one square with a grasping part.
- Next, fasten a small detail with a plug at the end. Since it is indicated in the figure we do in two units, because the robot has two hands.
Hands robot
In the hands of a robot we create a weapon. You can create it according to the instructions that are presented below.
Weapon for robot

Robot completed
Video: Collect a big robot from Lego
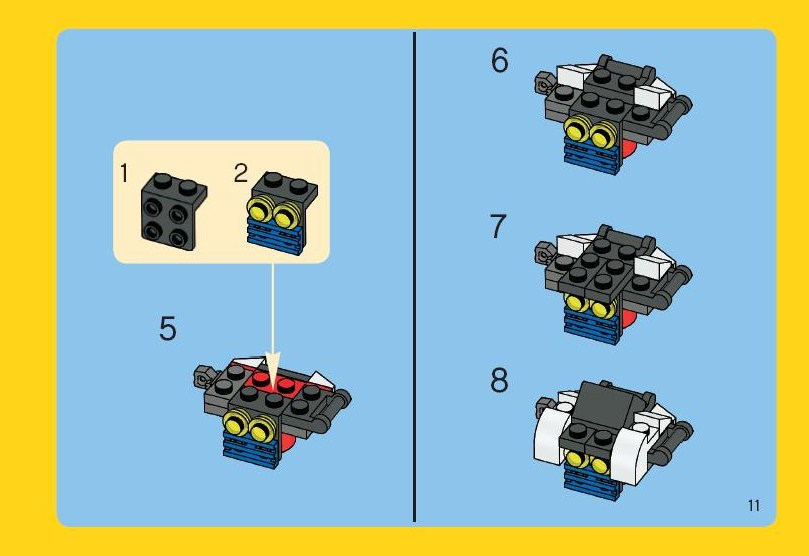
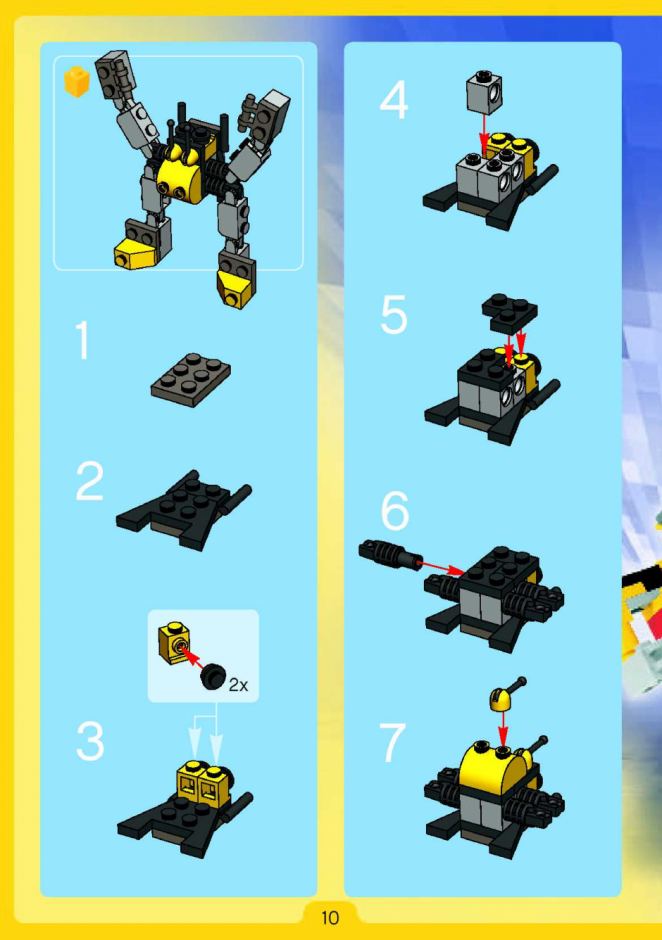
How to make a lego fighting robot designer: instruction, scheme, description
If your baby asks to make a robot with you, do not be lazy and postpone the case aside. The process itself will be so fascinating that you will definitely want to repeat the evening spent. But the robot must also be able to shoot, defend and attack. Dont be upset. Weapons can be reached from their reserves. After all, it is mandatory at some samurai or a military man he will be found.
What will take for a military robot:
- white or transparent cut-off triangle cube - 1 pc.;
- white single squares, one must be smooth from above - 2 pcs.;
- high single cubes - 2 pcs.;
- double cubes - 3 pcs.;
- cylindrical High Details - 2 pcs.;
- "Crarana" gray and black color - 2 pcs.;
- cone-shaped parts with cut riding - 2 pcs.;
- single cubes with "invigs" - 2 pcs.;
- round "squares" of black - 2 pcs.;
- gray cubes with cut triangular riding - 2 pcs;
- flat double cube gray - 1 pc.;
- cubes that have five places of fastening, black - 3 pcs.
We proceed to work (the assembly scheme in the figures below).
- Work begins with a head. And gradually go to the body of the robot. Take two parts of a high cube, which has several ways to fastening (or rather, on all sides).
Important! Details are installed, not sitting on top one on one one, and on the side. That is, the bottom of one cube is attached not to the upper part, but on the side mount.
- Now on the upper cube, the "squares" should be put on the side mounts. It will be shoulders. You need to add an exciting element to them.
Taking into account! You can take simple squares instead of round details, but then your hands will not be able to rotate in different directions!
Option of a combat robot from Lego
- Now proceed to your feet. Legs, by the way, can also move! We fasten the details as shown in the picture instructions.
- Finally, it remains to make feet. And this will help cubes with a cut end, which are attached to the legs.
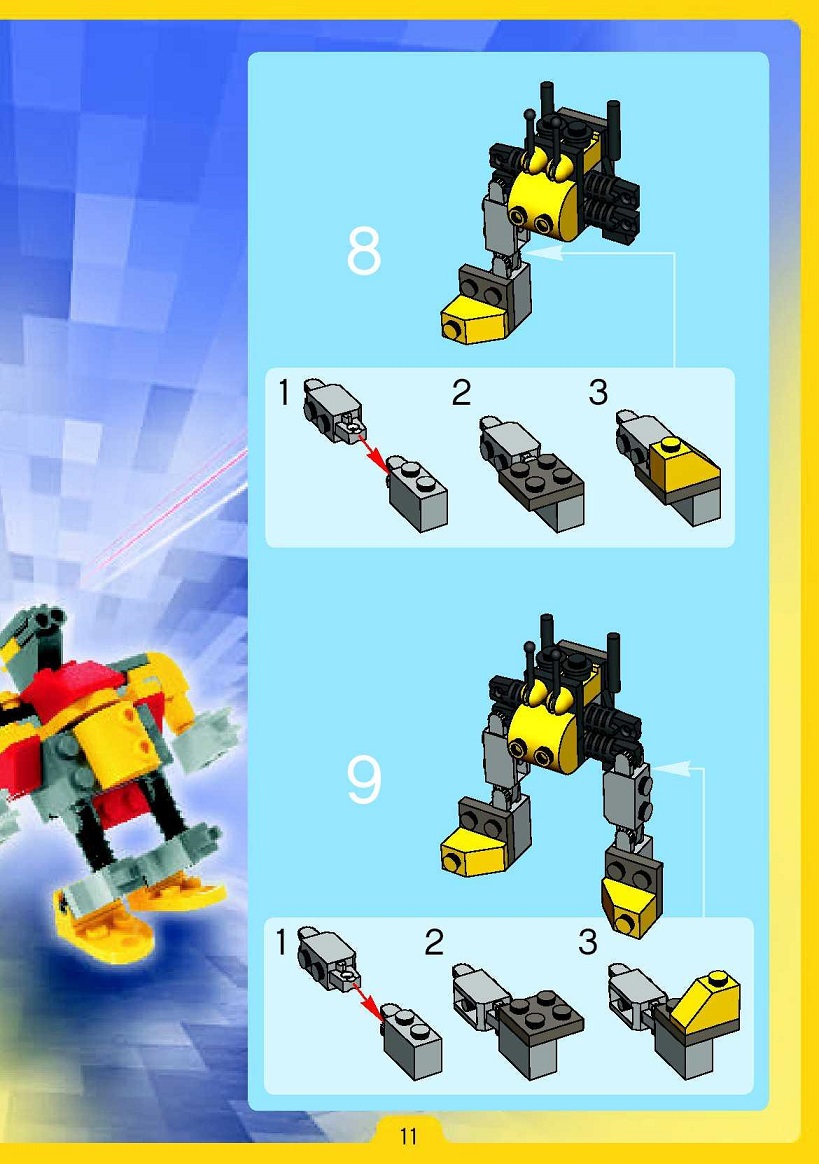
- Now you need to continue the formation of hands. In them we will put the weapon.
- For weapons, rectangular parts are used that need to be combined with each other as indicated in the picture.
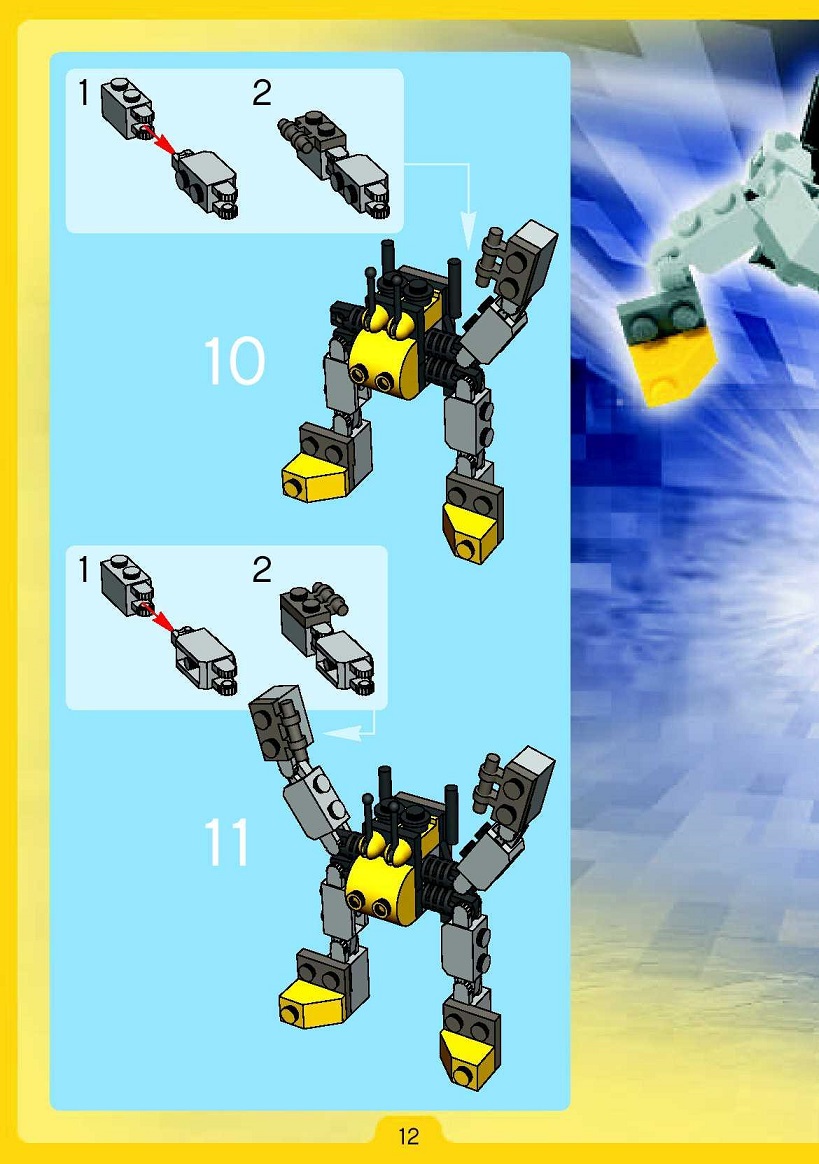 Hands just take aside so that they do not interfere and have not broken.
Battle robot is ready!
We present another option of a combat robot.
Watch its assembly in pictures below.
Video: Collect the combat robot from Lego
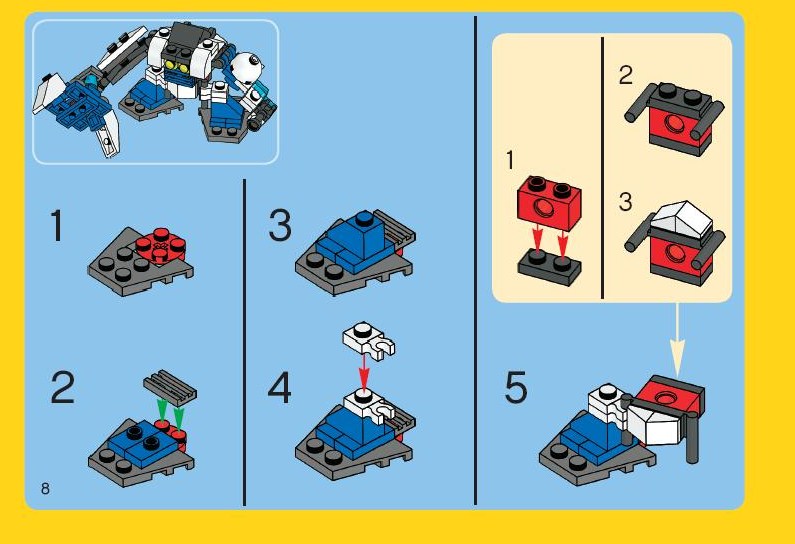
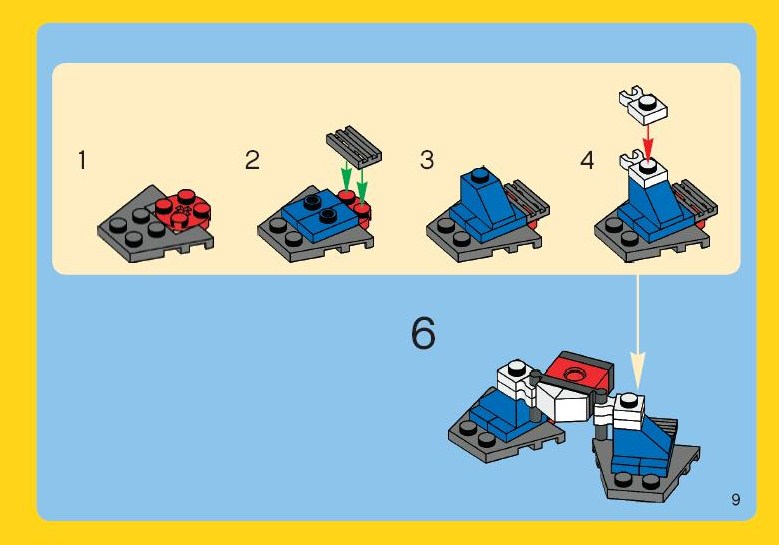
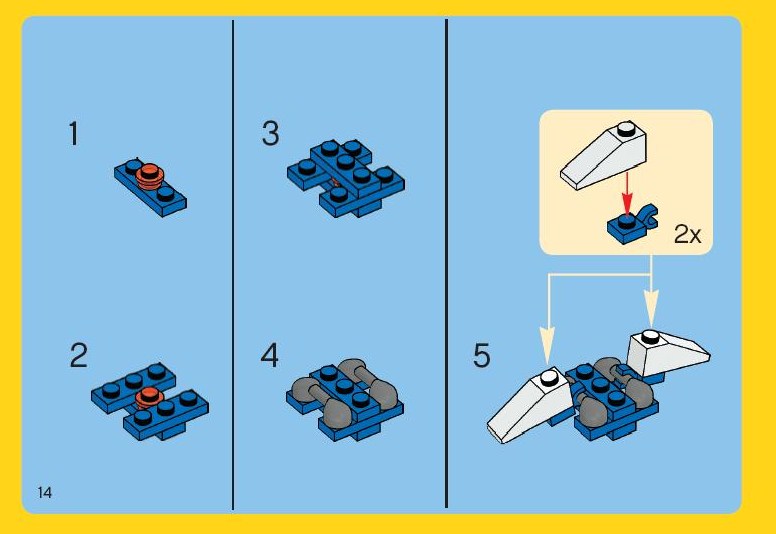
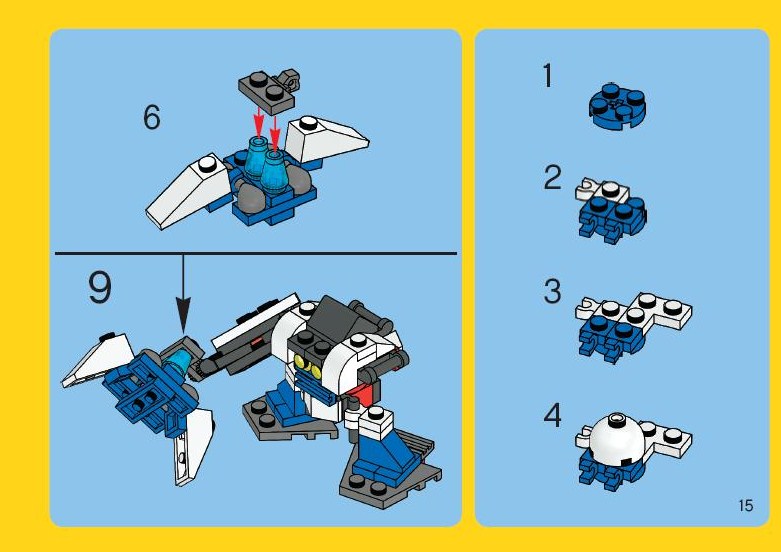
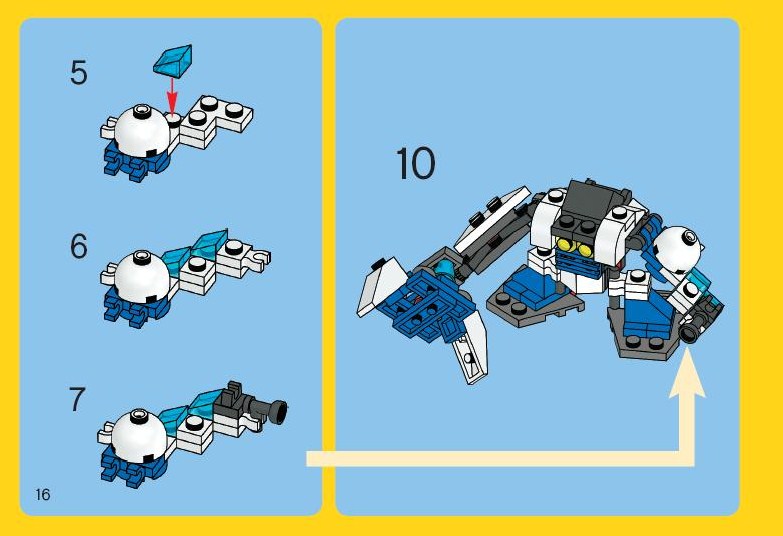
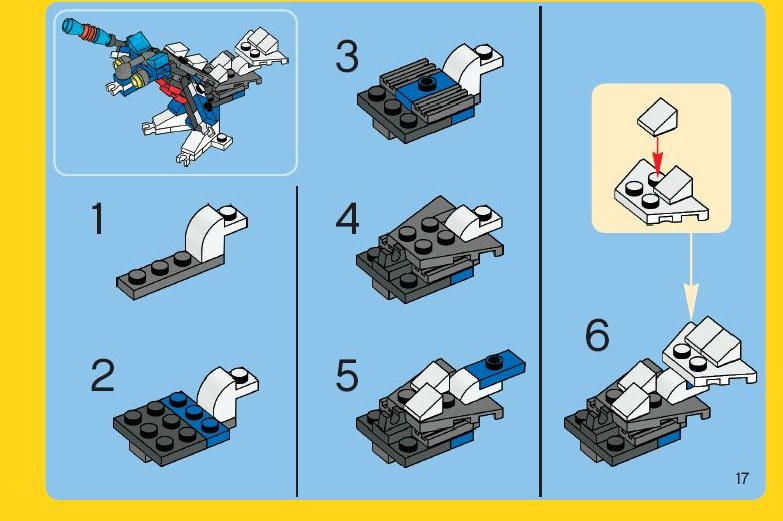
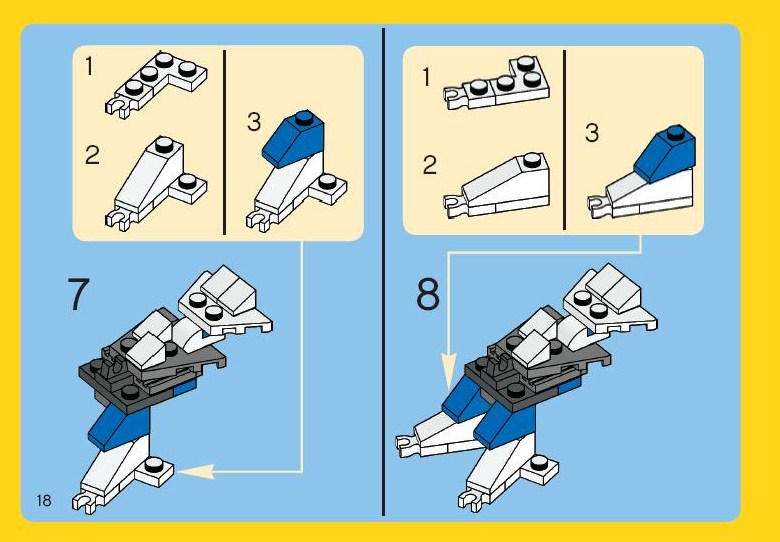
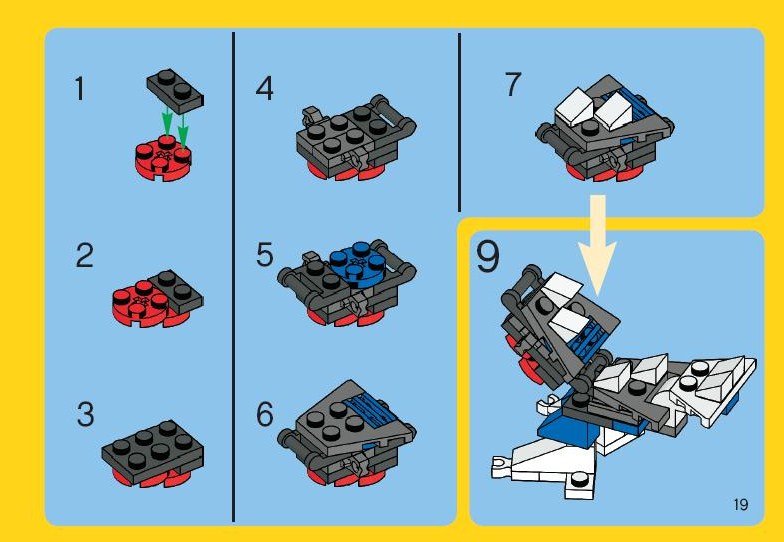
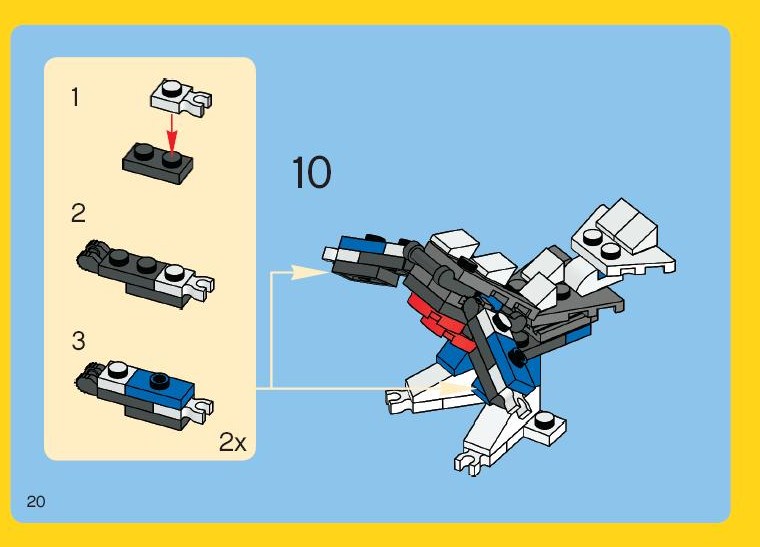
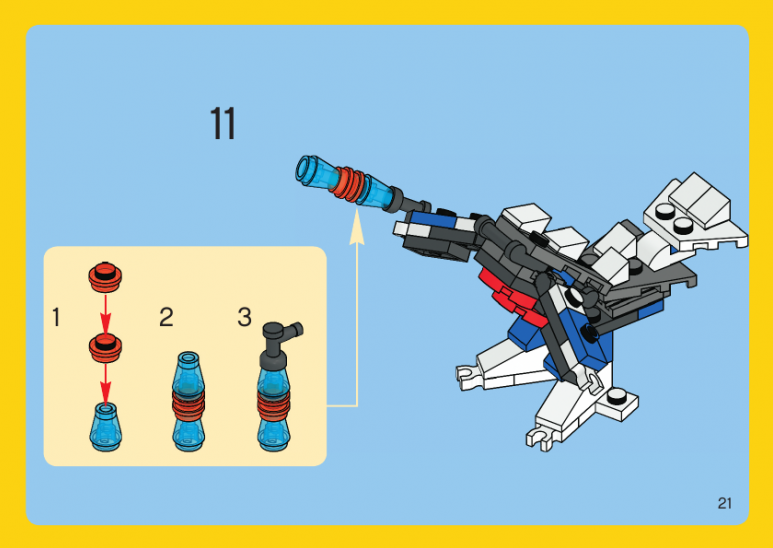
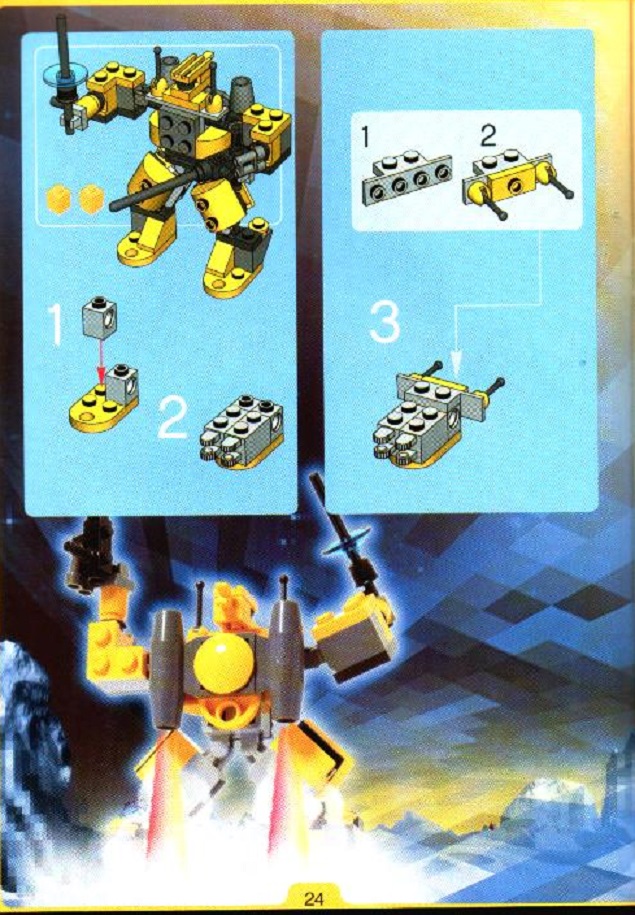
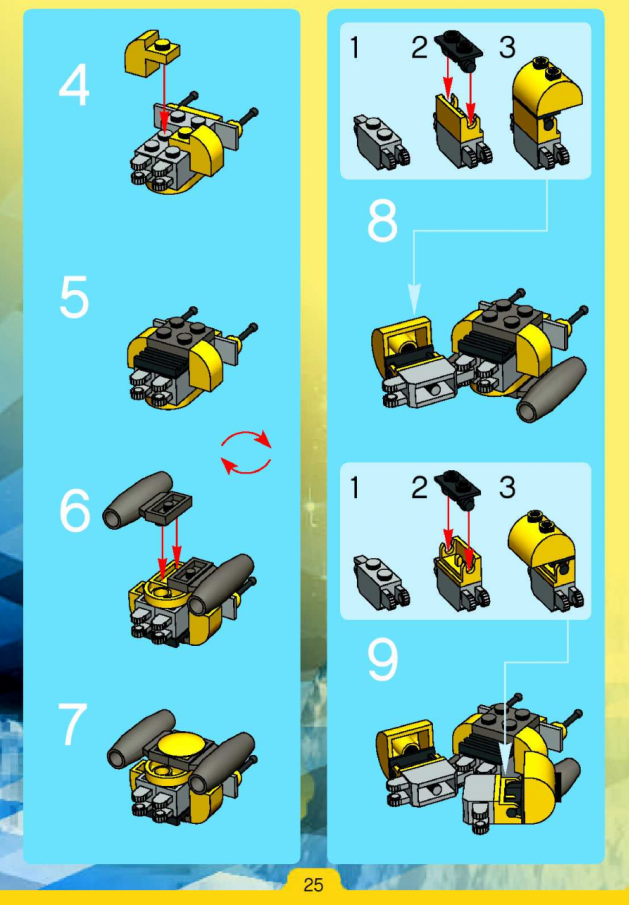
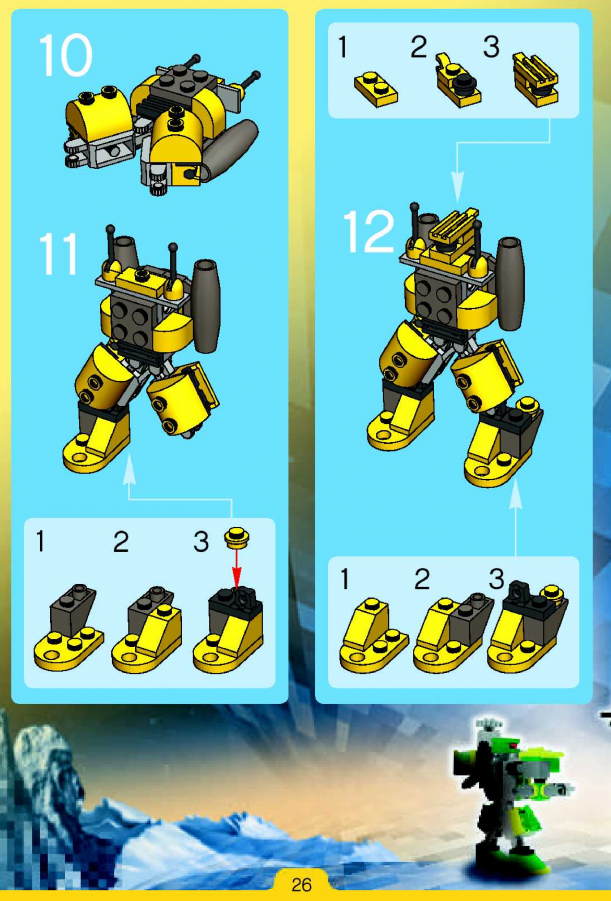
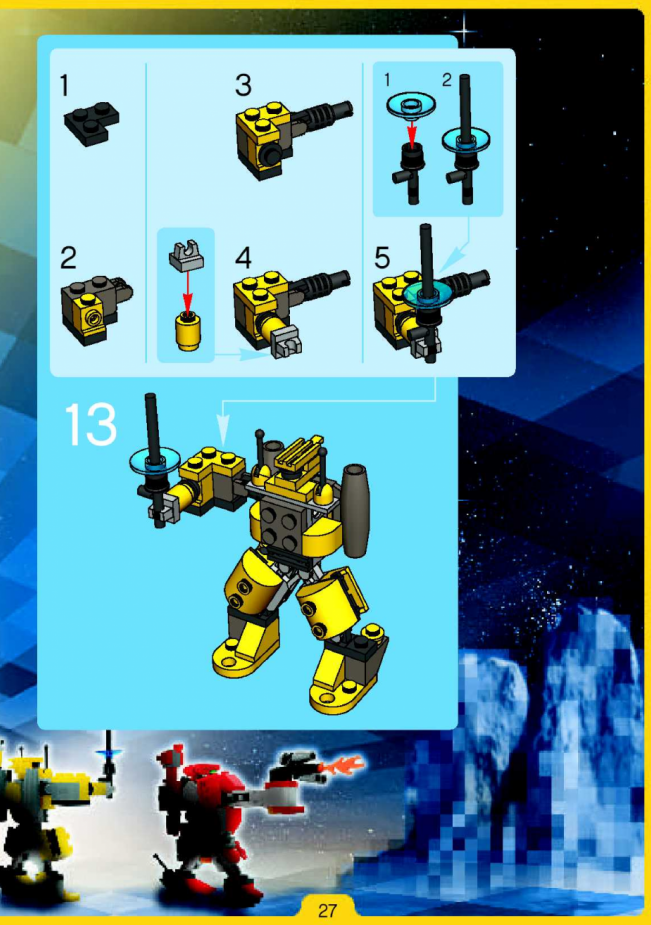
How to make from the designer Lego Space Robot Transformer: Instruction, Scheme, Description
Transformers conquered all boys! Yes, that, even the girls will be interested in make it possible to make it the robot, which is transformed into the car. First prepare the required details to reduce the assembly time. Although sometimes in search of the same desired details is given such an interesting time. After all, the whole family turns into the process!
We invite you to familiarize yourself with detailed instructions in pictures to independently assemble such a robot. This work is not out of simple, so carefully look at the pictures presented below and collect the desired number of details.
Beginning of work
Assembling robot transfirmer
Put the robot on the legs. You can collect it in the opposite scheme. Your robot transformer is ready!
Video: Assembling Robot Transformer
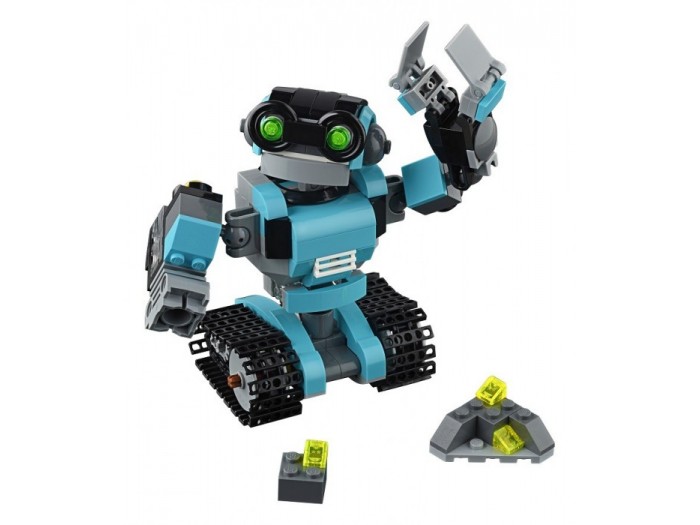
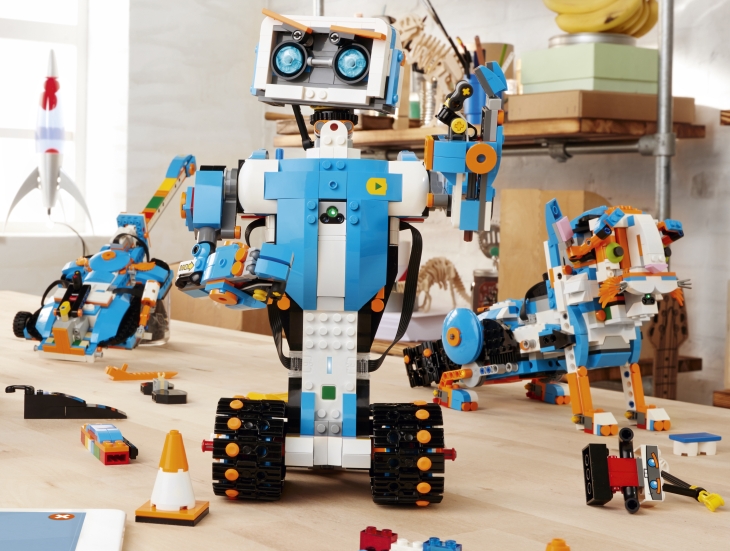
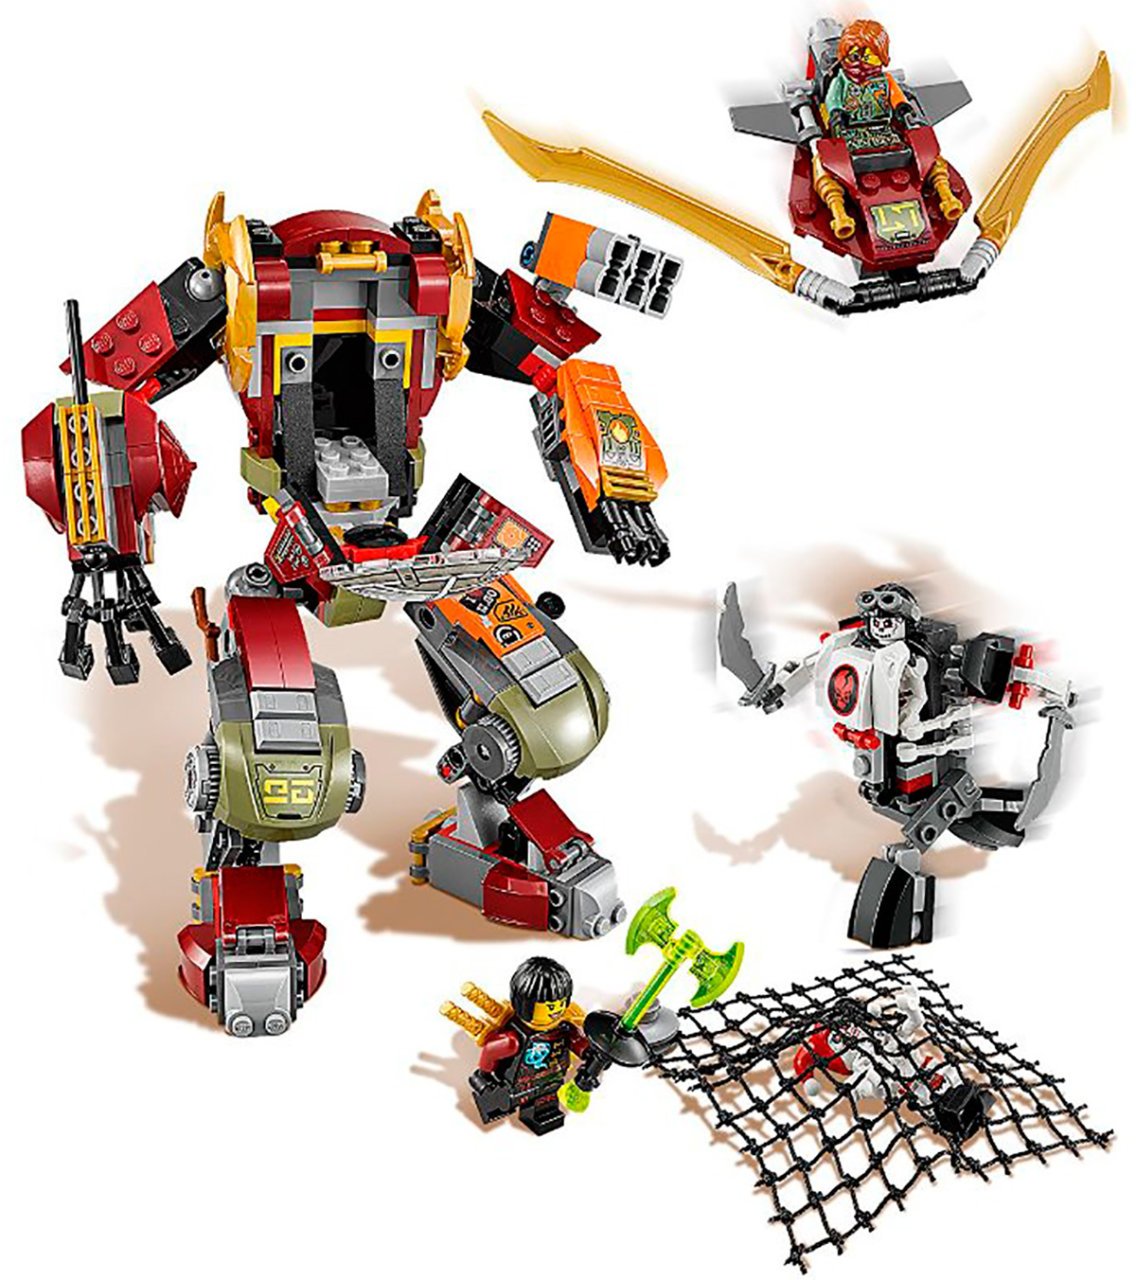
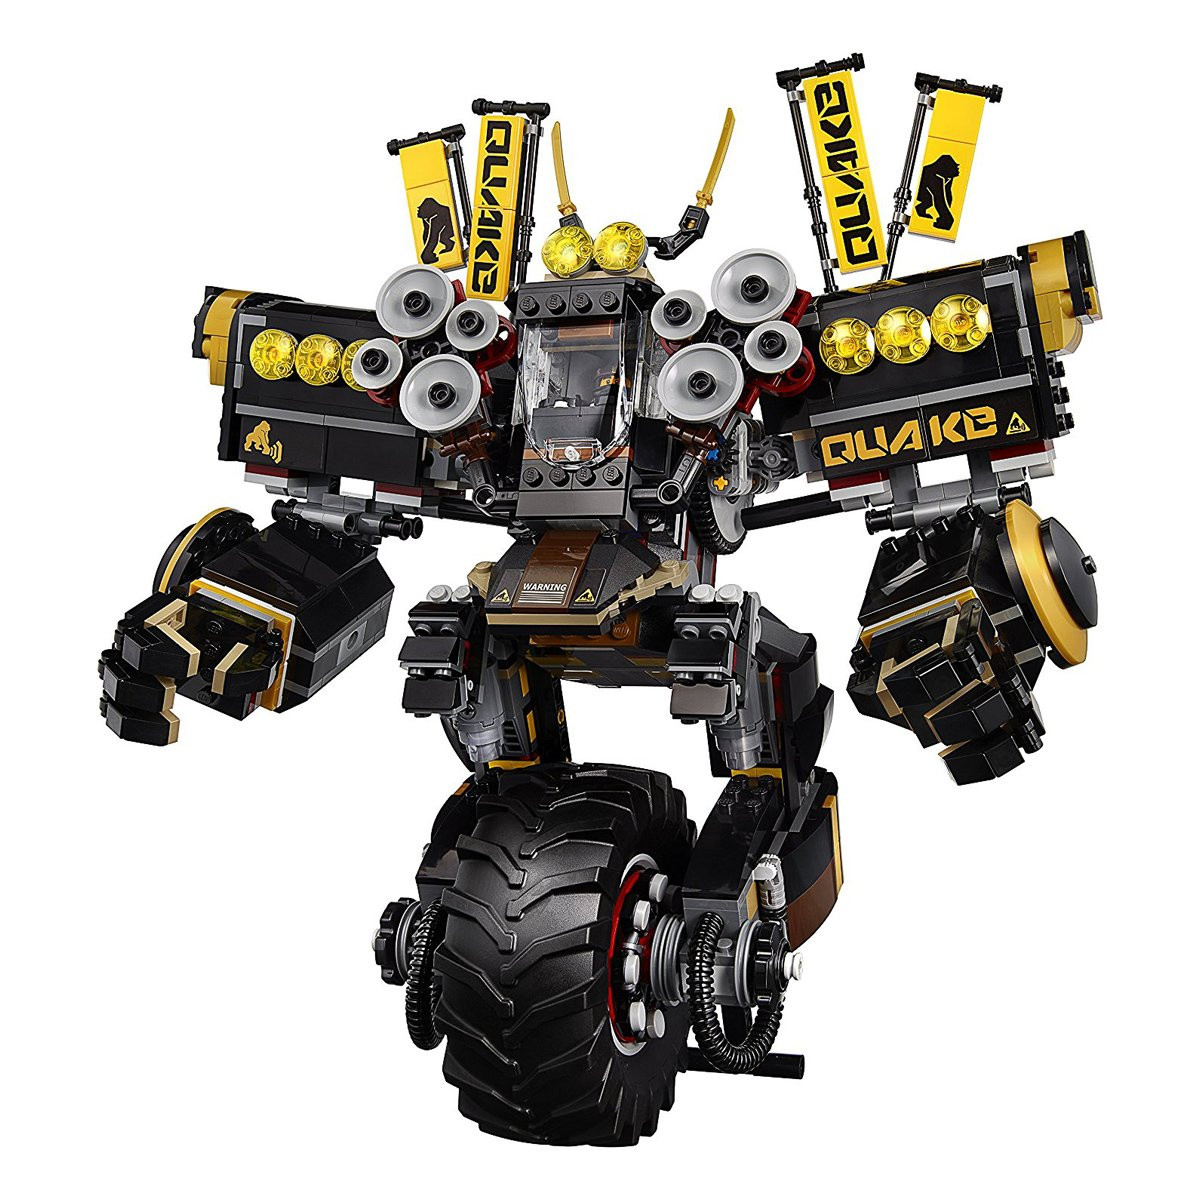
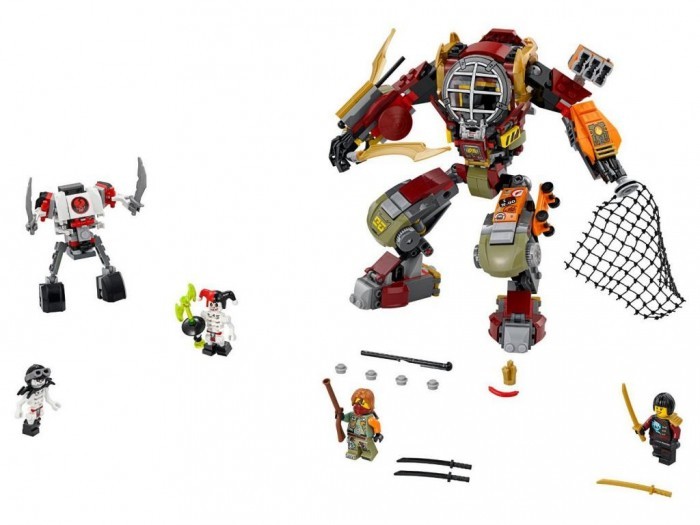
Robots from Lego do it yourself: photo
If you understand the principle of working with Lego designer, then you can make any robot. You can combine colors, add details. The main thing is to get inspiration. And so that you visited the muse, we bring to your attention a photo of robots made by your own hands.
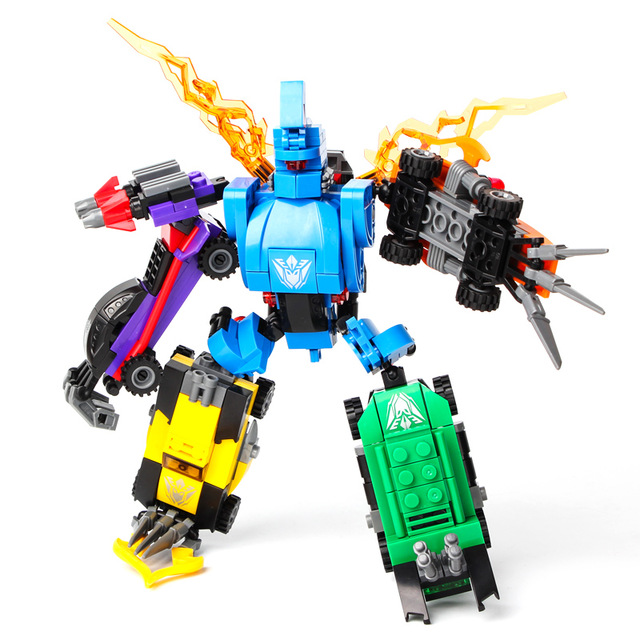
Bright robot
Robot Lego.
Robot
Modern robot
Collect a robot with a child