From our article you will learn how to properly prepare a greenhouse from polycarbonate for the new season.
The content of the article
- How to wash a polycarbonate greenhouse in the spring?
- Sulfuric checker for disinfection and disinfection of a polycarbonate greenhouse in spring: Application
- How to dilute copper sulfate for processing a greenhouse in the spring before planting?
- Polycarbonate greenhouse processing in the spring from late blight
- Greenhouse processing with phytosporin spring
- Preparation of soil and beds for cucumbers, radishes, seedlings in the spring in a greenhouse
- How to feed the earth in a greenhouse under cucumbers Radis, seedlings in the spring?
- How to warm the greenhouse from polycarbonate in the spring?
- Video: Preparing the soil in the greenhouse after winter. Disfection of soil with phytosporin
Each gardener knows that in order to get a good harvest you need to work a lot. Indeed, in order for the vegetable crops to grow intensively and are healthy, they must be planted in properly prepared soil. In view of this, it will be better if you start the battle for the future crop not with sowing seedlings, namely from the treatment of soil in the greenhouse.
If you try and do everything right, then with great confidence we can say that all the cultures you have planted will delight you with abundant fruiting.
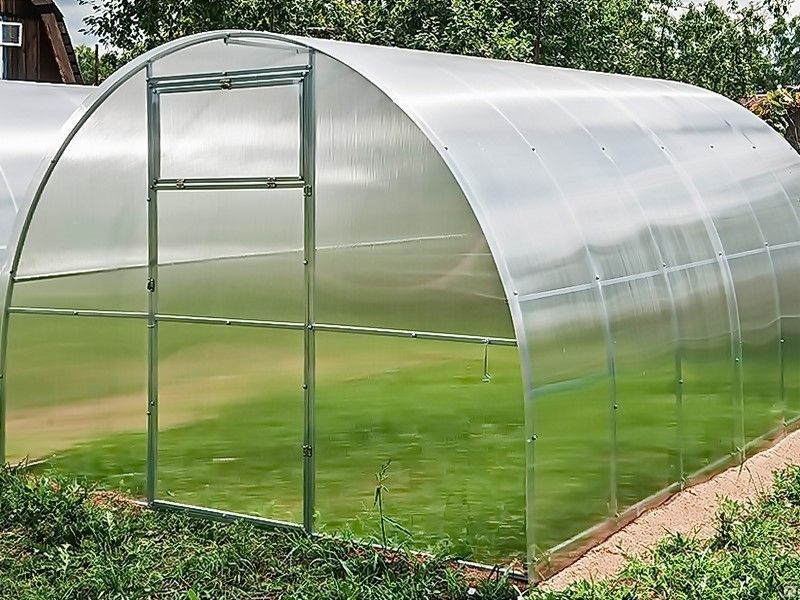
How to wash a polycarbonate greenhouse in the spring?
Recommendations on the mit of greenhouses from polycarbonate
- If you have been growing plants for not the first year, then you probably know that polycarbonate greenhouses have one small minus. Since the entire autumn-winter period they stand closed and do not ventilate, pathogenic microflora is collected on all internal surfaces in large quantities, which can subsequently infect young seedlings.
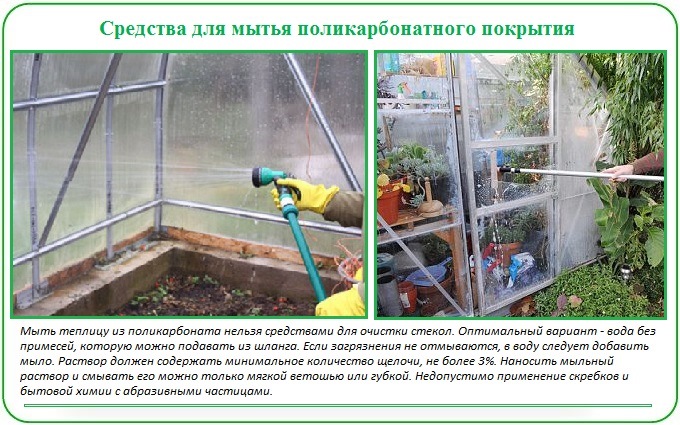
- Therefore, it is extremely important before starting to sow the shift in the ground, to carefully disinfect all the surfaces in the greenhouse. It is advisable to do this almost before you begin to carry out some work on the basis. And this means that if you plan to plant cold-resistant crops in the greenhouse, then you need to process surfaces in approximately the 20th of March. An ordinary soap solution can be used as a disinfectant.
- But keep in mind that it must be applied with an exclusively soft sponge or cotton rag. If you rub the walls of the greenhouse with something more rude, it is likely to scratch polycarbonate and subsequently bacteria will settle in the grooves that will provoke various diseases in your plants.
- In view of this, if you found a fairly large cluster of dirt on the walls of the greenhouse, then do not try to remove it with scrapers. It is better to soak it well with soapy solution, wait a little, and then carefully remove everything with a soft rag.
Recommendations for disinfecting a polycarbonate greenhouse:
- First, a little ventilate the greenhouse itself
- While this process is taking place, get the preparation of soapy solution
- To do this, heat 6 liters of water and dissolve in it 70 g of laundry soap
- Process all surfaces in the greenhouse (both polycarbonate itself, and the frame to which it is attached)
- Apply the solution so that it is well noticeable on the surfaces
- Leave it there literally for 2-3 minutes, and then rinse everything with ordinary clean water
- This procedure should be carried out both inside the greenhouse and outside
Sulfuric checker for disinfection and disinfection of a polycarbonate greenhouse in spring: Application
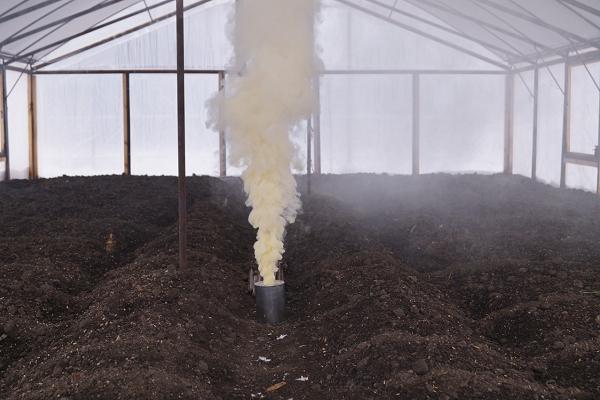
Disinfection of the greenhouse sulfur sulfur
As you already, probably, understood the processing of the greenhouse is a very important stage before planting plants in the ground. Therefore, you must do everything so that not only its surface, but the air that is in it is disinfected. For these purposes, you can use the so -called sulfur checker. This antibacterial agent with proper use will help you disinfect not only all surfaces in the greenhouse, but also the upper soil layer.
Moreover, if you do everything right, then the sulfur checker will kill all the larvae that have successfully survived winter frosts. But keep in mind that in order for it to have just such an action, before using it, you must check the telitsa as much as possible for the presence of cracks and cracks. If there are one, then you must first correct all these shortcomings and only then use a sulfur checker.
So:
- Inspect the greenhouse and if this is necessary, replace damaged pieces of polycarbonate
- Carefully fill all the cracks and cracks, and close the windows and doors tightly
- Put a brick or flat stone in the center of the greenhouse
- Install a sulfur checker on it and set fire to the wick
- As soon as you see that smoke began to stand out immediately, leave the greenhouse, tightly closing the door behind you
- Do not open the doors and windows for 36 hours
- After this time, be sure to gently ventilate the greenhouse
How to dilute copper sulfate for processing a greenhouse in the spring before planting?
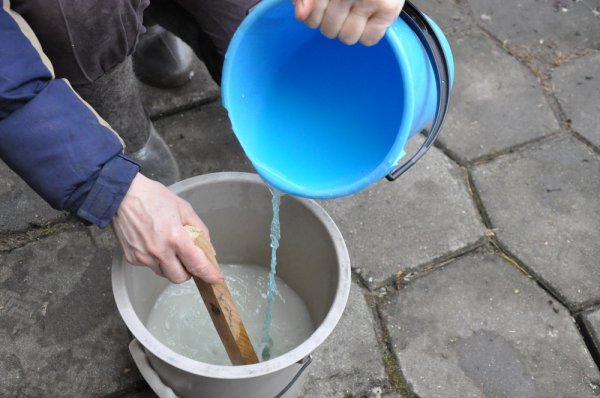
Recommendations for breeding copper sulfate
Copper sulfate is a blue-blue powder used to combat fungi and bacteria that settled on plants, the soil of greenhouses and greenhouses in the soil or us. After application, it gives almost 100% protection for a full thirty days. And remember, this substance contains copper ions that do not really like plants, so it will be better if you disinfect the greenhouse with this product you will be only once.
For this reason, try to process the greenhouse with copper sulfate immediately before you begin to carry out sowing or planting work in it. In this case, you will not need to carry out re -processing with copper sulfate until the next season. But when working with this tool, you must take into account that, if used improperly, it can harm your plants.
If you want to avoid such problems, then try to use the means of the desired concentration for disinfection. So, for example, to treat the surfaces of the greenhouse, you can use a 10% solution of copper sulfate, but for disinfection of plants and soil the indicator of the active substance should not exceed 3%.
Recommendations for breeding copper sulfate:
- First, heat ordinary water to 50 degrees
- At this stage, literally 2 liters of water will be enough
- Add 100 g of copper sulfate to it and try to dissolve it thoroughly in the liquid as thoroughly as possible
- When it dissolves, bring the volume of the solution to 9-10 liters
- Mix everything again and strain the liquid through a fine sieve or old nylon tights
- The resulting solution can be poured into a sprayer and treated with a greenhouse
Polycarbonate greenhouse processing in the spring from late blight
Polycarbonate greenhouse processing from late blight
- Phytopher is a fungal disease that affects the stems, leaves and fruits of vegetable crops. As a rule, most often this disease affects precisely those plants that grow in greenhouses. High temperature and very high humidity contribute to the rapid multiplication of the bacteria of phytophthors, as a result of which they fall into the ground in the shortest possible time from the plant itself.
- The worst thing is that these pathogenic microorganisms are very tenacious and under favorable conditions they can quite calmly survive the winter. Therefore, it will be better if before planting a new crop you will carry out the most maximum disinfection of the greenhouse. The frame itself, you can put in order the topics in order by the ways with which we introduced you to a little higher, but the soil will need to be processed with completely different substances.
- If you do not want to mess with the preparation of any solutions, you can quite calmly buy the right tool in a specialized store. True, in this case, you will need to work a little. Since the phytopher is very tenacious, experienced gardeners advise first to remove the upper soil layer (approximately 5 cm) and only after that conduct a sanitary. For these purposes, phytosporin, Mokosan, burgundy fluid and redomyil are perfectly suitable.
- But still, the so -called temperature method is considered in a more effective way. In this case, you will need to boil a large amount of water and then, without waiting for it to cool, pour it with the upper layer of soil. Having processed one section in this way, be sure to cover it with polyethylene. This will help the soil to remain hot for a longer period and as a result of this the maximum number of phytophthore bacteria will die.
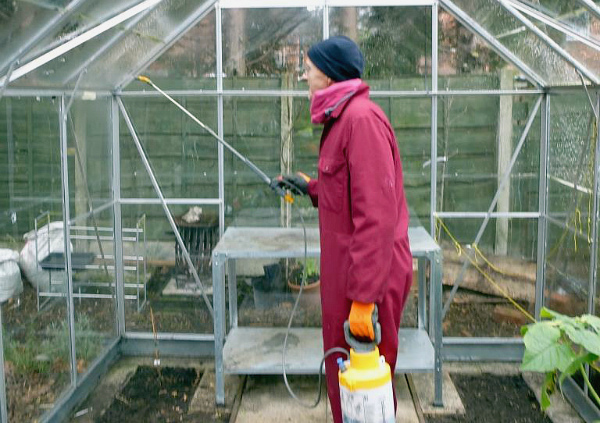
Greenhouse processing with phytosporin spring
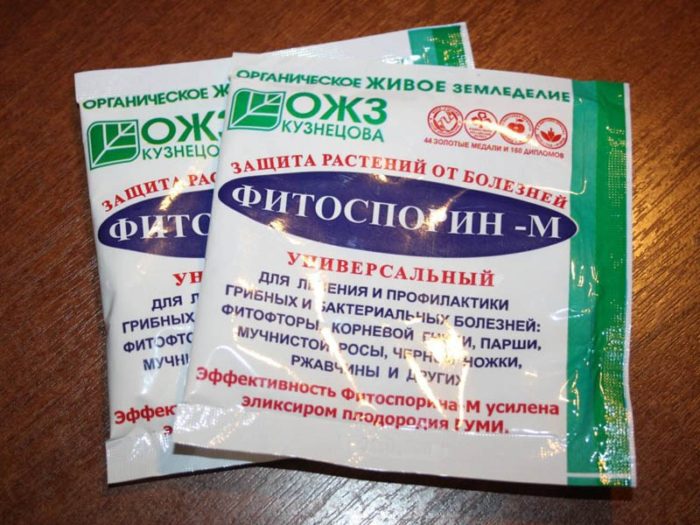
Teplita processing with phytosporin
Phytosporin is a new generation fungicide that is quite effectively fighting with almost all bacterial diseases of vegetable crops. This substance is sold in the form of powder, pasta and water suspension. The biggest advantage of this drug is that it is not afraid of either high or low temperature indicators.
The active substance remains active both at -40 and at +50. Therefore, in this case, you can quite calmly process the greenhouse long before you start to carry out the first planting work. But still remember, phytosporin is quickly destroyed under the influence of ultraviolet radiation, so it will be better if you are processing in cloudy weather.
As a rule, in order to disinfect the greenhouse, one soil surface treatment is enough. But still, if in the previous year you observed a fairly intense damage to vegetable crops, it will be better if you carry out re-treatment with phytosporin in 10-14 days.
Recommendations for the use of phytosporin:
- Powder. Diligns 2 hours before processing. To prepare a disinfectant, you need to take 5 g of dry matter and dissolve it in 10 liters of water.
- Paste. In this case, you will just need to dilute the product with clean water to the desired consistency and carefully treat it with the soil. It is desirable to do this a week before the planting of seedlings.
- Water suspension. As a rule, this substance is added to the water in the amount of 50 drops per liter of liquid, and then they are immediately treated with a greenhouse.
Preparation of soil and beds for cucumbers, radishes, seedlings in the spring in a greenhouse
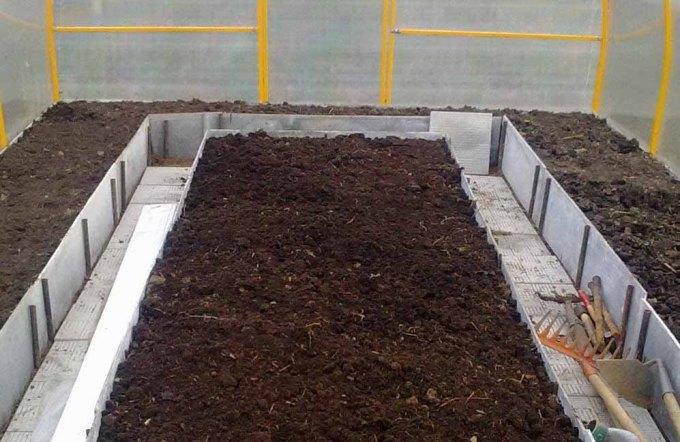
Soil preparation for the new season
Proper preparation of the soil for sowing and planting vegetable crops is the key to the fact that in the fall you will get a good harvest. Therefore, before planting seedlings in the ground, bring it “to life”.
It is necessary to do this, since during the winter the soil in the greenhouse is very dry and becomes dusty. And if for winter time it is good (the earth does not freeze deeply), then with the arrival of spring, this condition of the soil will not allow it to warm up evenly.
Recommendations for the preparation of soil for the new season:
- First of all, you should disinfect the soil in any way convenient for you. You can apply ready -made fungicides or use a sulfur checker or copper sulfate.
- When it is over, immediately begin to warm the soil. If you start working very early, then use heat guns or electric heaters for these purposes. Ideally, you should warm the soil, at least 10 degrees.
- When the Earth in the greenhouse warms up, you can take on its hesitation. To do this, make shallow grooves throughout the area of \u200b\u200bthe beds. They will help to enhance the contact of cold and warm air, thereby helping the soil to be enriched with oxygen as well as possible.
- At the next stage, proceed to the revival of the soil. To do this, heat the water, dissolve in it, for example, Baikal-1, and then pour a warm solution into the grooves. After that, cover them with soil as quickly as possible and give the liquid time to absorb.
- If after these actions the soil in the greenhouse still does not warm up to the desired temperature, then try to cover it with a black film. It will be very good to heat up in the sun, thereby creating comfortable conditions for planting radishes and cucumbers.
How to feed the earth in a greenhouse under cucumbers Radis, seedlings in the spring?
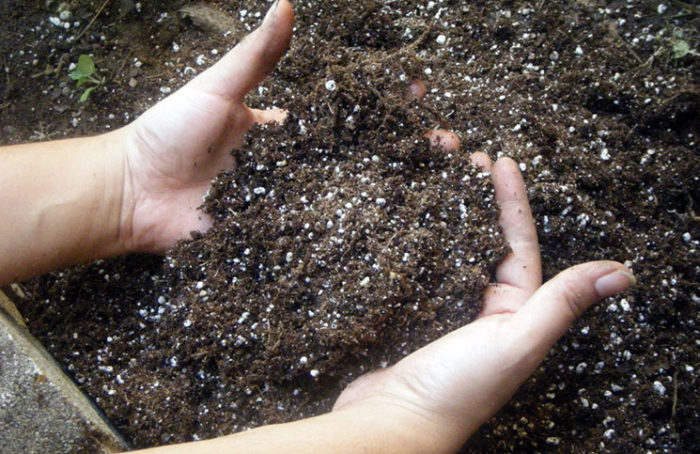
Types of top dressing for soil in a greenhouse
A good harvest is directly related to soil quality. But unfortunately, vegetable crops are abundantly fruit only on fertile soils, which are very rare in our country. For this reason, almost all gardeners have to artificially enrich the soil with the right trace elements.
In addition, top dressing allows you to restore soil quality after the previous season. As for the types of top dressing, there are three of them. Each of them has their own characteristics and nuances, but still all of them help to make the worst soil suitable for planting seedlings.
So:
- Organics. This type of top dressing includes manure, bird droppings and humus. As a rule, these substances are simply laid out with a thin layer on the surface of the beds, and then buried with a shovel. Also, if desired, you can simply put organic top dressing directly into the holes with seedlings.
- Inorganic fertilizers. In this case, it is best to give preference to multicomponent fertilizers, which include the entire list of necessary substances at once. Such top dressing needs to be applied either in very wet soil or simply diluted it in water, and then water all the beds with the resulting liquid.
- Mineral supplements. The most affordable feeding of this type is as a ash. Most often, it is scattered on the surface of the soil, and then it is simply loosened. If you do not have the opportunity to get the ash, then replace it with a ready -made micro -approval.
How to warm the greenhouse from polycarbonate in the spring?
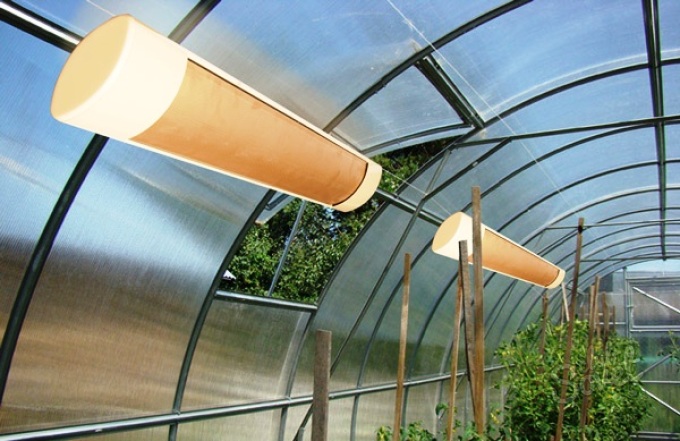
Methods of heating greenhouse from polycarbonate spring
If you plan to start planting plants in the ground in the second half of March, then you need to take care of the high -quality heating of the greenhouse. If you do not make sure that the soil and air are well warmed up all the time, then your seedlings will either die, or will grow very badly. The most affordable way of heating is the sun's rays.
In this case, the greenhouse is located in such a way that almost all daylights can fall into the soil through its roof (it must be transparent), the sun's rays can fall. But unfortunately, this method of heating does not apply to regions with a very cold climate. Therefore, it will be better if you try to equip the greenhouse with artificial heating.
So:
- Radiator heating. In this case, electric radiators are placed over the entire area of \u200b\u200bthe greenhouse, which, if necessary, can literally warm up the space in the desired temperature in an hour. If you wish, you can also install special automation and then they will be turned on only when the temperature will drop below 10 degrees.
- Cable heating. Such heating is established even at the stage of construction of the greenhouse. In this case, a special pillow is made under a layer of fertile soil, on which special cables are laid, which later also connect to the electric system.
- Infrared heating. You can install at any time, however, the minus of such a worm is a fairly large price. In this case, you will need to place special heaters on the walls under the ceiling, which will warm up the space.
- Solid fuel heating. This type of heating is very easy to use, and most importantly, available to people with a small income. All that will be required of you in this case, install a solid fuel boiler in the greenhouse and lay firewood or coal in it a couple of times a day.