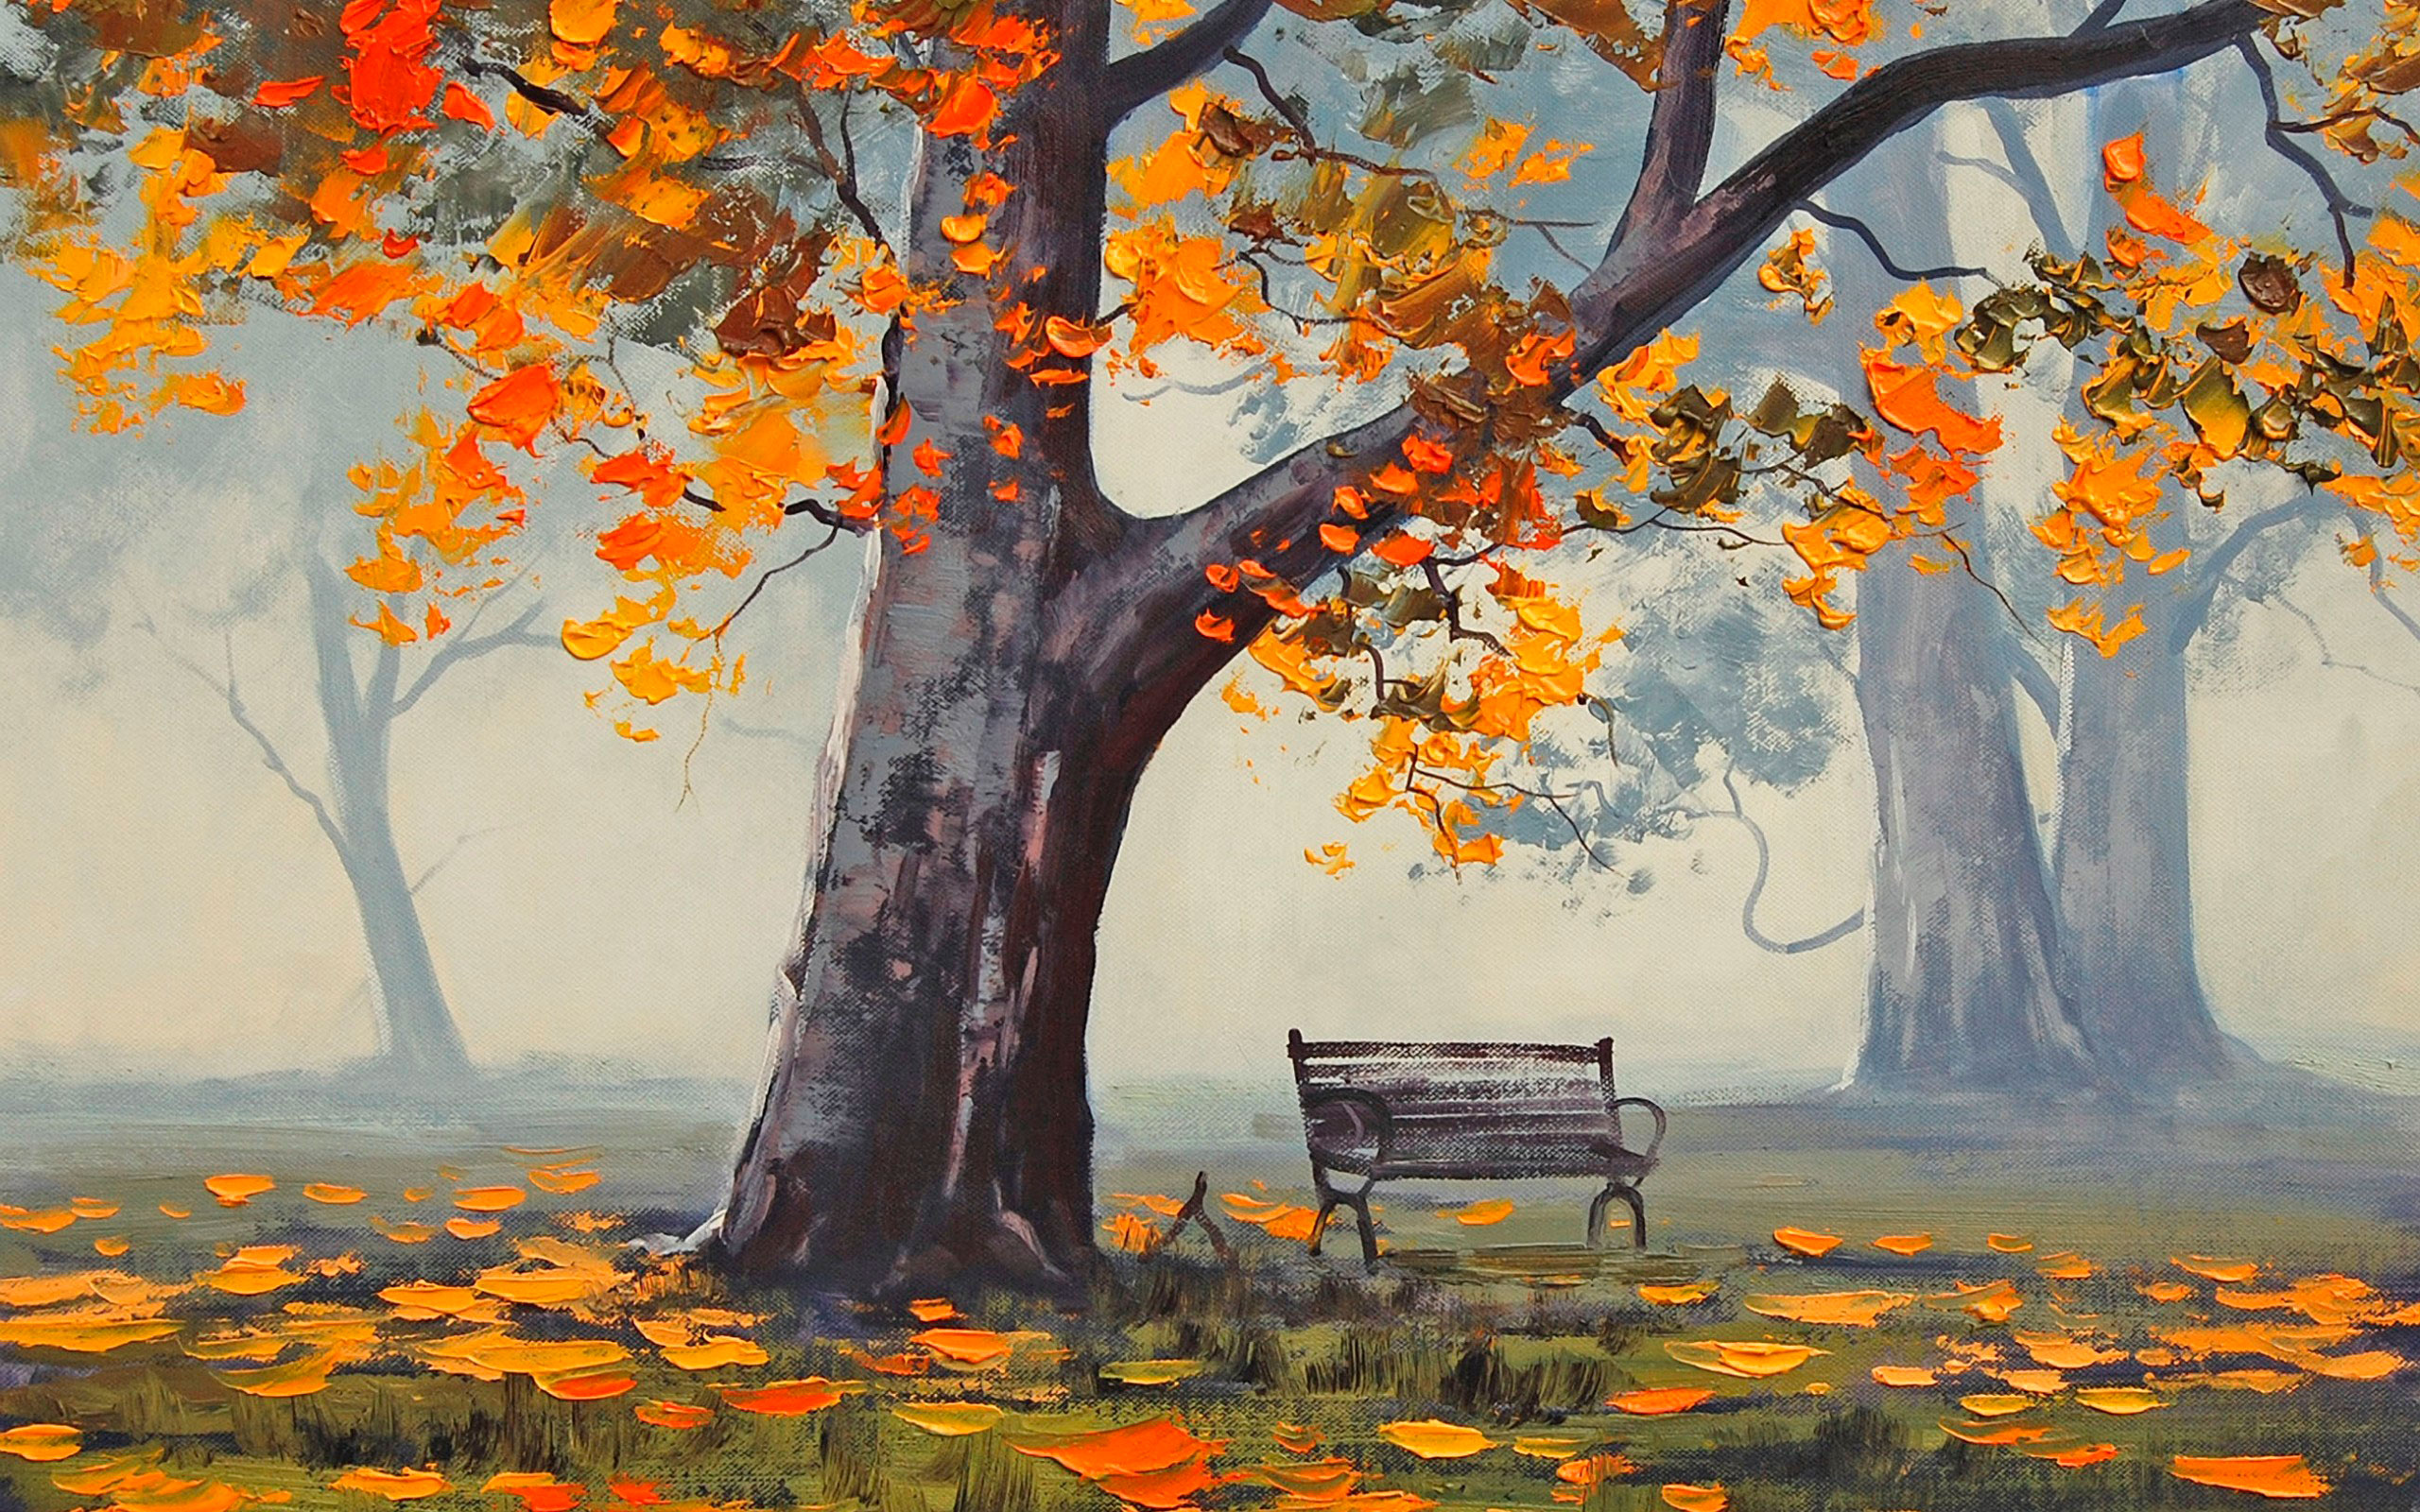
If you always wanted to learn how to draw, but for some reason you did not succeed, then our article will definitely come in handy. Here you will find simple drawings of golden autumn with a step -by -step explanation.
The content of the article
- How to draw a beautiful autumn landscape of nature with a pencil in stages for beginners?
- How to draw a beautiful autumn landscape of nature with paints, watercolors, gouache? Starting for beginners?
- How to draw a light landscape in the fall with a pencil for beginners?
- Simple and light and beautiful landscapes of autumn: drawings for sketching
- Video: How to draw a golden autumn?
Without even having a special talent for drawing, you can draw quite simple, but beautiful drawings. There are already many articles on our site, which explains in detail how to draw various drawings with pencils, gouache or watercolors.
This article will help you draw not very complex autumn landscapes with colored pencils and paints.
How to draw a beautiful autumn landscape of nature with a pencil in stages for beginners?
Now we will tell you how to draw a bright autumn landscape with the help of the most ordinary simple pencils that you can buy in any stationery store.
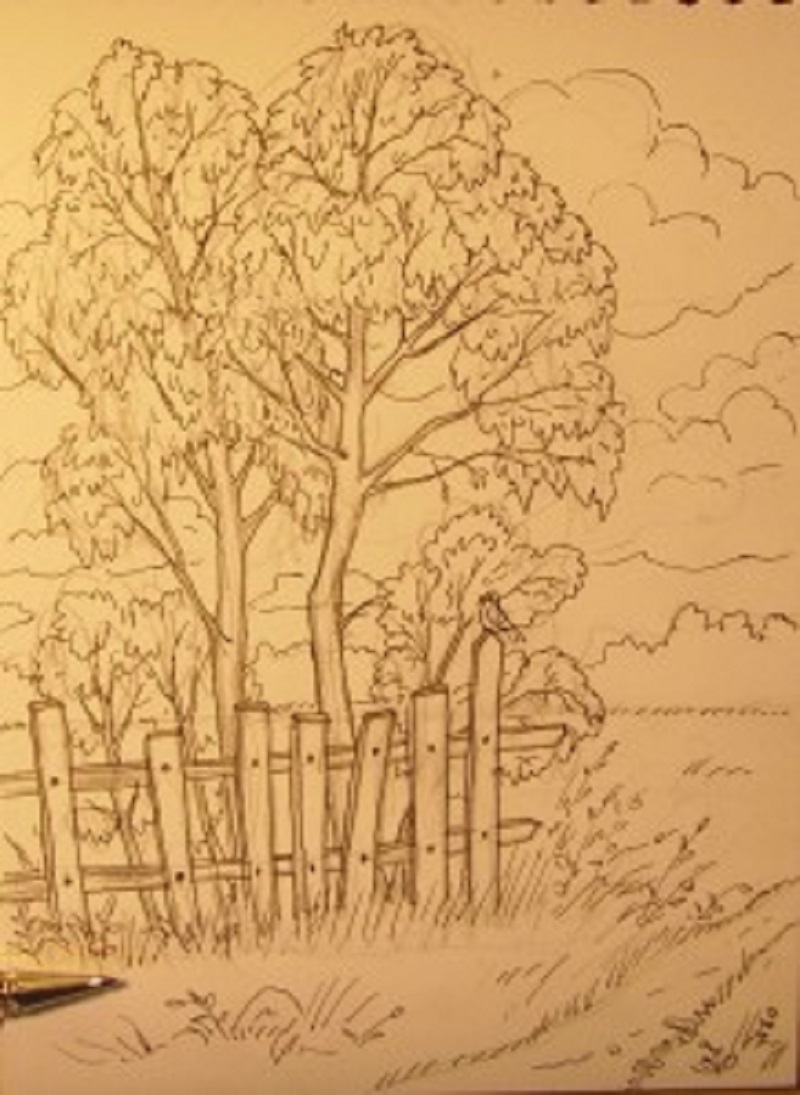
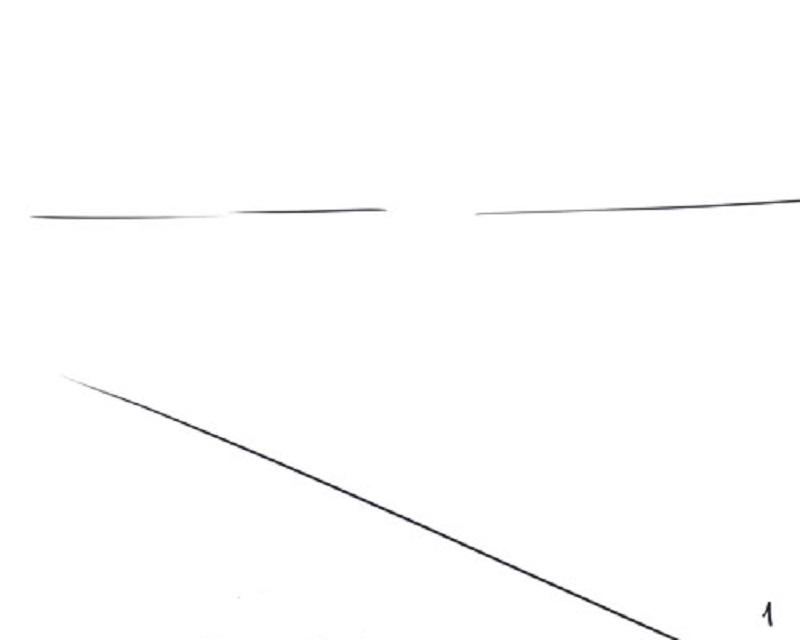
Step 1. On a blank sheet of paper, we first plan the approximate location of our fence. To do this, below the middle of the sheet and a little to the right we draw a short vertical line. Then we draw the horizontal strip and two stripes below, which go to the vertical.
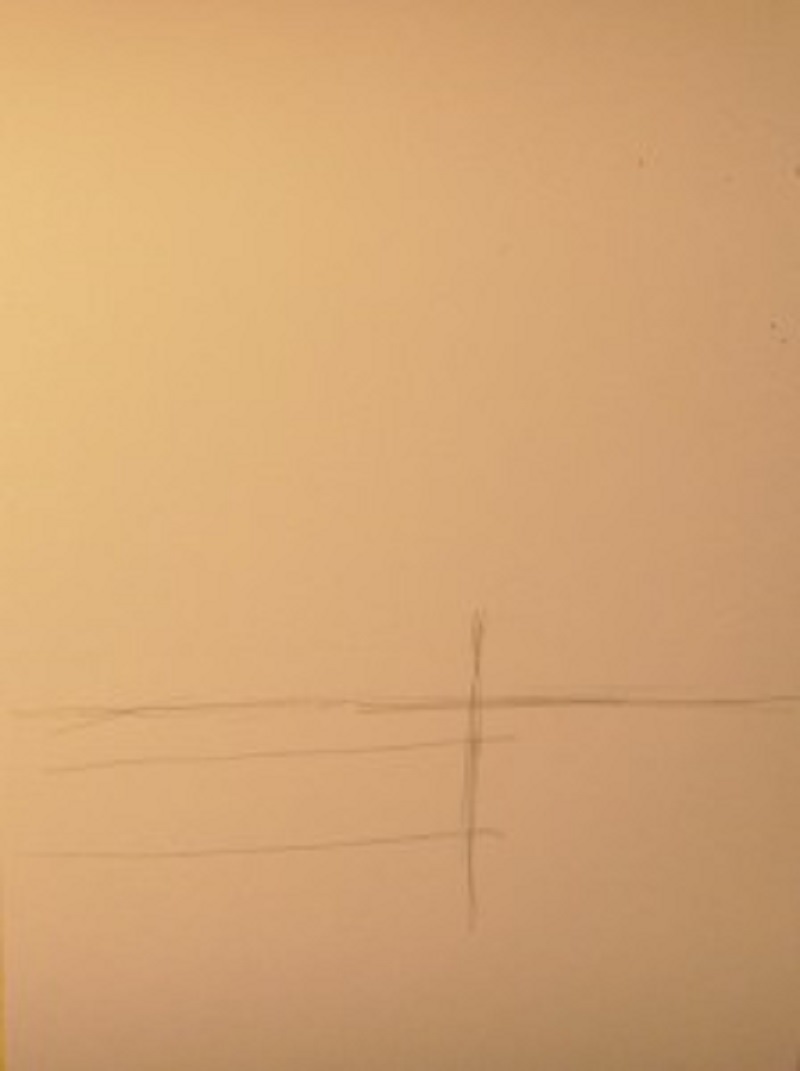
Step 1
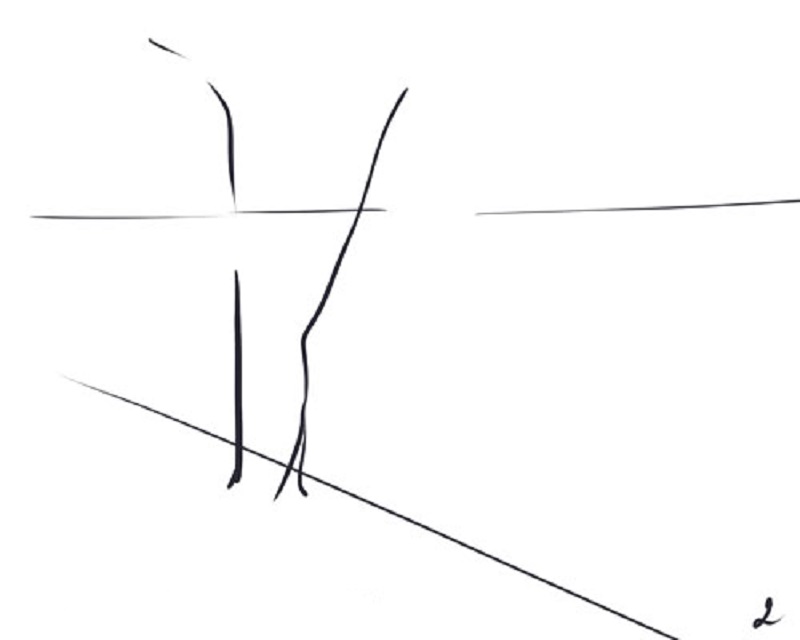
Step 2. We plan the trees. To do this, draw, as shown in the figure, two vertical lines. We draw the crown to the trees - large ovals of irregular shape. In the background, we denote the forest with a curve with a horizontal line.
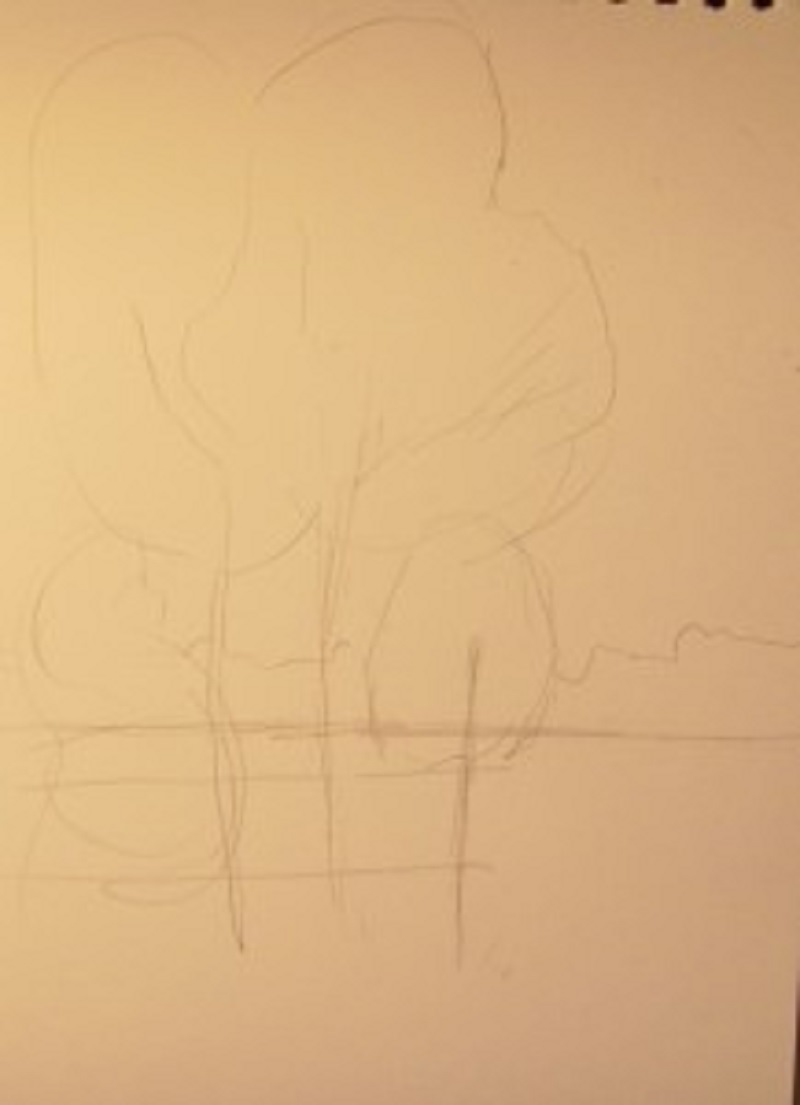
Step 2
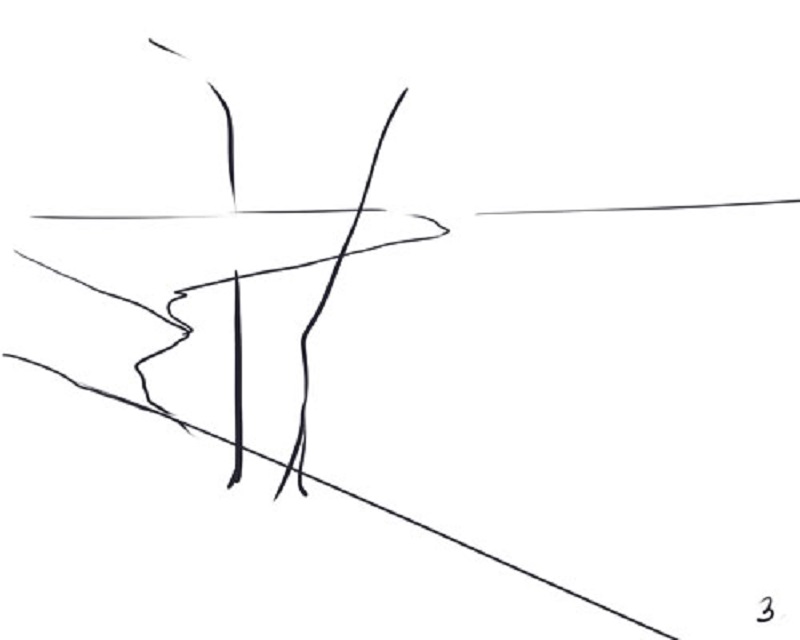
Step 3. Draw in detail the fence. In total, 7 vertical stakes should turn out. Two lower horizontal lines that we painted at the beginning are rods behind stakes. We also circle them. Under the fence you can designate grass.
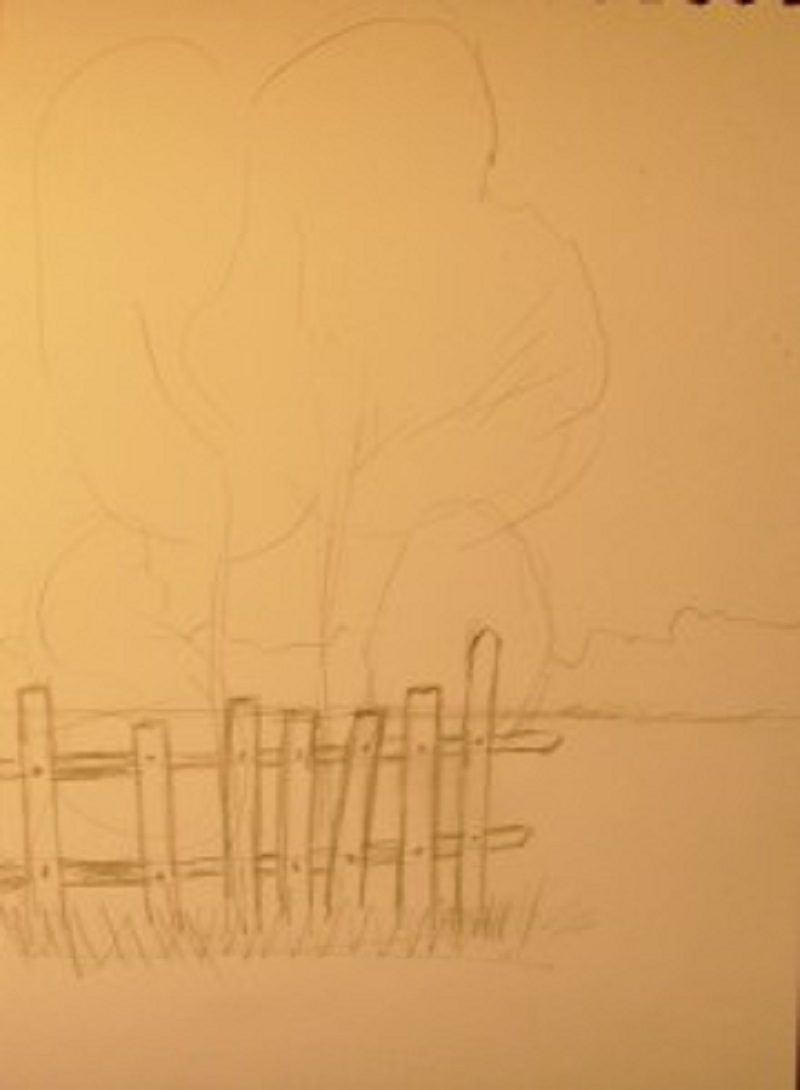
Step 3
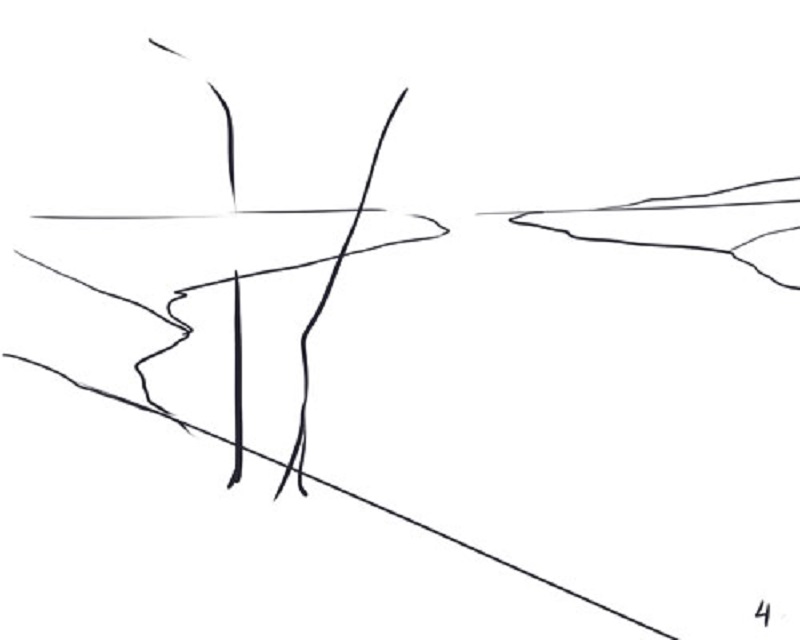
Step 4. We make our trees voluminous - add a lush crown, not very thick trunks. Be sure to draw twigs in the crown so that the pattern looks more natural. In the foreground, we denote the path. You can take the track into the distance, or you can do it as in the photo.

Step 4
Step 5. "There is nowhere more than now." So could be called this part of the work. All the details that were conceived must be transferred to paper. These are clouds, drawing leaves, bark, herbs in the foreground. We draw a small bird on the fence.
Step 5
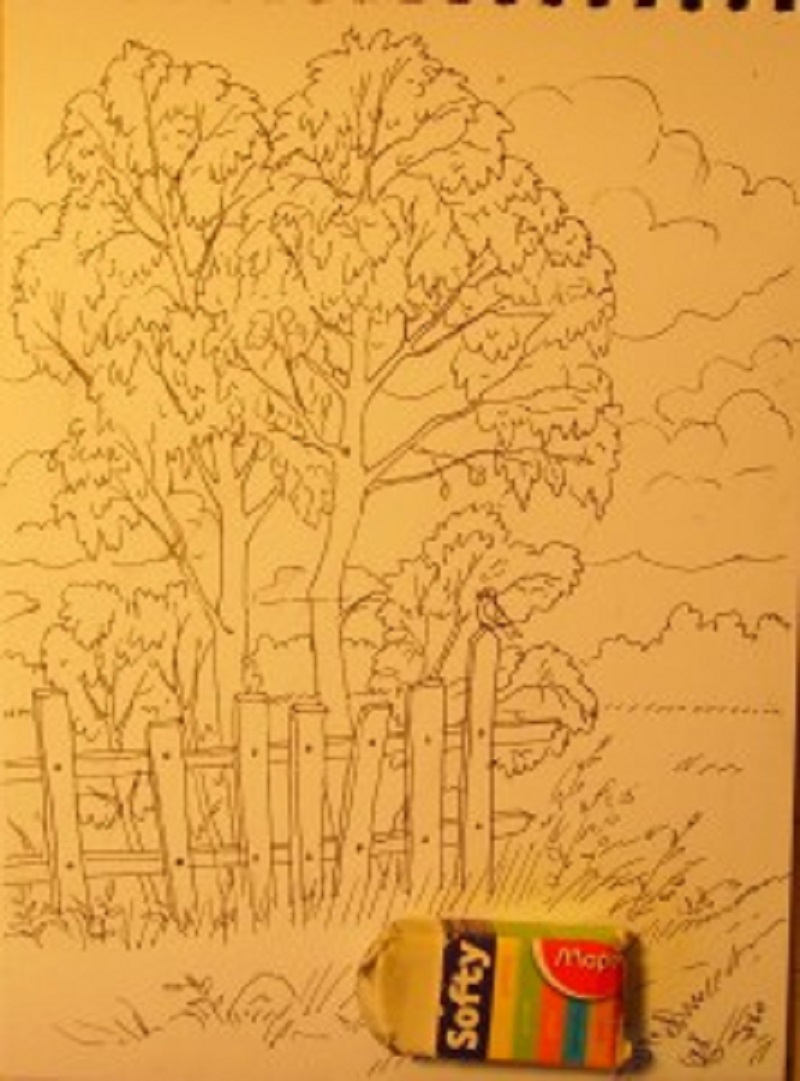
Step 6. We take the eraser and remove all the extra strokes. So to speak, “cleaning up” the drawing. The lines should be smooth, single. Since a person is not a robot, the hand of even an experienced artist can sometimes tremble and give out not perfect lines.
Step 6
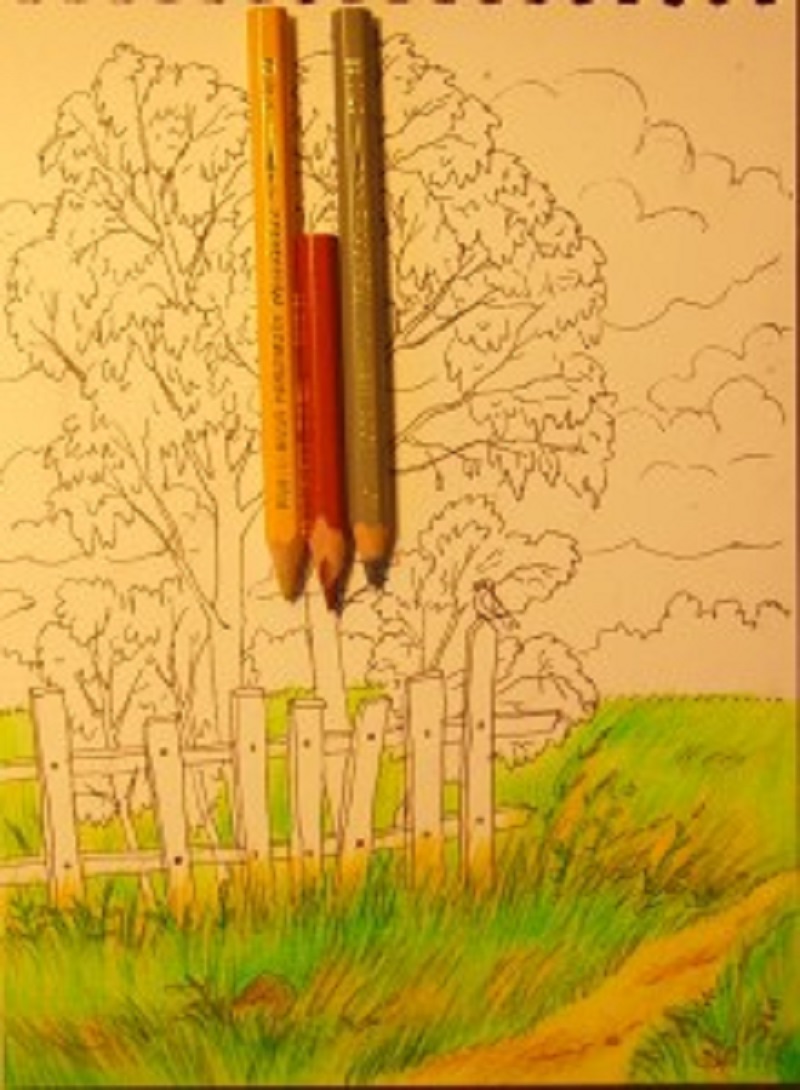
Step 7. We take colored pencils in the amount of 5 pieces: 3 shades of green (from light to dark) and two shades of yellow (one lemon, the other warmer, a mixture of lemon and ocher). And with the help of these pencils with vertical short strokes, we begin to draw grass in the foreground and on the far. Please note that the grass in the foreground is drawn in more detail, unlike the far.

Step 7
Step 8. Using red, gray and yellow, draw a track and stones. On the path we leave several red small spots - these are fallen leaves.
Step 8
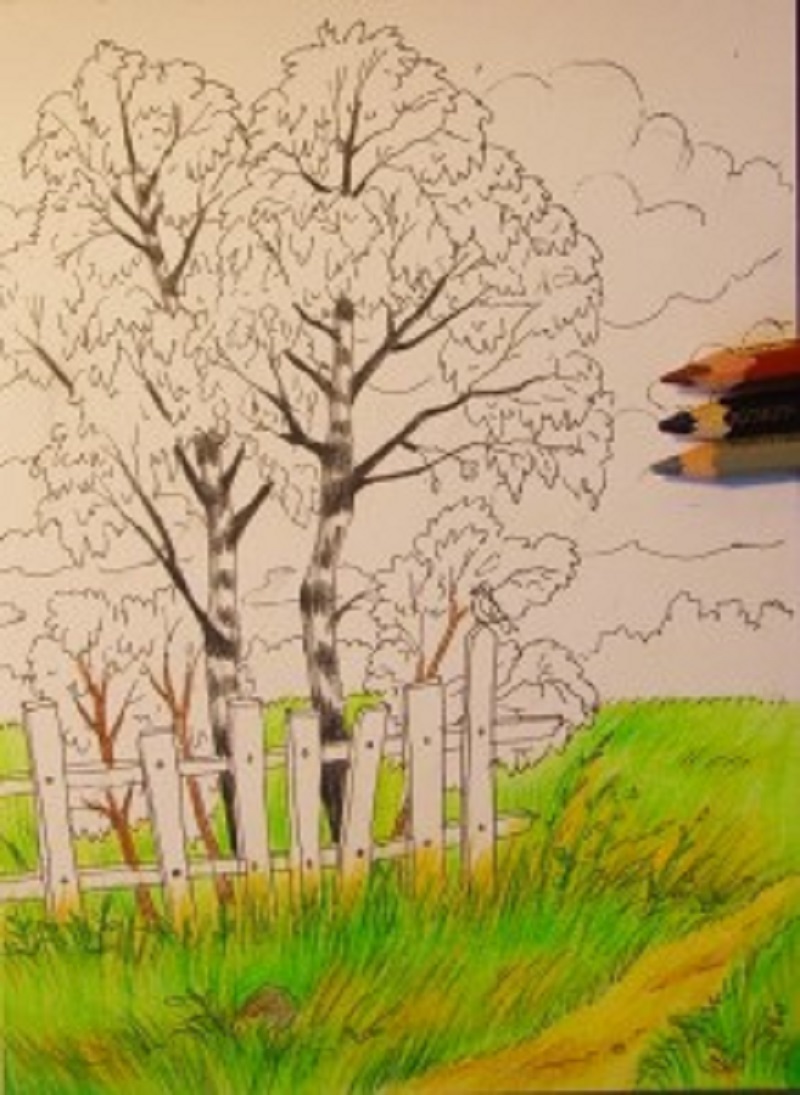
Step 9. We draw the trunks and branches of birches with a black pencil. Do not forget that the trunks of birches are painted with stripes (we use black and gray pencils for this), and the branches can be drawn in black. At the bushes, we paint the trunks brown.
Step 9
Step 10. Now we play with paints! We take green, brown, red, orange, yellow and lemon pencils (if there are more shades in the set, use them and must!). With all these colors, we draw a crown near trees and bushes. To do this, we remember the autumn and what colors are usually painted in the autumn. For birch, you can take yellow and orange, for other bushes - red, green, yellow, lemon, brown gray. Burgundy, swamp, emerald are also suitable. Lastly, add paints to our bird.
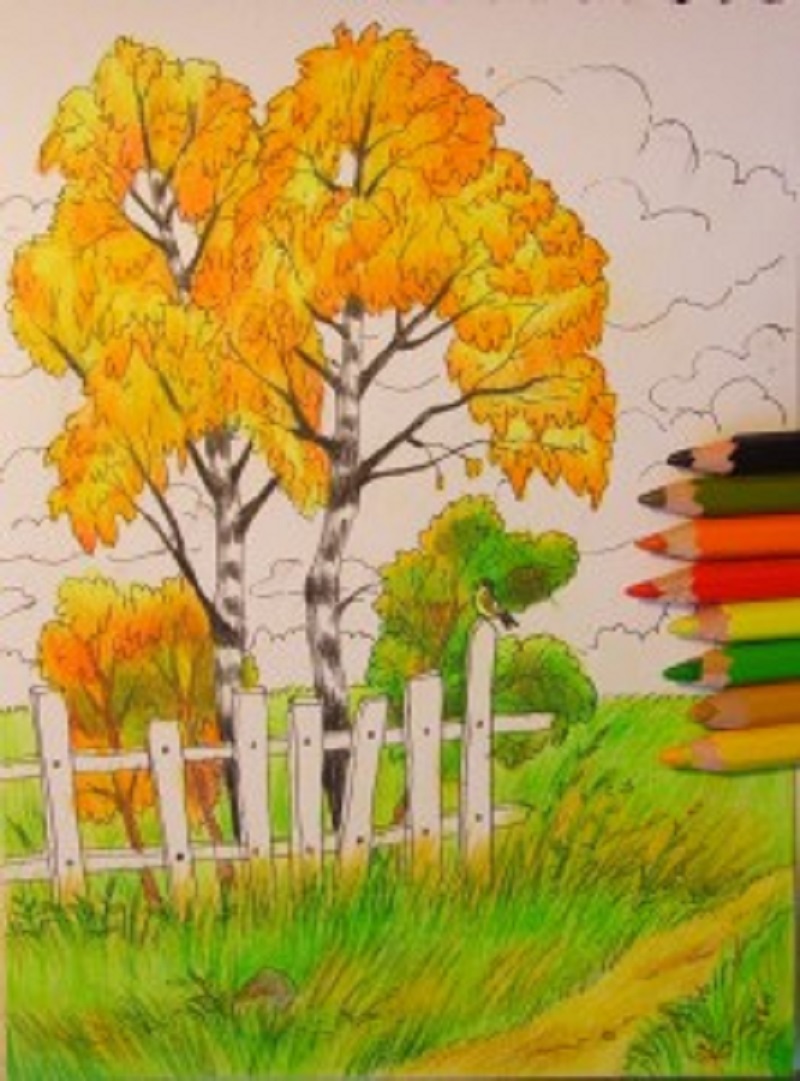
Step 10
Step 11. Using gray and brown pencils, draw our fence. Do not forget that the fence is in the foreground, which means it should be painted quite well and in detail.
Step 11
Step 12. Using green, yellow and orange pencils, draw a distant plan. And in the background we have a forest. Draw such a forest that looking at it, I wanted to go there.

Step 12
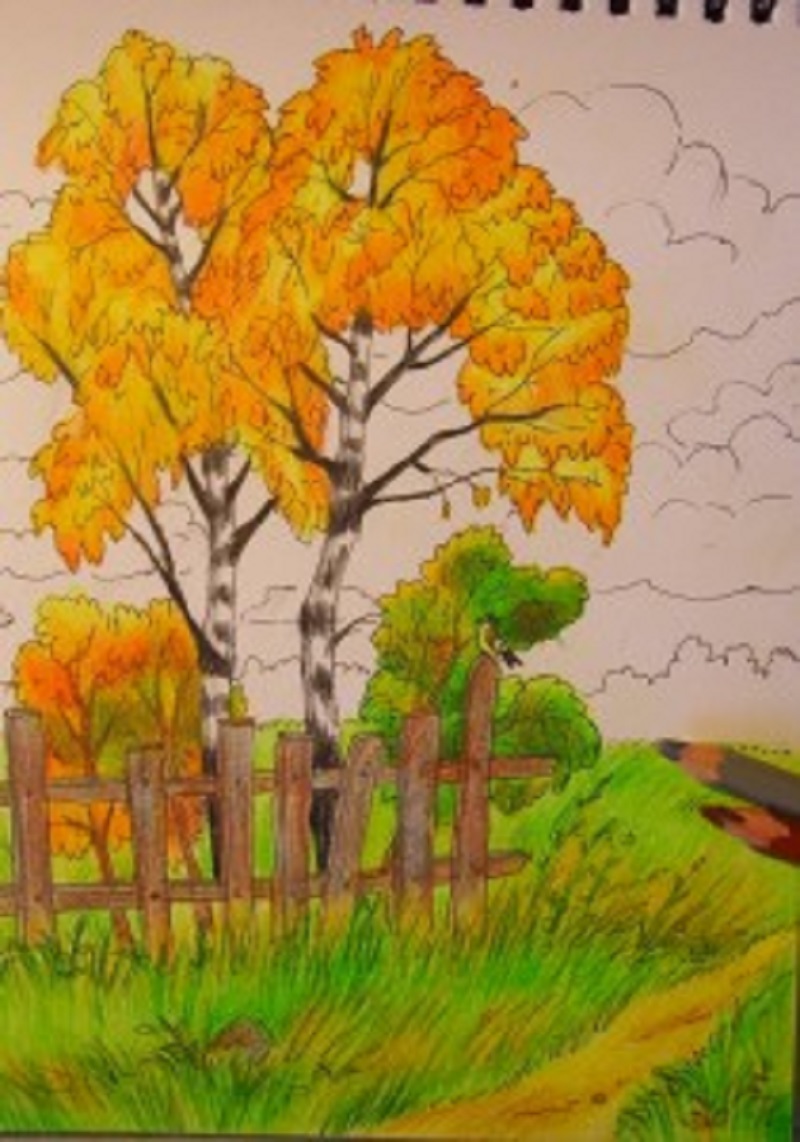
Step 13. At the beginning of the work, we outlined the cloud with a simple pencil. Now, with the help of blue and purple, we will paint the sky and the same clouds. With light vertical movements of the blue pencil, indicate the sky, and even lighter movements, but already purple pencil give the volume to the clouds.

Step 13
Step 14. Bring the drawing to perfection, correct minor flaws. Violet pencil on the clouds can be slightly shaken with your finger or dry brush. The drawing is ready! Now you know how to draw a simple autumn landscape using a box of colored pencils!

Step 14
How to draw a beautiful autumn landscape of nature with paints, watercolors, gouache? Starting for beginners?
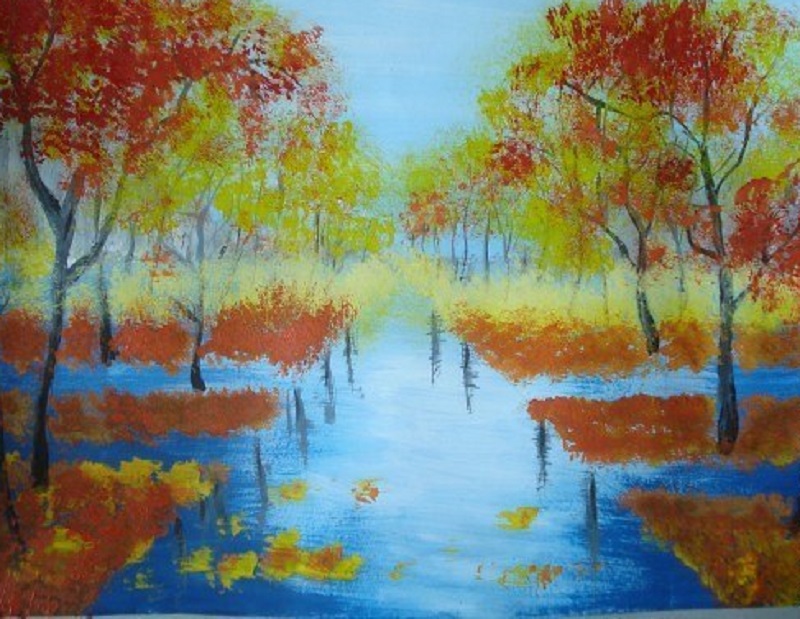
What kind of pattern of gouache can even be a beginner to draw? The answer is: “The one that does not contain clear lines, shapes and can be almost any, depending on the mood and desire of the author of the work!” In this part of the article, we invite you to learn how to draw a beautiful and colorful landscape with a brush and gouache.
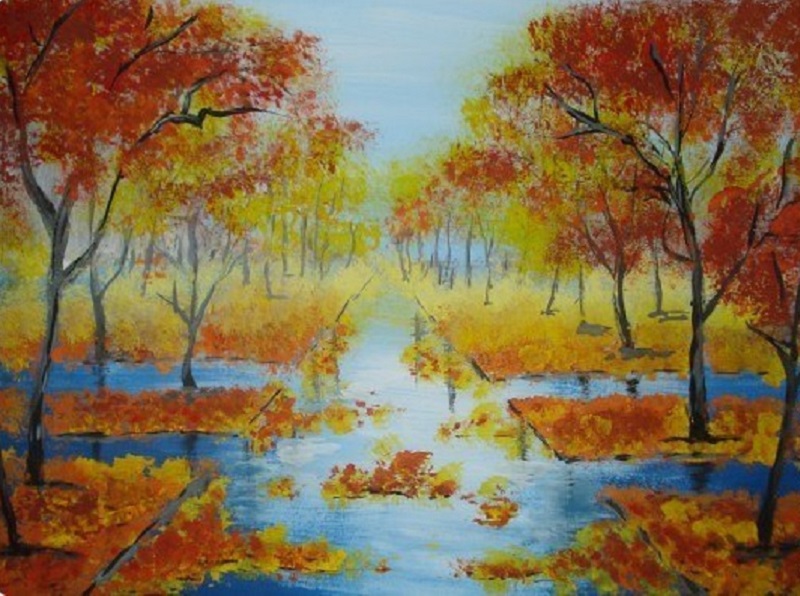
An example of finished work
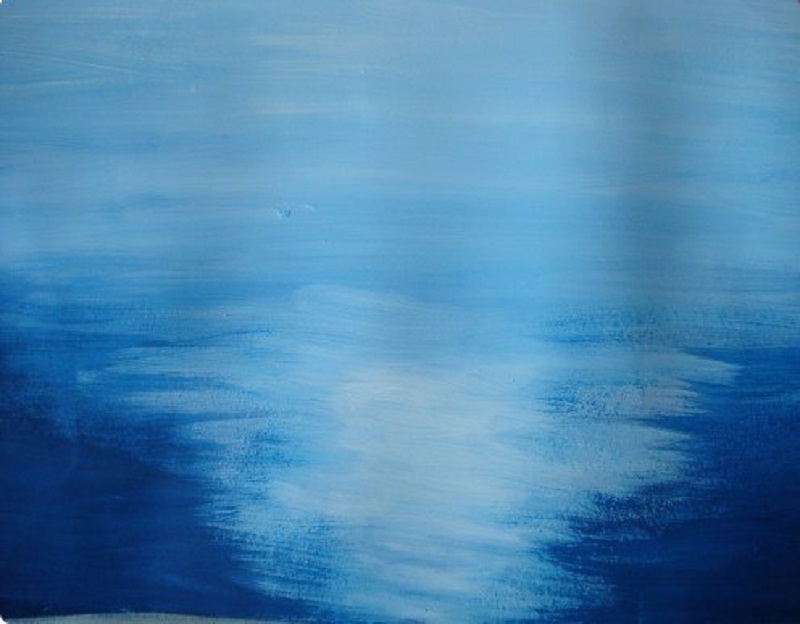
Step 1. We take two colors: blue and white. Mentally divide the sheet horizontally into two halves, the upper should be slightly smaller. Now, with wide horizontal strokes, we paint over the upper part of the white gouache, and the lower one is blue.
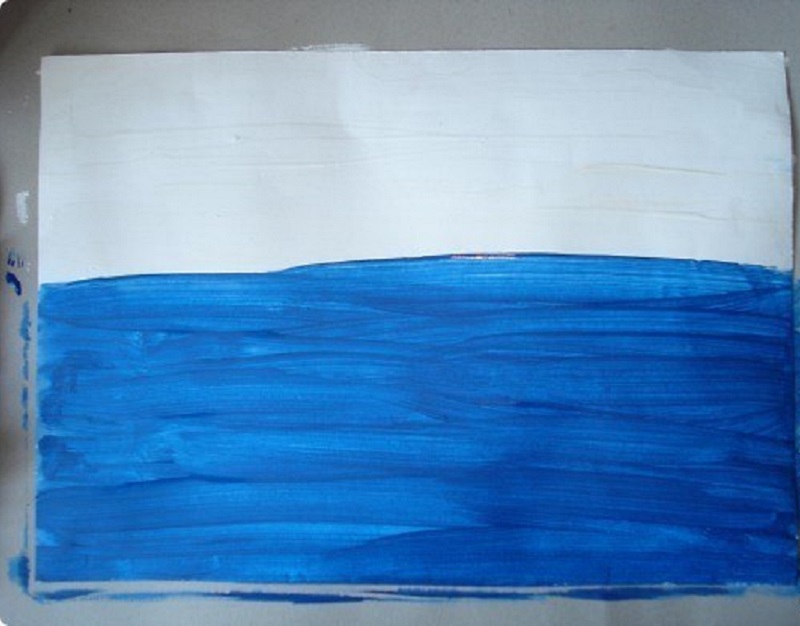
Step 1
Step 2. We create a background. Now our task is to mix these two colors, to make the transition more smooth. We continue to go white in white with the same wide strokes on the blue part, the colors will begin to mix and get a gradient. We highlight the middle with white, as shown in the figure.
Step 2
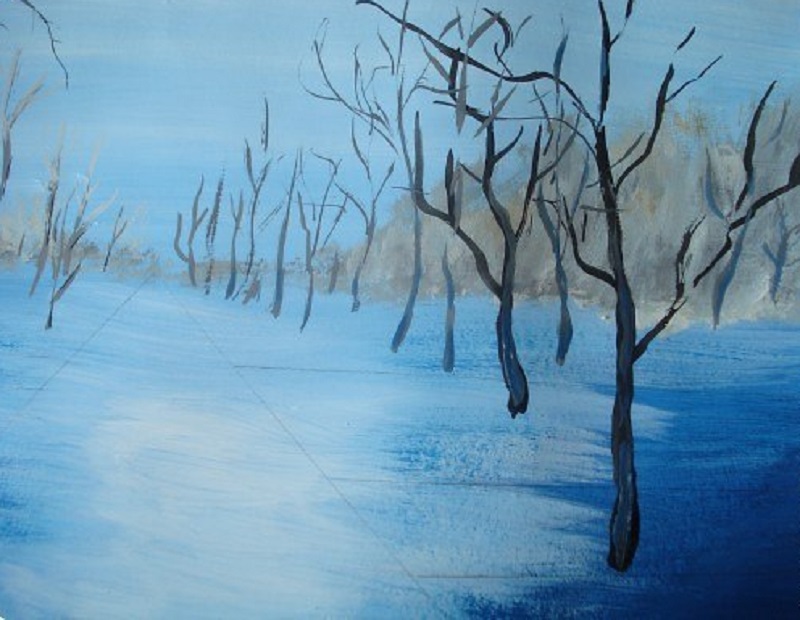
Step 3. At this stage, we denote the horizon line and directly on it with the help of white, gray and brown colors with strokes we denote the forest in the background. With a pencil, we denote the narrowing path to the horizon from the near edge of the sheet. Along this path, draw trees with a thin brush and black paint. Try to make the trunks not equally straight. There must be bends, fractures - everything to make the tree “alive”.
Step 3
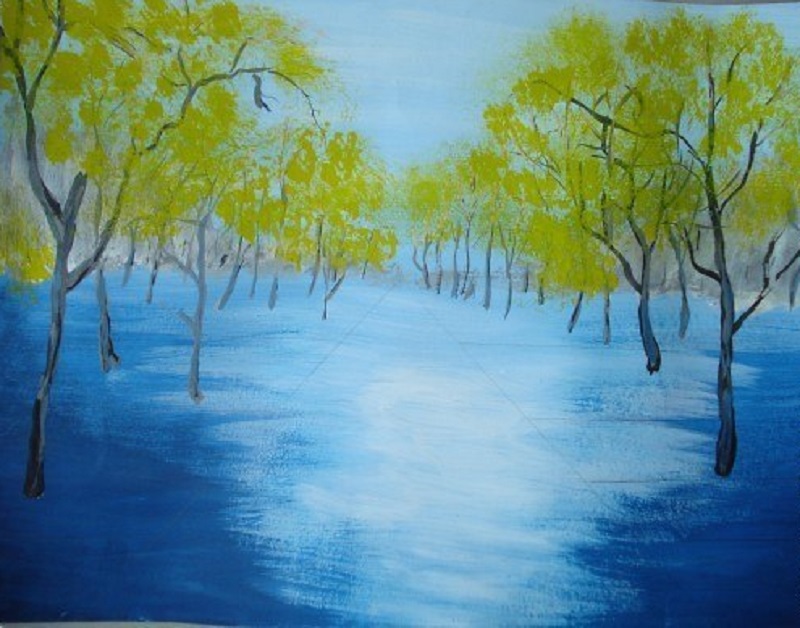
Step 4. Let the trees dry out and literally press the leaves into the paper with yellow paint. To do this, we take the brush of the ponies No. 4-6, dip it into the water, then with the help of a towel or rag we dry, make a fluffy brush, leaving a finger a couple of times and dipping the brush into the paint. Then we put this “disheveled” brush with paint on paper in places where there should be foliage, “blots”, as in the photo below. These "blots" will be leaves.
Step 4
Step 5. In the palette, mix yellow and white paint until a light yellow pastel shade is obtained. In exactly the same way as in step 4 we denote the distant plan. On the path marked with a pencil, we draw the reflections of the trees.
Step 5
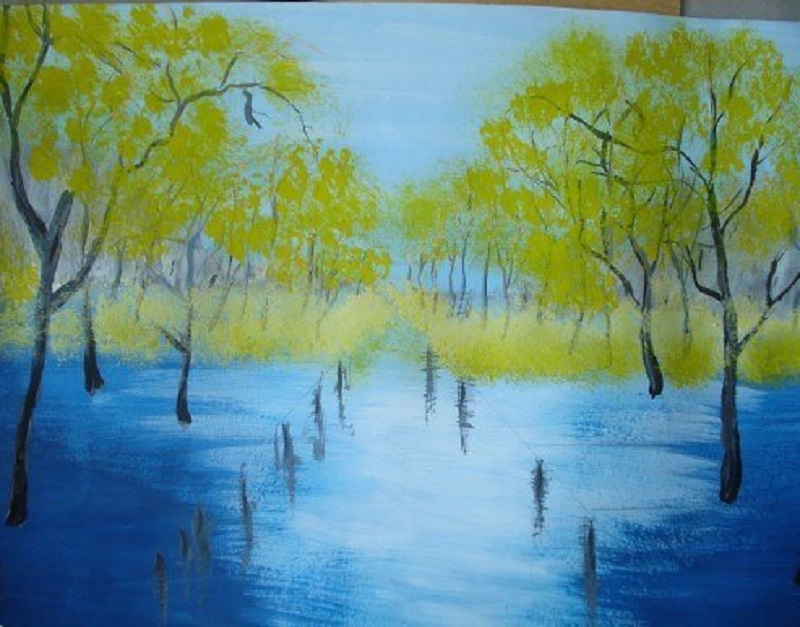
Step 6. Add red and orange to work. A few smears in red in the foliage of the closest trees. The asphalt on each side is divided visually into 3 sections divided by blue. We paint each section with red and orange. You can make several strokes with yellow paint in the foreground on the asphalt - these are fallen leaves.
Step 6
Step 7. We denote the curb, as shown in the figure, add more detail to the work. You can add more leaves, draw a few twigs to trees.
Now your work is finally ready! Let it dry and put it in the frame.
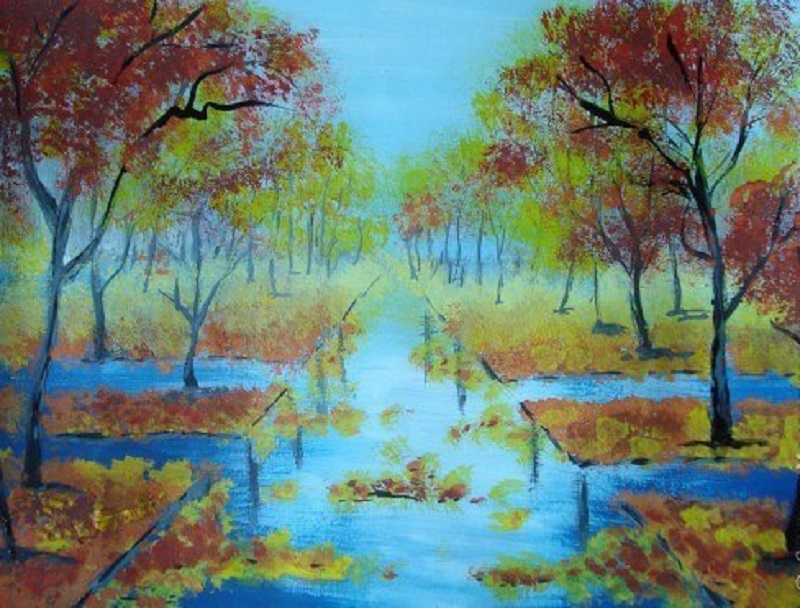
Step 7
If such a drawing seems too complicated to you, then try to draw more just an option - only a very beautiful tree.

You will succeed in it!
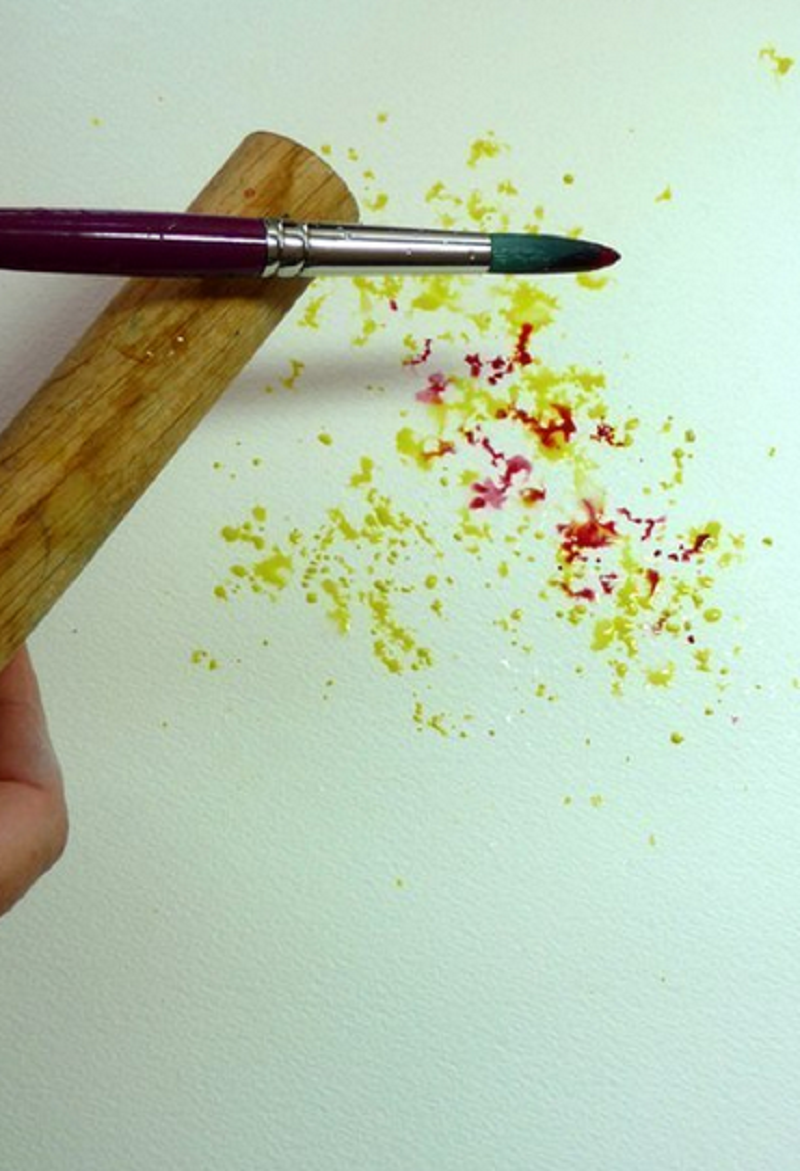
Step 1. Take clean watercolor paper, visually mark where your tree will be located. We recommend choosing a place for him in the middle. Now we take the yellow watercolor, dip the brush into the water, then into the paint. We will need an additional item: a toothbrush, a stick, a ruler, in general, something that can be pulled lightly about. We bring the brush, as shown in the figure and tapping movements, shake off the paint on a sheet of paper.

Step 1
Step 2. Add another color - red. We get beautiful spray.
Important! Do not get a lot of water on the brush, otherwise the pattern can turn out too blurry!
Step 2
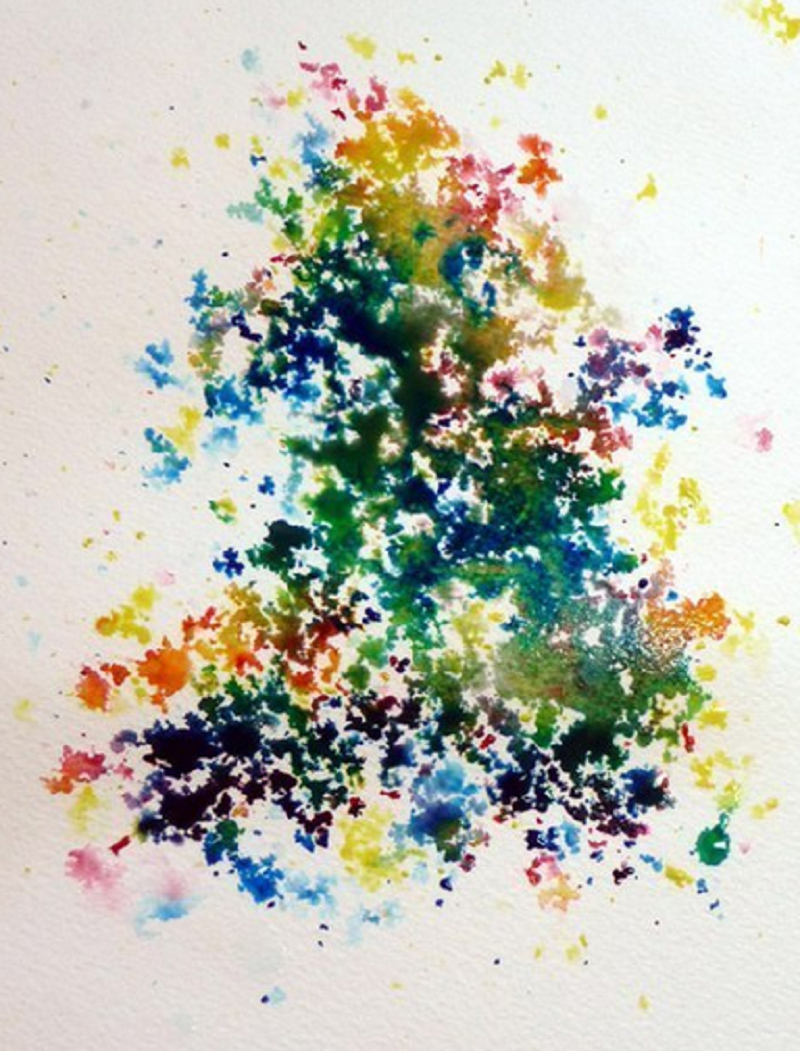
Step 3. To yellow and red add green, orange and a few drops of blue.

Step 3
Step 4. You can add a few more colors: pink, lilac, mild.

Step 4
Step 5. Using a spray gun, slightly erode the crown of our future tree so that the colors are not so bright and beautiful overflows are obtained. It is enough to sprinkle the pattern with water only 2-3 times.

Step 5
Step 6. When the paint spreads a little - let it dry, before that, a little brush with a brush.
Step 6
Step 7. We draw with a thin sharp brush here here and there are twigs. Brown paint designate the trunk and the ground below - the tree is ready!

Step 7
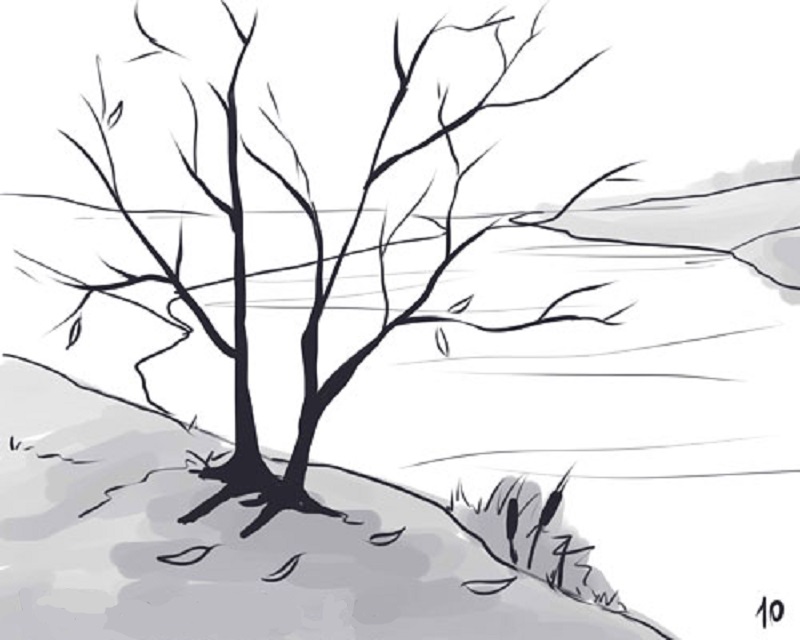
How to draw a light landscape in the fall with a pencil for beginners?
The landscape, which we suggest for you to draw below in reality, is quite easy. And our step -by -step guide will allow you to prevent mistakes in your work. Good luck!
Step 1. We mark the horizon line just above the middle of the sheet. Then, with an inclined line, we denote the close plan - the hill where our trees will grow.
Step 1
Step 2. We draw with two vertical lines the silhouettes of the trunks. We try to avoid straight lines.
Step 2
Step 3. Between the hill and the horizon line we will have a lake. We note its far and near shore on the left side.
Step 3
Step 4. On the right, the far shore is also visible in the distance. Design the low forest in the upper part of the coast, as shown in the picture.
Step 4
Step 5. In the foreground, where we outlined the hillock, draw grass. To do it is quite simple. Again, try to avoid straight lines.
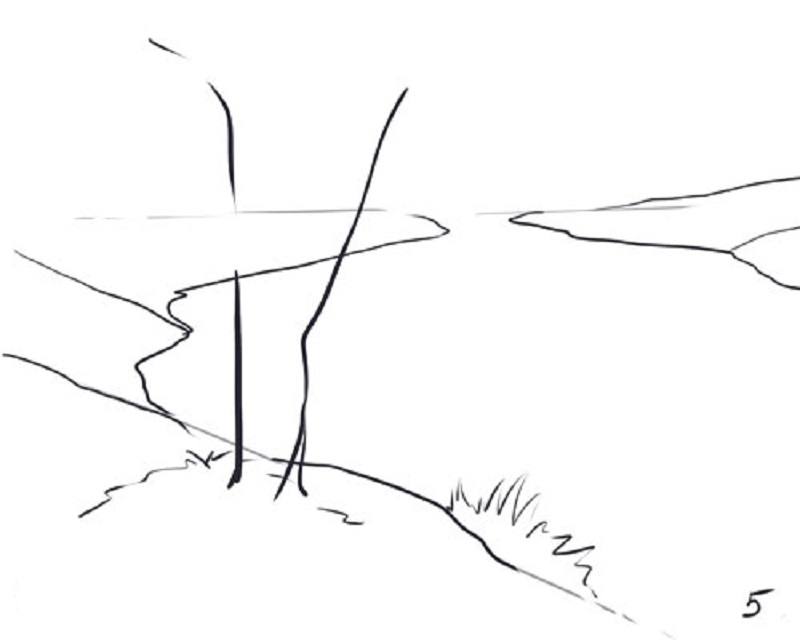
Step 5
Step 6. Now try as realistic as possible, as your skills allow you to draw trees with branches. The tree on the right should be quite sweeping.
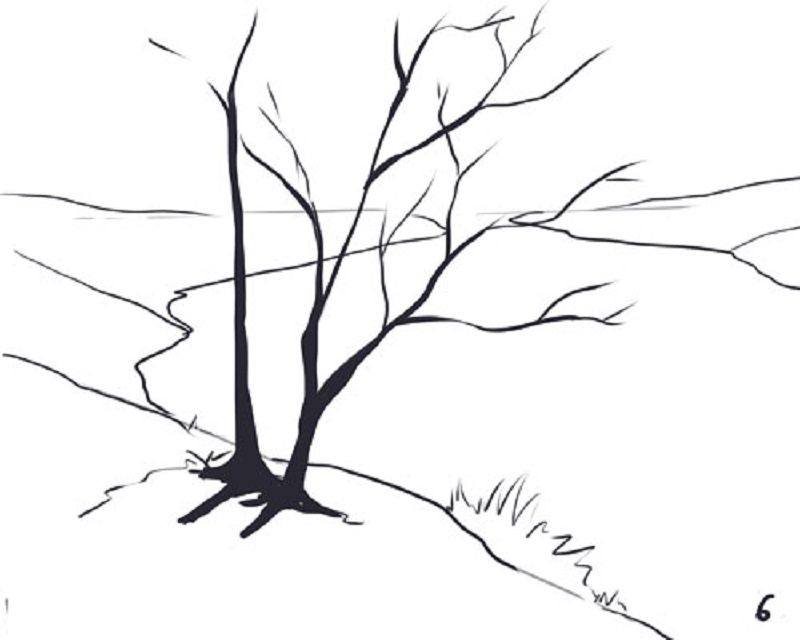
Step 6
Step 7. Now finish the left tree. In some places on the branches, draw leaves, draw the same shape on the ground on the ground near the tree. Where you painted the grass, draw reeds in addition.

Step 7
Step 8. Break it with a simple pencil of the lake with wide strokes not tightly, leaving a large distance between the lines.
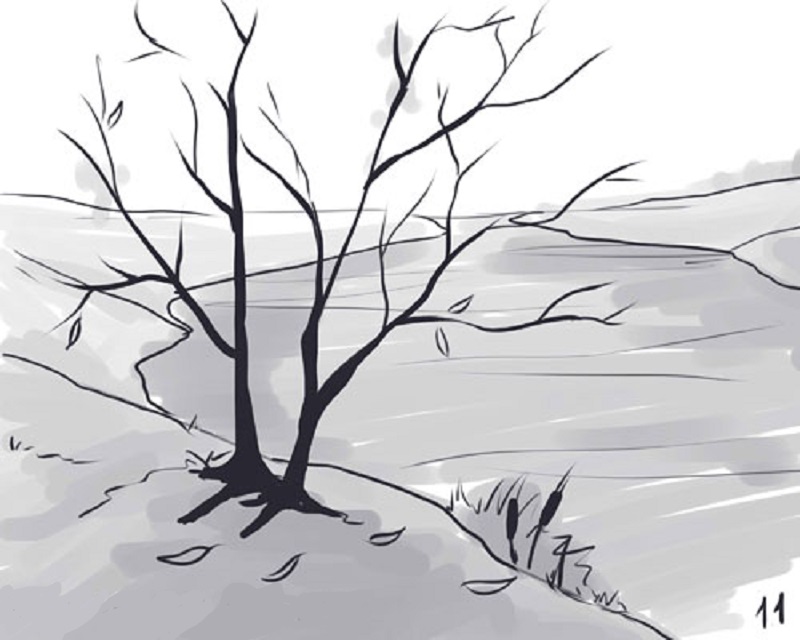
Step 8
Step 9. Take a simple pencil and shake the hill on which the trees are located. Do not forget that the shadow falling from the trees will be darker.
Step 9
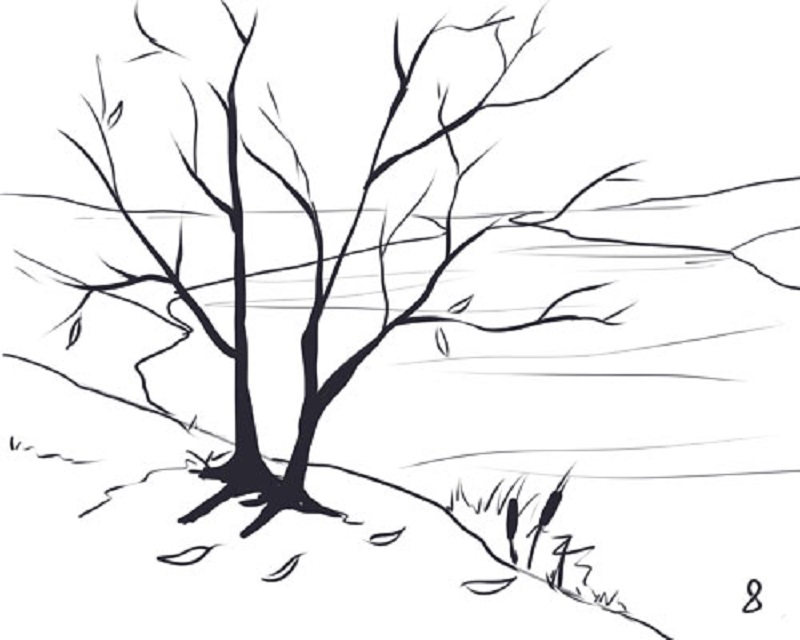
Step 10. The distant plan also shake, dismantling the shadows. Kamysh, paint over the shade of medium intensity.
Step 10
Step 11. The whole distant plan, including the lake and the left bank of the lake, paint the way as shown in the figure. And try to make part of the lake along the shores a little darker than in the center.
Step 11
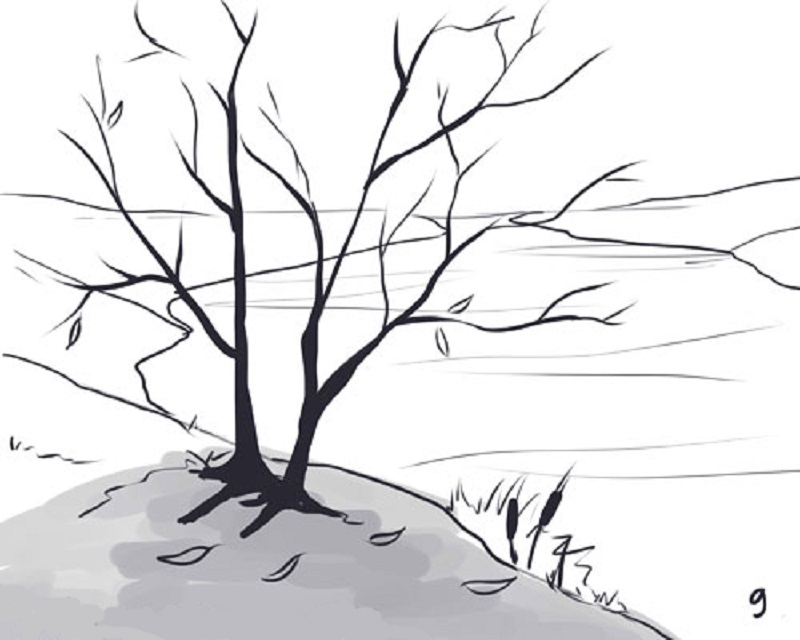
Step 12. Break off with a weak press on the pencil. Then, pressing a pencil a little stronger, draw light clouds.
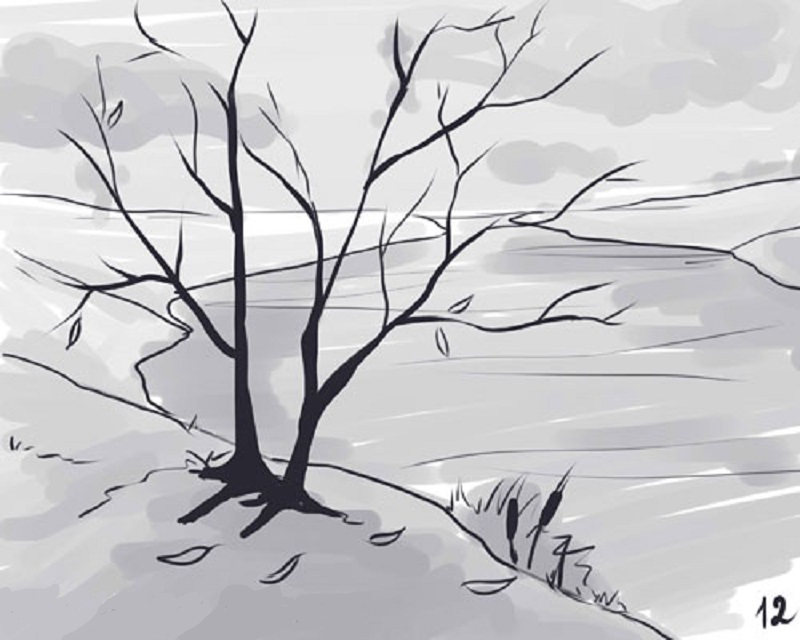
Step 12
Step 13. In the upper right corner, put several checkmarks - these are gulls flying in the distance.
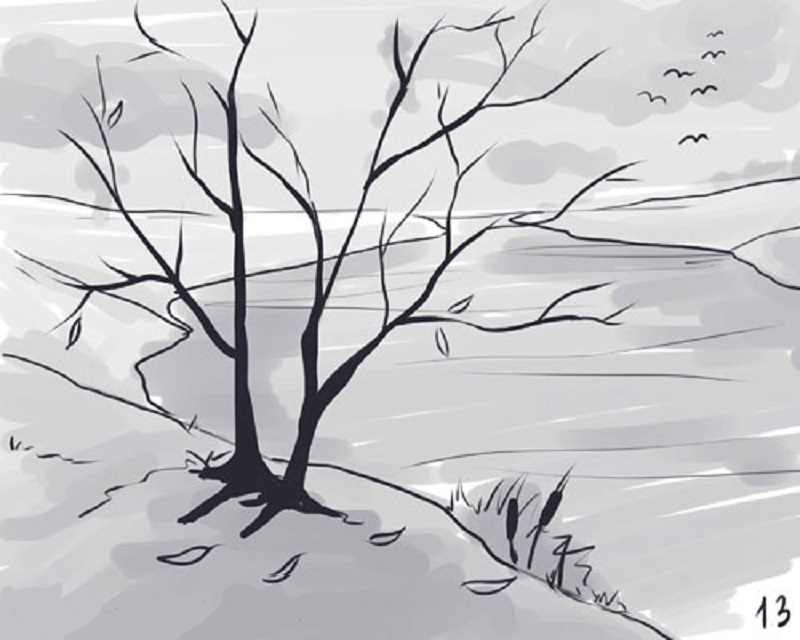
Step 13
Step 14. To give the pattern of realism, add a small web with a spider to the tree.
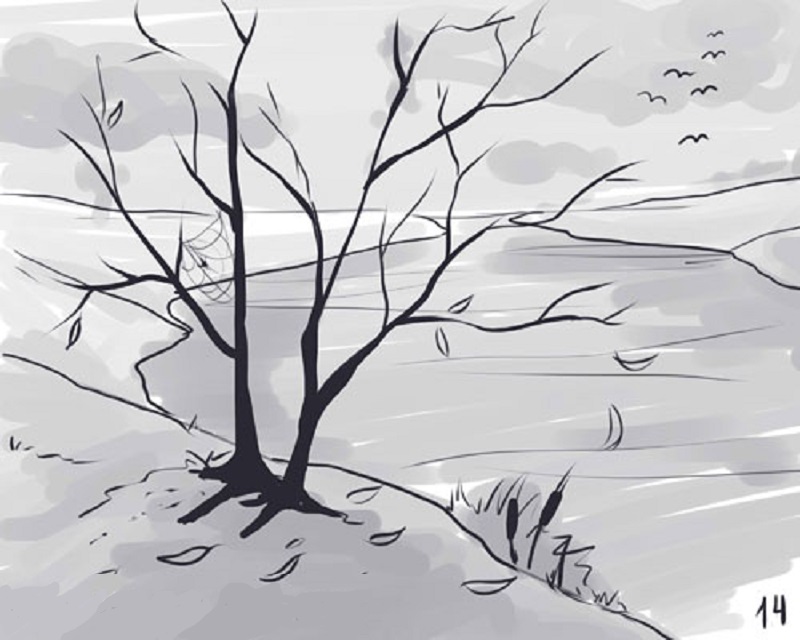
Step 14
Step 15. Using an eraser, highlight a small circle on the left side, as shown in the figure - this is the sun. Now the atmosphere has not become so gloomy, but your drawing is finished! Congratulations!
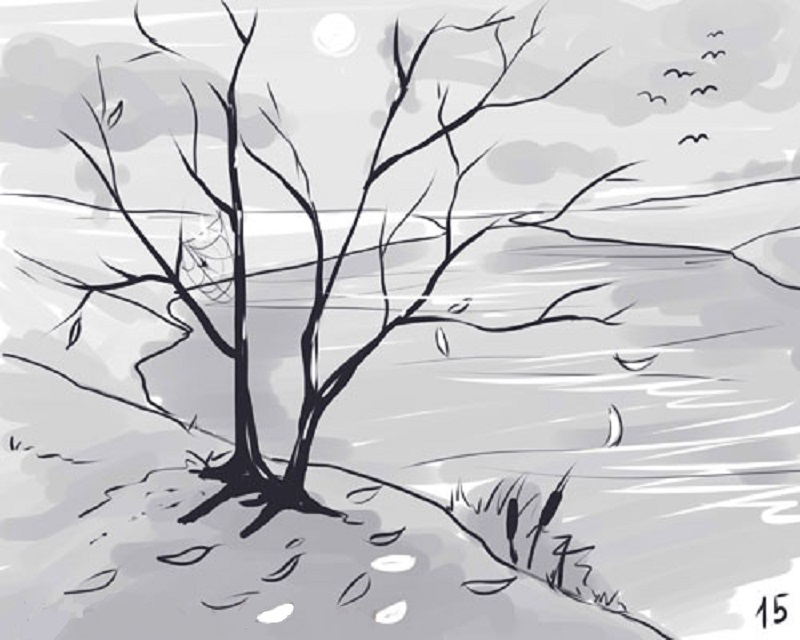
Step 15
Simple and light and beautiful landscapes of autumn: drawings for sketching
Further, as your homework, you will receive several drawings that you need to repeat without the help of a master class.
These three drawings are very simple. You can make them in color, or leave them as sketches.
Picture 1
Figure 2
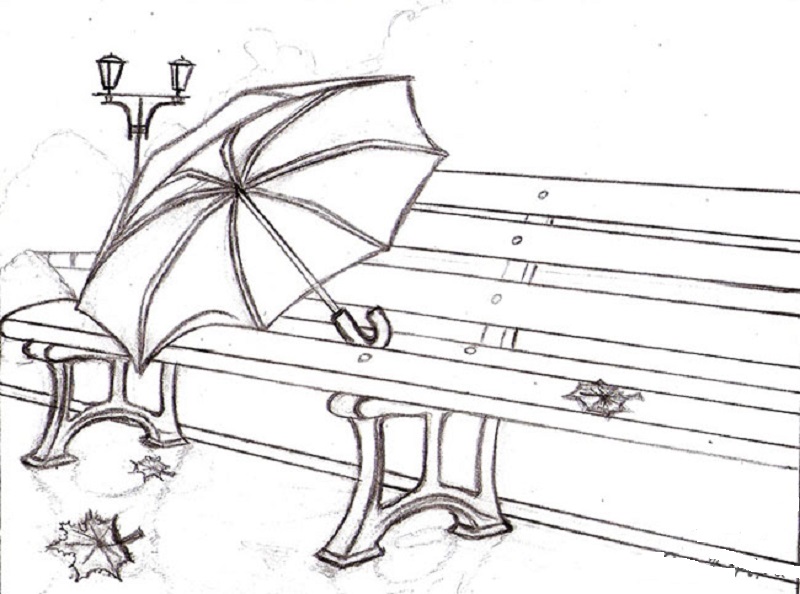
Figure 3
Using the techniques known to you now, to draw these landscapes for you will not be difficult.
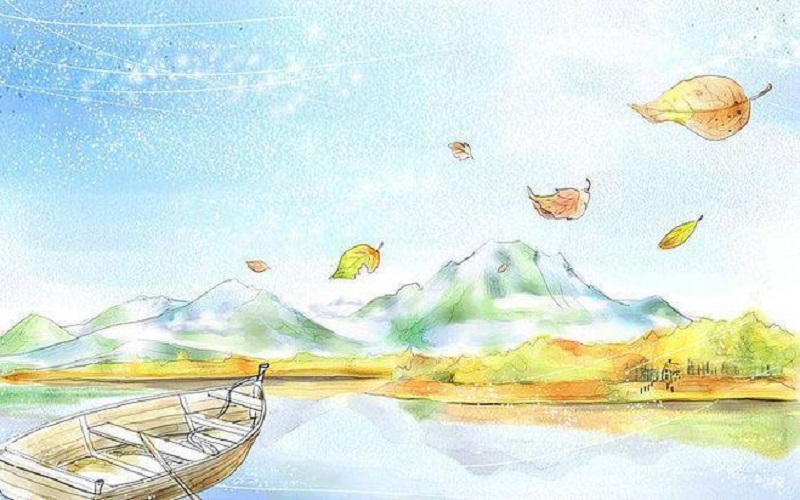
figure in color 1
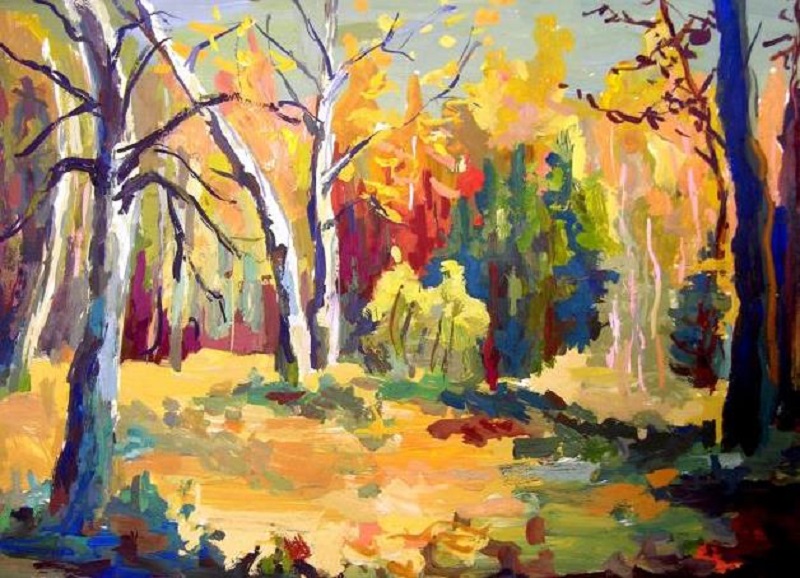
figure in color 2
drawing in color, wood, 3