How to draw a rose?
The content of the article
- How to beautifully draw a rose bud with a pharmaceutical with a pencil: scheme
- How to draw a rose with a pencil in a phased: Scheme
- Video: drawing lessons. How to draw a rose
- How to draw a rose with a pencil on the cells step by step?
- Video: Cells drawings
- How to draw a bouquet of roses in a vase with a pencil and paints?
- How to draw a heart with a pencil and paints beautifully?
- Beautiful drawings of roses for sketching
- Video: how to draw a watercolor rose
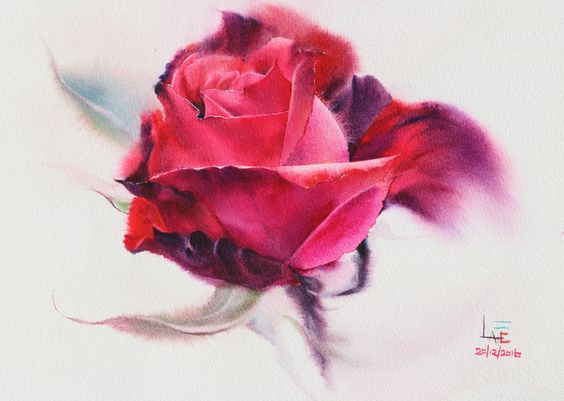
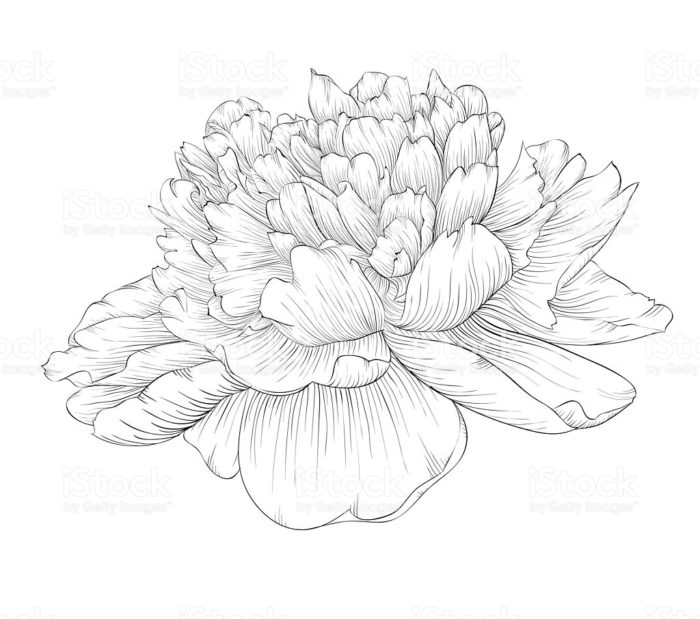
- From this article you will learn how to draw one of the most beautiful colors in the world - a rose. For many people, the holiday is associated, if not with roses, then with many colors, bouquets and small floral arrangements.
- A beautiful drawing of a rose will raise the mood and a beautiful pattern, which can be made by both a simple pencil and paints. The signed drawing will transmit the atmosphere of the holiday for a very long time to the culprit of the celebration.
- Even a novice artist can depict one rose or a whole bouquet on a sheet of paper if he followed our step -by -step guides. Using a simple pencil and several felt -tip pens, you can not only convey the main forms of the flower, but also draw the petals, transfer their beautiful bends to the paper.
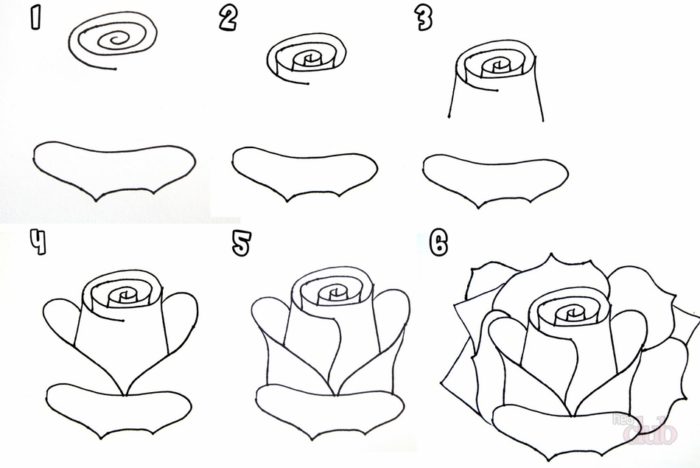
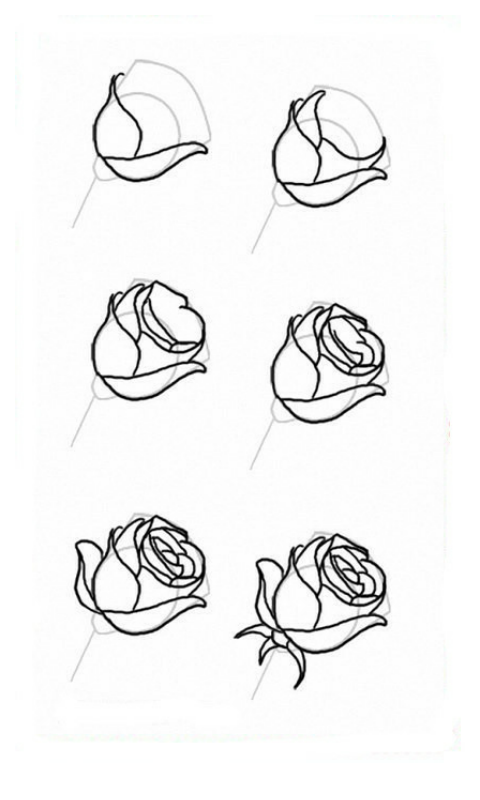
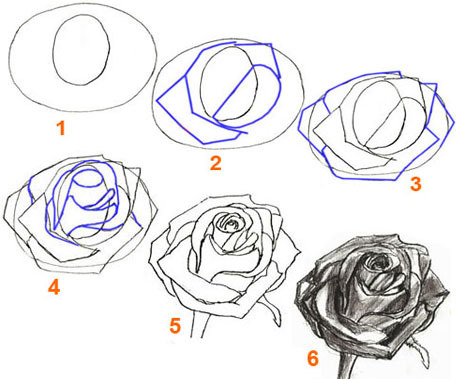
How to beautifully draw a rose bud with a pharmaceutical with a pencil: scheme
If you decide to portray an opened rose bud, you will need to draw every petal. We draw, not much pressing on a simple pencil, so that later it is easy to remove the extra lines. Just add a line on every step, checking with an orginal picture.
How to draw a rose
Adviсe:
- Start drawing from the upper part of the bud. Here the main thing is to adhere to the shape of the spiral, which resembles not a completely open bud.
- After that, having stepped back a little, begin to draw the petal: the largest and largest more than the rest in size, and then others - smaller.
- When the rose acquires recognizable contours, proceed to add volume. Having retreated from the top of the bud, draw the lower part of it. If you stretch out long lines, then the flower will look not loose.
- We draw the petals on the sides of the flower. If you decide to portray a magnificent flower, then add more petals.
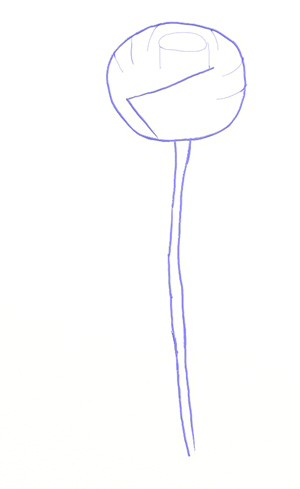
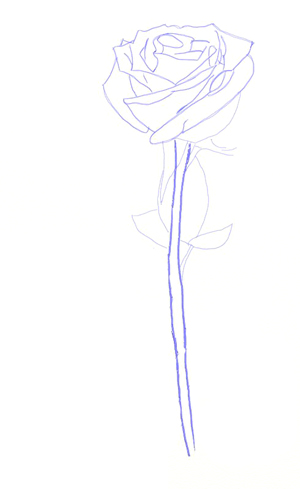
The drawing of the rose is in stages
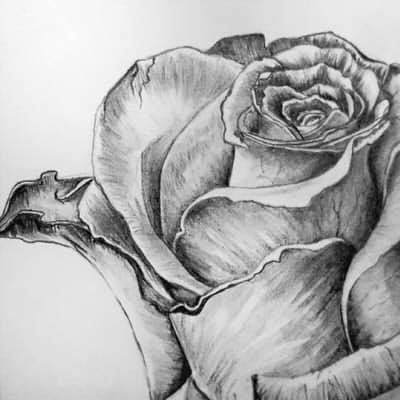
Rosa bud drawn with a pencil
Rosa bud drawn with a pencil
Rosa drawing step by step
How to draw a bud
Drawing rose with a pencil
How to draw a half -frayed bun rose
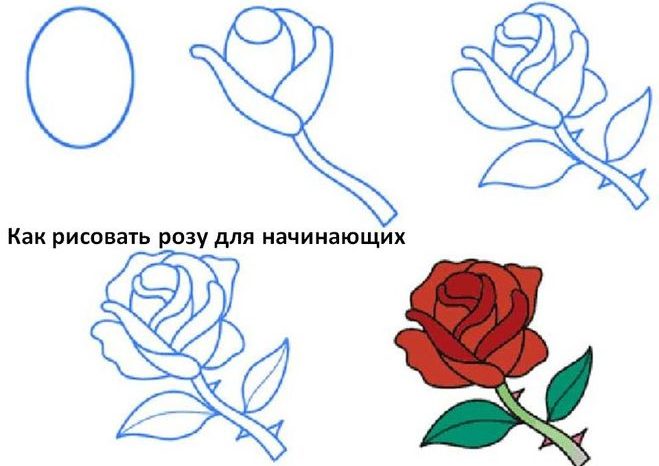
How to draw a rose with a pencil in a phased: Scheme
- Despite the fact that the rose is a complex flower for drawing, artists often portray it on their canvases. If you are just starting to comprehend the basics of drawing, it is better to opt for simpler colors.
For those who nevertheless decided to portray a rose, without much experience in drawing, the masters reveal their secrets in master classes. Here are some of them:
- You can draw a rose without experience in drawing colors. The main factors of creating a beautiful picture are the presence of desire and lack of haste.
- Zeal helps to reveal to artistic talents even those who are difficult to get the easiest pattern.
- To begin with, it is recommended to familiarize yourself with several basic drawing lessons. Now there are many sites where such information is available and informative.
Roses go well with other colors
- Look at the lessons that tell in detail about the techniques of applying pencil strokes, about how to make a bubbled, and which paper it is better to take with a simple pencil for the picture, and which - for drawing with watercolor paints.
- It is also worth choosing pencils of the corresponding degree of hardness. However, do not overload yourself with extra information. One or two lessons will be enough to portray a flower no worse than an experienced artist.
- Try to draw simple voluminous objects. This will help you understand how to have items on paper.
How to draw a rose
- Be careful and do not rush, because the extra lines will not decorate your drawing, but can only lead to irreparable errors. Yes, if you draw with a simple pencil, then all additional lines can be erased (painted without strong pressure), but real artists avoid applying unnecessary contours.
- Try to study the selected object before the start of drawing so that the picture in the smallest details can affect your imagination.
- To get started, draw a flower with an unexpressed bud. Its contours will be much easier to portray to a novice artist. Then follow the step -by -step explanations, finishing new lines to the original contours.
- Regular classes will help you transfer even complex shapes and pictures to paper.
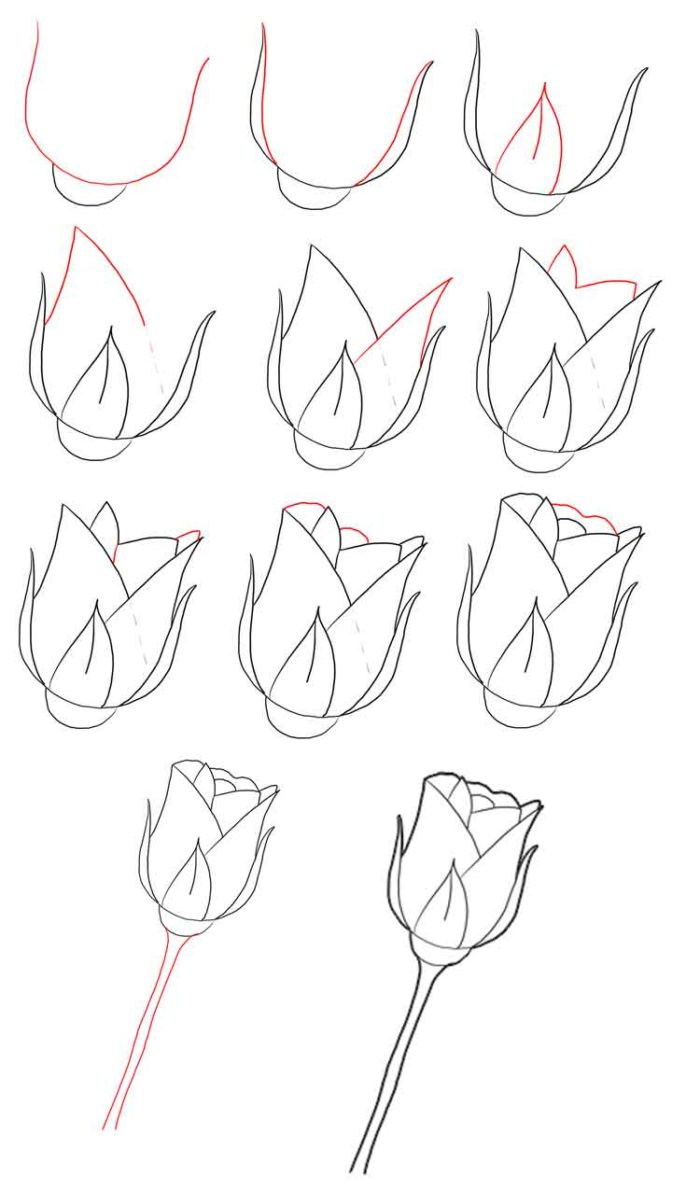
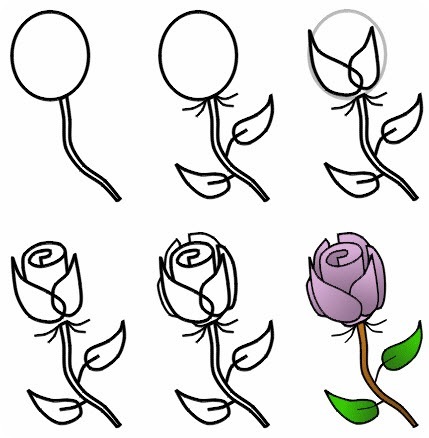
Step 1: Draw the contour of the rose bud and the stem
- We draw a conditionally horizontal line that divides the sheet into two halves. In the upper half of the sheet, we begin to draw a circle. We do not need an ideal circle, the main thing is to guess with the size of the original circuit.
- After all, inside the circle we will place a bud. We draw all auxiliary lines without pressing a pencil much.
- When the drawing is ready, we will get rid of them with the help of an eraser. We draw two parallel curved lines under the circle. It will be a stem.

We draw the original contours of the flower
Step 2: Draw the petals
- In the center of the circle, we draw the unexplored part of the bud. After that, we will conditionally divide the bud into two halves (in our example, this auxiliary line is blue).
- Now it will be easier to navigate: we have the right and left parts of the bud on which we need to draw petals.
We draw the petals
Step 3: Draw the leaves and add the details of the bud
- We pay attention to the petals.
- No need to copy them exactly: just give them natural bends.
Add the leaves
Step 4: draw the petals
- At this stage, you need to depict the leaves on the stem. Here you can also turn on imagination and finish several twigs with leaves so that the picture looks advantageous, and the flower does not seem lonely on a sheet of paper.
- When drawing twigs with leaves, try to give them more realistic sizes and shapes. Too large leaves will immediately spoil the overall impression of the picture. We will finish the veins on the leaflets.
- We draw the petals in more detail. Additional lines can be deleted now, or you can do this at the final stage. It is only necessary to keep in mind that the beauty of the rose lies in the correct image of the petals.
- We begin to draw lines under the upper, previously drawn circuits of the petal, connecting the edges. We will portray each petal with two lines, so we can create the impression of a little bent along the edges of the petals. Two lines of petals will also help to properly arrange the shadows on the bud in the future.

We draw shadows
Step 5: Draw the shadows
- The rose is almost ready. We only need to give her volume with the help of shadows. In order to depict a falling shadow, imagine which side of the rose is under the source of light.
- We fill the recesses between the petals with darker shadows, trying to press the pencil a little stronger. At the junction of the petals, we also draw dark areas.
- After all the shadows are applied to the flower, a little spread of the fingers with a shackled area. Such a simple technique allows you to smooth out sharp lines, which will make the drawing more tender.
Step 6: final
- You can make this stage final and remove all auxiliary lines with an eraser. The rose will look more realistic if you replace tinting with a simple pencil with colored pencils or paints.
- You can decorate the rose leaves with green, and the bud with a bright red or any other suitable shade. When drawing a rose with paints or colored pencils, do not forget to draw in deeper shades of the shadow. Otherwise, the flower will look "flat", two -dimensional.

We decorate the rose

How to draw a graphic drawing of a rose
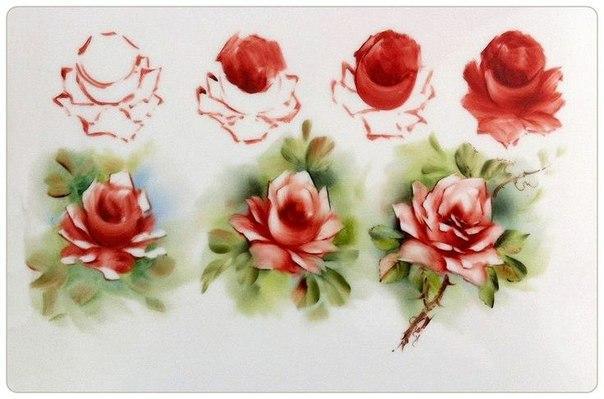
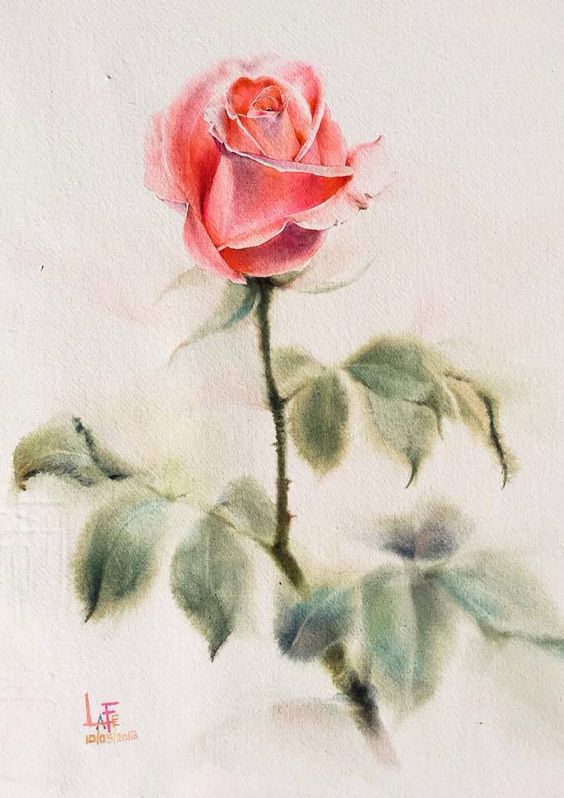
How to draw a rose with paints

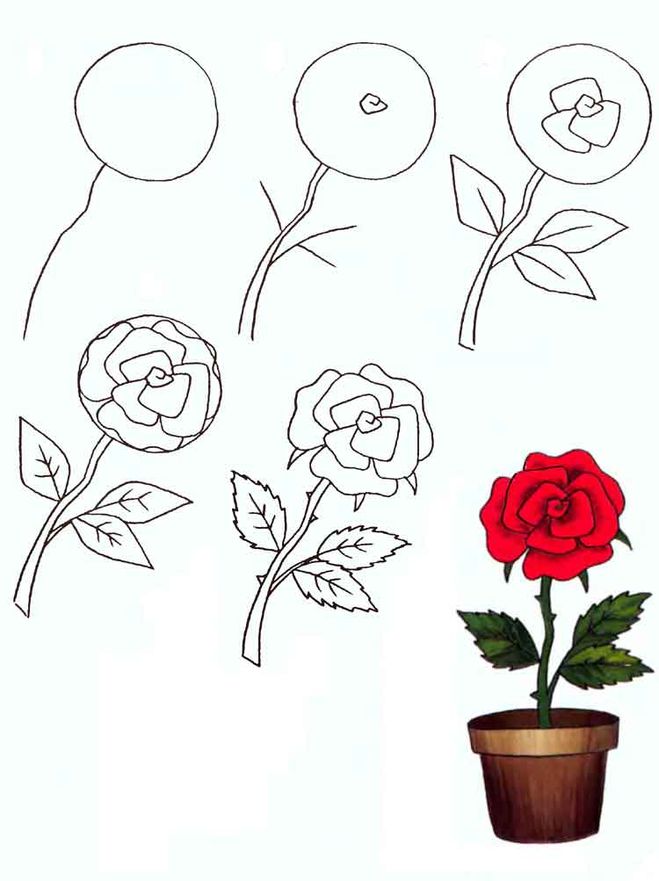
How to draw a rose in a flower pot
Simple rose drawing scheme
Video: drawing lessons. How to draw a rose
How to draw a rose with a pencil on the cells step by step?
- To draw on cells like both children and adults.
- If preliminary marking must be made on the album sheet so that the picture fit into the conditional boundaries, then when drawing on the cells, it is only necessary to take into account the scale of the plan and clearly adhere to the scheme.
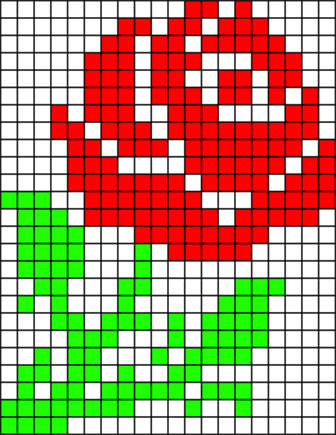
Simple pattern of rose on cells
- If you do not know how to draw at all, then transferring schematic images to the cell on paper will not be difficult. The main thing, attentiveness and a little free time!
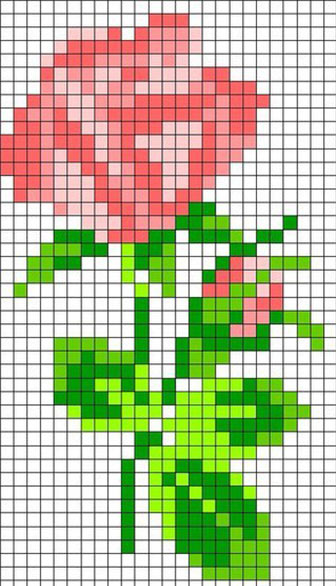
Rosa pattern by cells
- And with a set of necessary materials with this method of drawing, it is quite simple: the pictures can be created by felt-tip pens, colored pencils, markers, black and white using one simple pencil or even ordinary ballpoint pen.
- One necessary condition: the presence of a notebook in a cell.
You can carry ready -made simple patterns of drawings to the paper, or invent your own, taking the photo or picture you like as a basis. You will not need knowledge of various complex drawing methods.
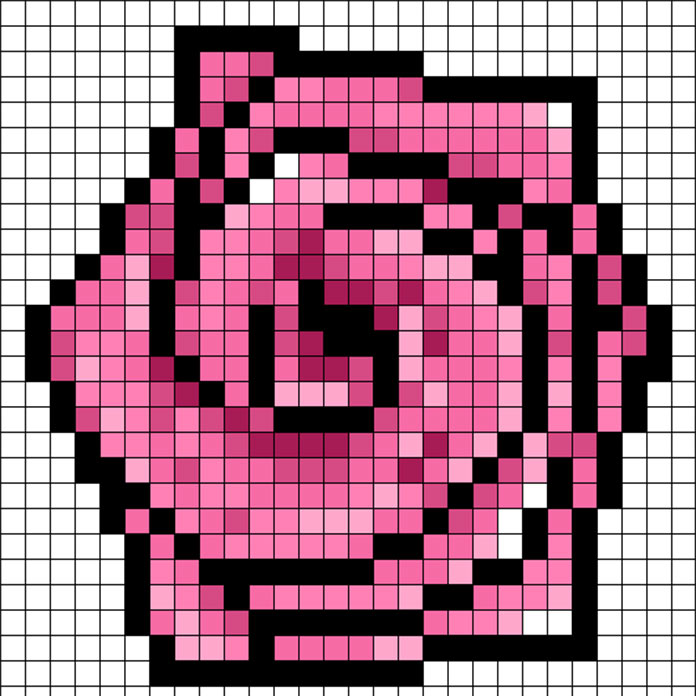
Rose bud
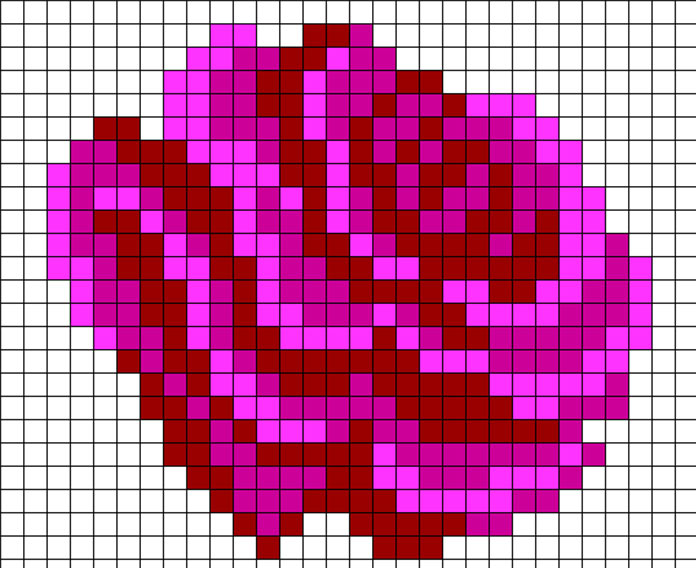
- Why do we offer to draw roses? Yes, because these flowers do a great job with the task of decorating any diary, notebook.
- When drawing on the cells, you need to start with the light schemes themselves, in which a small number of cells are provided for filling with colored pencils.
Rose on cells
- After simple pictures begin to turn out without any effort, you can begin to draw complex schemes in which several colors are involved.
Video: Figures on cells
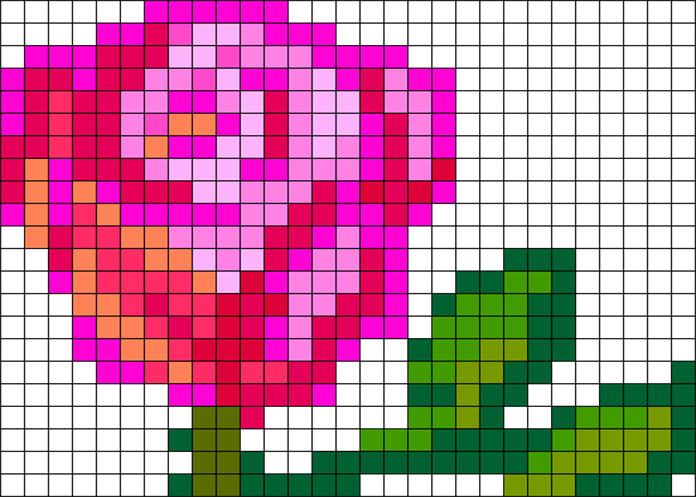
How to draw a bouquet of roses in a vase with a pencil and paints?
Having trained to draw roses buds, open to varying degrees, you can proceed to a more complex pattern - the image of a bouquet of roses in a vase.
Step 1: Prepare a draft and try to transfer the sketch of the picture to it. This will help to navigate the size of the future picture. We will also be able to outline in which part of the sheet it is necessary to start drawing the original lines.
Please note that the flowers in the vase are not located evenly, but slightly tilted.
Step 2: The bouquet can be drawn without additional elements, but most often the flowers collected together are drawn in a vase.
Step 3: flowers collected in a bouquet should differ in size and degree of flush. Other flowers will be appropriate in such a still life. The main thing is that all elements are proportional.
Step 4: When all the flowers take their permanent place in the figure, begin to give the volume with the help of shadows, while deciding at what point the light falls on the bouquet of roses.
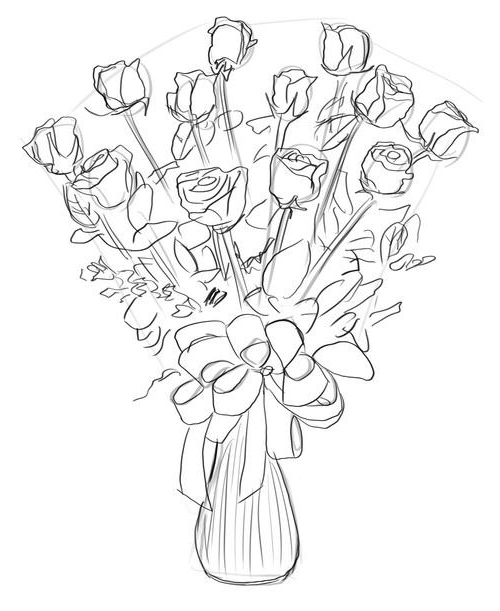
How to draw roses in a vase
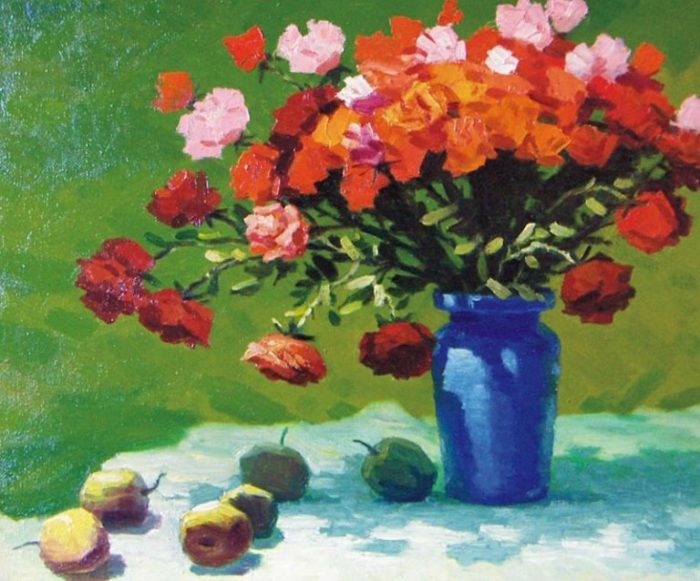

How to draw a bouquet of roses
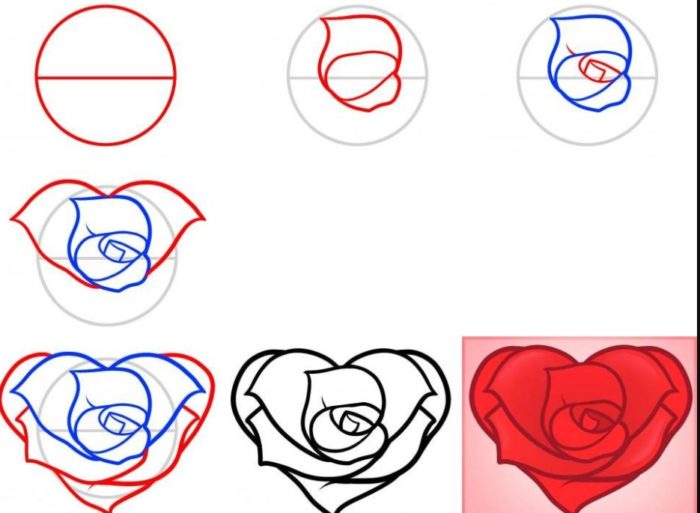
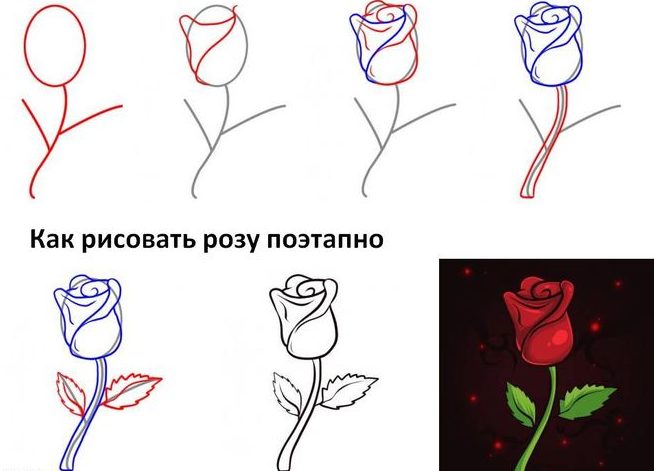
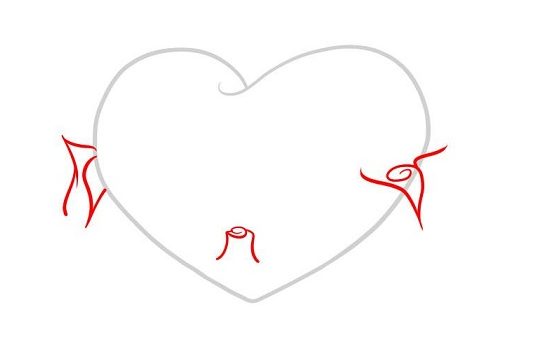
How to draw a heart with a pencil and paints beautifully?
The drawing, which depicts a rose with a heart, will decorate both a postcard for the birthday and Valentine. Let's try and we draw a heart next to one of the most beautiful colors - a rose.
- To begin with, we carry out the contours of a large heart. It will serve as the main element of the picture, to which we will “finish” the missing details.
We proceed to drawing the rose: we outline the original lines of the bud in the lower part of the heart.

We draw a big heart
Add a few petals.
We begin to draw the middle of the buds
We give a more realistic appearance to the roses, finishing two petals under each bud.

Add the petals
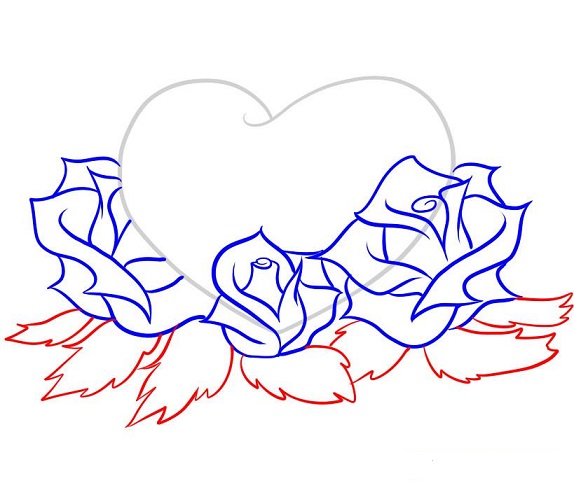
Add the leaves
Add the leaves: their edges can be made with small "cloves". We draw veins on the leaves.
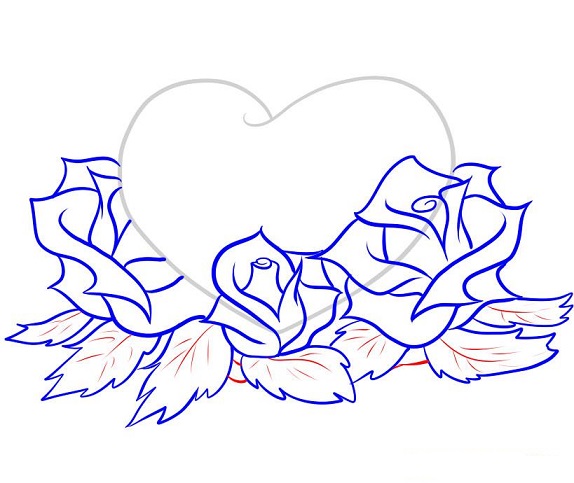
We draw veins on the leaves
The most interesting thing remains: to decorate the picture and arrange in a frame.


Another version of the pattern of rose with the heart
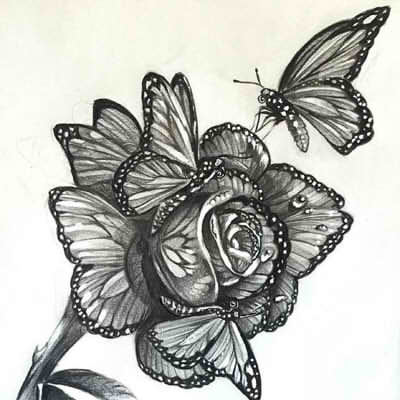
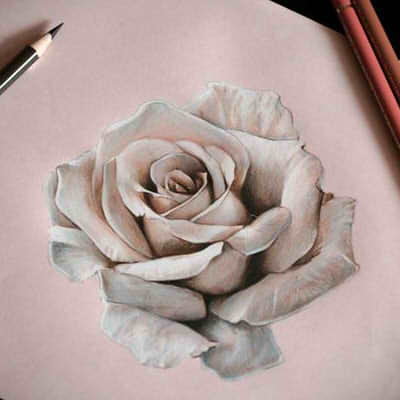
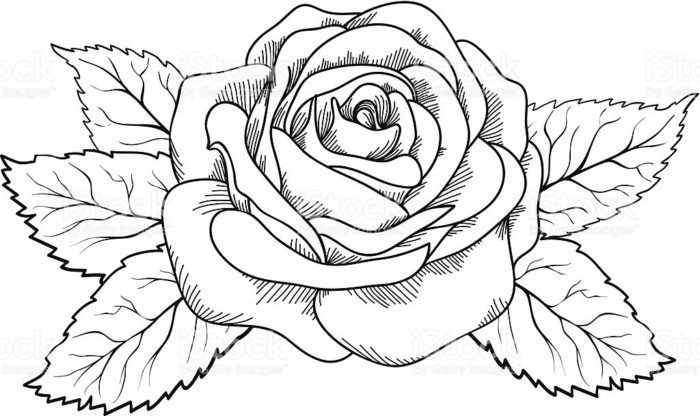
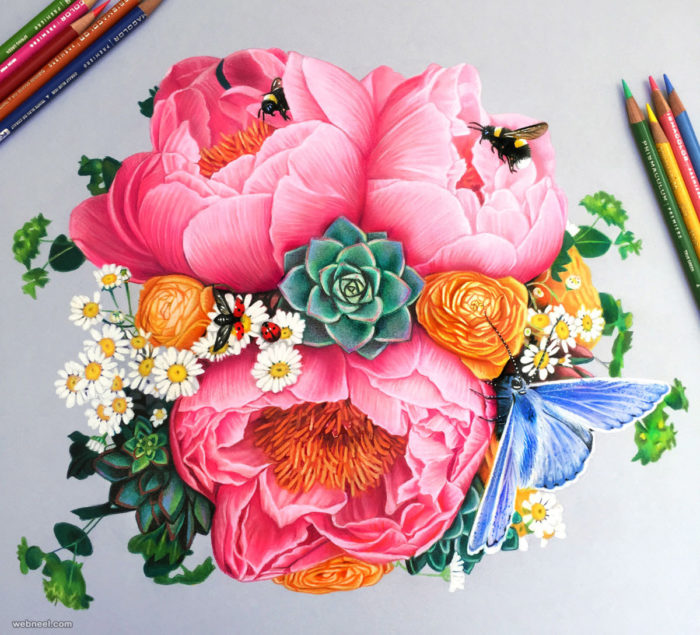
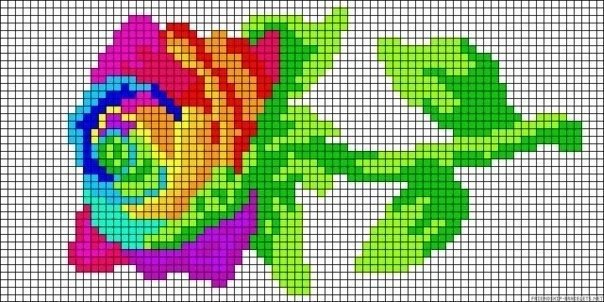
Beautiful drawings of roses for sketching
If it is difficult for you to draw flowers from the photo, then try to draw the contours of pictures made by experienced artists. Even with this method of drawing, you can show imagination and independently select colors, experiment with their richness.