Do you like crafts with your own hands? Then it's time to create crafts from clothespins.
The content of the article
- Crafts made of wooden clothespins: colored clothespins
- Crafts of wooden clothespins: aircraft
- Crafts of wooden clothespins: mirror
- Crafts made of wooden clothespins: a hot stand
- Craft from wooden clothespins: snowflakes
- Crafts of wooden clothespins: Flower pot
- Crafts of wooden clothespins: Christmas calendar
- Crafts made of wooden clothespins: holder for photos
- Video: Photo holder from clothespins: master class
The simplest wooden clothespins are now enjoying incredible success among DIY master. What is not done from them - from decorative garlands to lampshades for the chandelier. The smallest and most cute things, such as papers or signs for guests on a festive table made of clothespins can bring joy to their simplicity and beauty. And, believe me, all this looks not just original, but modern and beautiful. In addition, it is a kind of natural material that looks stylish, elegant and noble.
Of course, now wooden clothespins are not so often met. But you can definitely find a stock of such clothespins in the attic in your beloved and very reserve grandmother or in the market for old women who sell their reserves. And when you find them and at least once try to do any of them, you will not be able to stop. We have selected several simple and cute clothing ideas from which you can start working with this material.
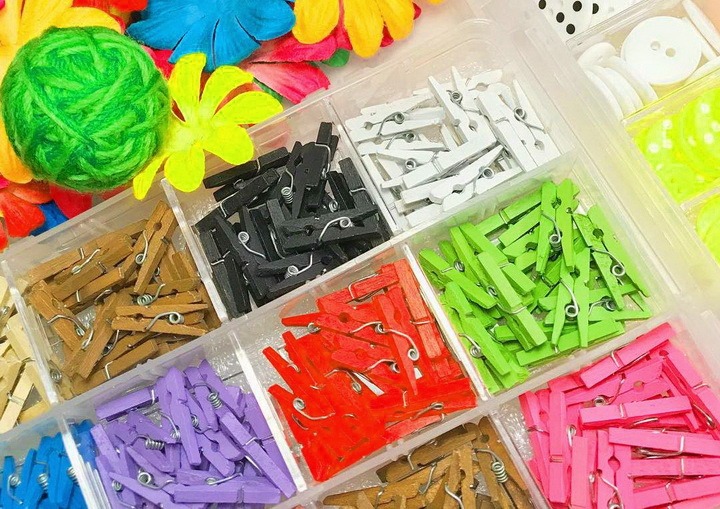
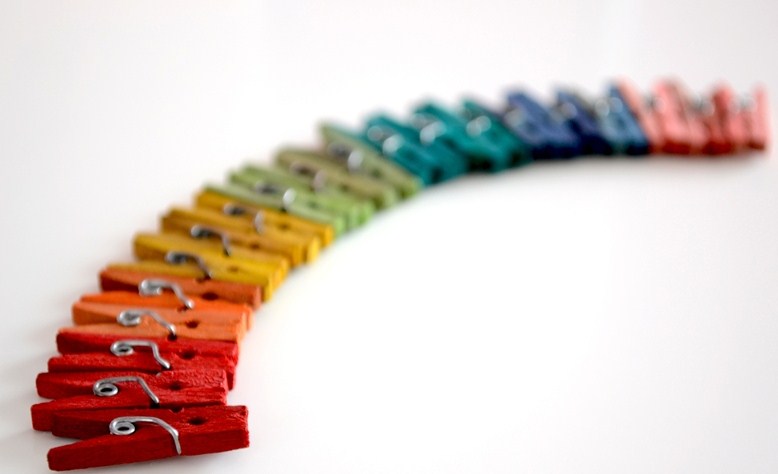
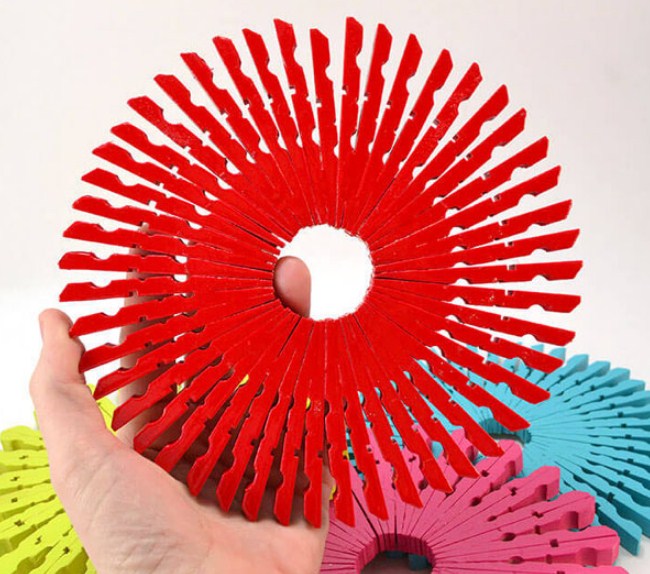
Crafts made of wooden clothespins: colored clothespins
If you just paint ordinary clothespins - you get a bright and beautiful accessory for a children's holiday or home photo shoot. With the help of such bright clothespins, you can make a garland of photos, tell your little guests, where there is a lot more, a lot more.
What do you need?
- 25 wooden clothespins (any size)
- 1 l of white vinegar
- according to a bag of liquid food dye of different colors
- 1 l of boiling water
- small containers in the number of colors
Bright clothespins
What do we have to do?
- Disassemble the clothespins. Metal parts can be oxidized in vinegar and rusted, so it is better to separate them from wooden parts that need to be painted. Disassemble carefully so that the spring is not damaged and then worked.
- In your containers, dilute a liquid food dye with water and vinegar. Put in a mixture of clothespin and wait an hour until the dye will work.
- Spread paper towels. Gently remove the details of the clothespins from the dye and put it on the towels.
- When the clothespins dry additionally process them with a hairdryer.
- Collect the clothespins.
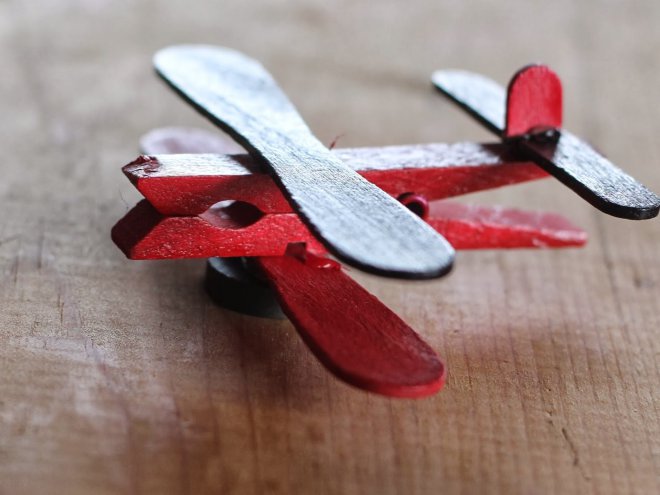
Crafts of wooden clothespins: aircraft
Small dreamers will be interested to make a clothespin with mom. Such an airplane can be a toy to the baby, as well as become a sweet element of decor in the child’s room or at a children's holiday. Adventures are waiting for you!
What do you need?
- 2 long coffee sticks
- 2 short coffee sticks
- 1 set of colors
- decorative stickers
- 1 brush
- super glue
- brush for glue
Aircraft
What do we have to do?
- Paint the clothespin in the color that you liked. It is advisable to apply several layers of paint. Leave it to dry. It will be a cabin and aircraft.
- Paint the long sticks in the color you like. It will be our wings.
- Paint a short wand. Cut the second short stick slightly obliquely. From these details we will make the tail.
- When our details dry, you can start assembly. To properly assemble the aircraft, pre -find a picture of clothespins on the Internet on the Internet.
- To assemble the aircraft, take a long stick, anoint with glue in the center and put a clothespin on it on the rib. Then anoint the next long wand and glue it. Then glue the rest of the details, according to the picture. Make sure that the glue does not break, and the design was neat.
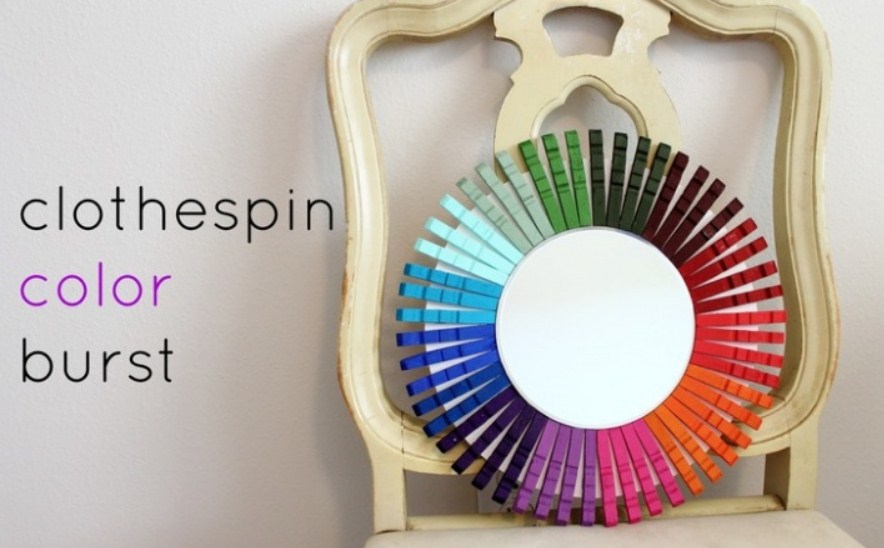
Crafts of wooden clothespins: mirror
What do you need?
- 1 sheet of dense corrugated cardboard 50 per 50 cm
- round mirror
- 100 clothespins
- 1 liter of white acrylic paint
- 1 brush for paint
- super glue
- brush for glue
- scissors
- compass
- a skein of aluminum wire
Bright option
What do we have to do?
- Using a circul on cardboard, mark a circle of 4 centimeters already than the diameter of the mirror. After 10 centimeters from this circle, draw a second, larger circle from its outer side. Make 2 holes in a circle to fix the wire with which the mirror will be attached to the wall.
- Cut the resulting frame for a mirror from cardboard.
- Disassemble the clothespins.
- Paint the details of the clothespins and cardboard with white acrylic paint in several layers. Leave to dry.
- Pull the wire into several layers in the holes so that the loop is obtained. Fasten the wire and drop the glue to the edges to hold better.
- We will glue the halves of the clothespins with a winding side up. Lightly smear the clothespins with glue and glue it to the frame.
- On the other hand, glue the mirror with a superglide. If desired, you can paint them with bright colors.
Crafts made of wooden clothespins: a hot stand
Claims for hot clothespins can be of two shapes - round and rectangular. They look very elegant and beautiful. They can also not be painted, but leave a natural wooden color. In this case, the products must be treated with varnish for wood.
What do you need?
- brongs
- 1 liter of white acrylic paint for primer
- 1 tube of blue paint for wood (or other to your taste)
- 1 brush for paint
- super glue
- brush for glue
- photo of a hot clothing arrangement
For hot
What do we have to do?
- Disassemble the clothespins into halves, remove the spring.
- Cover the details of the clothespins first with white acrylic paint. Then wait until you dry and cover the color you have chosen.
- Collect the adhesive stand alternately gluing each soul mate, according to the form that you have chosen.
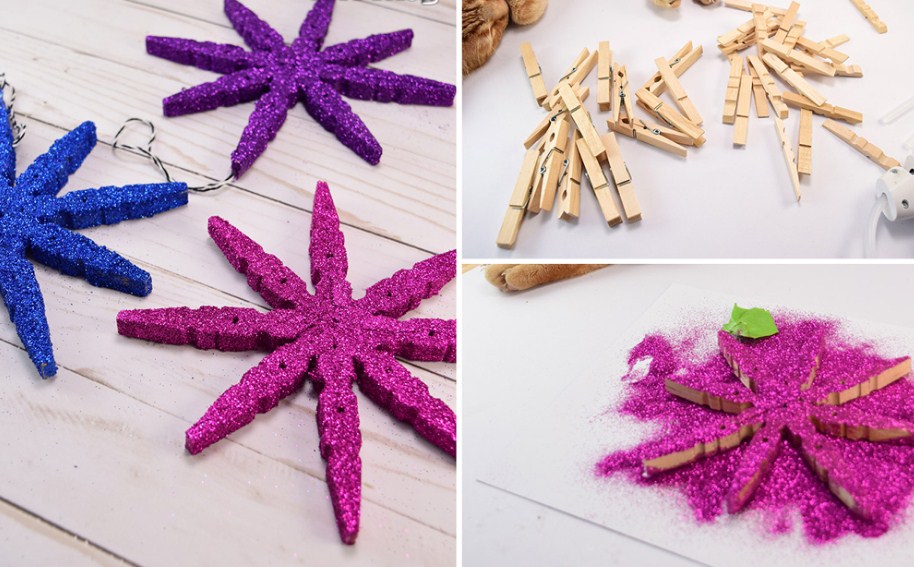
Craft from wooden clothespins: snowflakes
Wooden snowflakes are an original and delicate decor for the holiday. They are made according to the same principle as the stands are hot.
What do you need?
- 8 clothespins
- 1 liter of wood varnish
- 1 brush for varnish
- super glue
- brush for glue
- sparkles
Snowflakes
What do we have to do?
- Disassemble the clothespins and remove the spring.
- Cover the details of the clothespins with varnish in several layers. Wait until the varnish dries.
- Take the two halves of the clothespin and glue it to each other from the side where the clothespin is straight. Do the same with all the clothespins. Then glue the clothespins inward.
- Cover again with varnish and sprinkle with sparkles.
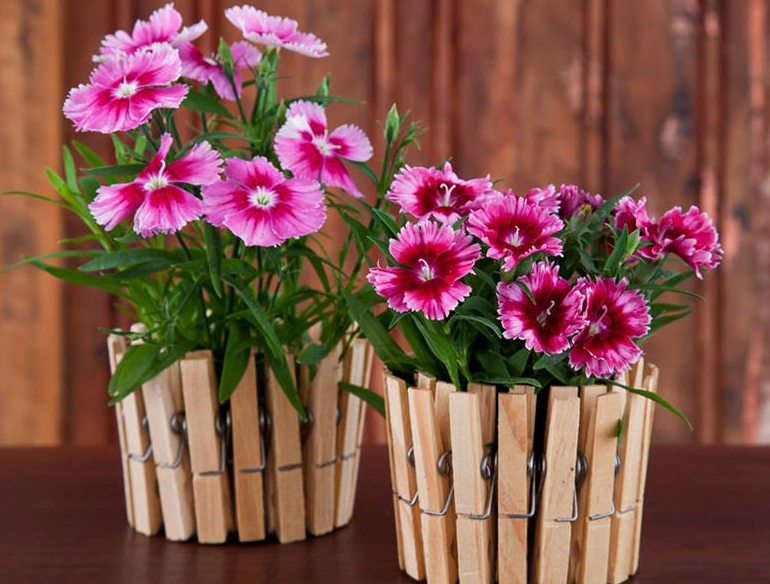
Crafts of wooden clothespins: Flower pot
This is perhaps the most just a master class. At the same time, such a pot looks fashionable and fresh and suitable both for planting the bulbs of spring flowers on Easter, and for distillation of green onions and beets in the winter.
What do you need?
- 1 low canning bank (for example, from under Sardin)
- 20 clothespins
- 1 liter of varnish
- 1 brush for varnish
- super glue
- brush for glue
For flowers
What do we have to do?
- Remove the lid at the tin can.
- Cover the clothespins with varnish and wait until the varnish dries. If you do not plan to use the craft for a long time, then you can not cover varnish.
- Smush the clothespin in turn with glue at the clamp site and fix it on the jar.
Crafts of wooden clothespins: Christmas calendar
Christmas is a holiday that all children are waiting for. And so that the expectation of the holiday also brings joy, there is a Christmas calendar that gives loved ones a little surprise every day of December, starting from the 1st and until Christmas.
What do you need?
- 24 clothespins
- 1 sheet of white or colored paper A1 format
- 1 skein of wide decorative adhesive tape
- 2 skeins of narrow decorative adhesive tape of different colors
- 1 skein of bilateral tape
- beautiful marker
- star
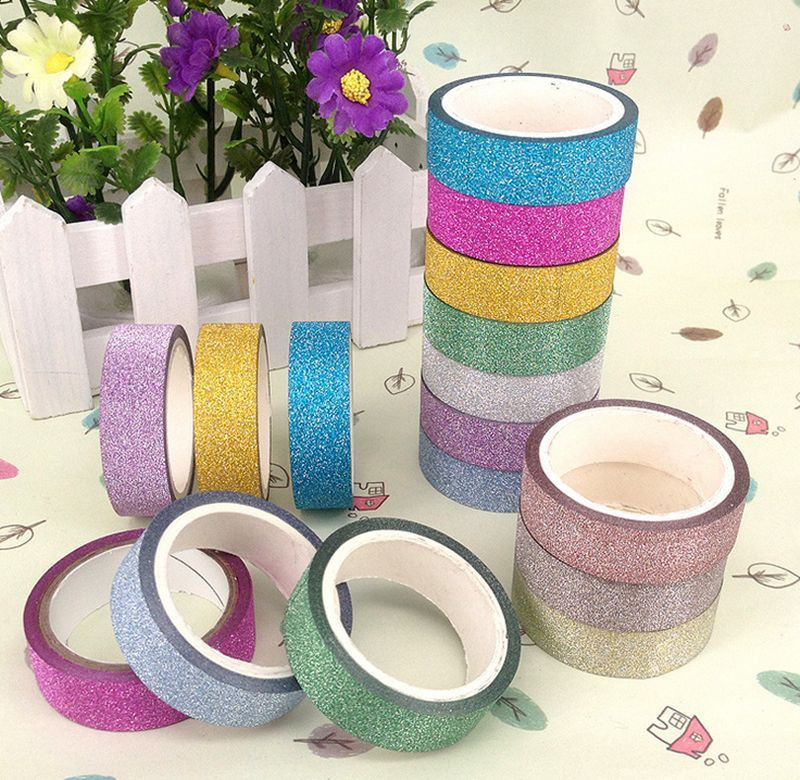
Decorative adhesive tape for the calendar
What do we have to do?
- Put the sheet vertically. Mark five horizontal and one vertical line perpendicular to horizontal. The vertical line should be in the center of the sheet and be equal to the height of the sheet - this is the trunk of our Christmas tree. The first horizontal line should be 10 cm above the lower edge of the sheet and for 3 centimeters already a batman on each side. The second line should be 5 centimeters first on each side and at a distance of about 18 centimeters from it. The third line is five centimeters already the second on each side and at a distance of 18 centimeters above it. Horizontal lines will be branches of our Christmas tree.
- Take a wide tape and glue along the marked lines.
- Take clothespins and glue 12 of them on one side with a decorative thin tape of one color and 12 decorative thin tape of another color.
- On the other side of the clothespins, glue a bilateral tape and fasten the clothespins on paper. At the first below the line, glue four clothespins on both sides of the barrel. On the second line - three clothespins on both sides of the barrel, on the third - two, on the fourth - also two and on the fifth, closest to the top of the branch - one clothespin. You can vary combinations of colors of clothespins. For example, on one branch of the clothespin of one color, on the other - clothespins of a different color. Or through one clothespin of different colors on each branch.
- Glue the star to the top of the Christmas tree.
- Attach gifts to our original Christmas calendar.
Crafts made of wooden clothespins: holder for photos
What do you need?
- 1 sheet of dense corrugated cardboard 50 per 50 cm
- 25 clothespins
- 1 liter of black paint (special, on which you can write with chalk) 1 brush for paint
- super glue
- brush for glue
- scissors
- compass
- a skein of aluminum wire
- 1 skein of paper towels
- five bags of food dyes of different colors
- five containers for painting
- 1 l vinegar
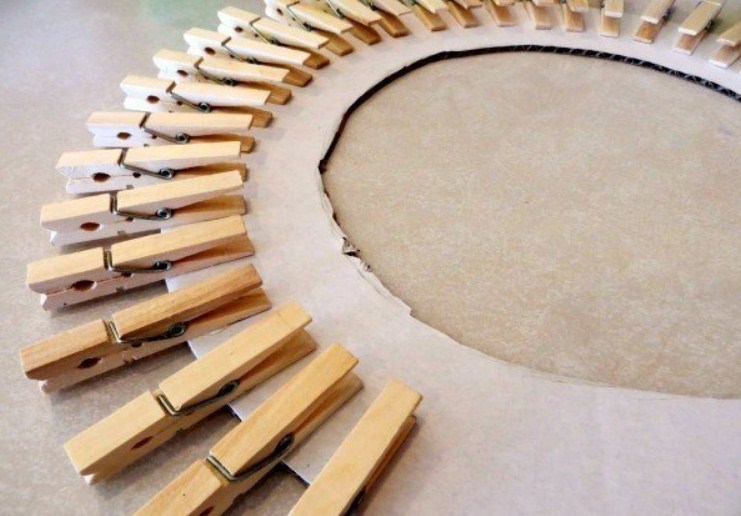
Holder for photo: beginning
What do we have to do?
- Using a circul on cardboard, mark the circle. The size of the circle depends on your desire. Make 2 holes in a circle to fix the wire with which you will attach the holder onto the wall.
- Cut the circle of cardboard.
- Disassemble the clothespins.
- In containers, dilute a liquid food dye with water and vinegar. Put the wooden details of the clothespins in the dye and wait an hour until the dye acts.
- Gently remove the details of the clothespins from the dye and put it on towels so that they dry.
- Collect the clothespins.
- Paint the circle of cardboard with black paint in several layers and wait for the paint to dry.
- Lubricate the clothespins with a superglue in the upper part between the planks, and glue the clamp to the circle at the same distance from each other.
- Fasten the photos.
- Take a chalk and sign a circle with a photo.