Do -it -yourself crafts are always interesting and pleasant. And the result will please you very much, create crafts made of wood.
The content of the article
- Boodle craft: bird feeder
- Boodle craft: snowflake on a Christmas tree
- Boodle crafts: a gift for the New Year
- Bolish craft: a star in the form of a star
- Crafts made of wood: lamp
- Wood craftsmanship: vase for office supplies
- Blood craft: flower bed
- Wooden craft: napkin stand
- Bolloe crafts: Halloween clock
- Crafts made of wood: doll
- Boodle crafts: hanger for outerwear
- Crafts made of wood: mug
- Boodle craft: Stylish butterfly
- Flower crafts: flowers
- Video: What can be made of wood with your own hands?
The number of fakes that are made of wood increases daily. There are many trees around us and after a hurricane there is material for new products. But, if you live in the city, this does not mean that you cannot get the necessary material. Broken branches and felled trees, as a rule, in large cities are taken to a landfill. Therefore, you should show ingenuity, find a tree and start work.
Boodle craft: bird feeder
Do -it -yourself wood products at home can be diverse. For example, a bird feeder is a great craft that you can do with the children.
Stock up for crafts:
- OSB scraps 0.9 cm thick
- OSB scraps 1.8 cm thick
Production process:
- Download the file with the pattern of the future product. Print the template, cut, glue it on OSB or cut it down the contour, and then apply as a stencil.
- Drink the necessary details from OSB:
- 2 racks with a thickness of 1.8 cm.
- The bottom of the tray from OSB 0.9 cm. The dimensions of the product should be 20 cm by 18 cm.
- 2 Bortion of the tray from OSB 0.9 cm. The dimensions of the product should be 20 cm per 4 cm.
- OSB roof 0.9 cm. Size 1 of the part - 29 cm by 19 cm, size 2 parts - 29 cm by 18 cm.
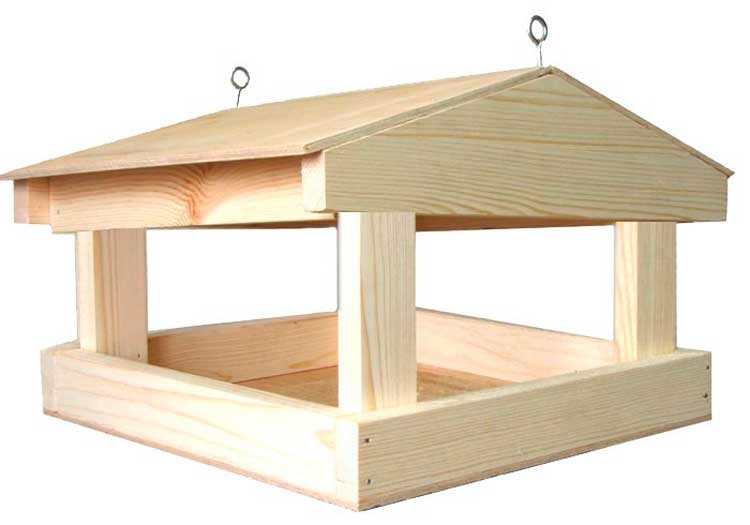
The feeder
- Connect the racks to the bottom. If you decide to use self -tapping screws for connecting, then go through a drill to the places of fastening so that the material does not crack.
- Attach the sides to the racks.
- Attach the roof elements overlap to the racks.
- To make the product to serve you for a long time, paint the parts or cover with varnish. Carefully process the ends of each part. If OSB is not varnished, then cover the roof with waterproofing material.
- Hang the feeder or install it on the column.
- Pour the feed into the feeder.
Boodle craft: snowflake on a Christmas tree
To celebrate the New Year well, people buy different jewelry and Christmas toys. But among such goods you cannot find snowflakes made of wood.
For such a craft, you will have to stock up on simple materials, namely:
- Winness clothespins - 6 pcs.
- Thermal pistol
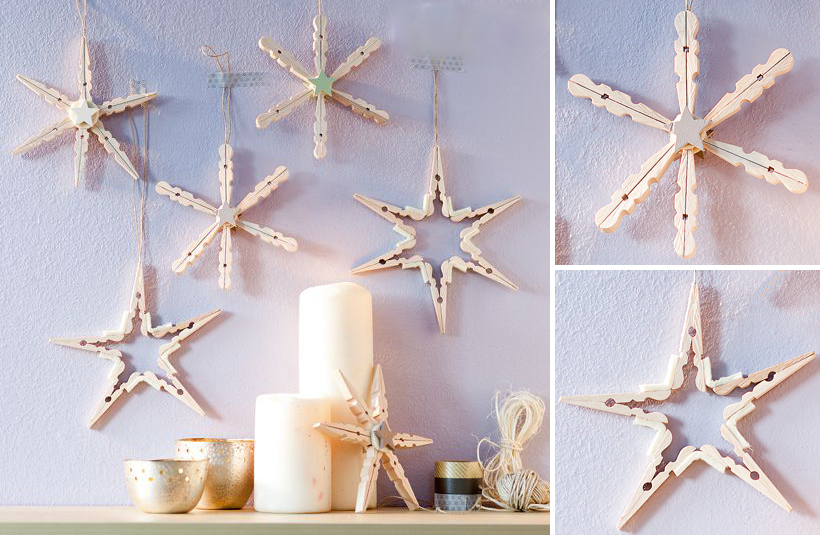
From clothespins
Production process:
- Remove the spring out of the clothespins.
- Take a thermal pistol. Using it, stick the clothespins in the wrong side in pairs.
- On the table, lay out the clothespins so that you get a snowflake with six rays.
- Combine the rays together using hot glue sequentially. Make sure that the rays lay symmetrically.
- You can take paints as a decor. Paint the product, cover it with sparkles.
- Tie a loop to the craft, hang on a fabulous beauty.
Boodle crafts: a gift for the New Year
On New Year's holidays, people are used to giving their loved ones gifts. You can also make a craft made of wood made at home, using improvised materials and a three -layer plywood.
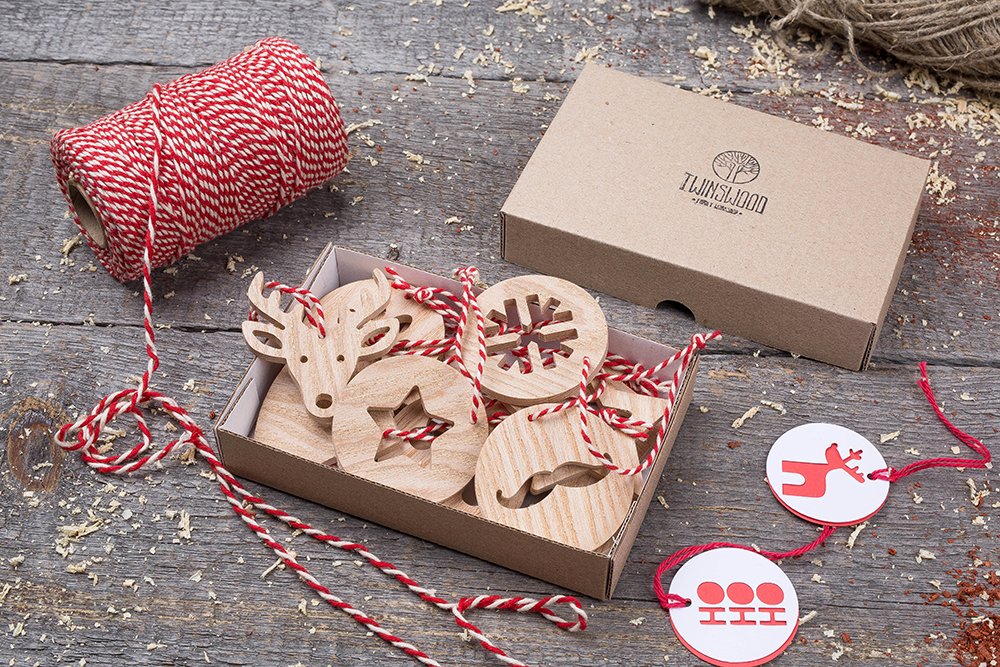
To the New Year
Production process:
- Download a special template on which you will make crafts.
- Cut the template, glue it on a plywood blank.
- Drink 2 parts on the contour of the obtained template.
- Remove the template, polish the details.
- At this stage, you can finish the work. But we recommend that you cover the product with a protective layer, for example, varnish. It is advisable to apply varnish in 2 layers so that the protection is stronger. You can also paint the product with any paint or multi -colored sparkles. In addition, the craft will look good on the New Year tree.
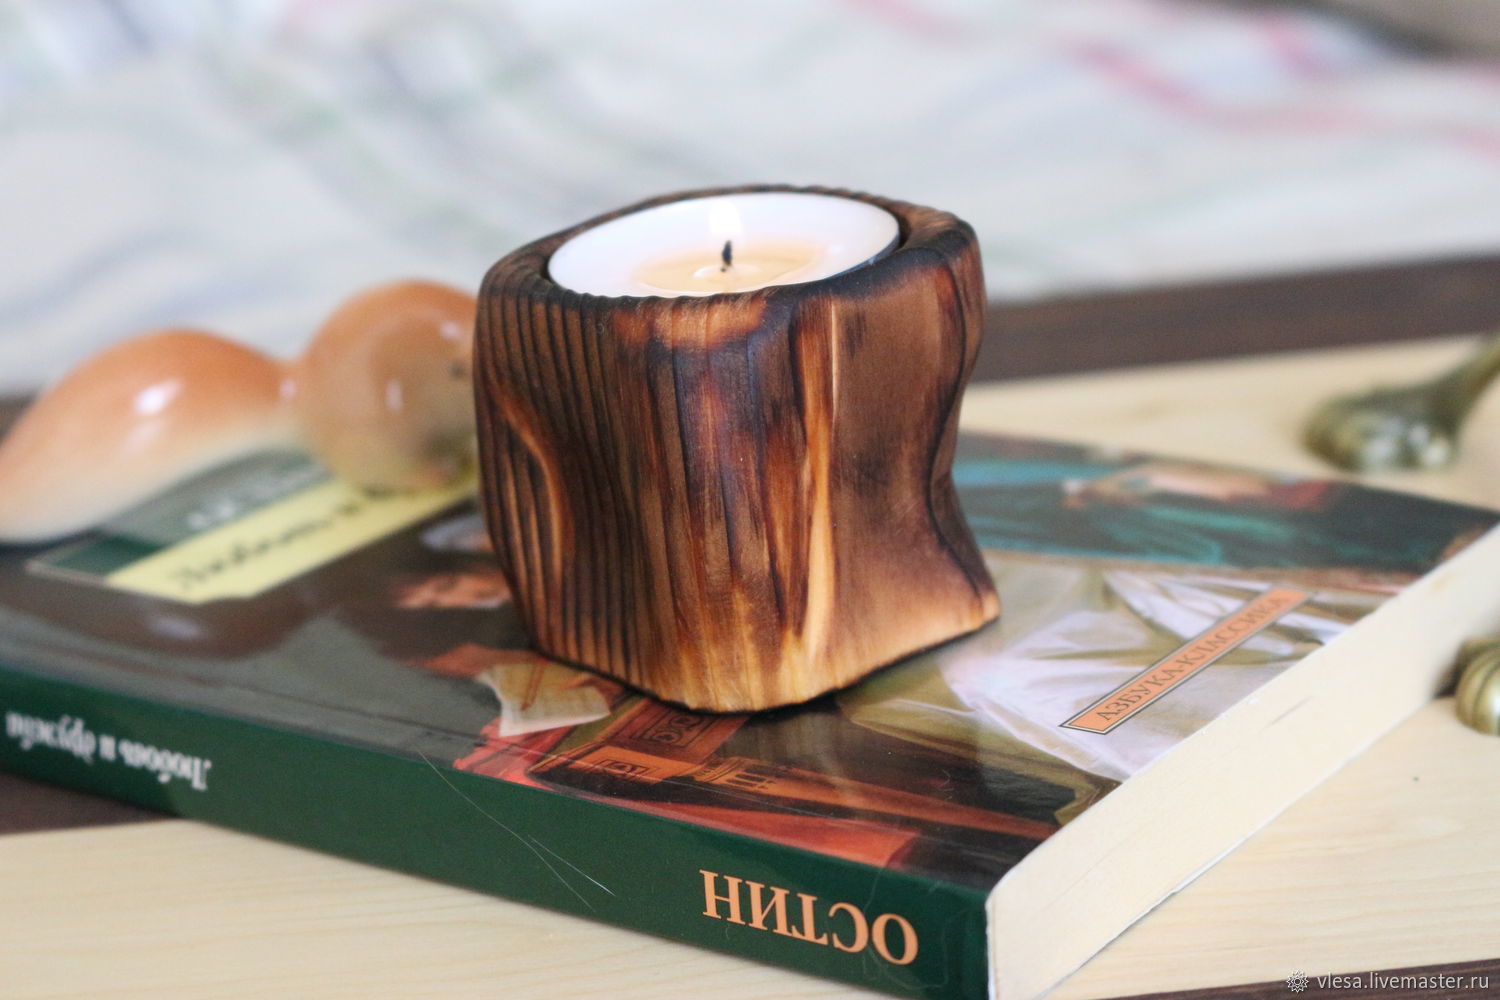
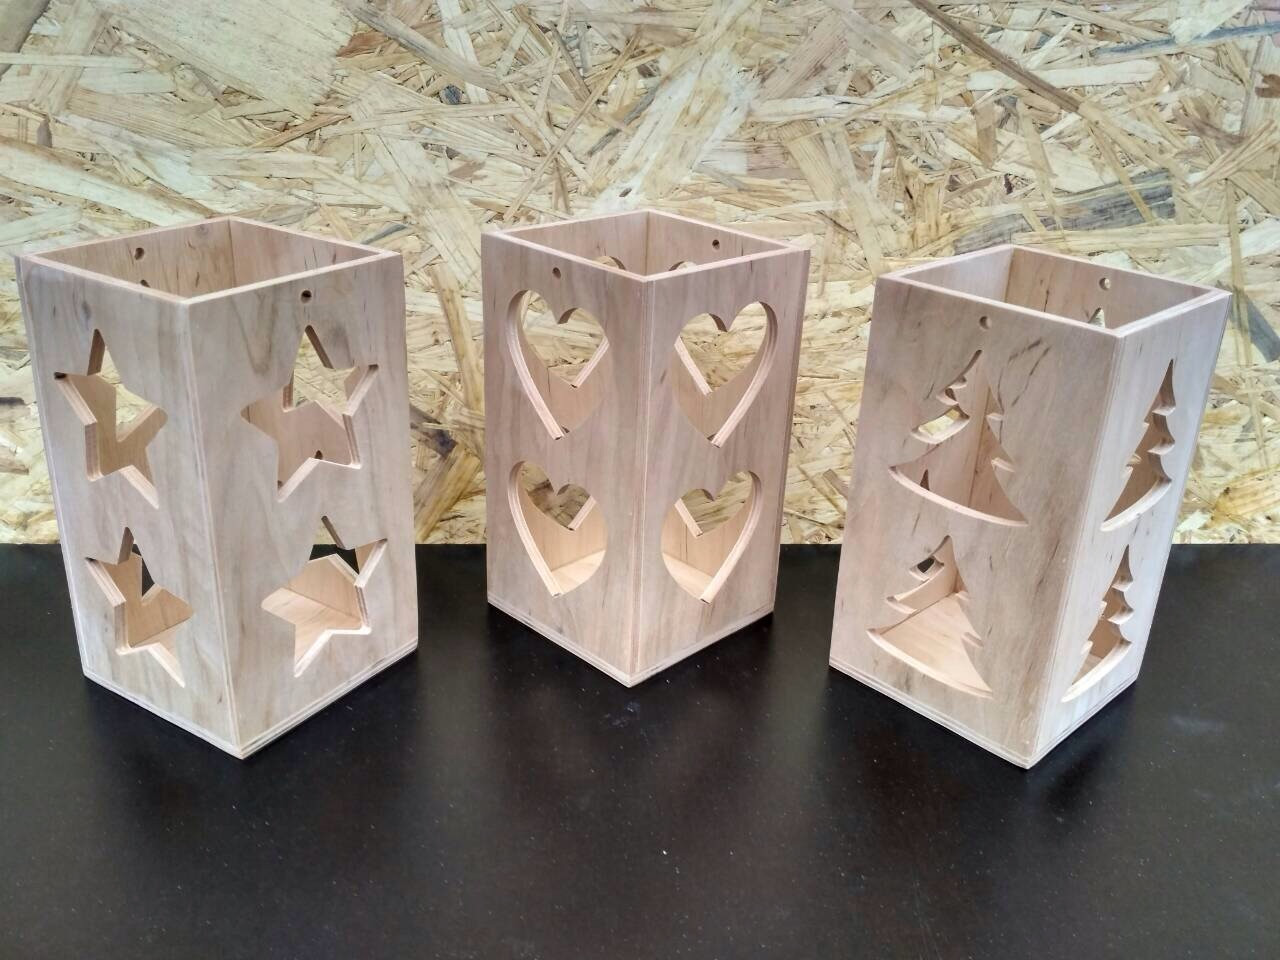
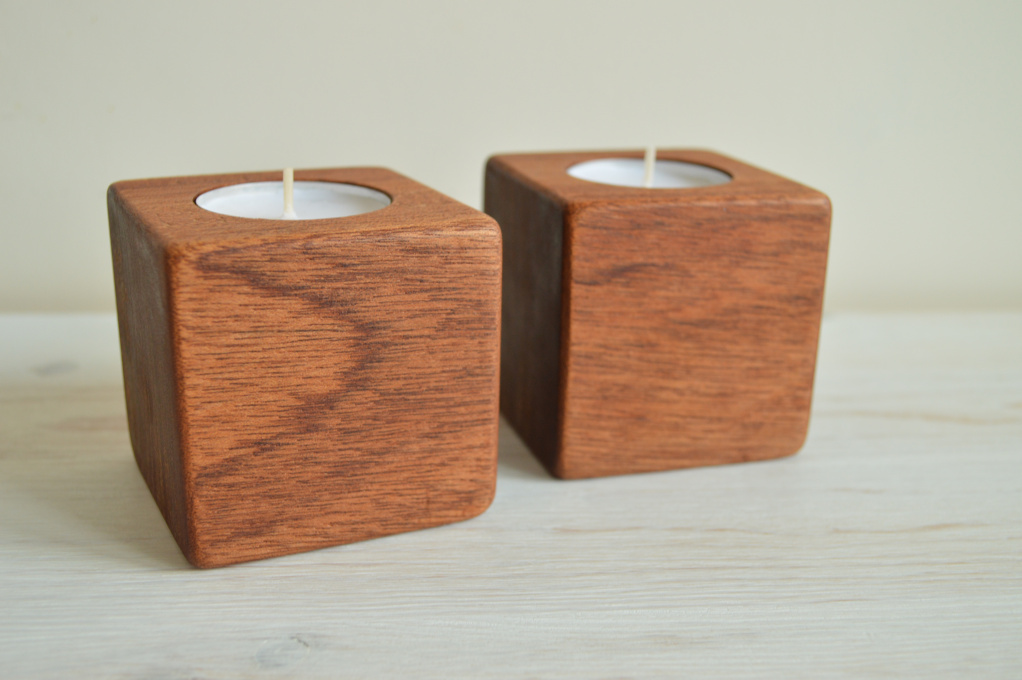
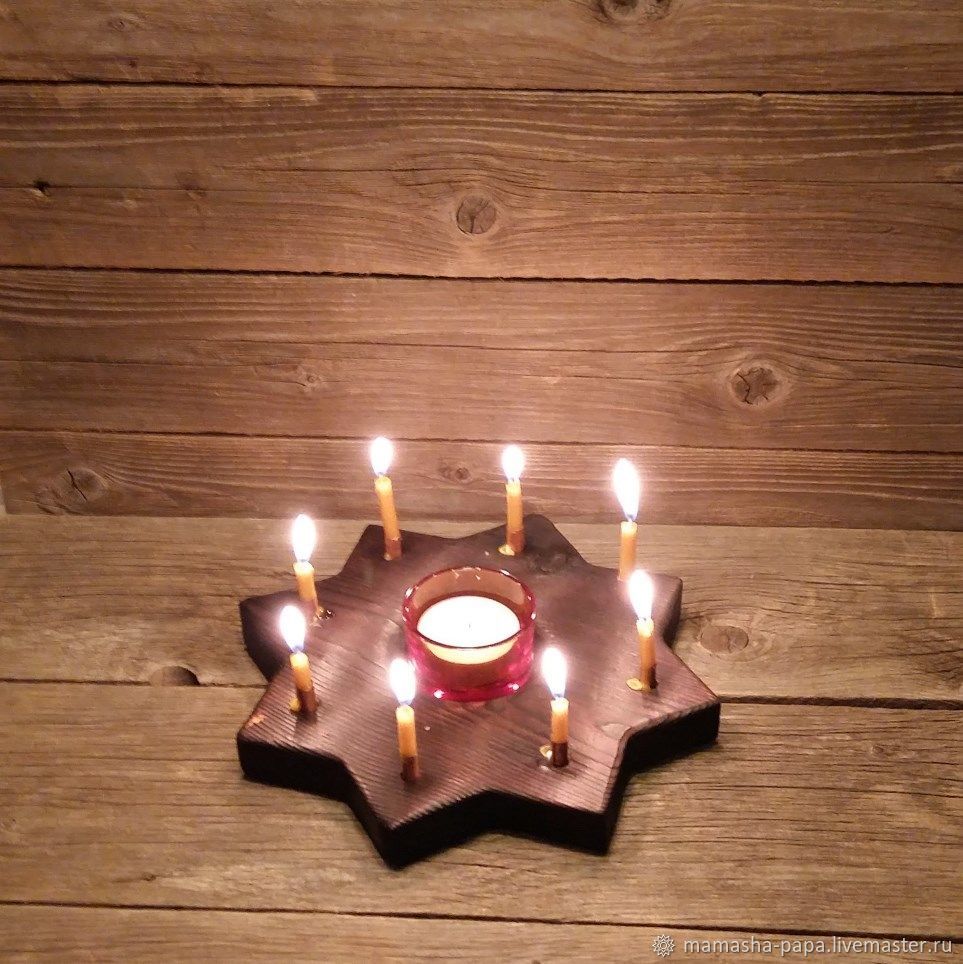
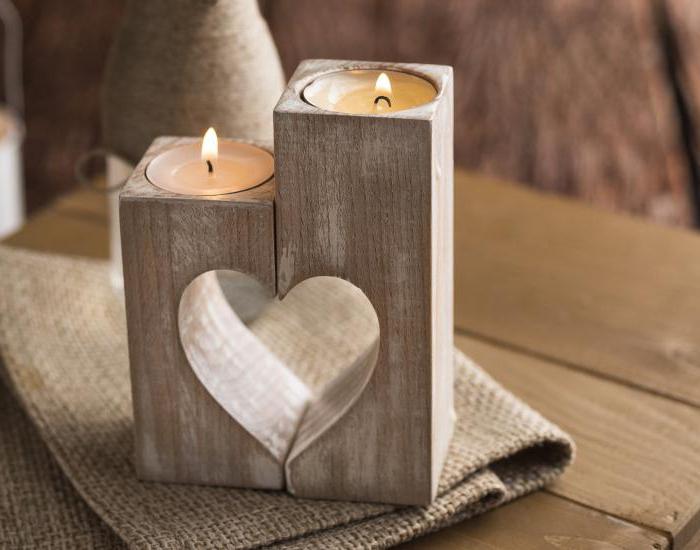
Bolish craft: a star in the form of a star
For the product, use small boards or plywood. In order to simplify and speed up the work, prepare a stencil in advance. Depending on your own capabilities and experience, collect products of various complexity. For example, just print a red stencil, cut the star and install a star in the center. And you can use our tips and make the next craft.
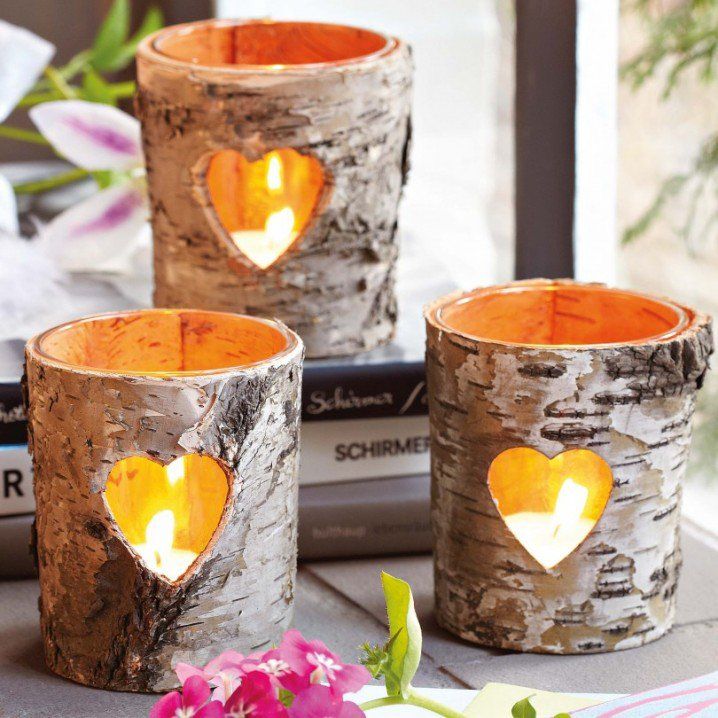
Candles
Candles
Candles
Candles
Candles
Production process:
- Print the necessary stencil. Cut the stencil.
- Make a recess in the workpiece so that its diameter is 4 cm, and the depth is 0.7 cm.
- Glue the stencil on your workpiece.
- Drink the star along the contour of the stencil.
- Remove the stencil. Snipple the workpiece to the desired cleanliness.
- If necessary, apply wax, butter or varnish to the surface of the product.
- Install a candle in a recess and light it.
Crafts made of wood: lamp
You will perform the work from the minimum number of materials. Stock up:
- Linen clothespins - 1 nab.
- LED tape - 1 m
- Plastic or metal tube - 1 m
- Glue
- Also purchase wires, a power adapter 12 V.
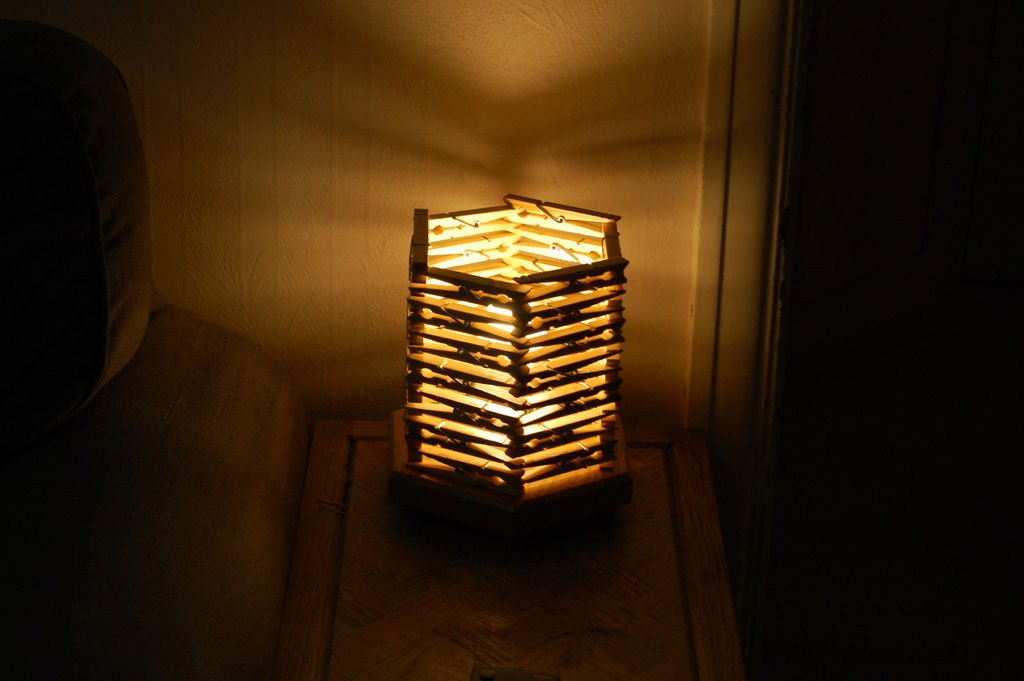
Lamp
The process of manufacturing a lamp made of wood:
- Disassemble the clothespins.
- Glue clothespins so that you get squares. From the very beginning, apply glue. When he froze, glue every corner.
- Glue the squares among themselves.
- Clean the lamp from the remains of the glue, cut a small piece of a plastic tube.
- Drill 4 holes in the workpiece, insert 2 sticks. Try on the tube attachment method. Glue the sticks using thermocles.
- Until they removed the sticky layer from the tape with LEDs, try it on, cut the required amount.
- Glue the tape on the tube. If necessary, solder the power wires to the tape.
- Insert the tube into the lamp. Then insert sticks for fastening into the holes. Dramat in the central part of the tube, fix the sticks.
- Come up with some suspension, turn on the lamp.
Wood craftsmanship: vase for office supplies
The next craft is made of wooden sections. If you have a end saw, then the process will take you a minimum of time.
Stock up for work:
- Branches
- The basis for the vase (it can be any bank)
- Glue
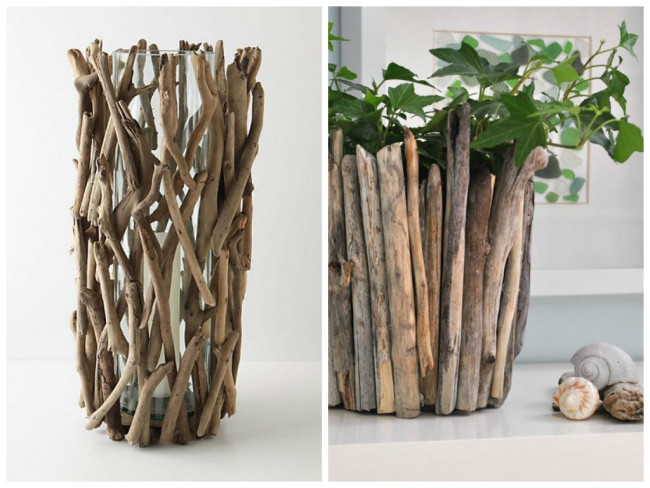
From twigs
Production process:
- To work, take a large number of sections. Make slices from dry branches, it is desirable that there is no bark.
- Dissolve the branches into sections so that their thickness is 0.8 cm.
- Having prepared the right number of sections, go to the next process. Take the jar. Glue the sections to the workpiece, using a thermal pistol or liquid nails.
- From the very beginning, glue large sections, then fill the empty seats with small sections.
- At the edges of the product, glue the sections, dividing them into 2 equal parts.
- Cover the finished craft with varnish. Fill the voids with a dark sealant or multi -colored putty.
Blood craft: flower bed
If you have a wooden small stump in stock, you can make a flower bed from it by installing in the garden.
The work is not very difficult, and therefore you will have to stock up in advance with an ax and a hammer.

A flowerbed of stump
Production process:
- Remove the inside of the stump.
- Expand the hole, set the stump in the required place in the garden.
- Fill the cavity with fertile soil, plant the plants as you wish.
- Narcissus will look great in such a flowerbed, since they are not afraid of frosts and do not need special care.
- Do not forget that you will have to periodically water such a flower bed.
Wooden craft: napkin stand
We offer you an inexpensive and simple napkin option that you can make yourself.
Stock up for the product:
- Chipboard
- Plywood
- Glue
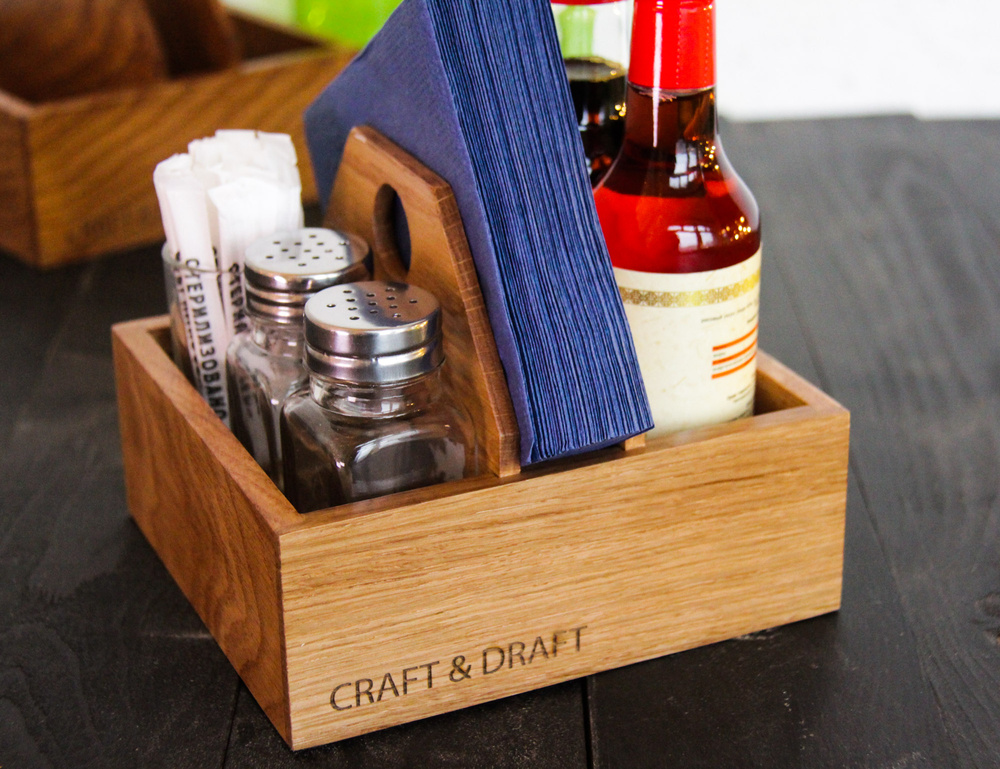
For napkins
Production process:
- Draw yourself the contours of the future product. Draw only one half of the napkin.
- Drink the workpiece, draw a second element of crafts along its contour. Using a ruler, draw a connecting bar.
- The dimensions of the product choose any. We offer you a napkin: a length of 14 cm. 5 mm, 7 cm high, 5 mm, 2 cm deep.
- Drink one workpiece.
- Drink a heart in the center of the figure. From the very beginning, drill a hole. Enter the file into this hole, cut the heart.
- Transfer the contours of the resulting workpiece to another half of the product.
- Having decided on the width of the bar, which will connect the half of the napkin. The most optimal width is 1 cm 5 mm.
- Check the blanks so that they are compatible. Connect them. If necessary, cut the protrusions that interfere.
- Snipple the edges.
- Re -check the product from the side. Glue the blanks among themselves, then paint them or cover the surface with varnish.
Bolloe crafts: Halloween clock
A holiday that falls out at the end of October is celebrated every year. You can also join this holiday by making some terrible elements. For example, a wall clock in the form of a bat.
Stock up for work:
- Plywood or chipboard
- Glue
- Mechanism for the watch
- Dark paint
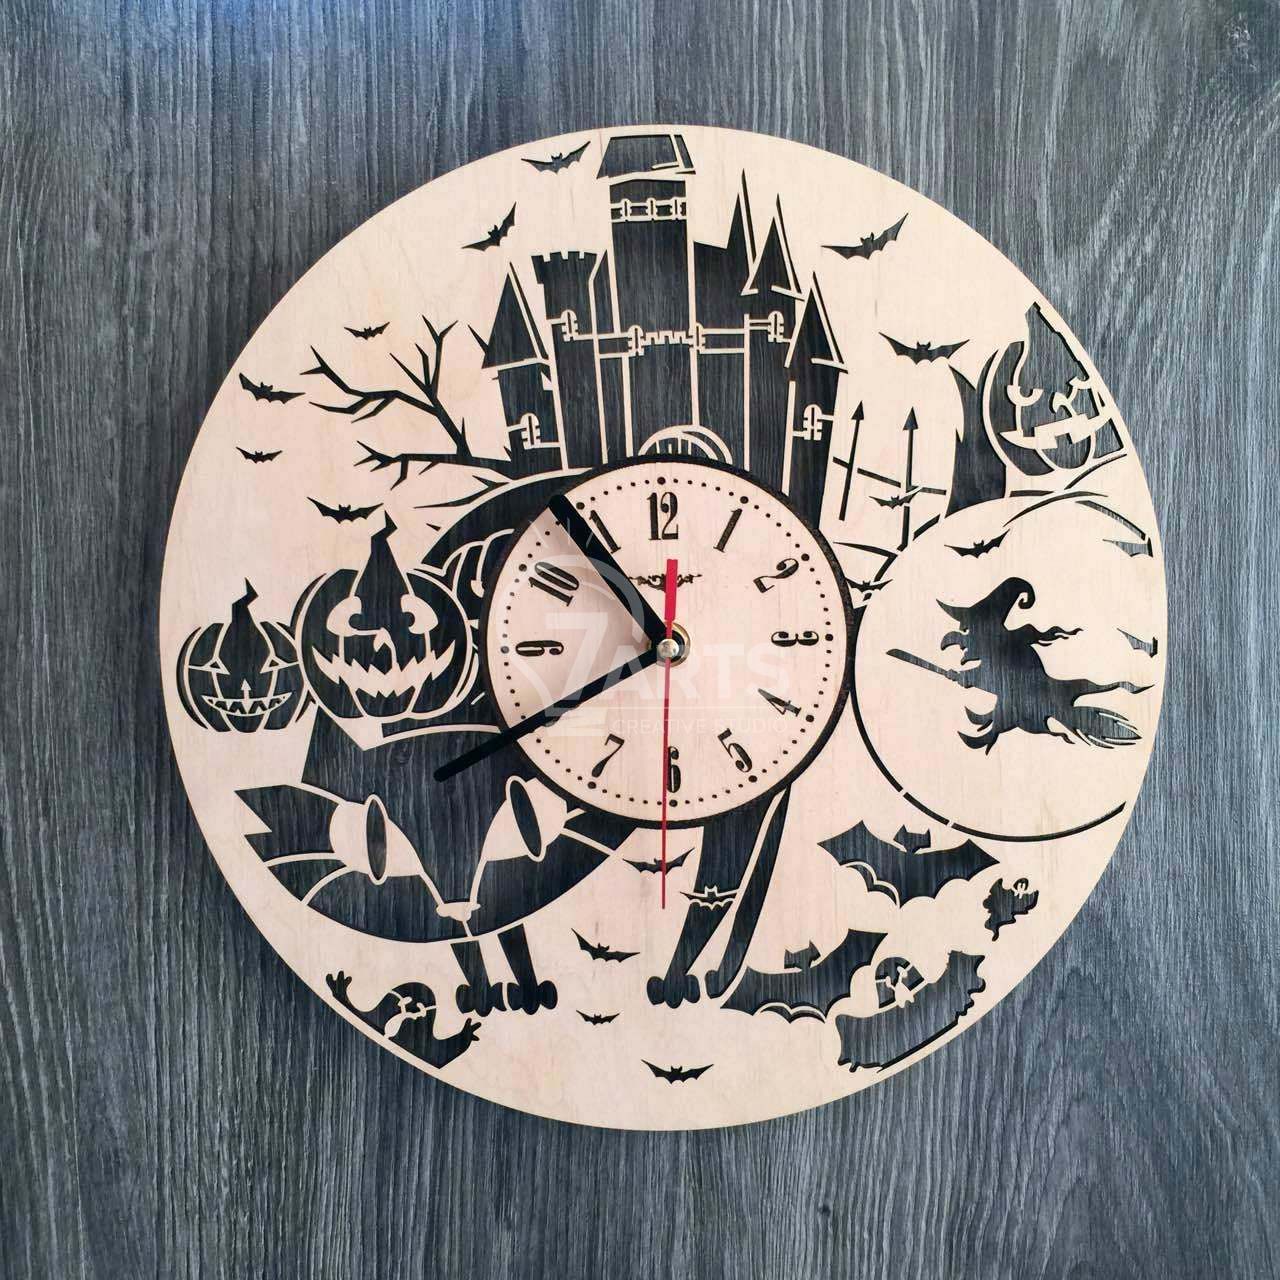
Hallow watch
Production process:
- Cut the bat from plywood.
- Drink the dial using the jigsaw.
- Drill a small hole in which you attach the watch mechanism. Sprinkle the workpiece.
- Cover the product with varnish or use dark paint for this.
- Install the arrows and mechanism on the workpiece. So that they are in contrast with the clock themselves, paint the arrows with the right paint.
- Insert the battery into the mechanism.
- Hang the clock on the wall.
Crafts made of wood: doll
You will have to stock up on the following materials:
- Branches
- Plastic eyes
- Fabric shreds
- Tape or island

Doll
The process of manufacturing a wooden doll:
- Select the desired branches for the product. Combine the elements using tape. In the end, you should get a little man.
- Take a piece of felt. Make your head out of the fabric. Attach it to the branch. Attach your eyes to your head.
- Take dense threads. Of these, make the hair of the doll. Also make slippers of the doll using felt.
- From pieces of fabric, wait for the clothes.
- Complete the image of the doll with the child. Many clothes.
A small doll will surely appeal to your daughter, plus she can decorate any interior of the room.
Boodle crafts: hanger for outerwear
Working with such a craft is not complicated. You will need very little time and stock up on such materials:
- Dense twigs of identical size
- Plywood
- Nails
- Glue
- Paint
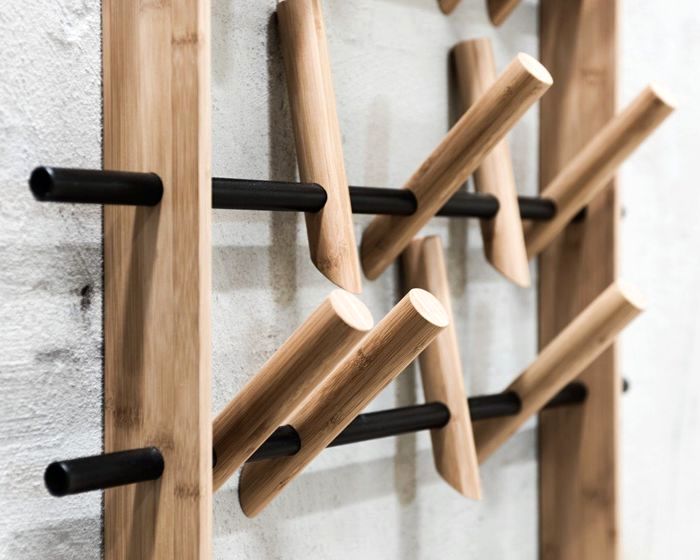
Hangers
The process of manufacturing a wooden hanger:
- Process the wood, cover it with paint.
- Level each branch in height of the future product. The branches should fit tightly to the faner.
- Attach the branches to the shelf. Put them so that they are located tightly to each other, but the bitch at the same time look out. They will serve as hooks.
- Paint the hanger with paint or cover with varnish.
Crafts made of wood: mug
If you were able to find ready -made bars that are already polished, then the process will decrease at times. If you were able to find only the board, then you will need to perform some manipulations.
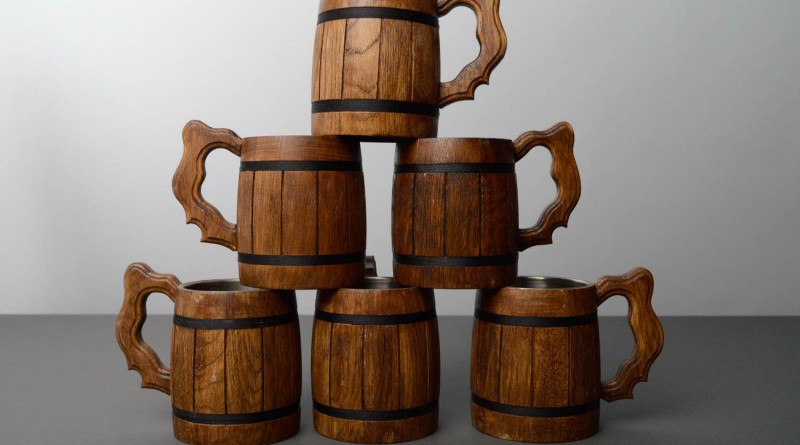
Mugs
The process of manufacturing a wooden mug:
- Make out on the board so that between them the width is about 3 cm. Wipe the board on the beam. Sprinkle them.
- Around the jar, lay the tightly obtained bars. Promise the sides with glue before this, fasten with a burning or elastic band.
- Snipple the dried workpiece on each side.
- Also made of wood make the bottom with a handle. Attach the elements to the product.
- Fasten the mug in the following way - just put an iron ring on the product.
Decorate the finished mug. For example, glue the initials on it or write memorable words on it. Any man will like such a gift.
Boodle craft: Stylish butterfly
Today, unusual elements of the wardrobe, for example, a wooden butterfly are included in fashion. It can be worn on any holiday, for example, on a birthday or a New Year's party.
Submit for work:
- Faner
- Textile
- Threads
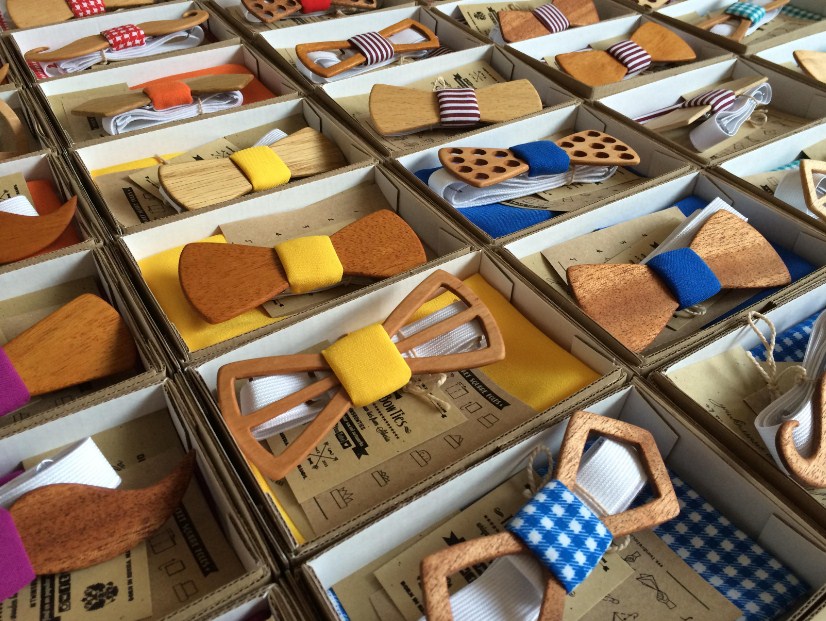
Butterfly
Production process:
- Draw a product sketch in advance. Think about every little thing.
- Take the plywood. Cut the butterfly from it. Pull each edge.
- We eat a special holder from the fabric. Attach it to the butterfly using a thick node so that you get a classic pillow in the center of the accessory.
- Decorate the product with an inscription or apply engraving.
Flower crafts: flowers
Flowers are an ideal craft that you can give a beloved woman. D. la crafts of wooden flowers stock up:
- Plywood
- Plasticine
- Wire
- Paint
- Varnish
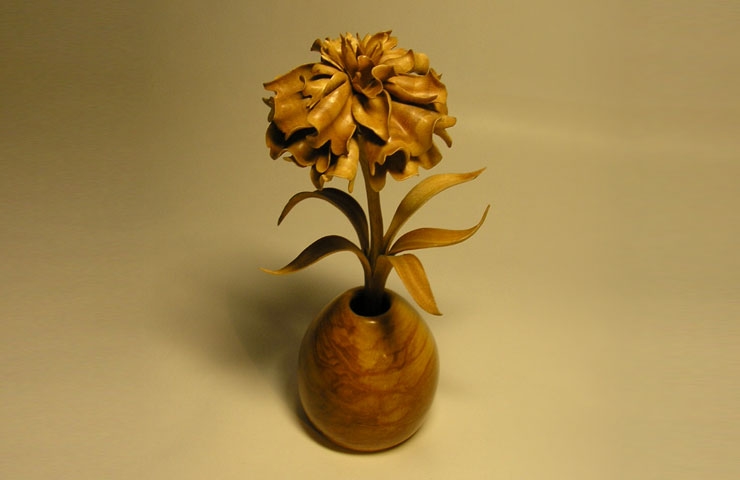
A wooden flower
The process of manufacturing wooden products:
- Make a drawing in advance. Think about how much your flower will have petals, its shape and size.
- Transfer the sketch to the plywood, cut out each element.
- Using plasticine, attach each petal in the middle of the product. Make the stem from the wire.
- Pull the details.
- Next, turn on the imagination. Paint the flower, cover it with varnish.