The article provides detailed recommendations for the manufacture of bulk snowflakes.
The content of the article
- Volumetric snowflakes of paper with their own hands: Step-by-step instructions, photos
- Video: "Handmade" Snowflake in a queening technique
- Video: Double bulk snowflake made of paper
- Video: Skinny Snowflake made of paper with your own hands
- Beautiful bulk snowflakes 3D - balls: templates, photo
- Video: Christmas toys and paper decorations
- Video: New Year's bowl of paper with his own hands
- Origami technique to create bulk snowflakes
- Technique Kirigami when creating snowflakes
- Video: How to cut beautiful snowflakes with kirigami?
- Modular origami technology when creating snowflakes
- Machinery Quilling when creating snowflakes
- How to make a three-year spring 3D for the new year from paper?
- Video: crafts for the new year. How to make a bulk snowflake from paper with your own hands
- Volumetric snowflakes of paper strips: Schemes
- Large bulk paper snowflakes: schemes
- Types of volumetric snowflakes - origami: photo
- Video: How to make a bulk snowflake from paper?
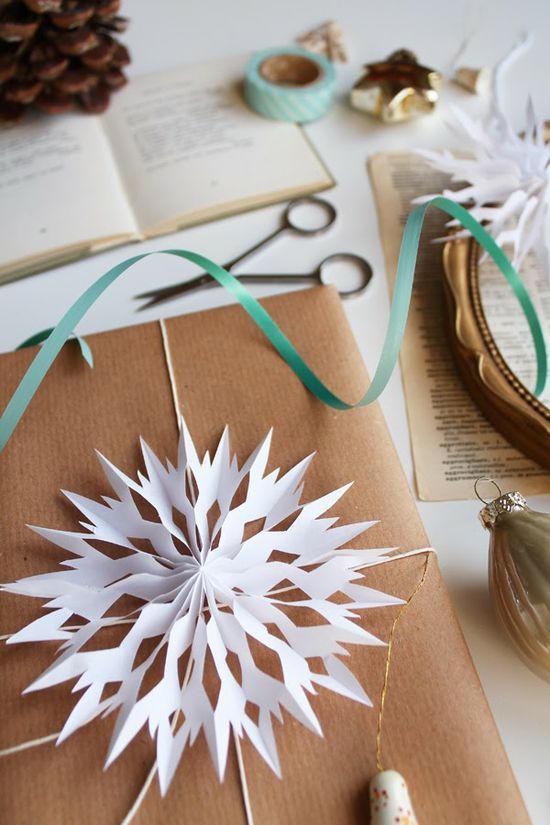
Although the New Year's troubles and occupy all our thoughts from the beginning of December, but you shouldn't forget about the decoration of the house too. If you prepare decorations and toys in advance, then the unhurried process of New Year's decoration of the rooms will deliver exceptionally positive emotions.
Paper snowflakes are filled on the eve of the New Year holidays window of houses, shopping centers, shops, schools, offices. Carving snowflakes as a type of applied creativity has acquired its own name "Paperoplasty".
Snowflakes are able to completely change the atmosphere indoors
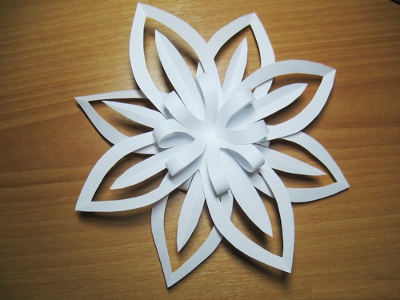
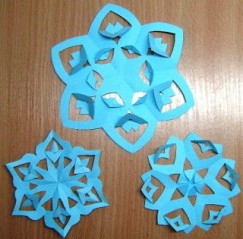
Volumetric snowflakes of paper with their own hands: Step-by-step instructions, photos
From the man-made decor, together with households, you can make a whole garland and hang it on curtains or under the ceiling. For this snowflakes are cut different in magnitude and fixed by thread at different levels.
Several garlands made in this way will create the illusion of snowfall. To create bulk 3D snowflakes, you will need:
- white dense paper (but if you use to decorate the room a certain color, you can use it)
- stapler
- sharp stationery or manicure scissors
- line, simple pencil
- pVA glue or any other paper glue
Instructions for the manufacture of bulk snowflakes:
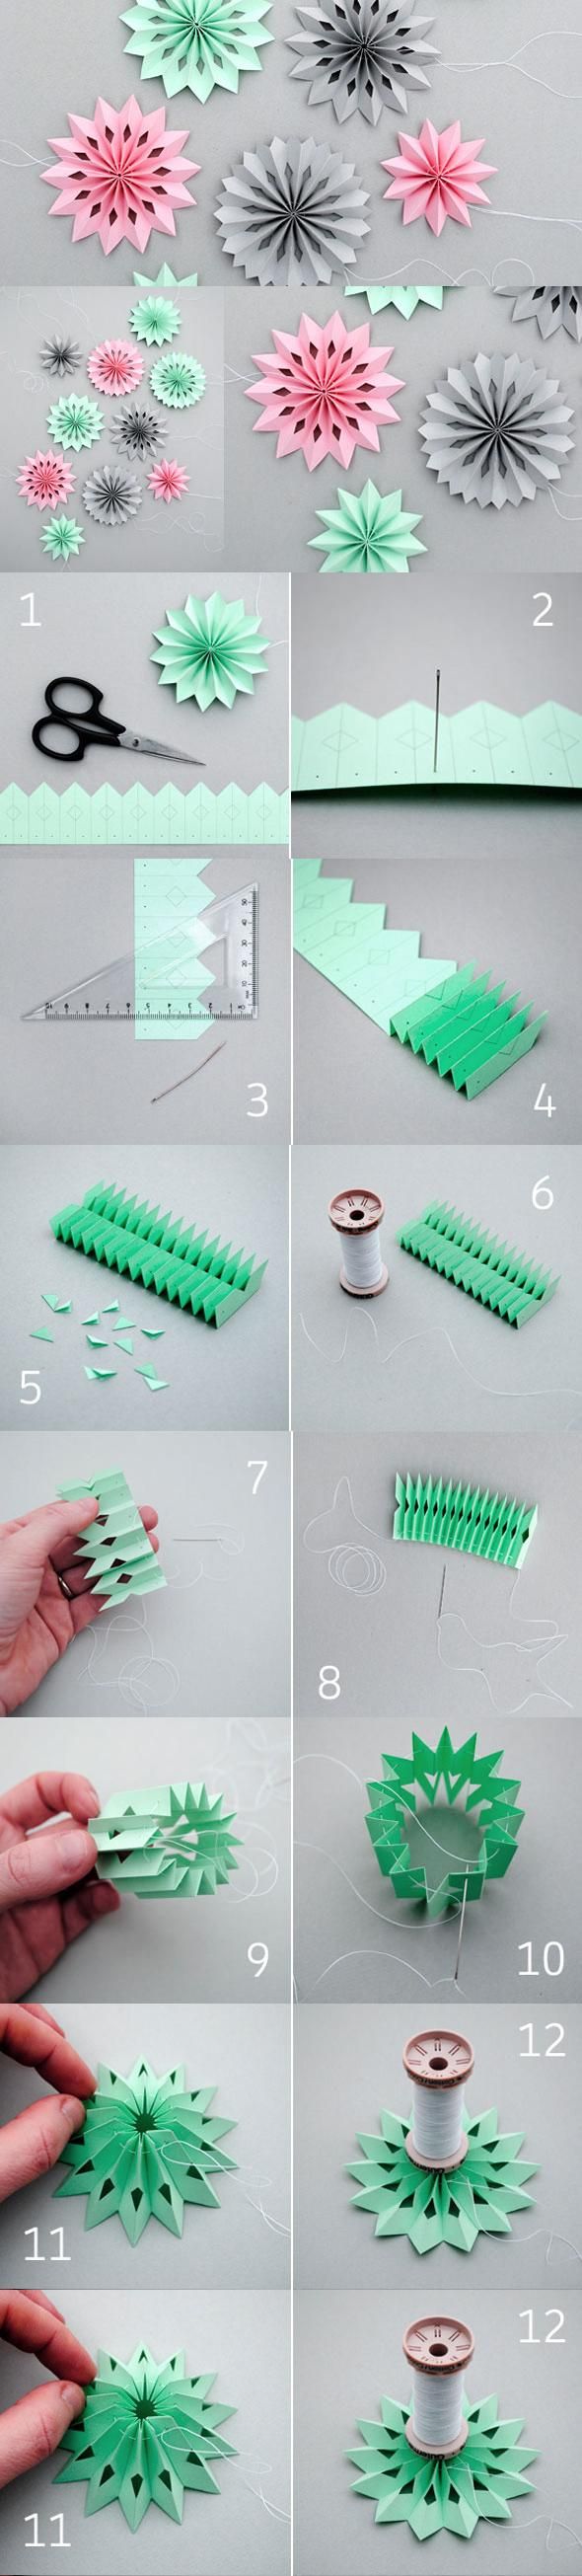
- We will prepare the stencil that will help in the manufacture of individual segments of future snowflakes. On a dense sheet of paper, and better - on cardboard, we will carry out 6 straight parallel lines. Place them at a distance of 1 cm from each other.
- After that, take pre-prepared squares. They should be 6 pieces. If you decide to make big snowflakes, take a tight paper. You can also use felt.
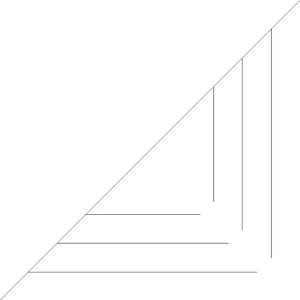
Let's do stencil
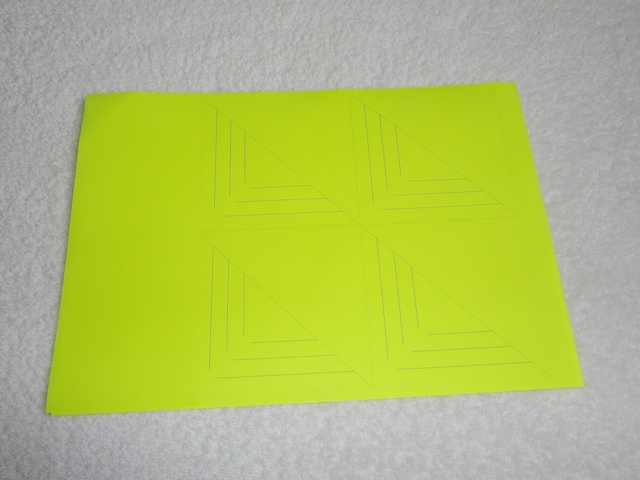
For one snowflakes will need 6 squares
- We fold the square diagonally and plan on the triangle that we have a line using stencils (on each side of 6 pieces). Cut them. You can make more lines than shown in the photo.
- Carefully deploy the square with cuts and connect the first pair of opposite corners consistently (we applied the glue to the tips of the corners).
- Watch the second couple of corners in the opposite direction and glue the tips. We repeat everything from the third pair of corners, and then - with the fourth.
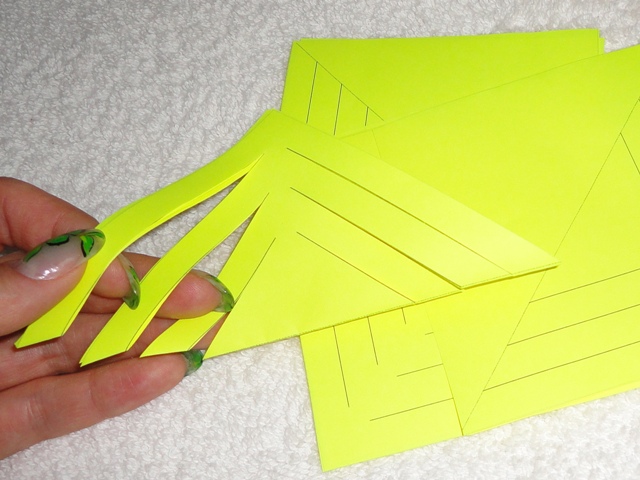
Making cuts
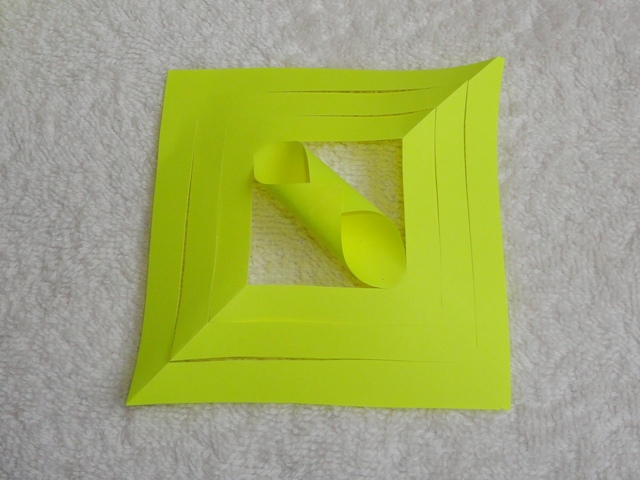
Connect the angles of the first inner square
From the opposite side, connect the corner of the second internal square
Connect the remaining corners of the inner square
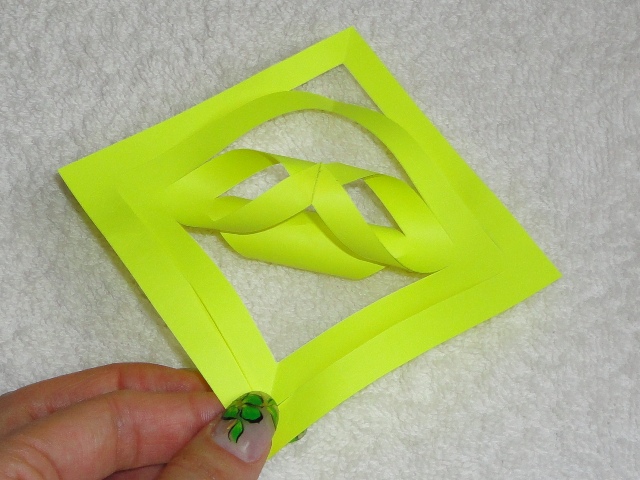
- The resulting segment is 1/6 snowflakes and we need to continue to make cuts and glue the tips of the corners of another 5 squares.
- When all segments are ready, connect them to the stapler: first the first parts are connected together, and then the remaining 3.
- The resulting two halves of three segments are also connected by the stapler. So that the snowflake does not break, it is necessary to fix it with a single clip, but a few.
We connect two blanks of three segments in each
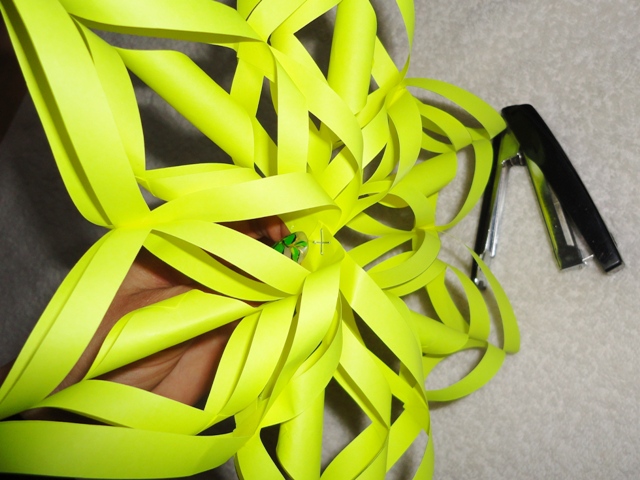
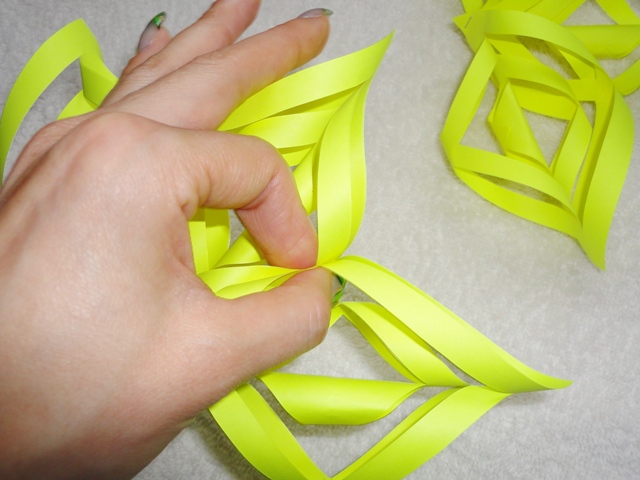
So that the snowflake does not fall asleep on the components, it must be copped with a stapler at 6 points
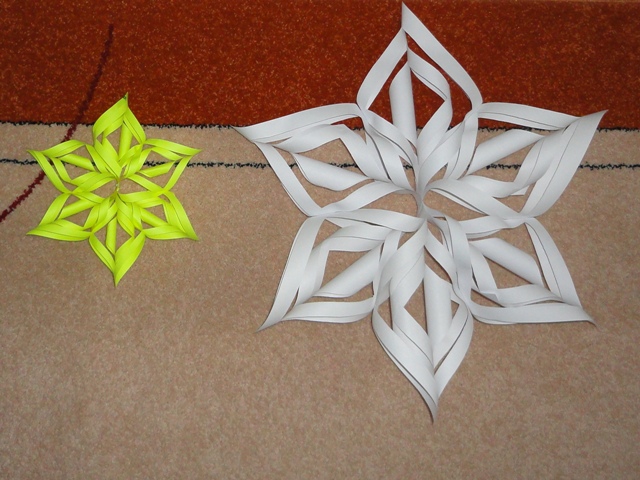
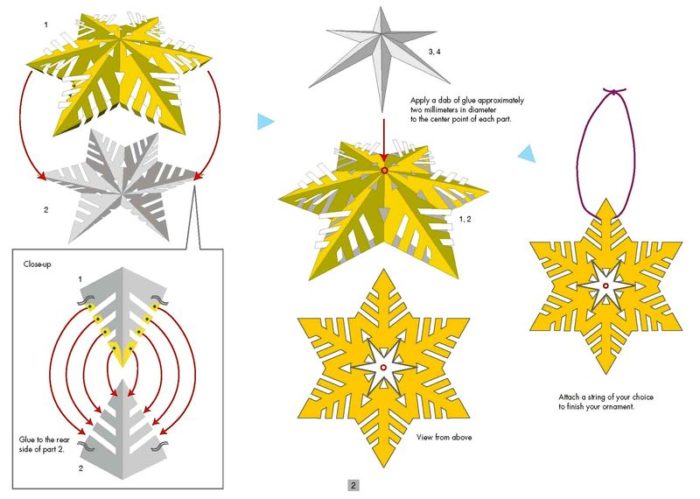
You can tie a string and hang a bulk snowflake to the ceiling or hoisted on the top of the Christmas tree
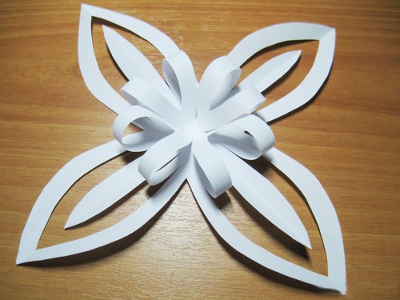
Second version of bulk snowflakes
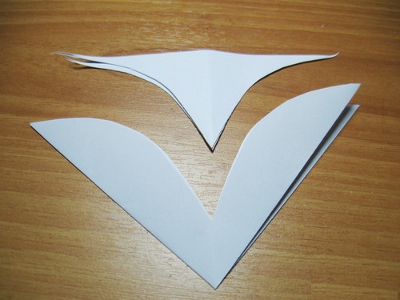
- This snowflake will also be made from 6 parts of the same size.
- Cooking squares again: fold the sheet diagonally and cut off the excess rectangular "tail. The triangle, which turned out, do not unfold, and again we put in a smaller triangle.
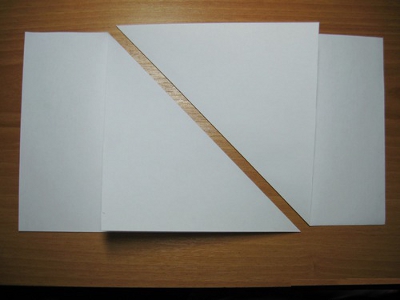
Cut the squares
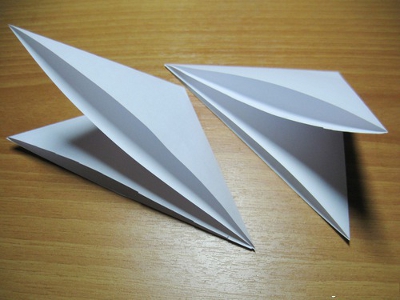
We fold again in half a diagonal
- Now you need to properly cut petals. How to do it, see the photo.
Cut the petals
- Inside the petals spend on 2 lines, following the way they do not intersect and do not reach the bend, and make cuts.
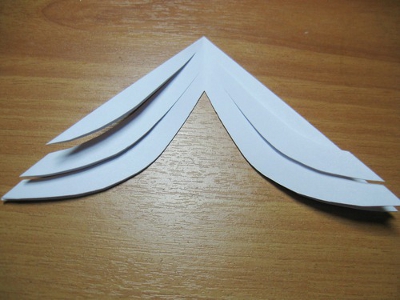
In each petal we make 2 cuts
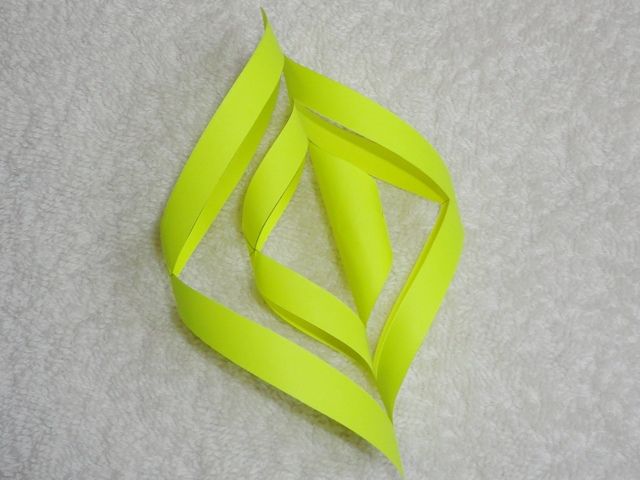
- Gently deploy the detail of the snowflake. We must lie down the figure of four petals with three separate segments that are coming from each petal.
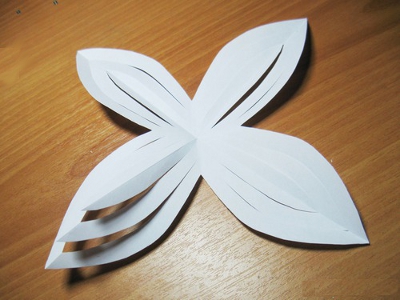
Deploy the workpiece
- We take the middle segment and, lubricate its tip with glue, fix in the center.
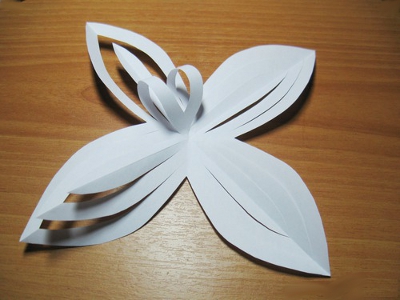
Watch the middle segment
- We proceed the same procedure with the rest of the petals segments.
We repeat with the rest of the petals
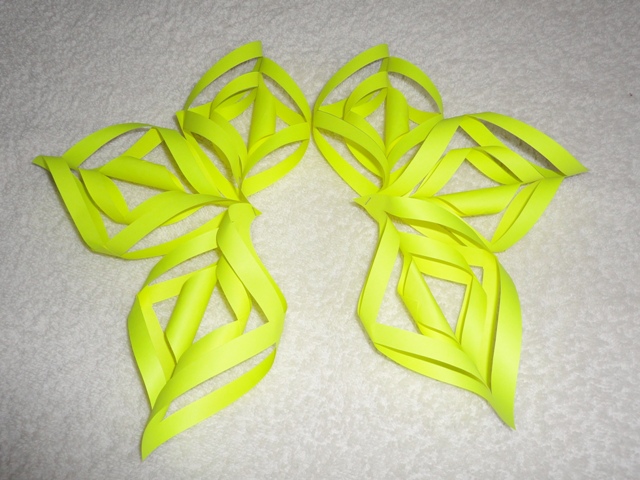
- The second detail of the snowflake is preparing the same. After that, both parts connect flat sides with each other.
Connect both halves
In detailed video instructions, the entire process of creating snowflakes is shown.
Video: "Handmade" Snowflake in a queening technique
Video: Double bulk snowflake made of paper
\
But another interesting way to manufacture bulk snowflakes:
Video: Skinny Snowflake made of paper with your own hands
From paper, you can not only cut patterns and figures, but also combine various embossing techniques, folding.
In the process of making paper Christmas tree toys, you can teach a child with your own hands to create beautiful snowflakes from ordinary white paper, garlands and much more.
This article contains step-by-step instructions on how to make unusual snowflakes.
Beautiful bulk snowflakes 3D - balls: templates, photo
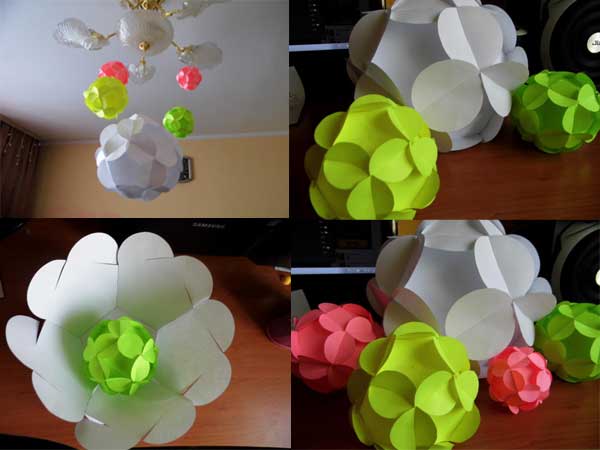
Very interesting looking paper snowflakes 3D - balls. They can be cut out of white paper, and you can use multi-colored parts.

Ball from paper
So that the ball looked easy, air and festive, what we used to see the New Year's decorations, then on each segment the interesting patterns should be cut through.
- For the manufacture of 3D - the ball cardboard will be needed, ordinary colored paper or velvet. Beautiful will be a ball of paper, which was previously covered with glue and shiny powder.
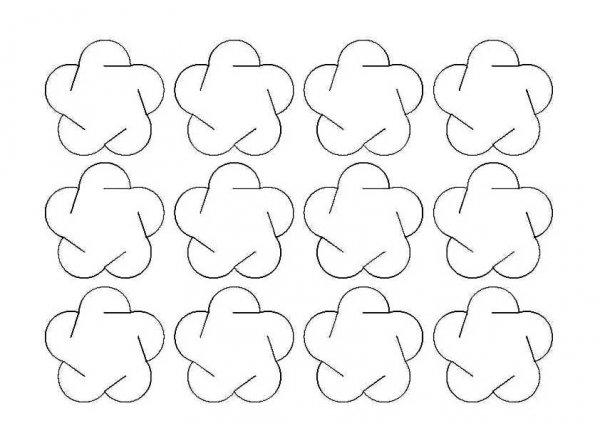
- Prepare 12 identical parts for the future bowl - rounded pentagons.
- For those who make such a ball for the first time, we recommend cutting details more. Cuts on each workpiece must be made strictly along the lines, which on the template are denoted by the dotted line.
Cut the blank
- The center of the first part is punctured and shifted through it a thread with a loop. Burry to scotch or glue.
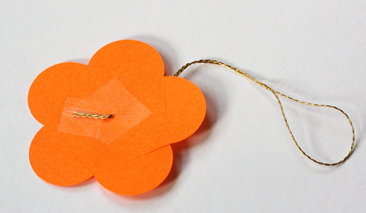
To one of the sides, secure thread
- Now connect three details, and then three more. There should be half the future ball.
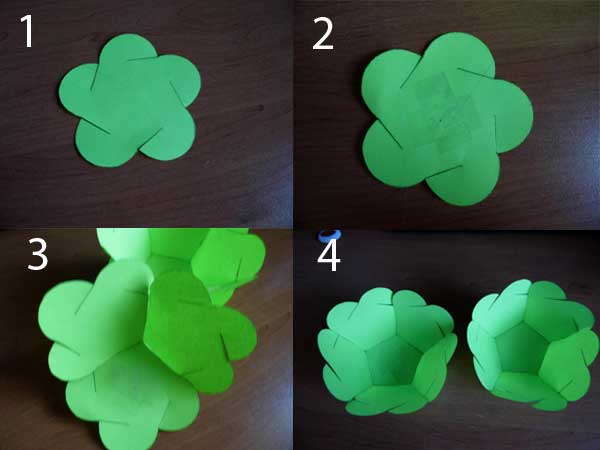
We connect three details
- When and the second half of the ball will be ready, connect them together.
These are the balls should work out.
Below is a diagram of drawing blanks for a ball. Of course, you can print a ready-made template, but if you do not have the printer, then do the following:
- Draw a pentagon. On one side, draw a circle, repeat so with each side.
- Wash the auxiliary lines, leaving those for which you will do cuts.
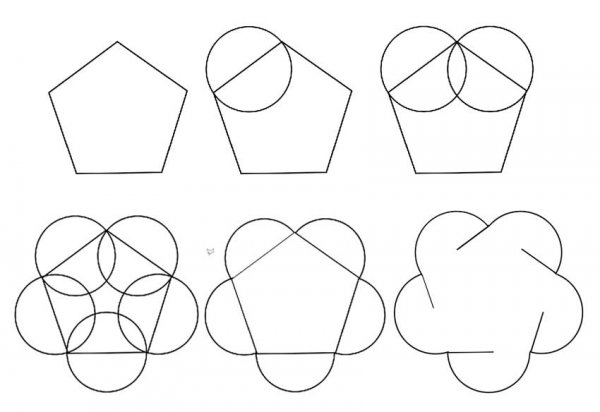
Blank drawing scheme for ball
How to connect the details, can be seen in the photo.

How to connect billets
How to make a New Year's ball from paper. Look in the video.
Video: Christmas toys and paper decorations
Video: New Year's bowl of paper with his own hands
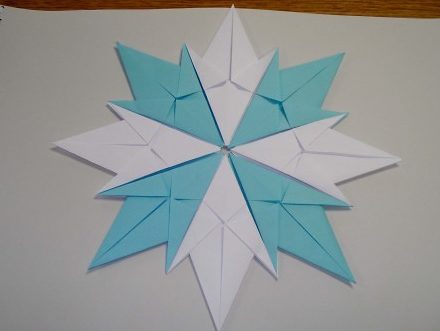
Origami technique to create bulk snowflakes
So, what volume snowflakes will help you create a snow-white or colorful New Year's fairy tale? Several methods use several methods to create Christmas decorations.
- Make a snowflake in Origami technique at first glance seems difficult and impracticable task. But if you show patience and completely concentrate on the man-made process, you can admire the result obtained by creating bulk snowflakes and in this technique.
- Snowflakes in this technique are performed traditional for origami: folding paper sheets according to certain schemes.
- The result of such a folding is the 3D volumetric product. In this method, there is no need to glue and fix parts or sites on the snowfish. A beautiful decoration is obtained only if the sheet of paper is folded correctly and gently.
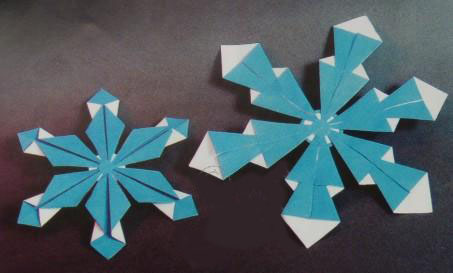
Snowflakes in Origami
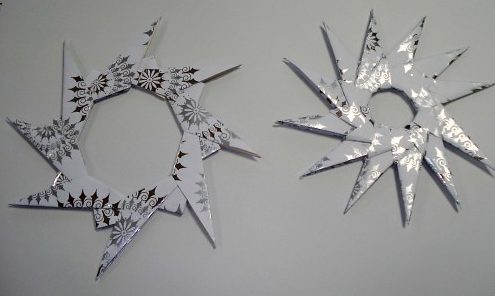
Technique Kirigami when creating snowflakes
- If you think that the origami snowflakes is difficult, then you are mistaken. It is more difficult to make a snowflake in the technique of karigami.
- The method of creating a snowflake is to fold the sheet in a certain sequence and further as much as possible cutting items.
- For those who make such a snowflake for the first time, one can recommend pre-draw the pattern. This will facilitate the further cutting process.
- For cutting small parts use standard scissors or manicure. Newbies are better to use manicure scissors who will easily cut even an intricate pattern.
- After the cutting process is completed, the volumetric snowflake-kirigami will take the desired shape if some of its parts are adjusted.
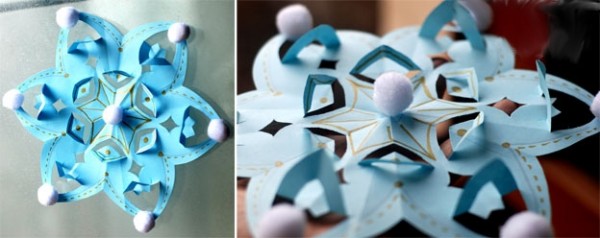
Snowflake - Kirigami

Snowflakes - Kirigami are decorated with cute pomponchiki, rhinestones or woolen balls
Video: How to cut beautiful snowflakes with kirigami?
Modular origami technology when creating snowflakes
- But the most difficult way to create snowflake is considered modular origami, which allows you to create truly fabulous decorations.
- The method is to manufacture a large number of small details, which then need to be properly connected.
- Even the most insignificant mistake made by assembling the figure will spoil its visual perception.

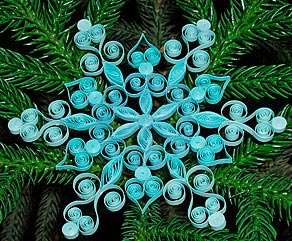
Machinery Quilling when creating snowflakes
- Snowflakes can be made of paper strips. It is enough just to show zeal and stock paper strips or buy ready-made stripes in the store.
- If earlier paper snowflakes pasted on the windows could not cause surprises from passersby, since they were the same type, now the New Year's decorations please the variety of forms and how to create them.
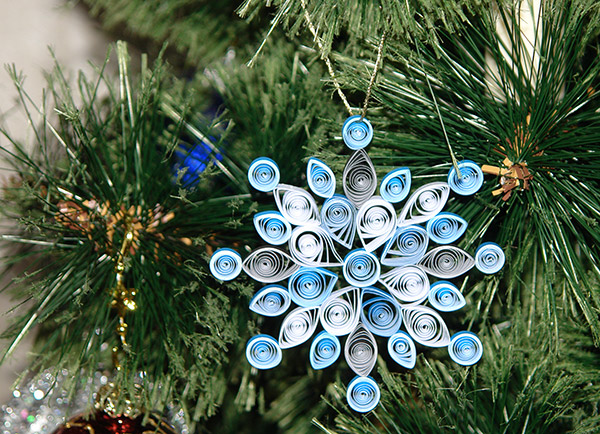
Snowflakes in the technique of quilling
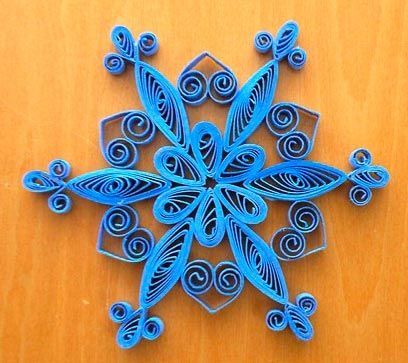
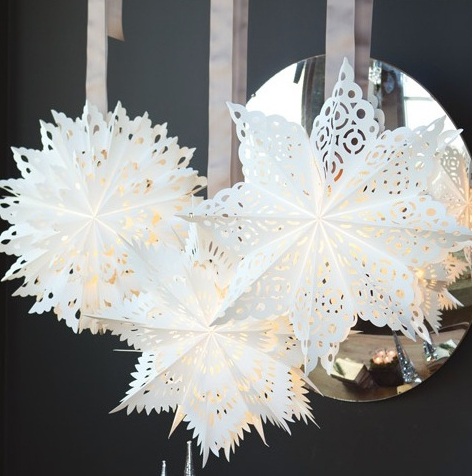
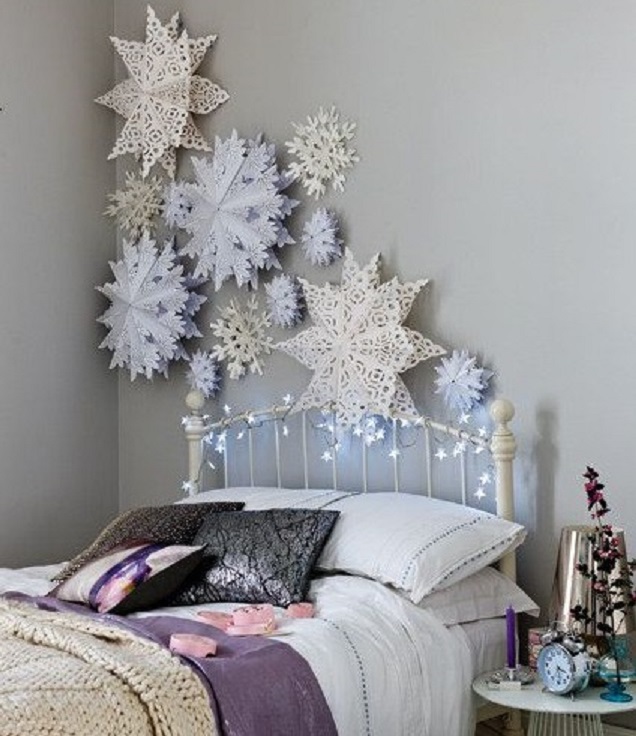
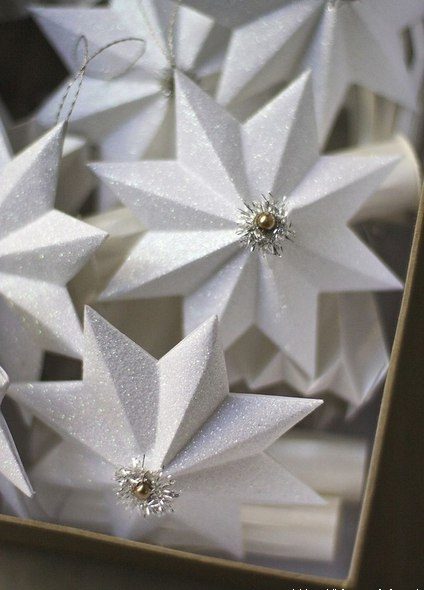
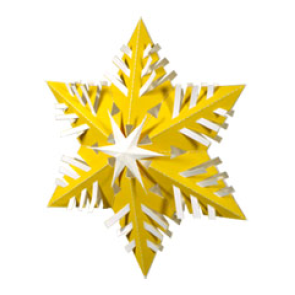
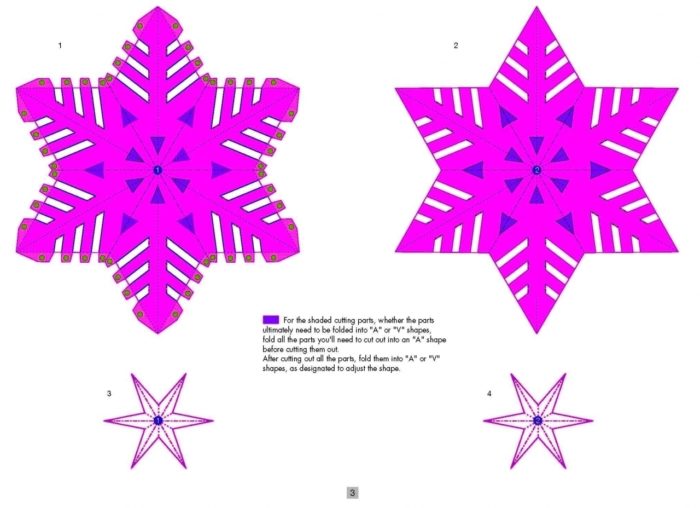
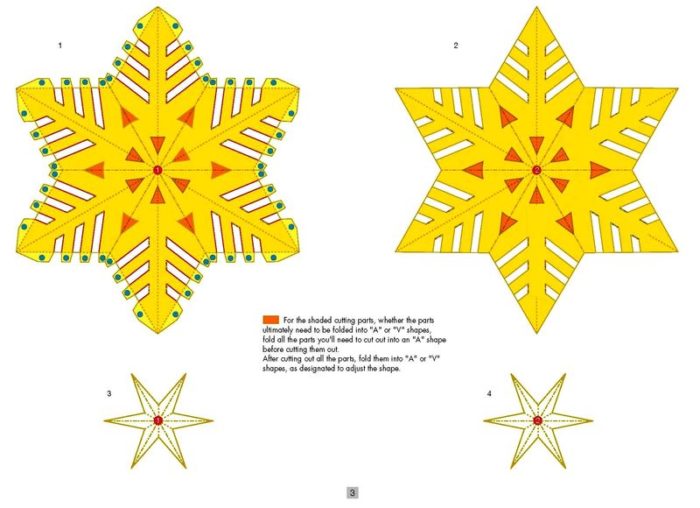
Volumetric snowflakes will decorate the Christmas tree, window, walls or furniture. It all depends on what size from the New Year's decoration.
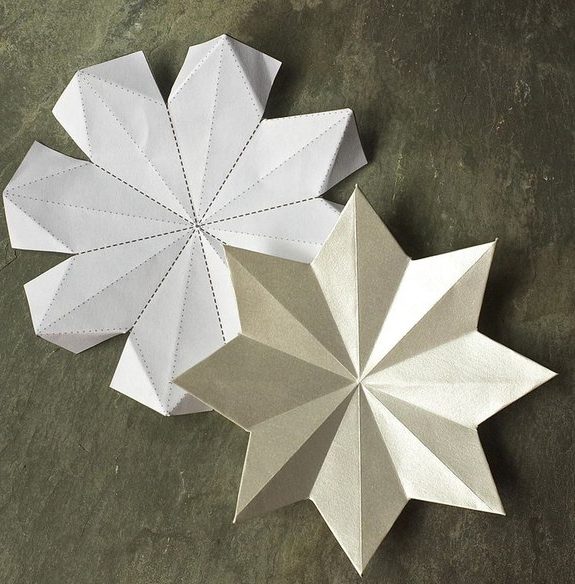
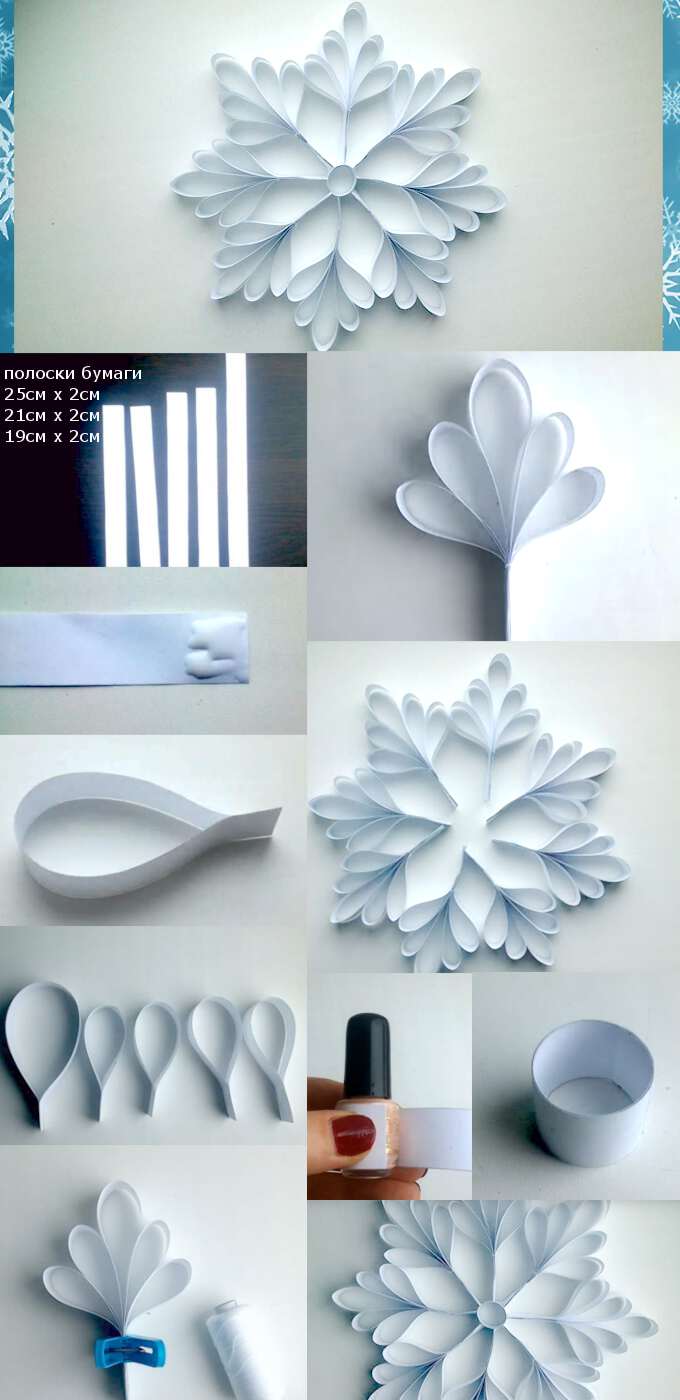
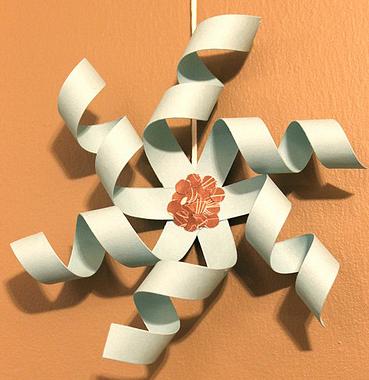
How to make a three-year spring 3D for the new year from paper?
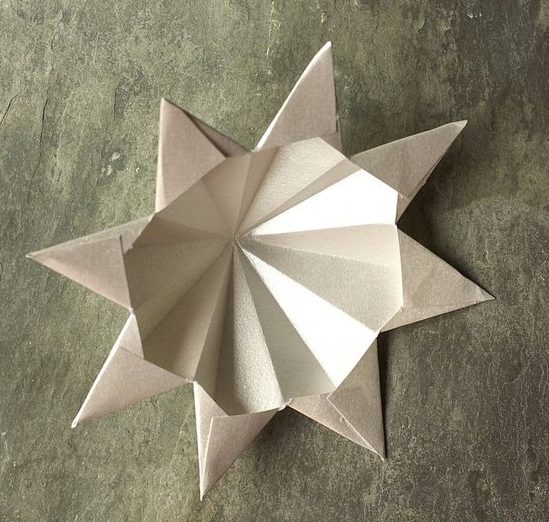
Very nice, the bulk snowflake is very beautiful, made of thick paper with glued in the center of the bead.
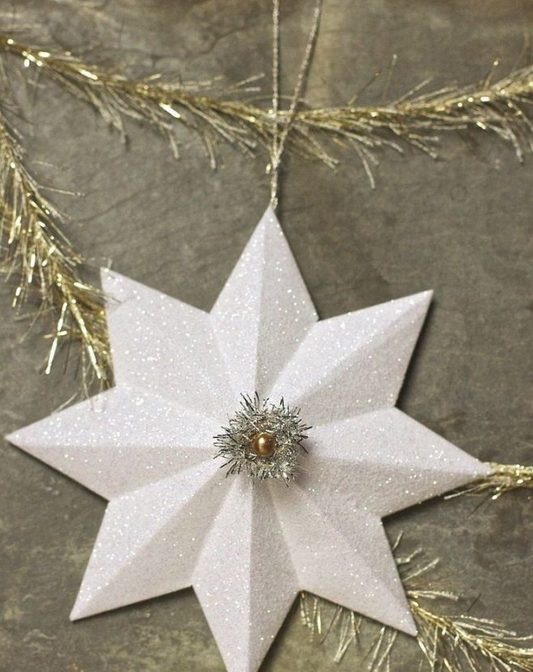
- For its manufacture, it is necessary to prepare the workpiece for which we will bend the snowflake segments.
- Next, you need to cut a circle on paper or cardboard and spread this shape in it as in the picture. Cut out the resulting flower with petals (there should be 8 pieces).
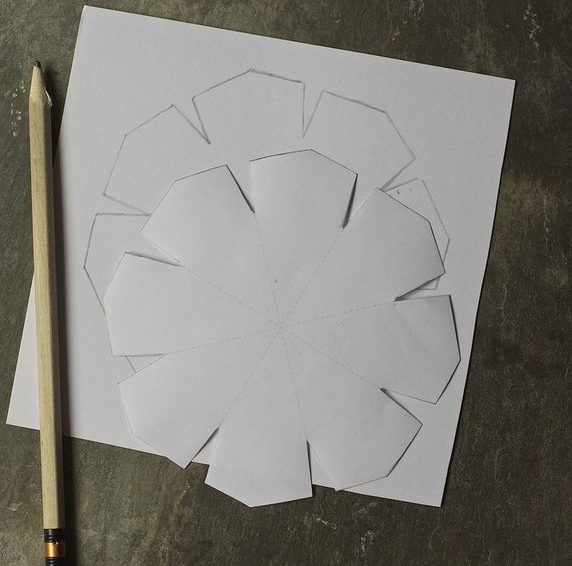
Diameters snowflake segments and cut out
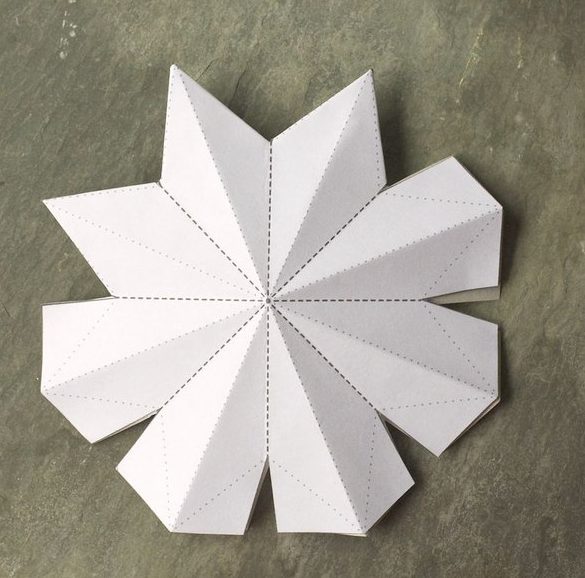
Making bends like pictures
Look at the drawing and gently transfer all dotted lines. 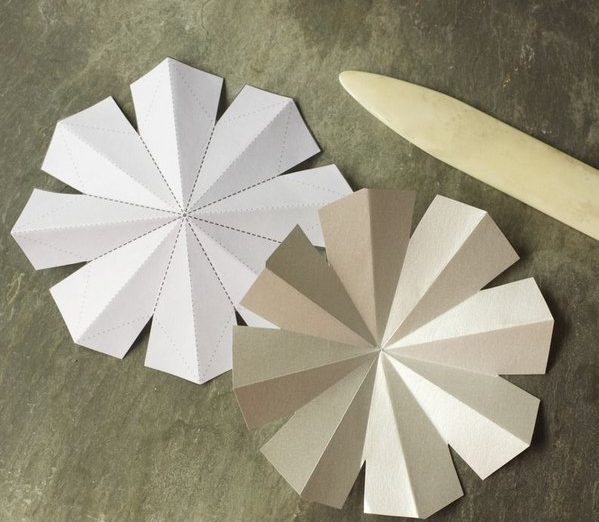
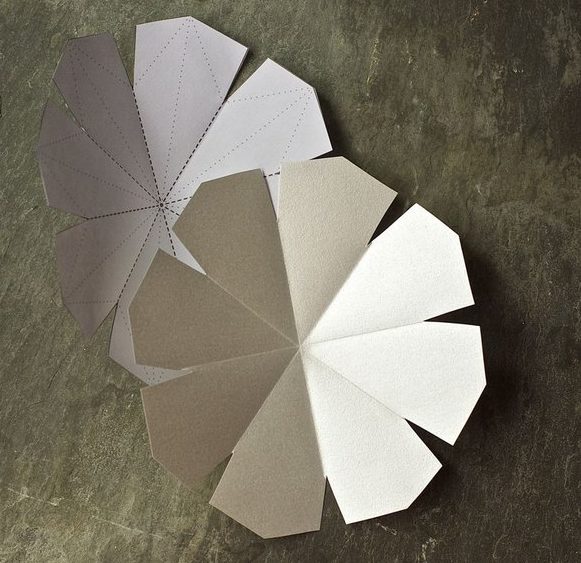
- We drive into the center every petal, directing paper segments from yourself. Each triangular petal tip also bend from opposite sides.
- We apply our workpiece with the dotted lines and check how exactly we have bent each segment.
Bend the tips of each petal
Survey the folds of the folds
- From the opposite side, the triangles of petals glue together.
Glue two corners of each snowflake segment
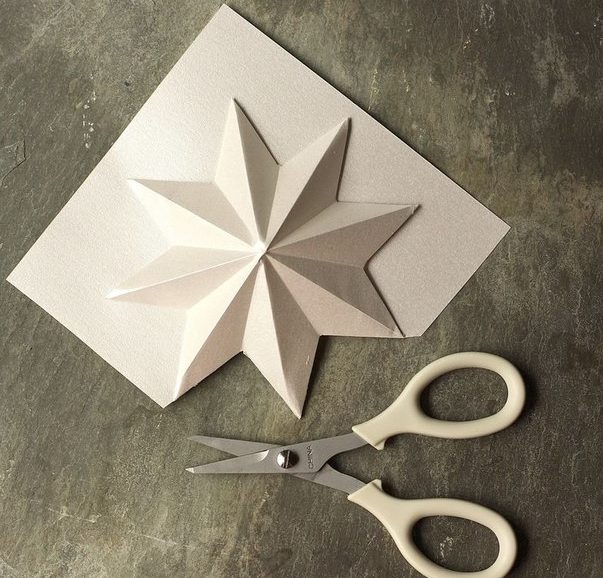
- It remains only to sprinkle with sparkles and glue a bead or other interesting part in the protruding part. Snowflake hangs on a thread for one of the segments.
Video: crafts for the new year. How to make a bulk snowflake from paper with your own hands
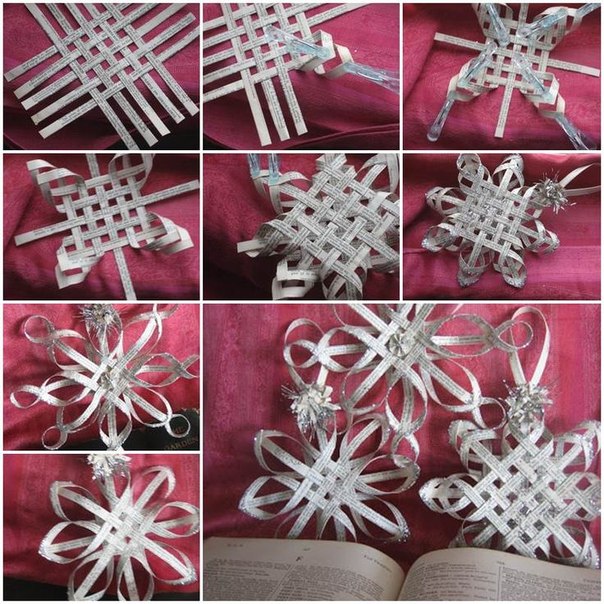
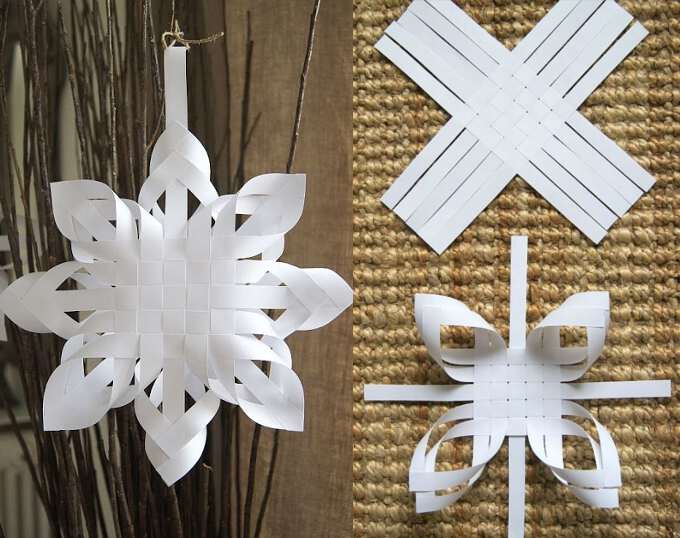
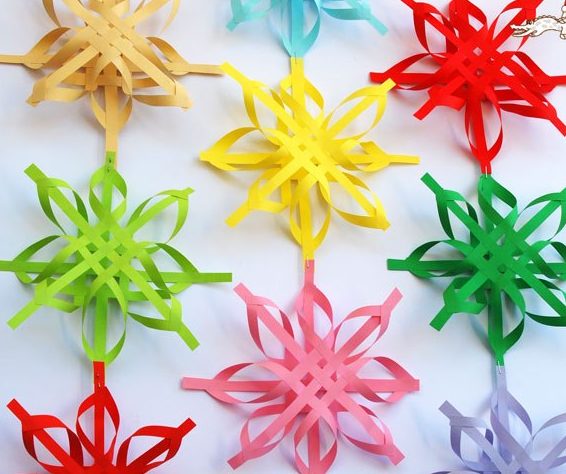
Volumetric snowflakes of paper strips: Schemes
With a snowflake of paper strips, you will have to work longer, but as a result you will have a beautiful and original decoration.
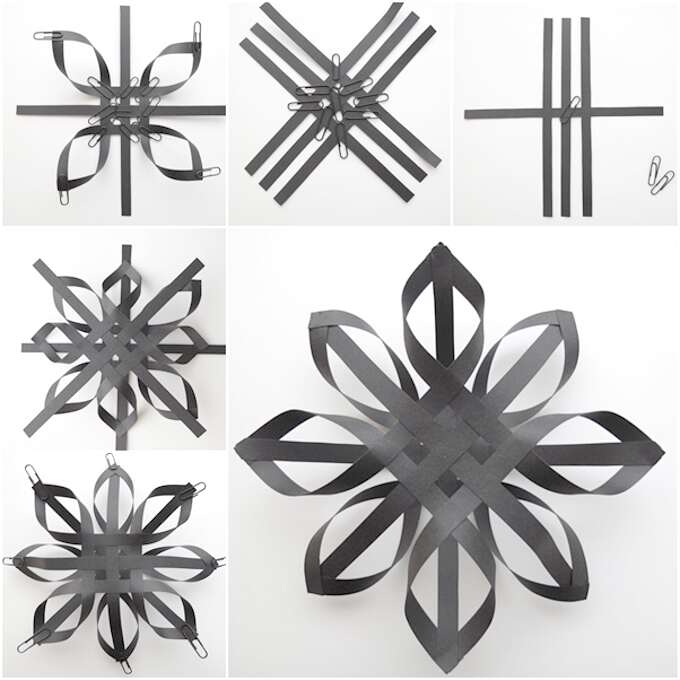
- So, cut paper stripes. They should be 12.
The width of the strip is 1.5 cm, the length is 30 cm (you can use the strips of a different size: 1cm / 20 cm). - Blacks on paper stripes and cut them out. We take two stripes and connect their cross on the cross in the center. We take two more strips and intertwine them on both sides, as if weeping Lukoshko.
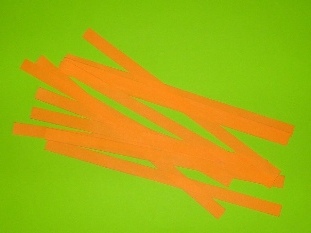
We cut paper stripes
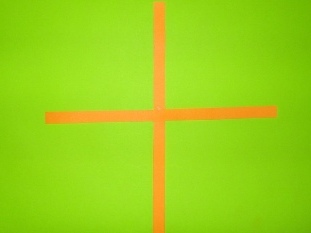
We connect the cross on the cross
- Where the strips are superimposed on each other, we can be glue for strength.
- Add two more strips across and fix them with glue.
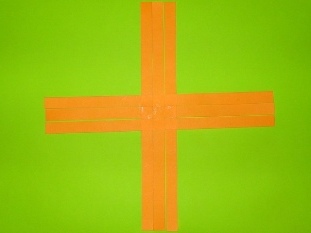
"Wet" two other strips on the sides
- Now every angular couple of strips is fixed with glue, connecting with each other. We should have a star with four segments and strips between them.
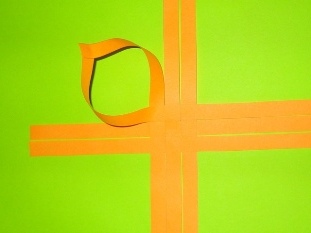
Corner strips connect and glue tips
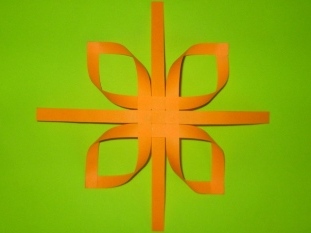
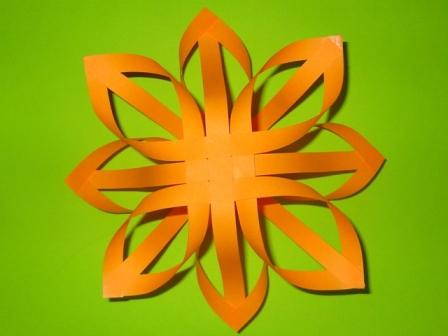
That's what should happen
- We repeat everything on the other half of the snowflakes. After that, we connect both halves, gluing them together (half the angle of 45 degrees). We glue the middle so that the snowflake is not too convex.
- It remains only to glue the ends of the strips to the corners of the petals.
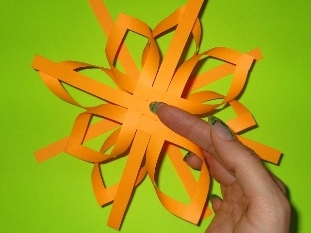
We connect two halves of snowflakes, having them at an angle of 45 degrees
Below are schemes of bulk snowflakes from paper strips.
 Large bulk paper snowflakes: schemes
 Large bulk paper snowflakes: schemes
This section contains the schemes of bulk snowflakes. You only need to properly transfer contours to paper, cut and connect to several segments.
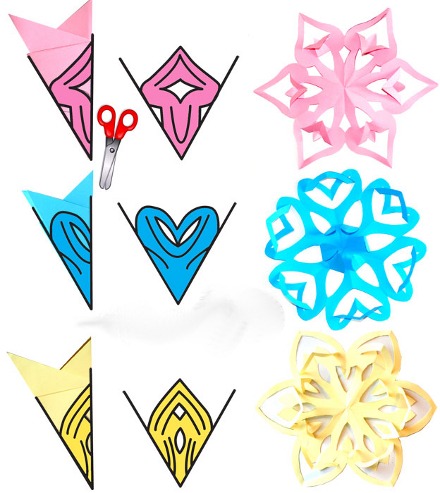
Schemes for cutting Snowflakes-Kirigami
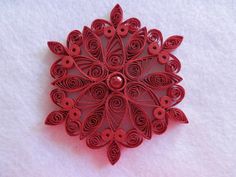
Snowflake in Quilling technique
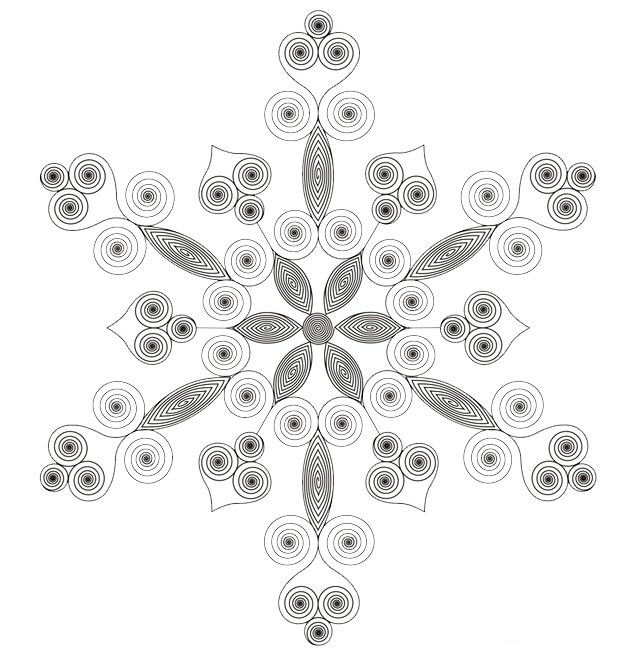
Scheme for snowflakes in a quilling technique
Another snowflake in a quilling technique
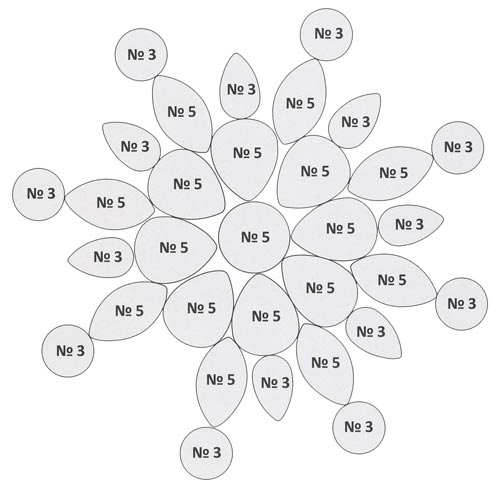
And scheme for its manufacture
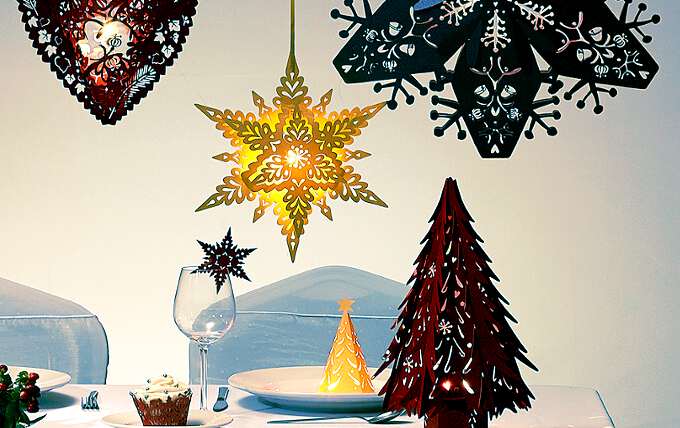
Types of volumetric snowflakes - origami: photo
Putting the Christmas tree in the living room, you will not fill the rest of the rooms in the spirit of Christmas and New Year's fairy tales. Festive garlands and christmas toys will also not cope with this task without the indispensable attribute of winter - snowflakes.
In order for the festive mood to be in every corner of your home, we suggest you to postpone all the works and to pay a little time to turn your home at the present snow kingdom.
Of course, you can, of course, do not bother and just cut down the snowflakes, as we did in school years. But after all, such paper decorations managed to the fourteen. Volumetric snowflakes look much more effectively and more interesting.
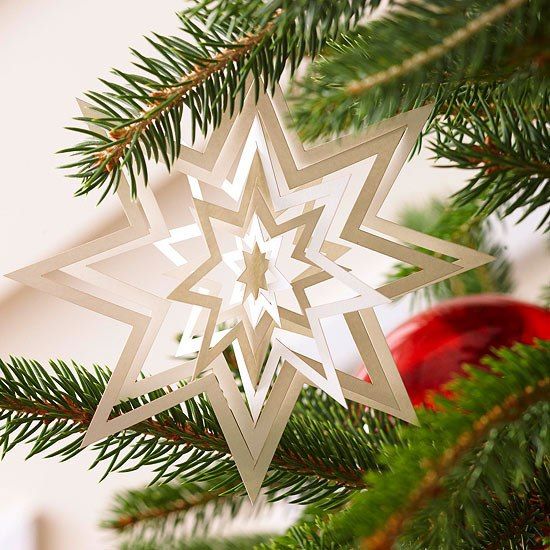
3D star
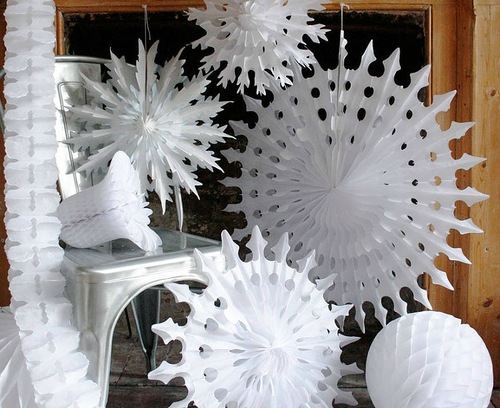
Volumetric snowflakes
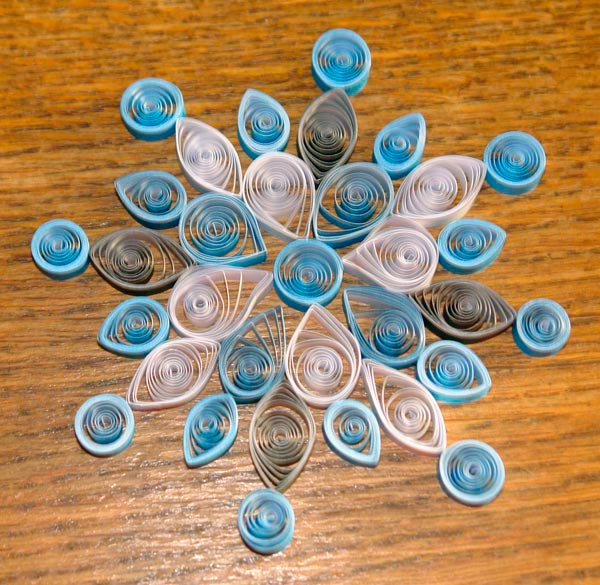
Snowflake in Quilling technique
Snowflake-petersburg
Snowflake from curls