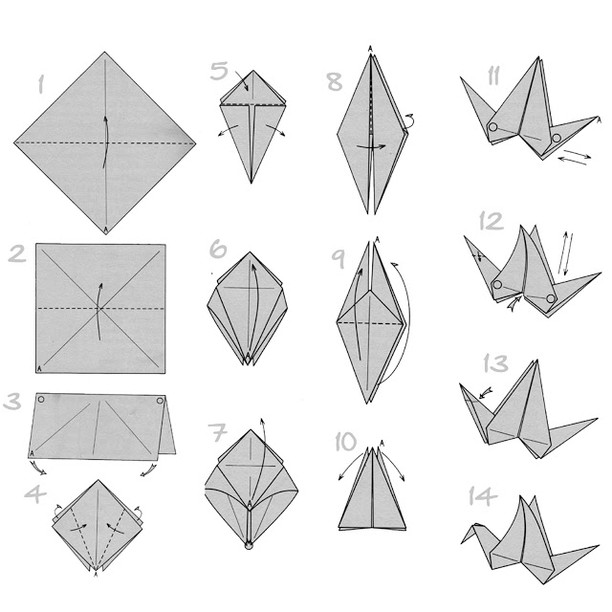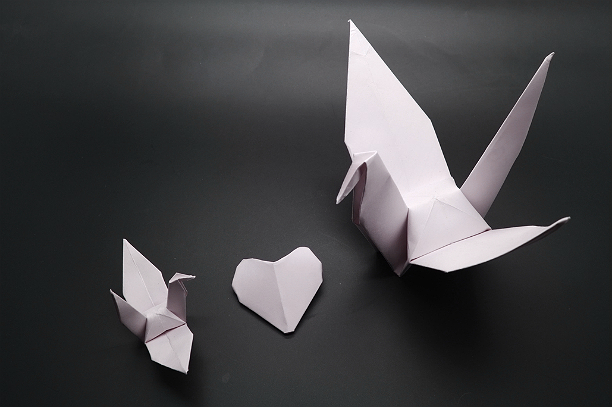
Original handicraft - paper swan: from simple options to complex using modules.
The content of the article
- Swan in Origami technique: how to do?
- Video: Origami Swan from paper
- Swan from modules: how to do?
- Video: Triangular module. How to make a module? Master Class
- Video: Origami Swan. Modular origami for beginners. Modular origami Swan
- Video: Lebed Paper Origami (Modular)
- Video: Modular origami Swan
- Video: Swan from modules
- This article contains the simplest and most popular ways to create a paper noble bird - swan.
- You will open the secrets of creating a beautiful bird in the Origami technique, and detailed instructions will help you collect feathels from paper modules.
Swan in Origami technique: how to do?
- Swan in fairy tales, legends and legends personifies impatience, beauty and restrained nobility. The image of this bird was played to decorate the house. The bird-charm was assigned hopes for attracting wealth, love, family well-being.
- The swan figure can easily create independently by applying one of the popular techniques - origami.
- The swan performed in the Origami technique will certainly attract the attention recognizable forms, which means that it will harmoniously fit into any interior.
- And if you still doubt, do you from paper swan or not, it seems to you that it is very difficult, then read the material of this article and proceed to the assembly.
- The job description is set out the most accessible as possible, and therefore there should be no problems. In addition, on the eve of the name day or another holiday, such an exercise will become an original and unforgettable gift.
Paper swan: how to do?
Swan in Origami technique: Step by step description
Paper handicraft
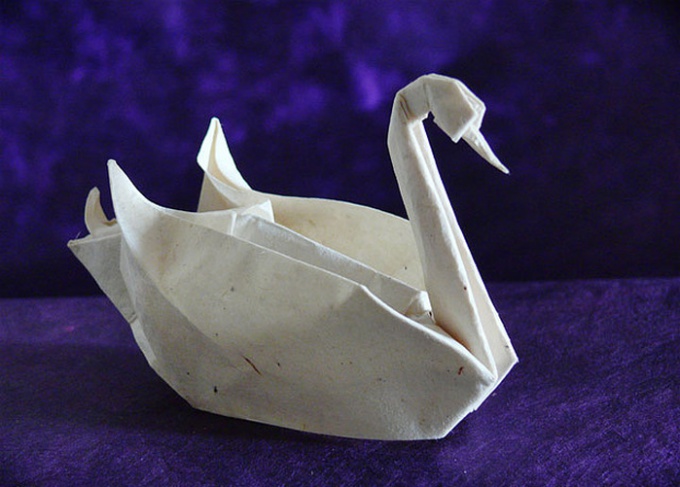
Beautiful and original craft can be made independently of paper.
First method: Swan from paper or napkin
- Paper or napkins - an excellent material for lovers to create something with your own hands. Even kids will be able to create a swan of paper. Because this method is recommended for beginners. After all, a difficult version of work will bring a person to hysterics. And we need the opposite effect - calm the nerves, and it is interesting to spend time with children.
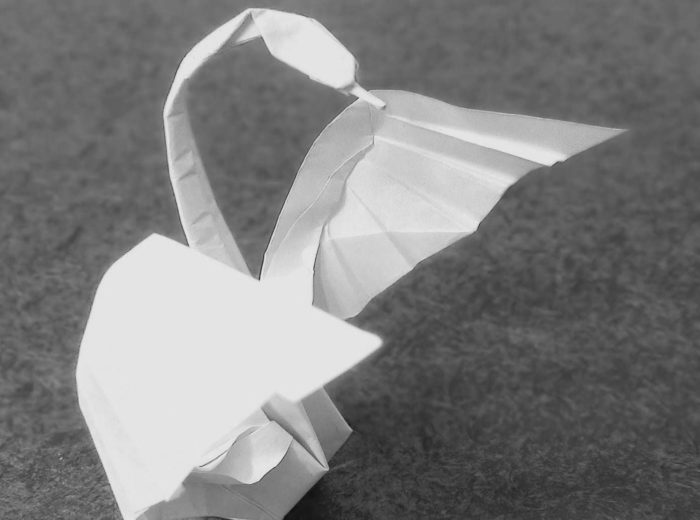
Square Leaf Swan
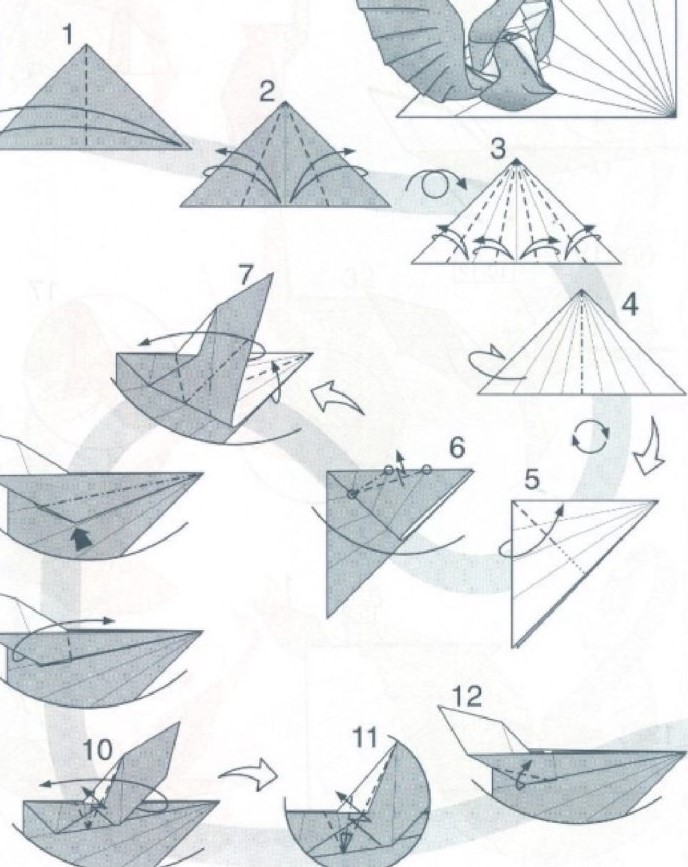
Swan from a square sheet of paper: part 1
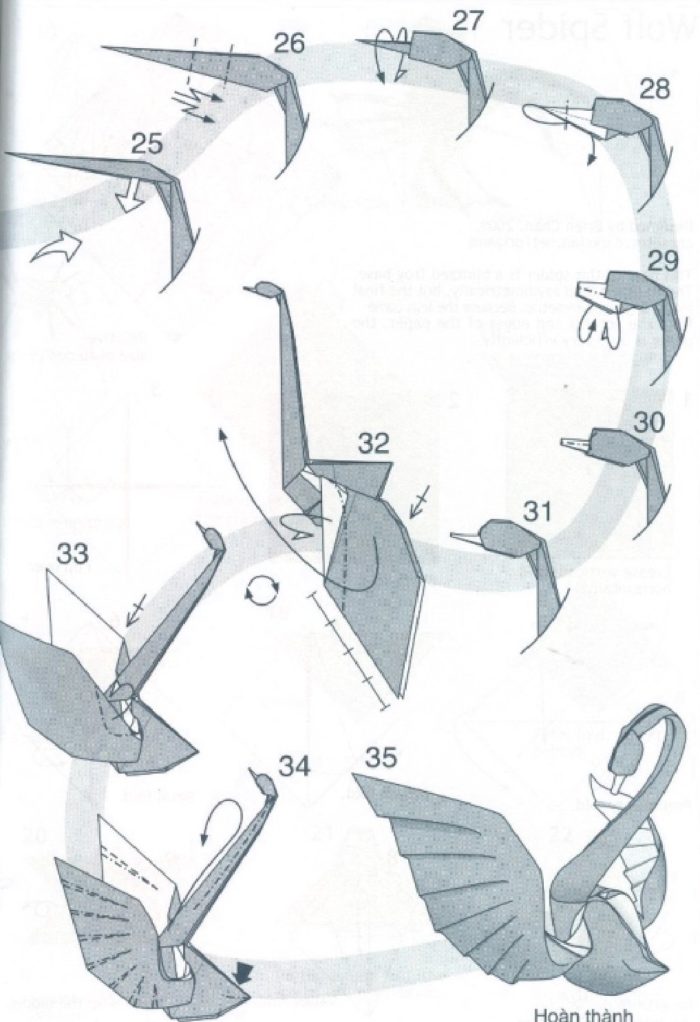
Square Paper Leba Assembly Scheme: Part 2
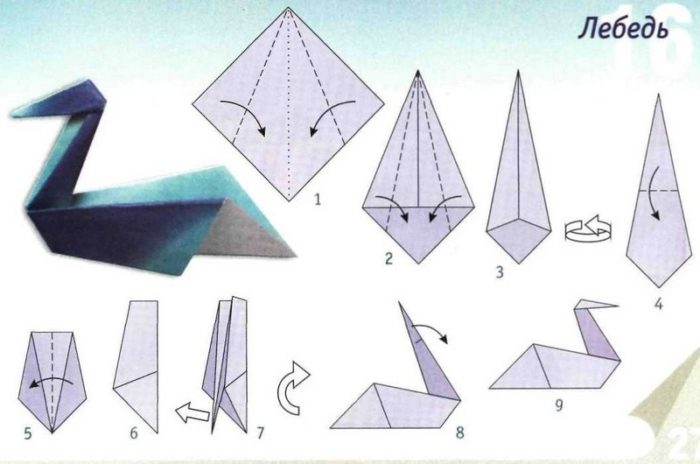
The step-by-step photos presented below will help make a swan of a square sheet of paper or napkins in just a few stages.
- We have a napkin angle down. For the formation of the central line we add two halves of the square.
- For the formation of a long neck, the birds are bent two square angle, a little climbing the central line. It turns out a kind of wedge.
The resulting workpiece turn over with an invalion up. - We drive the corners of the wedge to the median line.
- We fold the workpiece in half. The top of the wedge and the lower corner of the part must match.
- We divide the angle formed on the half and one part wrap up to the bird head formed.
- In order for the bird's head to be more like a real thing, we need to add a billet volume. We fold the item on the vertical line. Align the neck and head, bending the vertical line in the same way.
- The degree of inclination of the bird neck is adjustable at its discretion: for a more curved form, it is necessary to slightly raise the inner part of the wing.
- The finished figurine can be used as a decor: we put it on the table, on the shelf with books and admire.
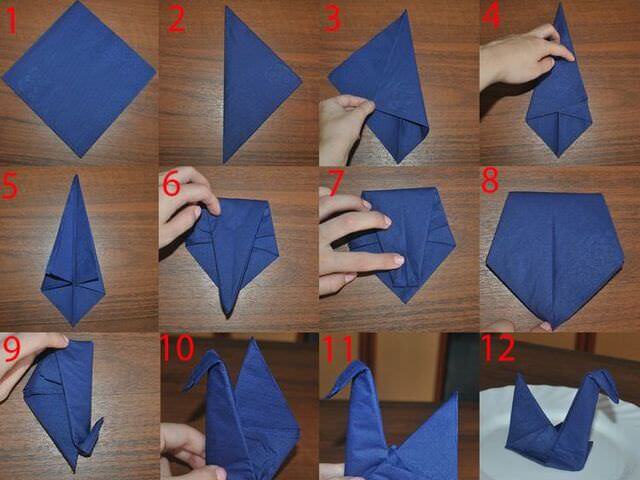
How to fold a napkin in the form of a swan?
IMPORTANT: Before you begin to fold the bird from the napkin, it is worth paying the time to make the same figure out of paper, because the material from which the napkin is made, soft, does not always hold the shape, and you need to work very carefully.
Second way: Paper Swan:
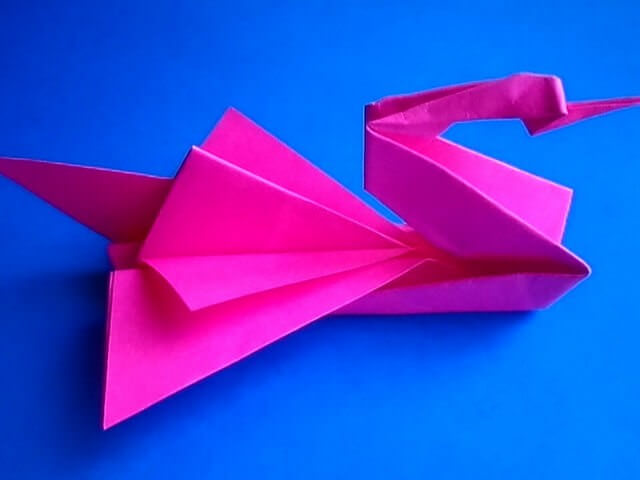
This method of making swan only seems difficult, but in practice - everything is simple. You just need to carefully read the instructions and repeat all the bends, focusing on the description and photo.
- We will make a representative of the Pernomy Kingdom from a sheet of white paper (but you can choose another color at your discretion and make a swan blue or black). Cut the square.
- Severe the square on the diagonals twice and deploy.
- Bend in half in length and width.
- Hold the formed acute angle to yourself and reduce the sidewalls to the center. The drawing will tell you how to do it right.
- Customize the edge of the received rhombus to the central axis in such a way that triangles come out.
- Intripping the top layer by starting the edge of the turntable the book.
- Having lifted the face of the workpiece, pull it up.
Left triangle bend on the right side. - The resulting rhombus fold in half along the horizontal line.
- Triangles who have formed inside the right and left side, we release out.
- We spread the sides horizontally internal parts of the workpiece.
- We repeat the action, only pull the item in this time vertically.
- The left edge of the triangle is bending to get the head of the bird. Figure Swan is ready. You can put on a shelf, on a beautiful plate and with pride to demonstrate my relatives.

Video: Origami Swan from paper
Swan from modules: how to do?
The hard and scrupulous work is considered modular origami. If the usual paper figure can be folded in 10-15 minutes, then with the craft of modules you will have to tinker, take into account the set of nuances during the manufacture of figures.
- For the manufacture of individual details is usually a long time. However, the usual handicraft from paper, for whatever complex scheme I did not have to add, not compare with the final result of the figures from the modules.
- Smooth bends, plastic movable parts (at the Swan This neck) - All this allows you to safely demonstrate a bird made in the technique of modular origami as a work of art.
- If you decide to replenish the ranks of the real masters working in the technique of modular origami, then we suggest you familiarize yourself with the instructions and start folding the swan.
Paper swan: assembly scheme
Modules tightly hold the form due to the fact that they are rolled up on each other. But to give a figure of additional stability, a dense cardboard is used.
Assembling modules:
- For the manufacture of modules, we will need a sheet A4. We divide it into 4 equal parts on each side. As a result, 16 parts should be released (53x74 mm).
- Rectangles cut and fold modules from them. We have a leaf long side to yourself. We fold along. After that, we fold across and deploy, by chanting the central line.
- From the central line bending triangles both edges of the workpiece. I turn over.
- We drive up the bottom edges up. So we folded the triangle. We fold the figure in half. We repeat all actions with a rectangle.
- Folding modules, it is important to ensure that all blanks have the same size to obtain a uniform composition, otherwise, when assembling the figure, you will have to lose time for the manufacture of new modules.
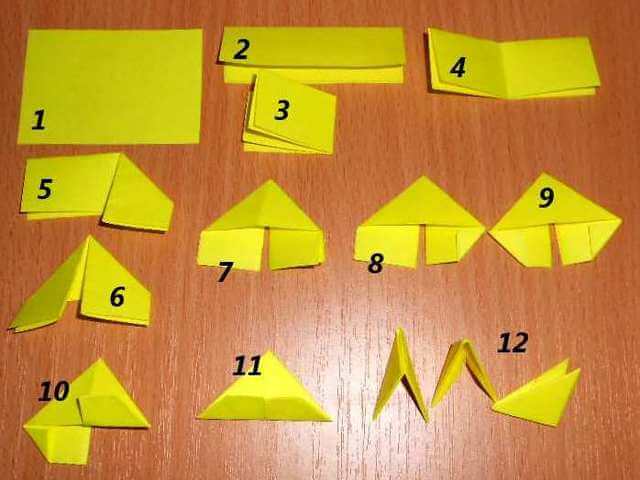
We collect modules
Video: Triangular module. How to make a module? Master Class
We collect swan from modules
Assembling a small swan from modules
- If you first collect a figure from the modules, it is recommended to practice on small models. The option described below is just suitable for newbies to fill the hand in the quality manufacture of parts and secure them.
- Following the instructions "Origami Swan's paper" you can assemble a small instance. It is likely that on this you will not stop and the first small swan from the modules will serve as the beginning of your collection of copies of paper modular crafts.
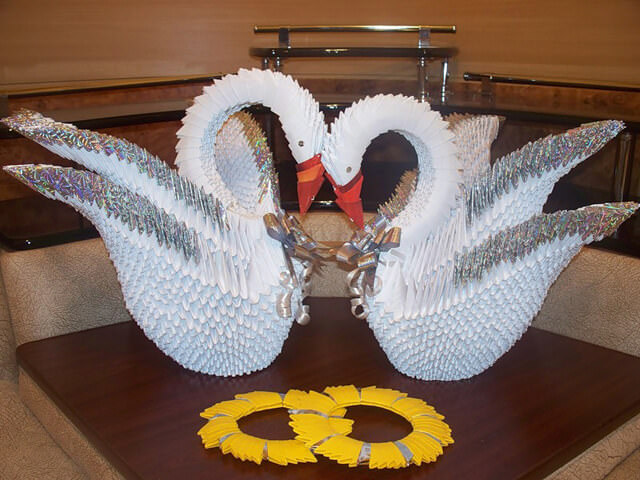
Little swan from modules
Step-by-step assembly of the Swan model:
- The basis of the figure consists of three triangles. We press two of them to each other, having twisted in the third pocket. The third triangle we have a long side down.
- We take two more modules and connect them with a folded blank, pressing the sides to each other and placing the corners in the pockets.
- So connect 40 modules (20 modules should be seamless in the corners and 20 to fasten them). As a result, we should get the item in the form of a circle of two rows of modules.
- Collect the third row of 20 triangles, putting on the corners.
- We continue to collect on the same principle and with the same number of modules of the 4th, 5th rows. We must have a circle that you need to bent into the formation of a sustainable base.
- Go to the 6th row: it is important to send elements up.
- For the formation of wings, we determine the angles for the further location of the neck of the swan. You can install the module in this place to make it easier to navigate.
- We skip 8 elements on each side. These will be the grounds for the wings. We continue to collect rows for such a principle: every new row we do less on 1 part to get wings in the form of triangles.
- We fold the tail: fix 3 modules based on and continue, reducing the number of elements in each subsequent row one.
- 16 modules will be needed to form a head. We ride them on each other in the place that we have on the basis of the module. Configuring modules, we make the neck curved.
- Add a bird beak made from a red module. I correlate the wings, bending them a little out. Swan ready! Now it can be placed on everyone to review and take compliments for excellent work.
From the videos presented below, you will learn how to make a swan from modules

