
Flowers from Foamiran: Simple and understandable MK.
The content of the article
- How to make small flowers from Foamiran do it yourself: patterns
- How to make a bout of orchids from phoamyran for beginners, patterns?
- Flowers from Foamyran, Orchid, Templates
- Flowers from Foamiran, Peony: Master Class
- How to make Ranunculyus from Foamiran
- How to make wildflowers from Foamiran do it yourself: templates
- Large Rose from Foamyran: Pattern Pattern
- Flowers from Foamyran, Chamomile, Patterns
- Apple tree flowers, Apple tree branch of Foamiran, Pattern
Artificial flowers filled almost everything today. This is the interior decor, and a chic accessory for clothes, and hair decoration, and the author's jewelry. How many masters, so many diverse species and techniques. The most elegant - Flowers from Foamyran.
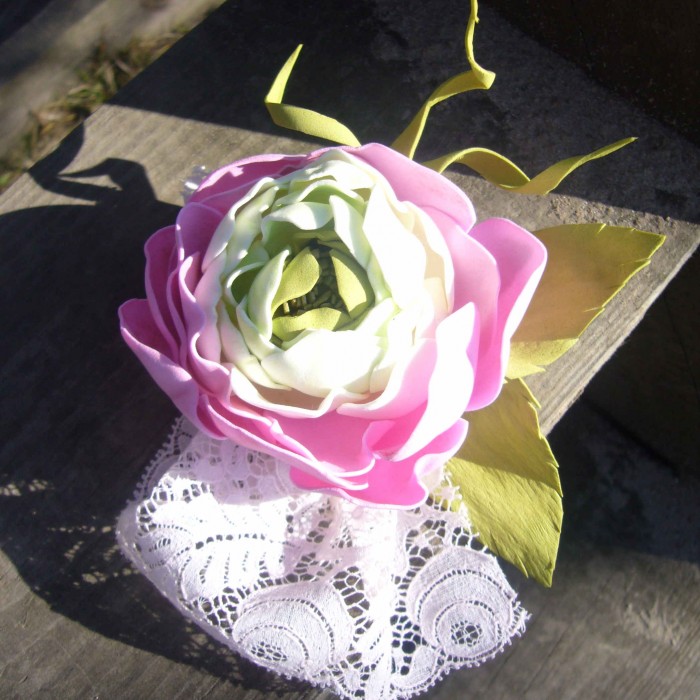
Flowers from Foamiran do it yourself
Foamiran appeared with us not so long ago, but found just crazy popularity thanks to a variety of colors and shades, easy to the structure and realistic products, which result in the result. The common name occurred from the same name Iranian factory, which produces this delightful material. The company saw an excellent opportunity for needlework in the material Foam, from which without any difficulties you can create intricate sculptures, flowers, toys, and so on.
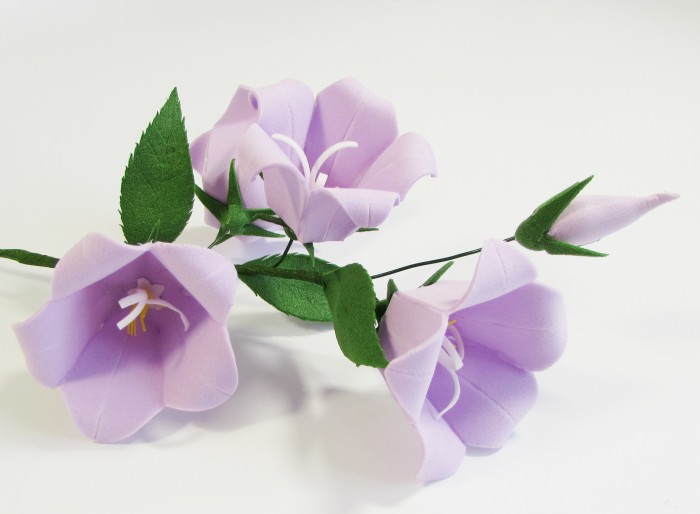
Bells from Foma
How to make small flowers from Foamiran do it yourself: patterns
Wreaths and dressings, jackets and pins, as well as the interior decor is simply impossible to imagine without these realistic small flower. They are simply made, they look great, and in care simple and durable. We offer an elementary master class for beginners, as a result of which we will create a delightful bouquet of violets.
We will need:
- Two leaves of phoamiran violet and green
- Toothpick
- Wire
- Yellow Tint Beads
- Hot glue
- Pot and gypsum if you "disembark"
So, proceed
- Cut out of cardboard flower pattern
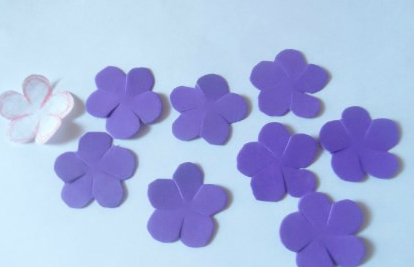
How to make small flowers from Foamiran do it yourself
- We put on the Foamiran template and supply toothpick. Ultimately do not recommend drawing with a handle, as the traces will remain on the finished product
- Cut the flowers
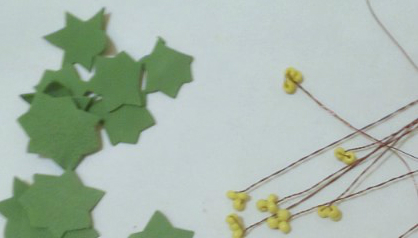
How to make small flowers from Foamiran do it yourself: cut out the details
- Cut the wire with a length of 20 cm. On each of them on the middle we ride 3 bispers and twist as in the photo
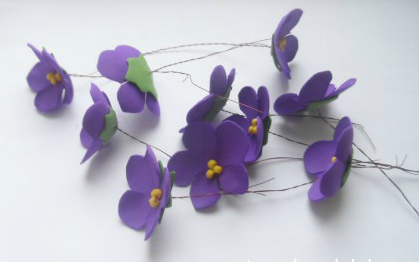
How to make small flowers from Foamiran do it yourself: We collect the items
- From the green phoamyraner, cut out the leaves in the same way as the flowers. We draw on the cardboard one leaf as in the photo, cut out and carry the toothpick on the material. Pay attention: leaves should be less flowers
- Heat the flowers slightly and give them a form
- In the middle we make holes with a seboard or toothpick
- We ride on the wire
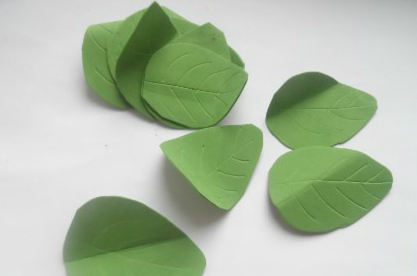
How to make small flowers from Foamiran do it yourself: Making leaves
- I repeat the same with the leaves and ride the wire
- Between the flower and the leaf ripping glue and press each other. Hot glue will also give a little "alive" flower shape
- At the request of the wire, we wrap a teep ribbon, but if the "Sadim" take-tape is not required
- We need a little green material. We cut out leaves from it, toothpicks drawn streaks and fastened to the wire
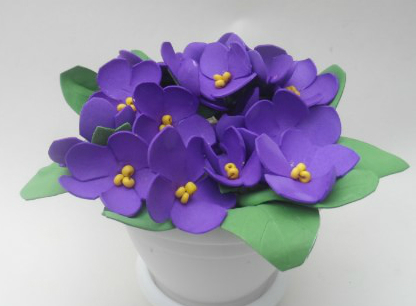
How to make small flowers from Foamiran do it yourself: Making leaves
- In the pot wept gypsum and "Sadim" our violets. But the need to fix the toothpicks so that the bouquet froze smoothly and beautiful
Video: Flowers from Foamyran. Forest violets. MK for beginners
How to make a bout of orchids from phoamyran for beginners, patterns?
A gentle flower is not lucky from everyone, but I want it so much. What to say about accessories with this magnificence.
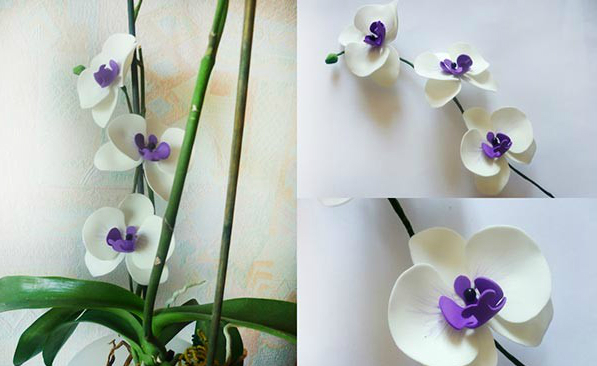
Foamiran orchid bud for beginners
We will need:
- Foamiran white, purple, green
- Black beads with a diagonal not more than 5 mm
- Wire
- Foil
- Floral wire
- Candle, Shilo, Scissors, Toothpick
- Hot glue
Master Class:
- Orchid consists of the core and 5 petals. We supply the template and cut out. Optionally, we increase or decrease the size of each detail, but necessarily symmetrically
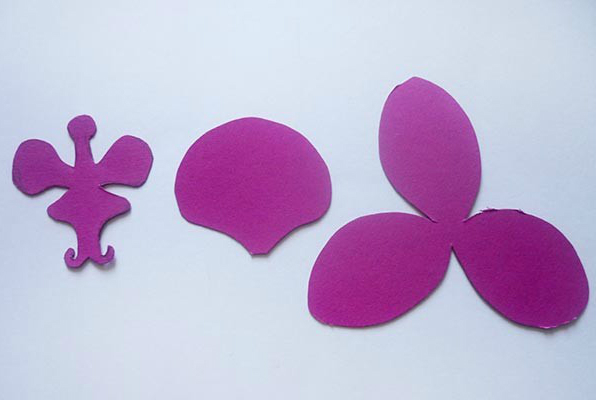
Bud Orchids from Foamiran for beginners: Templates
- The average template will be requested so that the thin part is joined into another exactly the same thin part. Cutting them, leave the connected, that is, double
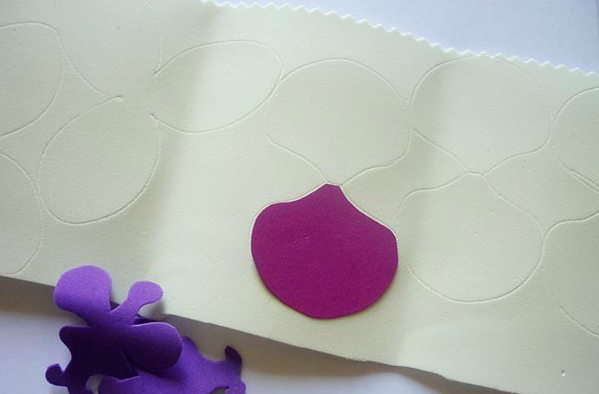
Bud orchids from Foamiran for beginners: cut out the details
- As in the previous one, the master class will circulate on the material of the contour toothpick, at will shill
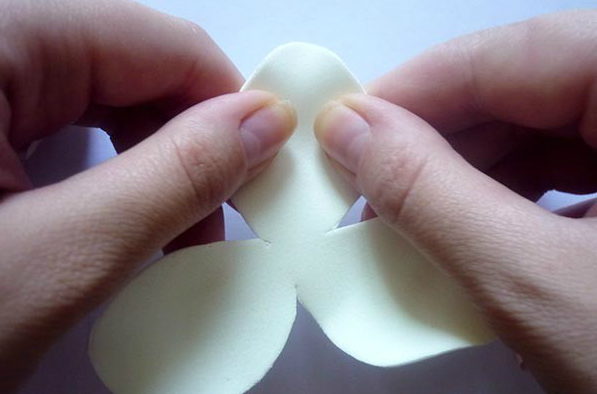
Bud Orchids from Foamiran for beginners: stretch the petals
- Finger hands a little warm the material and slightly stretch. We do it carefully not to damage the integrity of the material.
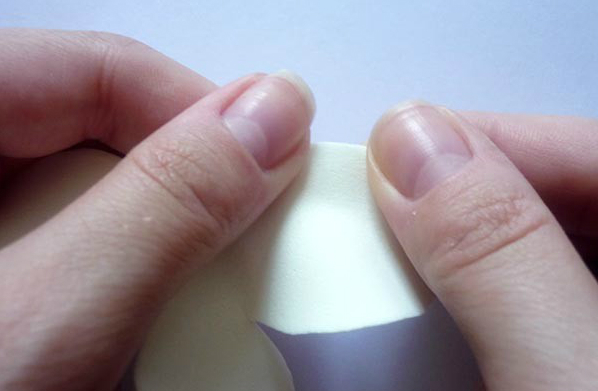
Bud Orchids from Foamiran for beginners: stretch the edges
- Stretching and convening a slightly convex form, go to the edges. They stretch so that they become a little wavy, like live petals
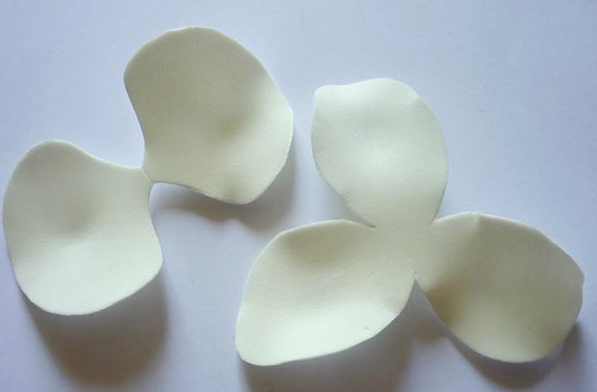
Bud Orchids from Foamiran for beginners: Petals Ready and only cut
- Petal is ready for the assembly. Go to the next. Especially carefully pass by thin places
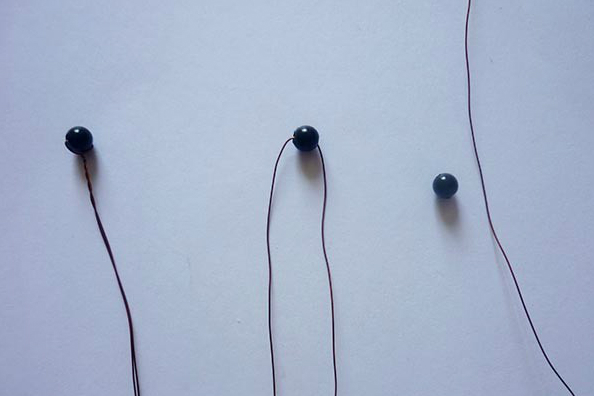
Bud Orchids from Foamiran for beginners: stamen
- Cut the wire with a length of 17 cm. We ride each bead and tips twist as in the photo
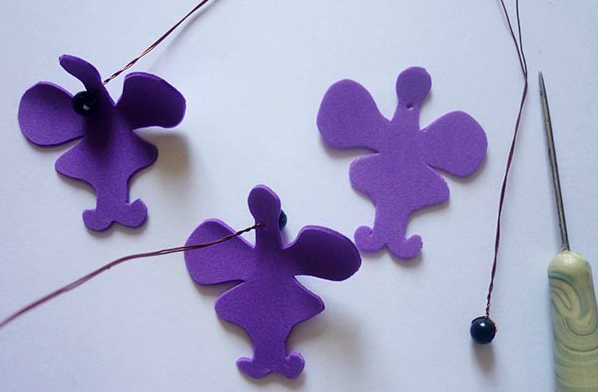
Bud Orchids from Foamiran for beginners: We start assembling
- We take the core. Desert a hole at the top of the details (as in the photo) and we ride a wire
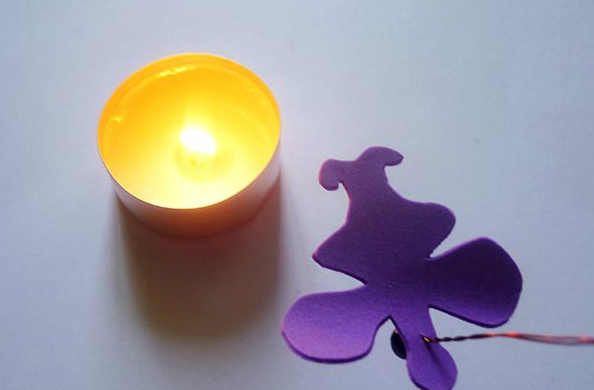
Bud Orchids from Foamiran for beginners: Warm core
- We light the candle. Above it at a height of approximately 20 cm. Hold the workpiece. As soon as she starts to turn around - we clean
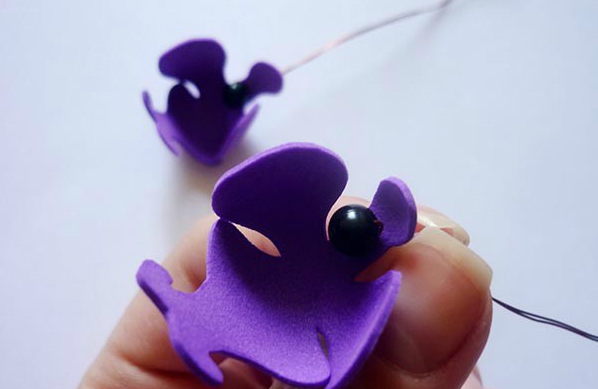
Bud Orchids from Foamiran for beginners: fix the core
- Shell on the petals make holes and ride as in the photo
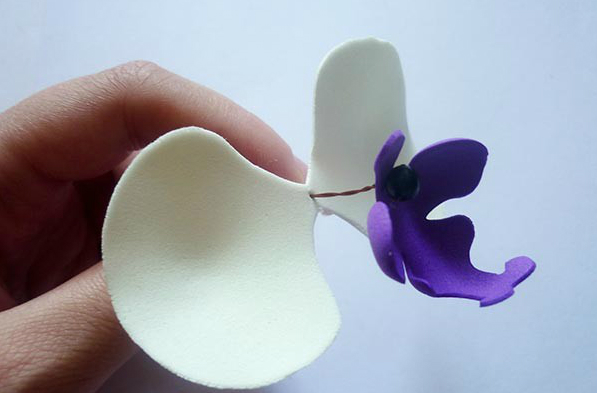
Bud Orchids from Foamiran for beginners: assembly
- Also Breppy Self Triple Detail
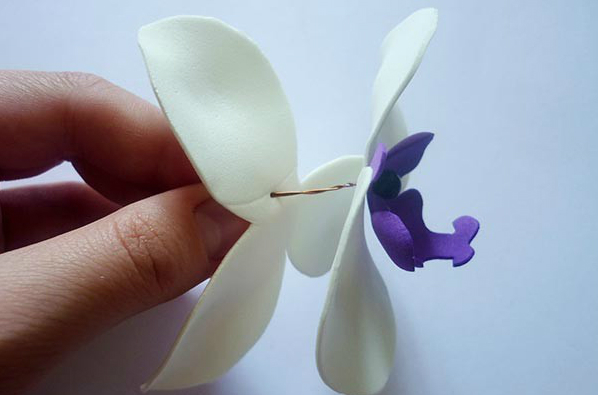
Bud Orchids from Foamiran for beginners: Freakym second petal
- Violet ballpoint handle drawn bodies on double petals. From the middle to the edges of the fan (again we look at the photo)
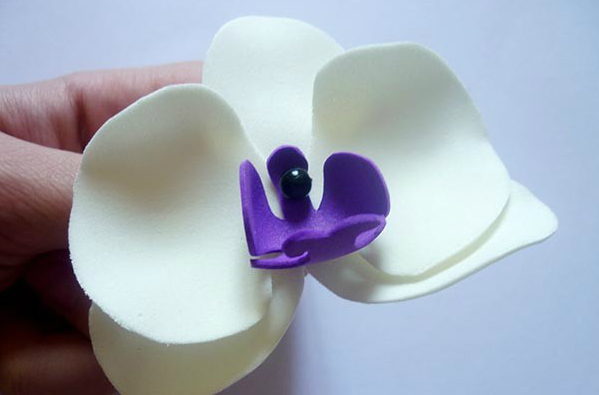
Bud Orchids from Foamiran for beginners: Forming a flower
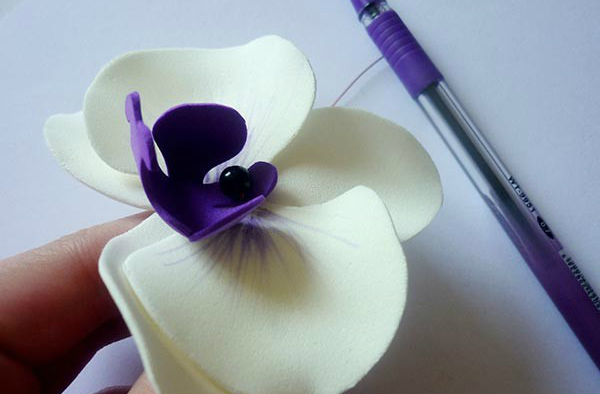
Bud Orchids from Foamiran for beginners: Draw a streak
- We drip onto the wire with hot glue and warm the foil at the top. Drop shape about 10 mm long
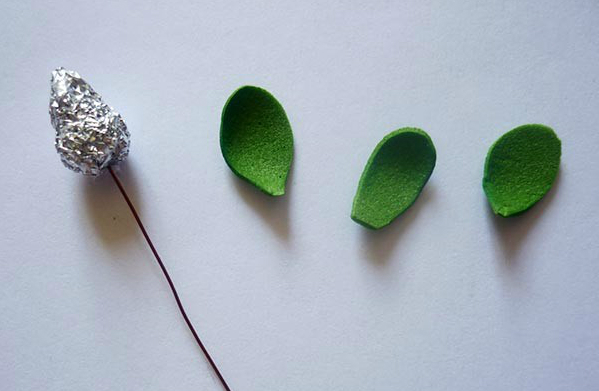
Bud Orchids from Foamiran for beginners: bouton
- Green Foamiran Cut the leaf-drops with a length of 15 mm and 10 mm width. Heat over the candle a little and form the volume. Glue on Foil.
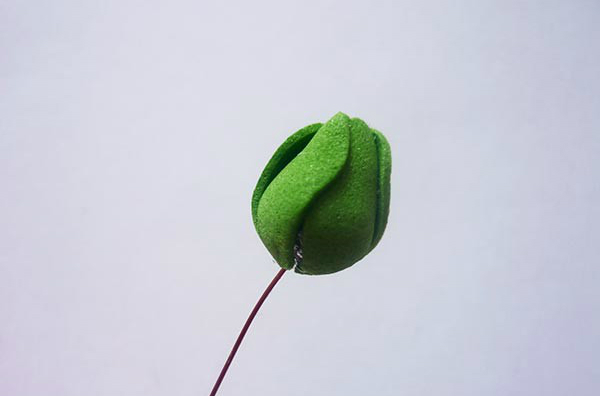
Bud Orchids from Foamiran for beginners: Budster Ready
- Details are ready, let's start collecting them together. On the floral wire we wake a green bouton, the tip of the wire is wrapped as in the photo. The tip of the bud must persist in the wire tip
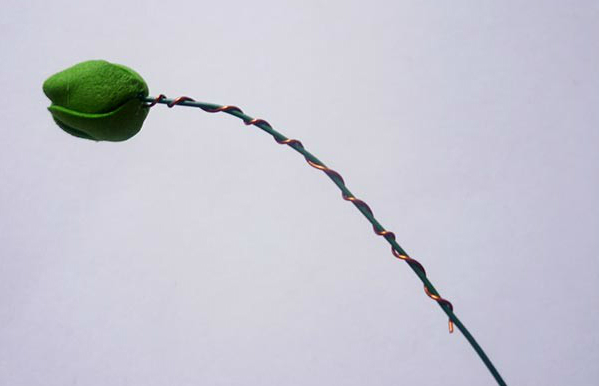
Bud Orchids from Foamiran for beginners: Freedom bouton to floristic wire
- Rates from the bouton of 60 mm, we also attach a flower. But here the flower does not rest in the wire, but on the contrary, hanging at a distance of 15 mm
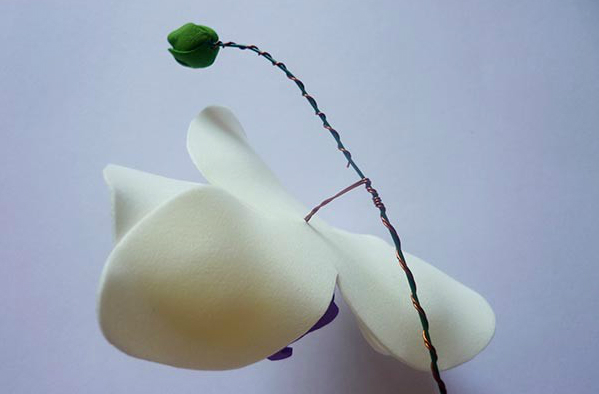
Bud Orchids from Foamiran for beginners: Floor Flower to floral wire
- Tighten two more flower
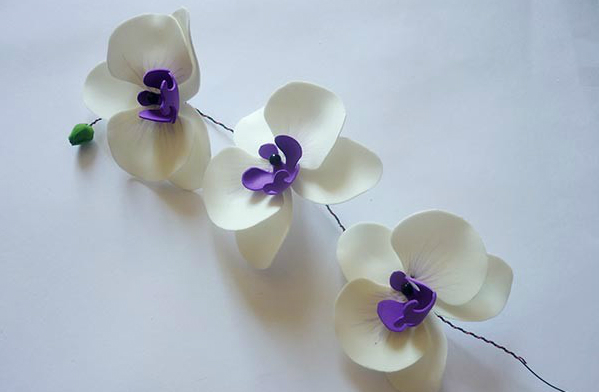
Bud orchids from Foamiran for beginners: Fresh all details
- Wrapping wire teip-ribbon
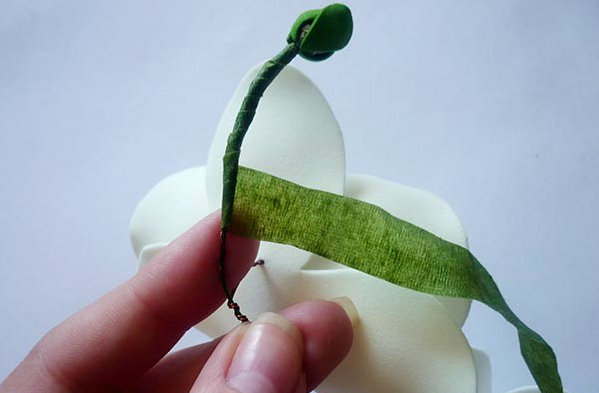
Bud Orchids from Foamiran for beginners: wind ribbon
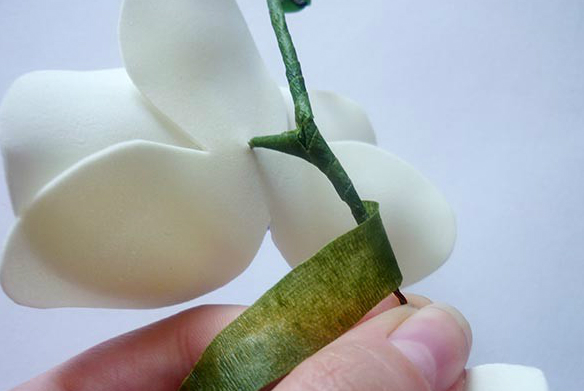
Bud Orchids from Foamiran for beginners: wind ribbon
- Conaches fix hot glue. Put / lie the branch of orchids and enjoy beauty
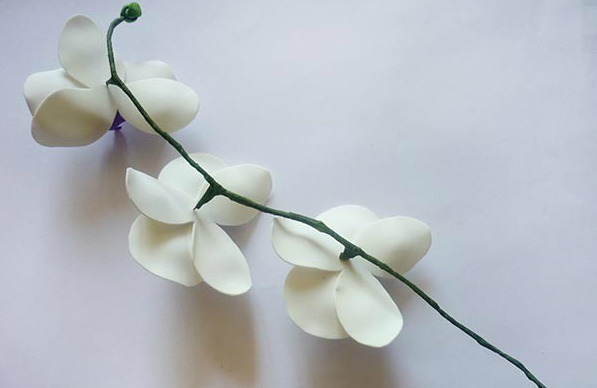
Bud Orchids from Foamiran for beginners: Fix the tape
Video: Orchid from Foamiran. Flowers from Foamyran Master Class
Flowers from Foamyran, Orchid, Templates
We have prepared simple and interesting patterns that will help in the manufacture of beautiful colors.
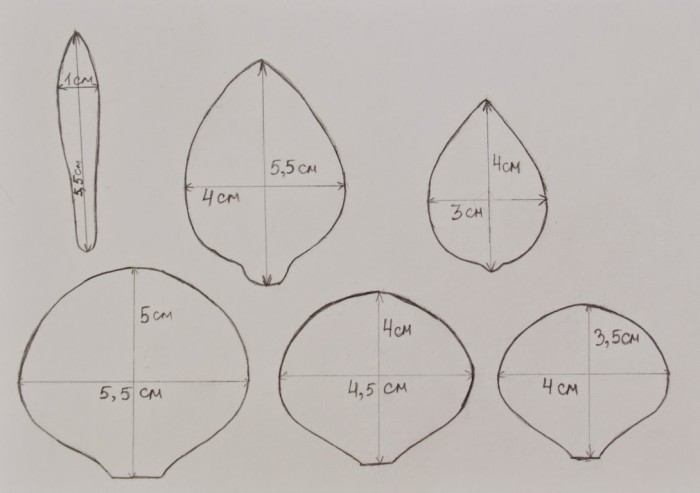
Flowers from Foamyran, Orchid, Templates
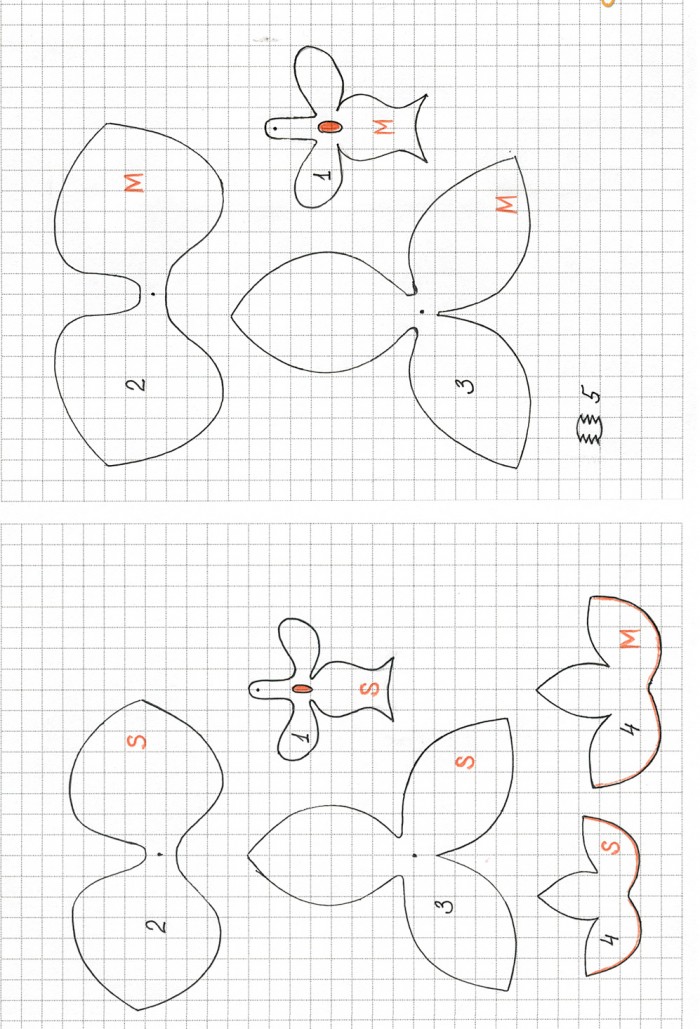
Flowers from Foamyran, Orchid, Templates
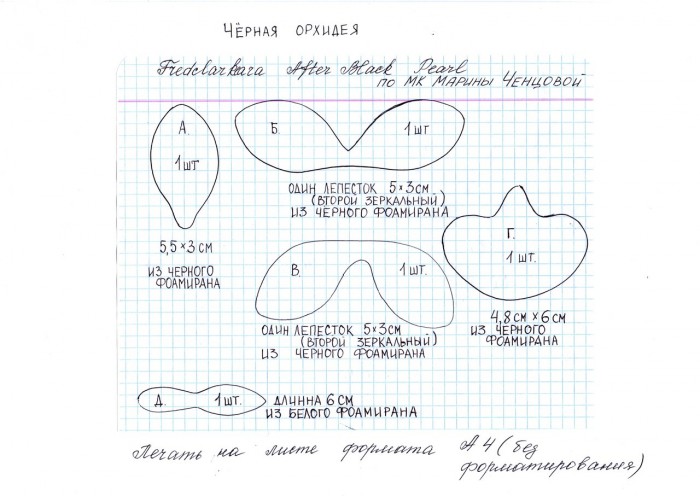
Flowers from Foamyran, Orchid, Templates
Flowers from Foamiran, Peony: Master Class
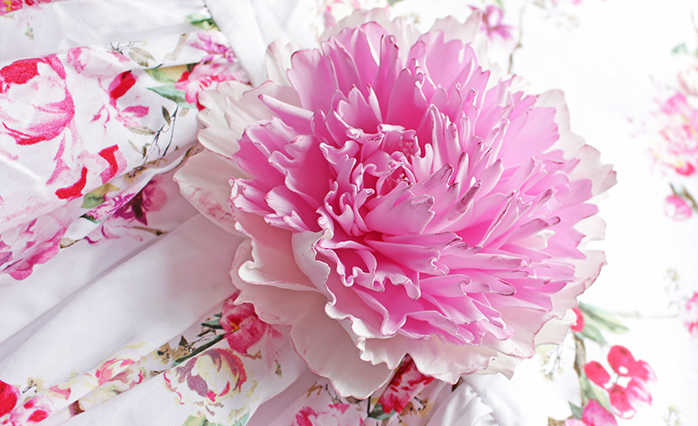
Peony from Foamyran
Large, beautiful bud just strongly conceived for a feminine gentle image. It is often discarded, as the work seems to be volumetric, and if you see other master classes, and over the complex. We are looking for rationality, speed and simplicity. That is what we will show in this MK.
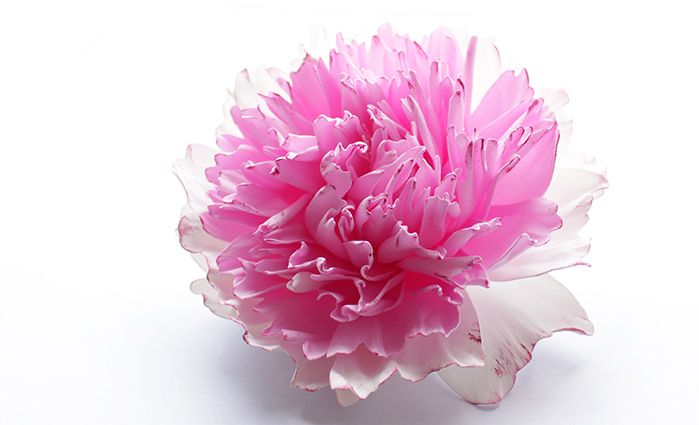
Peony from Foamyran
NOM will need:
- Slim (0.5-1 mm) Foamiran Pink, Dark Pink and White Color
- Wire Floral thickness no more than 0.8 mm
- A wooden bead with a diameter of 15 mm (color is not important, you can replace the bead from the foam, but it is necessarily something easy)
- Superchalters (hot too thick layer will give)
- Depending on where the flower of the rim, the hairpin, the base for brooches
- Scissors, nippers, hot glue
Master Class
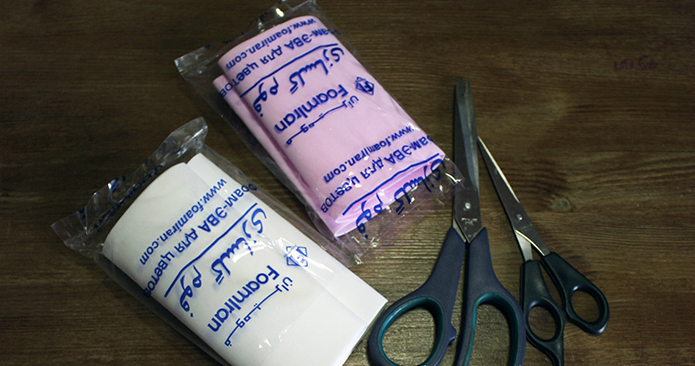
PION from FOAMIRAN: Material
- Cut the strips of 4-6 cm. In our case, we used 2 identical pink pieces and 1 white. But for more realistic bud, it is also preferably to take three tones
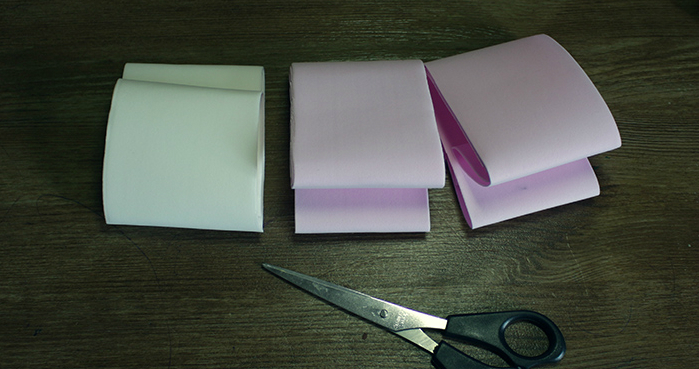
Peony from Foamiran: Cut by Fom
- Write on the cardboard templates and cut out. The first few petals can be cut from the template to the toothpick material, and then on the eye. After all, each petal can be unique
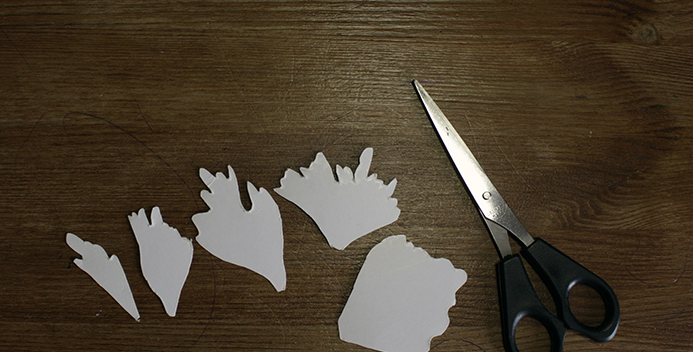
Peony from Foamiran: Templates
- Cut to start work about 70 pcs. The most narrow with a dark pink (core) that thicker - pink, the widest - white
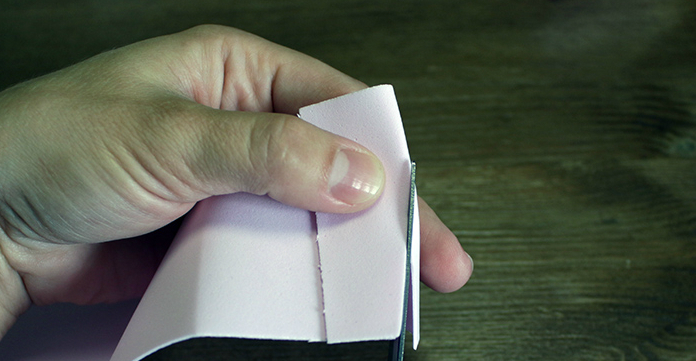
Peony from Foamyran: Cut the petals
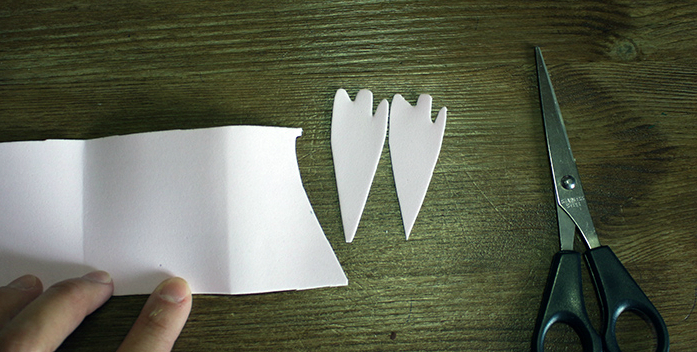
Peony from Foamyran: Cut the petals
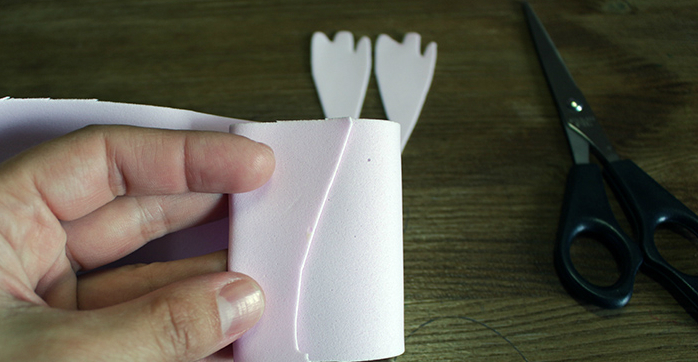
PION from FOAMIRAN: Cut the petals turning fom
- If you initially cut the segments of the same width, then you will not be difficult even to cut the right petals. Only accurate length is important, the width may vary slightly. Each subsequent petal comes into contact with the previous on the canvas. Look like a photo
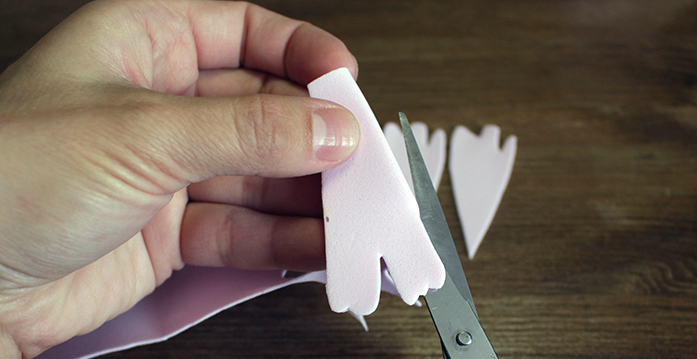
Peony from Foamiran: Cut the petals with unique edges
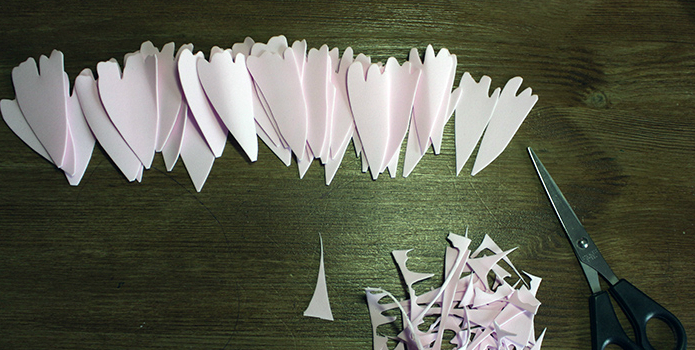
Foamiran Peony: Small Petals
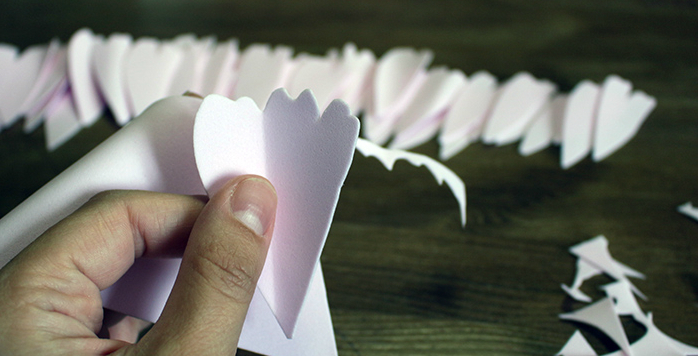
Peony from Foamyran: Middle Petals
- From the second color (lighter) cut out the sewn. Recommended the wavy edge arbitrarily, without using a template. So the flower will turn out more realistic
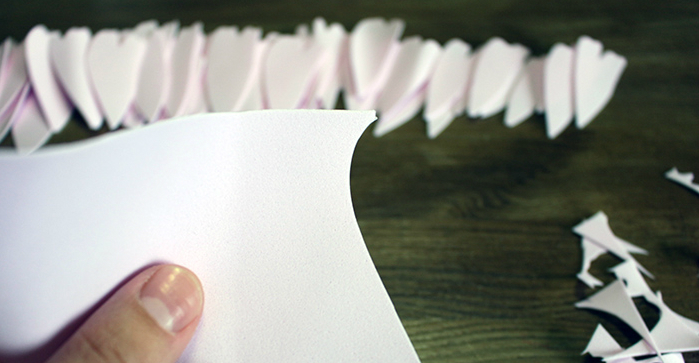
Peony from Foamiran: Do not forget to turn the bag
- Each time, cutting the petal, turn the piece to save the material
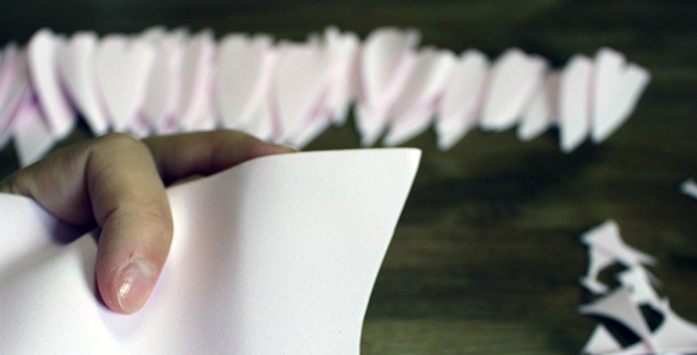
Peony from Foamiran: Do not forget to turn the bag
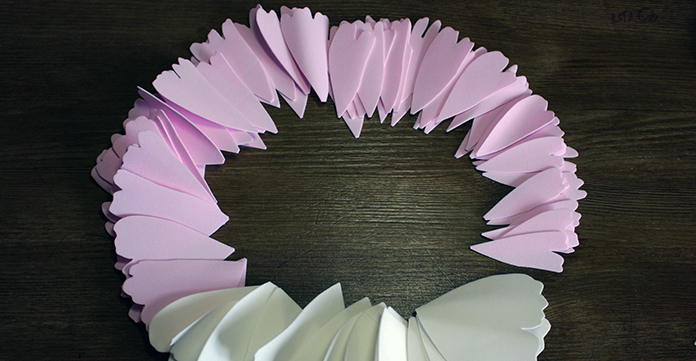
Foamiran Peony: Petals Sliced
- The next piece is white and the petals are the widest

Peony from Foamiran: residues
- Note that the residues are quite a bit
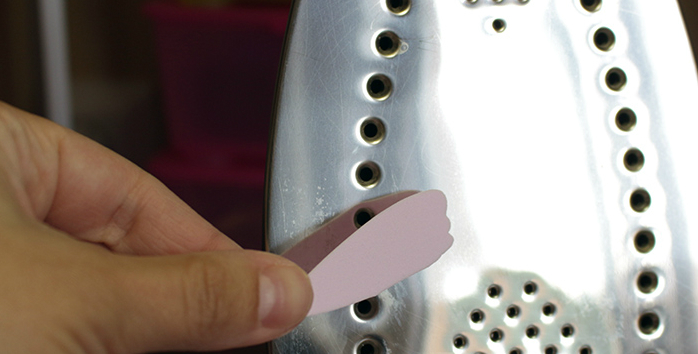
Peony from Foamyran: Warm on Iron
- Heat the iron, bring the petal and let it warm up a little. Watch not overheated, since you risk reduce it in the amount of several times, make hard and not elastic
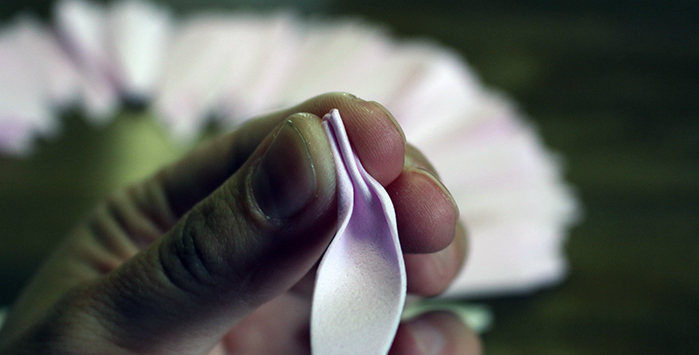
Peony from Foamiran: form petal
- The heated element fold the harmonic and roll between the fingers. Stretch a little material, but not much
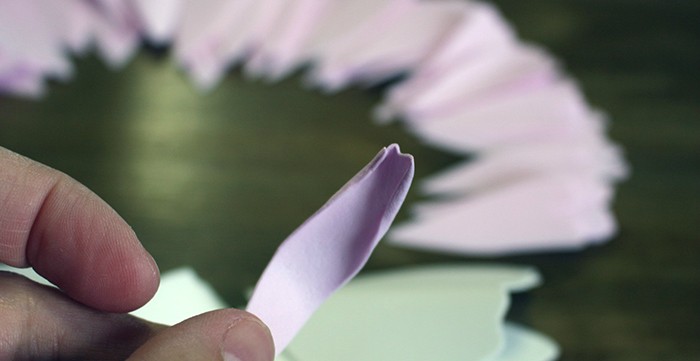
PION from FOAMIRAN: straighten the petal
- Open the petal, placing the edges several times. The edges turned into "fibrous" and more tender
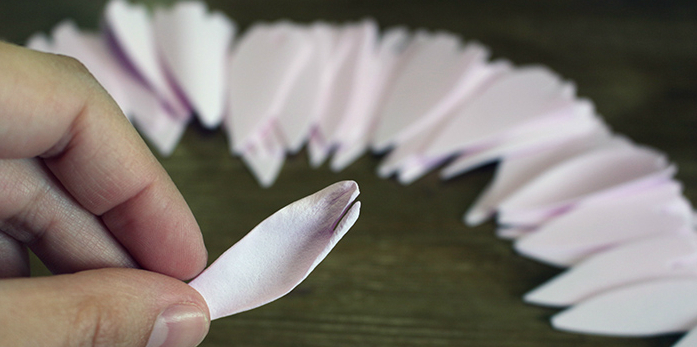
Peony from Foamiran: Washing the Petal
- Click on the middle, a little bending the petal around the edges. It turns out a bulk form as a "boat"
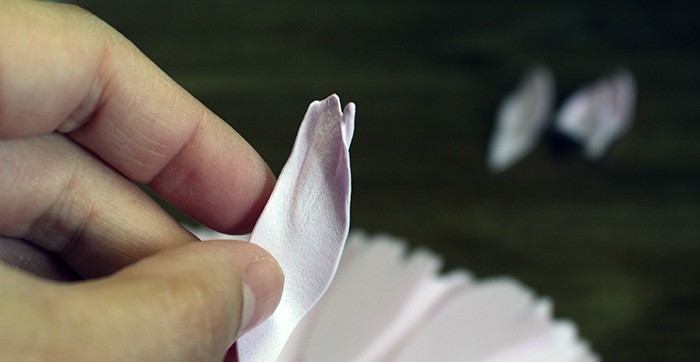
Peony from Foamyran: Ready Petal
- Stretching, move neatly, watch the petal did not break
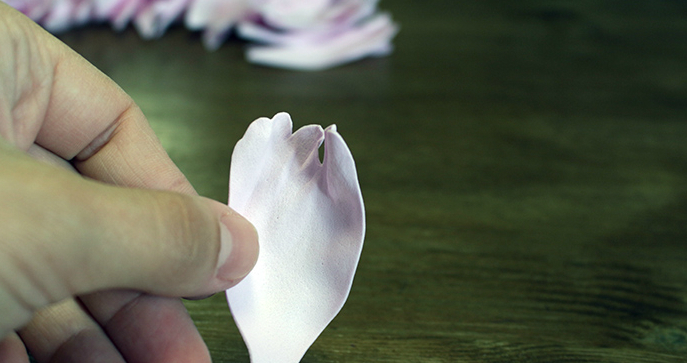
Peony from Foamiran: Large Petal
- Processing of petals will require a lot of time and strength, so we do not recommend starting such creative people
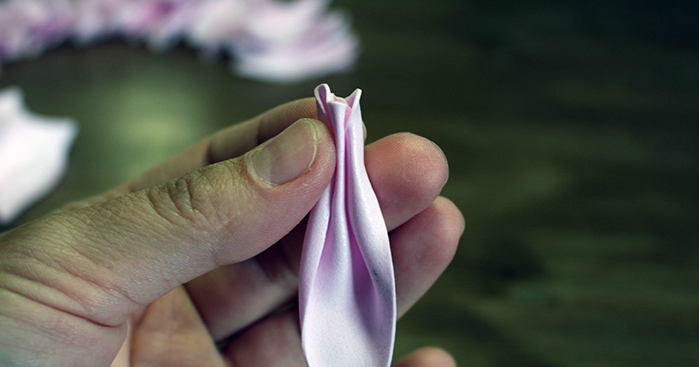
Peony from Foamiran: Form the following petal
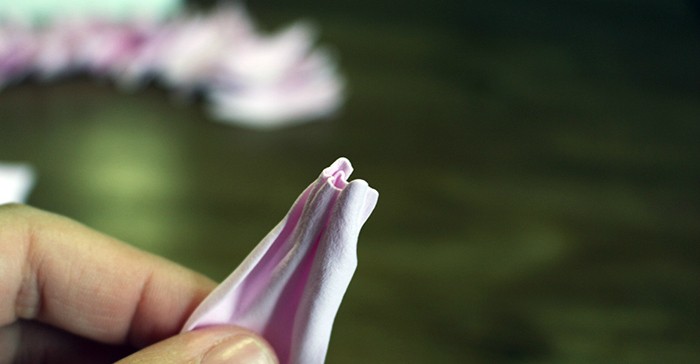
Peony from Foamiran: Squeeze the petal
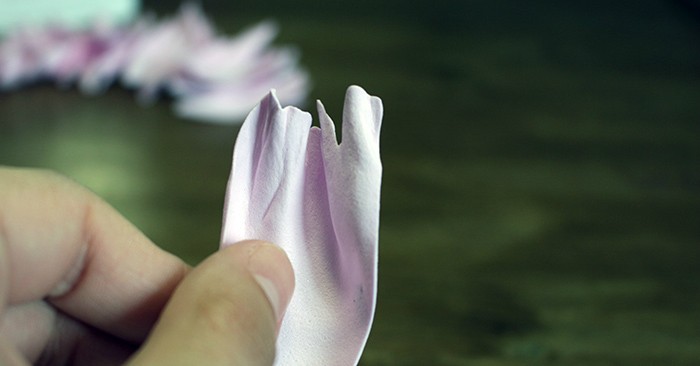
Peony from Foamyran: form a large petal
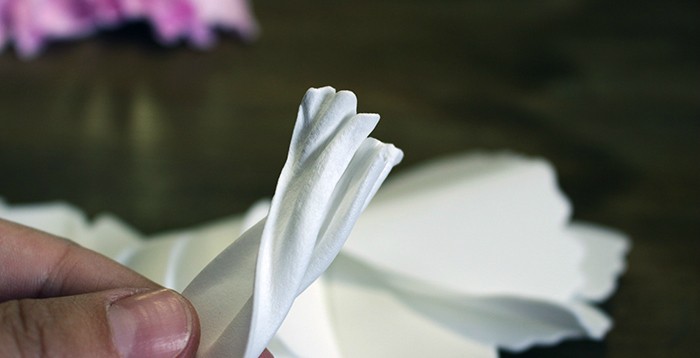
Peony from Foamyran: slightly stretch the petal
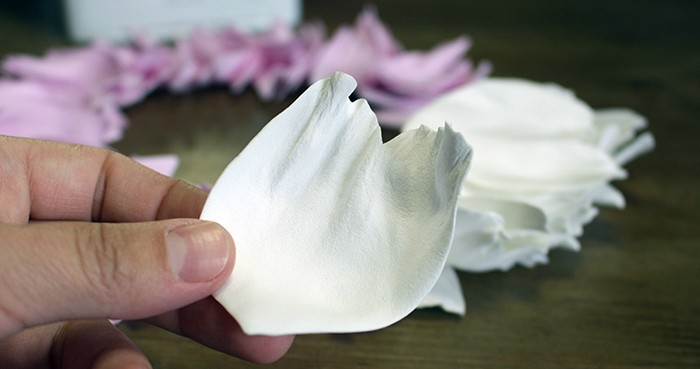
Peony from Foamirana: what should come out as a result
- For convenience, lay out petals in a circle in order

PION from FOAMIRAN: Ready petals for assembly
- We recommend to take a wooden bead for the base, the Foamyran is well glued to it, unlike foil, and the tree does not eat super glue as foam. We produce a floristic wire through the bead and twist as in the photo. We carry a strip of glue and glue the first petal
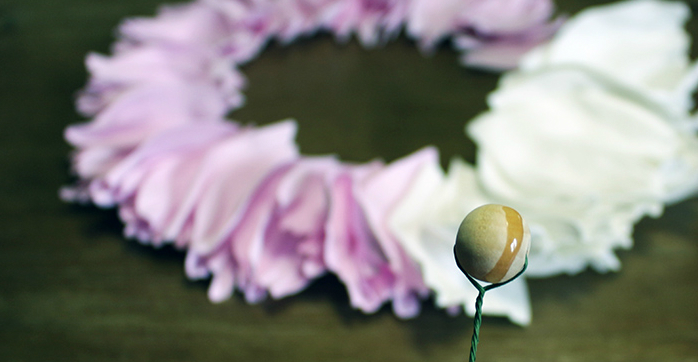
Peony from Foamiran: Bead
- I don't just apply the petal, namely press to work out as in the photo. The core should not be visible in the final version.
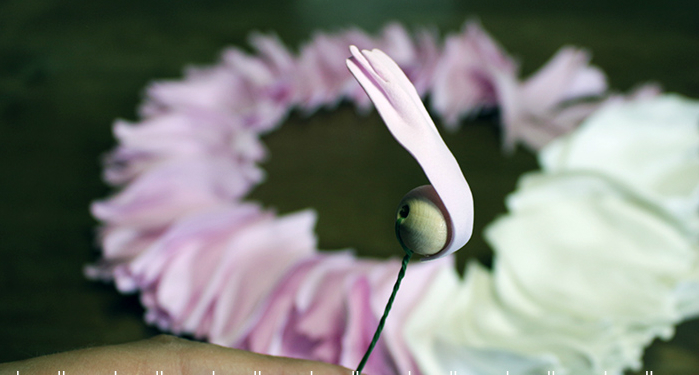
Peony from Foamiran: glue petal
- Further, in a circle one by one glue, first all the dark, then those that turn, and at the end quite white
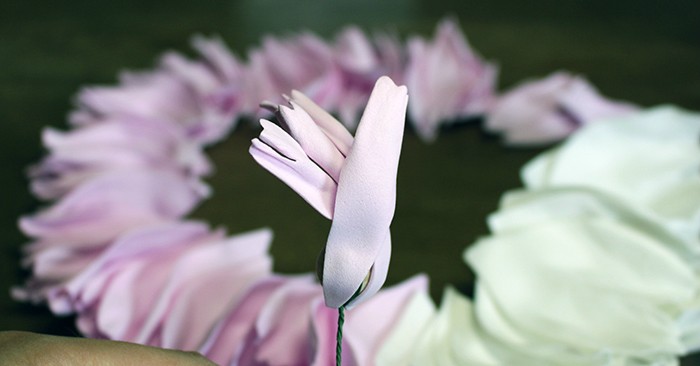
Peony from Foamiran: glue second petal
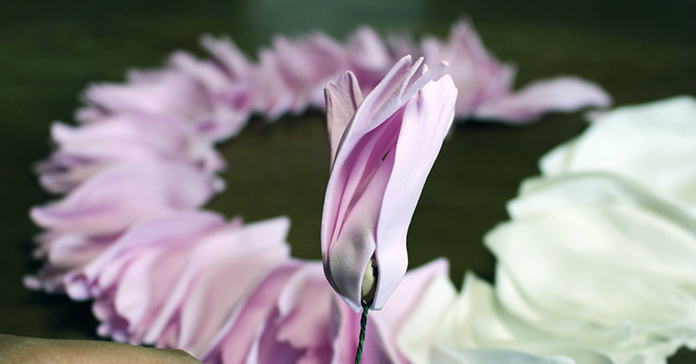
PION from FOAMIRAN: We put a bead
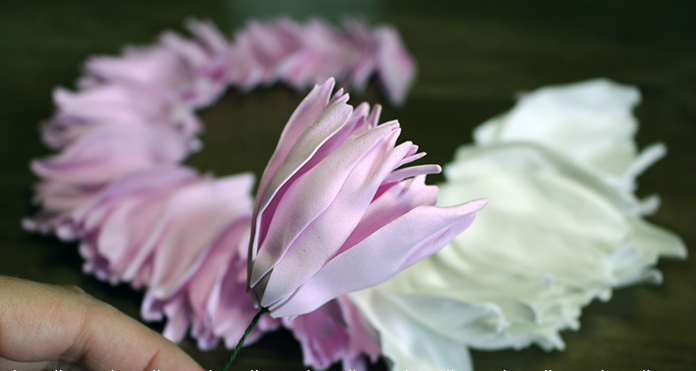
Peony from Foamiran: glue one by one
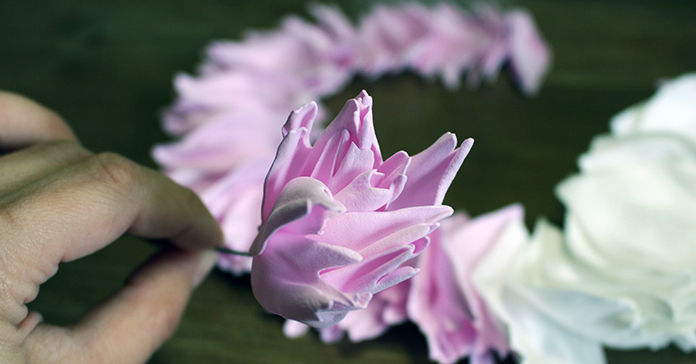
Peony from Foamyran: Watch that the petals lay down a little chaotically
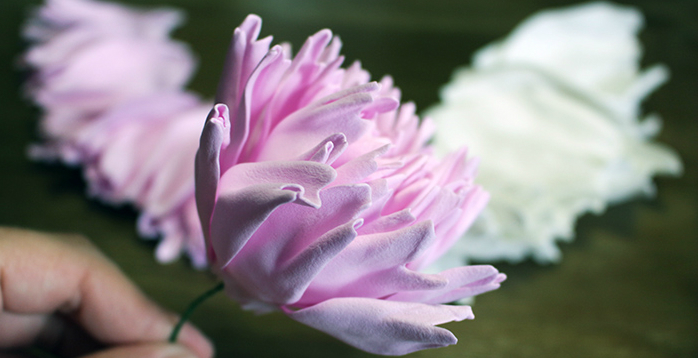
PION from FOAMIRAN: I get straightened each time the petals
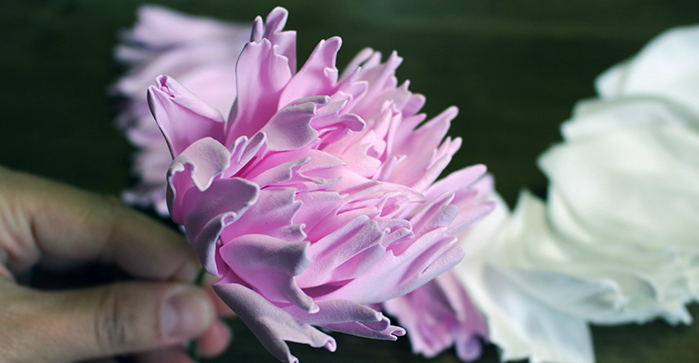
Peony from Foamiran: go to the next tint
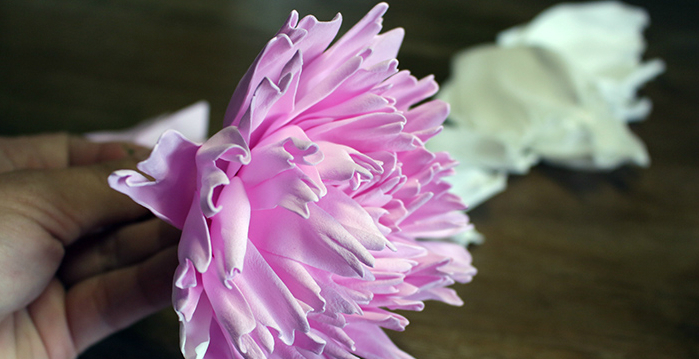
Peony from Foamyran: bud is quite large and glued inconvenient
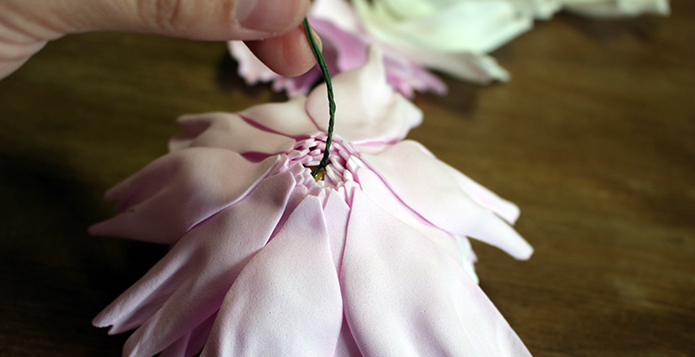
Peony from Foamiran: turn the bud
- When the bud becomes larger to scam from the bottom, so we turn the wire up and on the glue
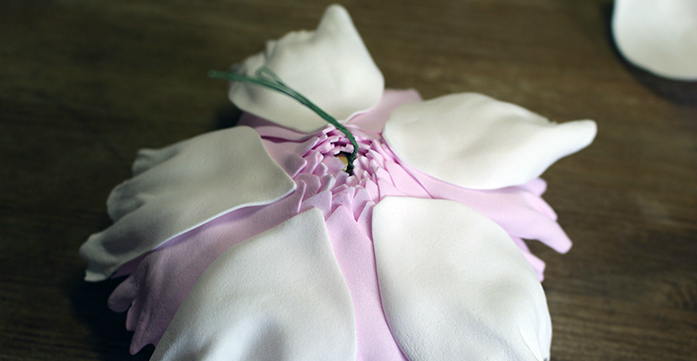
Foamiran Peony: White Petals
- We reach white. 5 white petals glue at the same distance from each other. The following row closes gaps
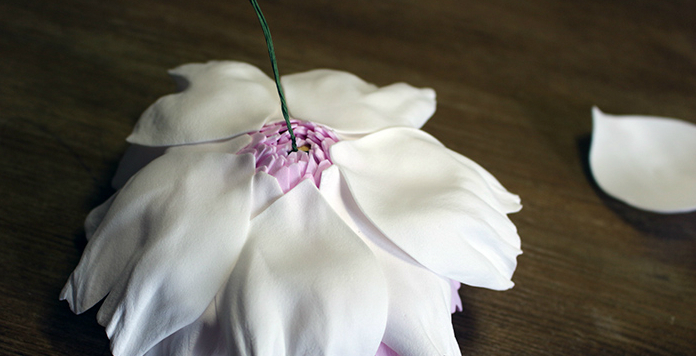
Peony from Foamiran: Second Layer of White Petals
- If there are still petals - distribute them evenly. I have 3 left and I decided to also attach them
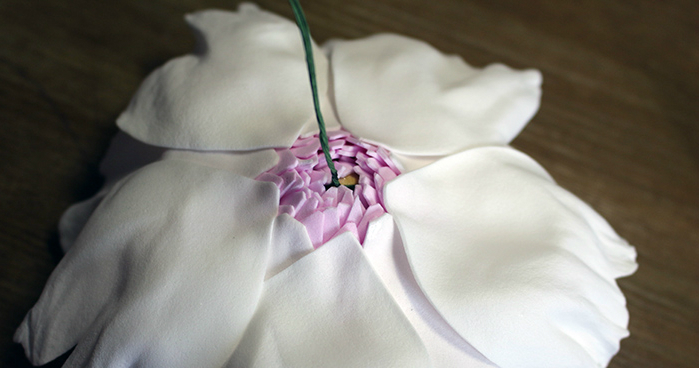
Peony from Foamyran: Print the latest petals
- Peony ready! It remains to bite the wire, drop the hot glue on the core and stick to the pin
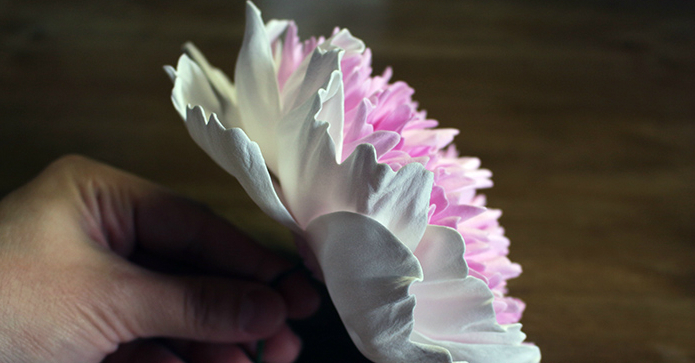
Peony from Foamyran: Checking if all the petals lie correctly
- For those who did the first time and allowed some of the oversight, in the frequency visible beads, you can hide it, sticking the stamens
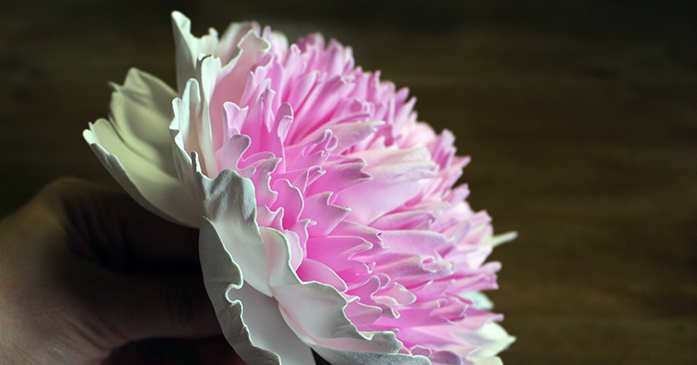
Peony from Foamiran: Bud is almost ready
- To impart naturalness and effectity, open a bit of dry burgundy pink pastels, moisten a napkin and blot around the edges. Drink a hairdryer with cool air
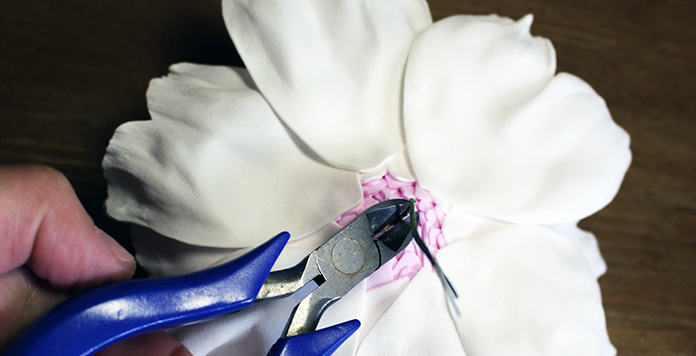
Peony from Foamiran: Cut off the excess wire
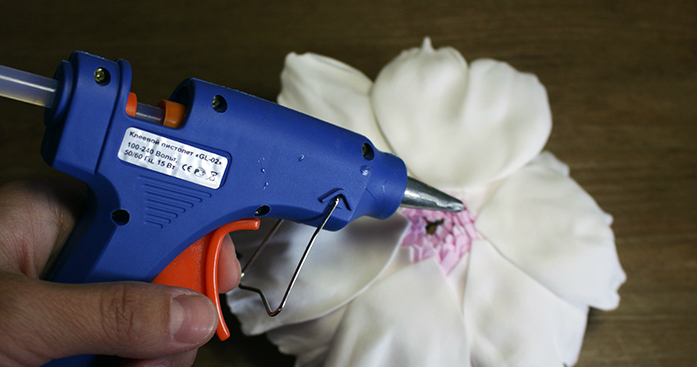
Peony from Foamiran: Additionally, we sample
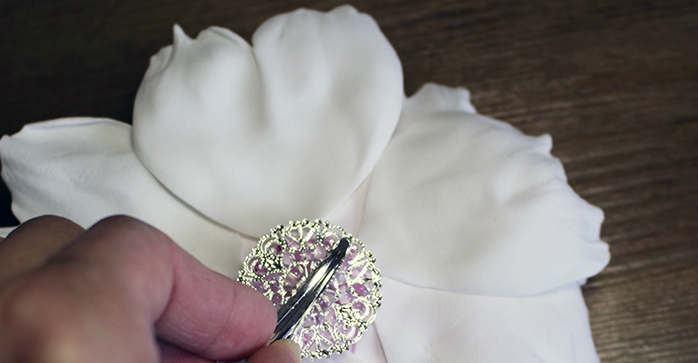
PION from FOAMIRAN: We are lining to brooches
- Peony is completely ready!
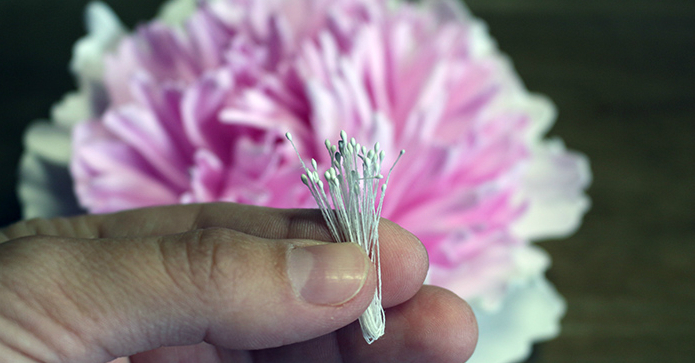
Peony from Foamiran: At the request of the glue of the stamens
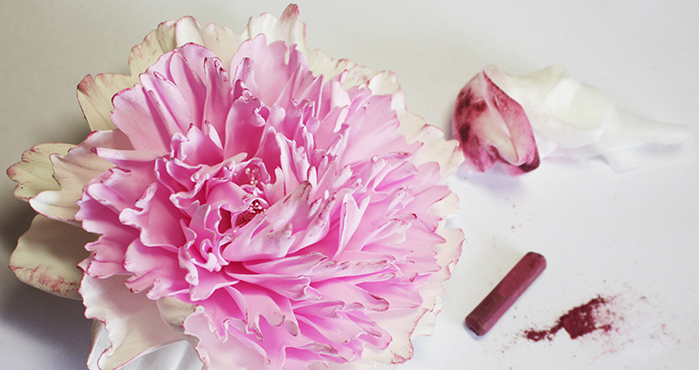
Foamiran peony: Tinging
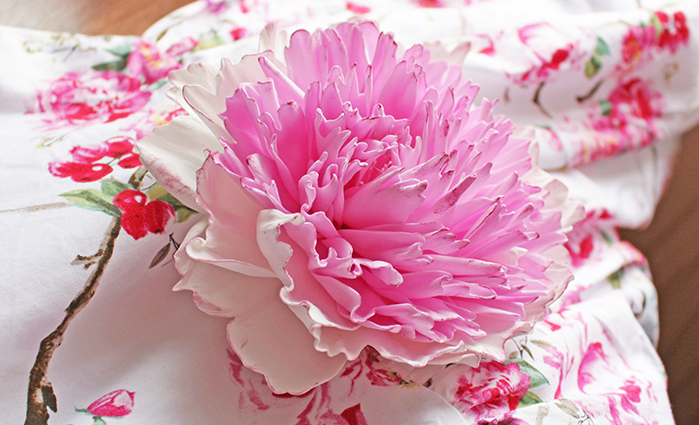
Peony from Foamyran: Ready
How to make Ranunculyus from Foamiran
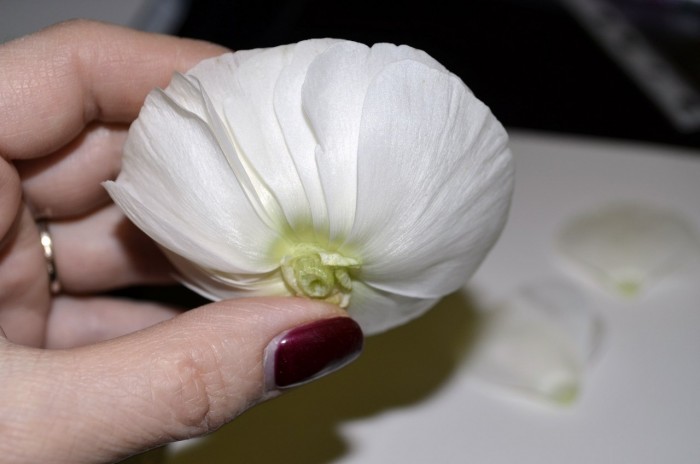
How to make Ranunculyus from Foamiran: Simple MK
Delicate flower with the finest petals as if created by nature. But looking at it can be understood that with Thomas. All ingenious simply, and with us. We simply disassembled the flower viewed as nature created, and embodied beauty with Foamiran.
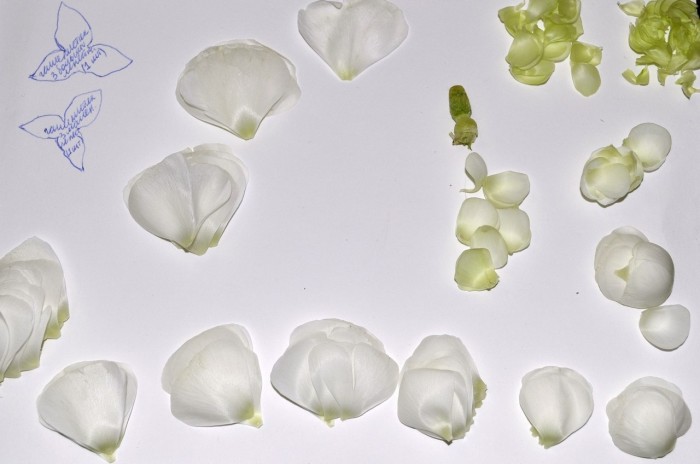
How to make Ranunculyus from Foamiran
- We created a template and signed the number of petals of each size. Completely small cut from a salad foma, the rest with a white-dairy
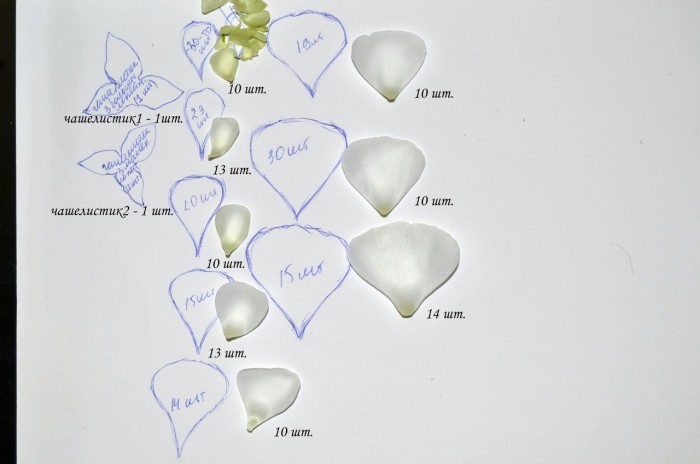
How to make Ranunculyus from Foamyran: Cut the petals
- Everyone cut out, heating a little, pull the "boat" on the middle and stretch the edges as in the photo
- The assembly is simple - on the ball with foil or wooden beads. It has a wire and twisted in the hartus
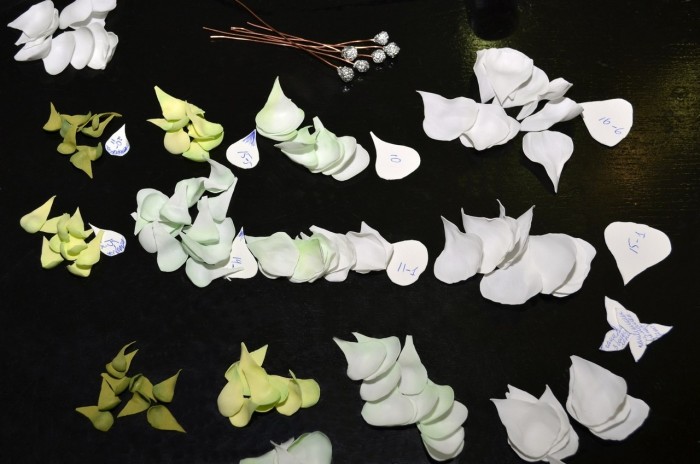
How to make Ranunculus from Foamiran: Getting to the assembly
- The drop of glue and glues the thinnest and small petal. Next one by one
- Initialing the last large petal, we glue two three hundred prehending pre-doing the selection hole in the middle
- Additionally, we paste glue to the flower tightly held
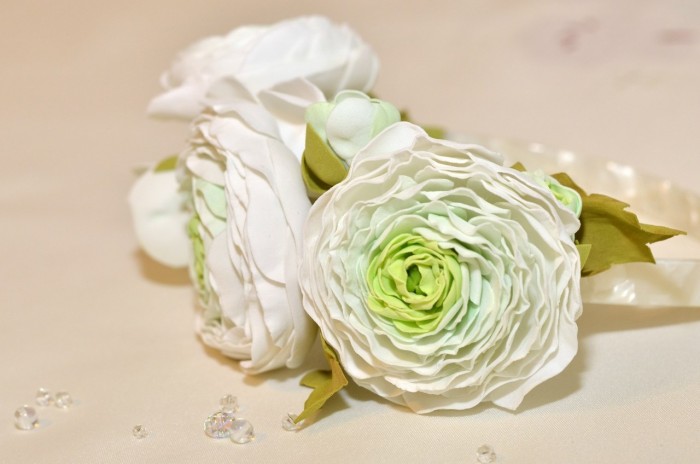
Ranunculyus from Foamyran
- Attach Teip-summer and turn around the wire, the tip is also lining
- Fix flower on brooches, rim, hairpin at will
How to make wildflowers from Foamiran do it yourself: templates
From the previous master classes, the principle of assembling flowers can be easily assimilated. But there are minor wildflowers, the assembly of which is elementary, but the patterns of petals and leaves are needed. In this section you will find this particular.
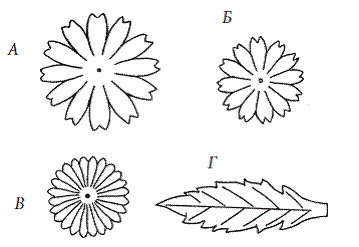
field Flowers from Foamiran do it yourself: Templates
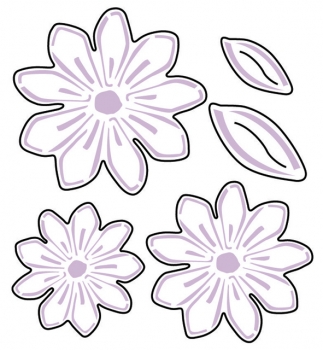
field Flowers from Foamiran do it yourself: Templates
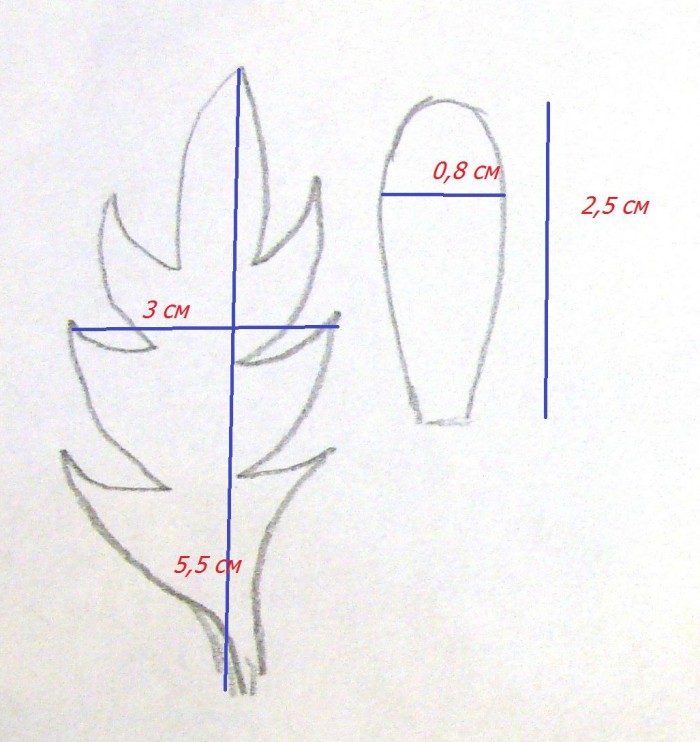
field Flowers from Foamiran do it yourself: Templates
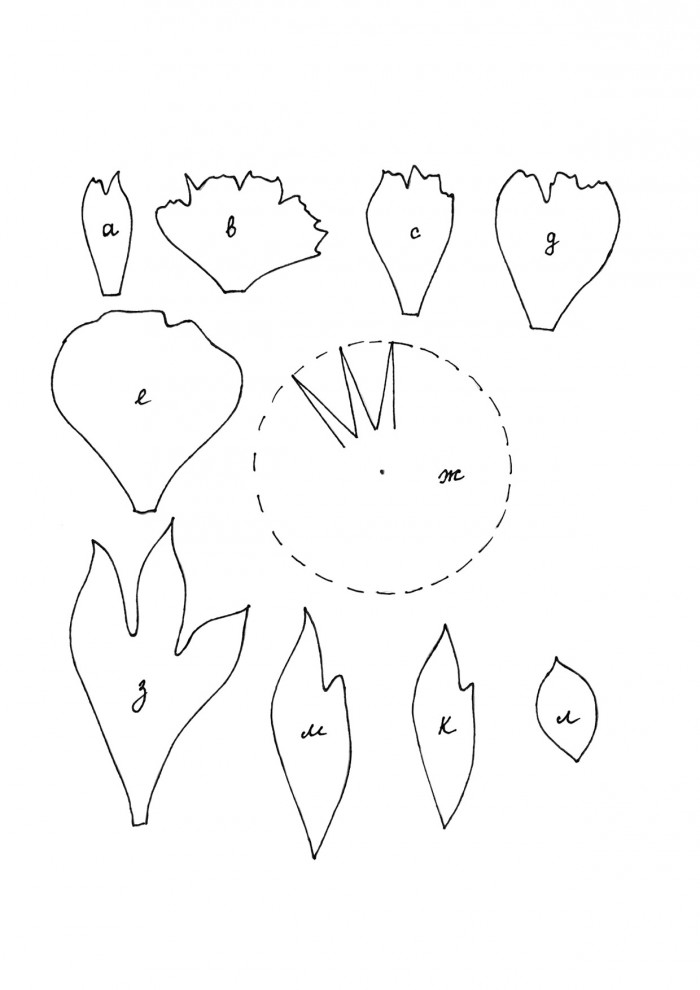
field Flowers from Foamiran do it yourself: Templates
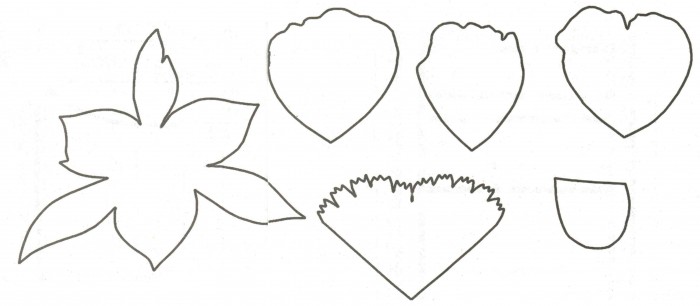
field Flowers from Foamiran do it yourself: Templates
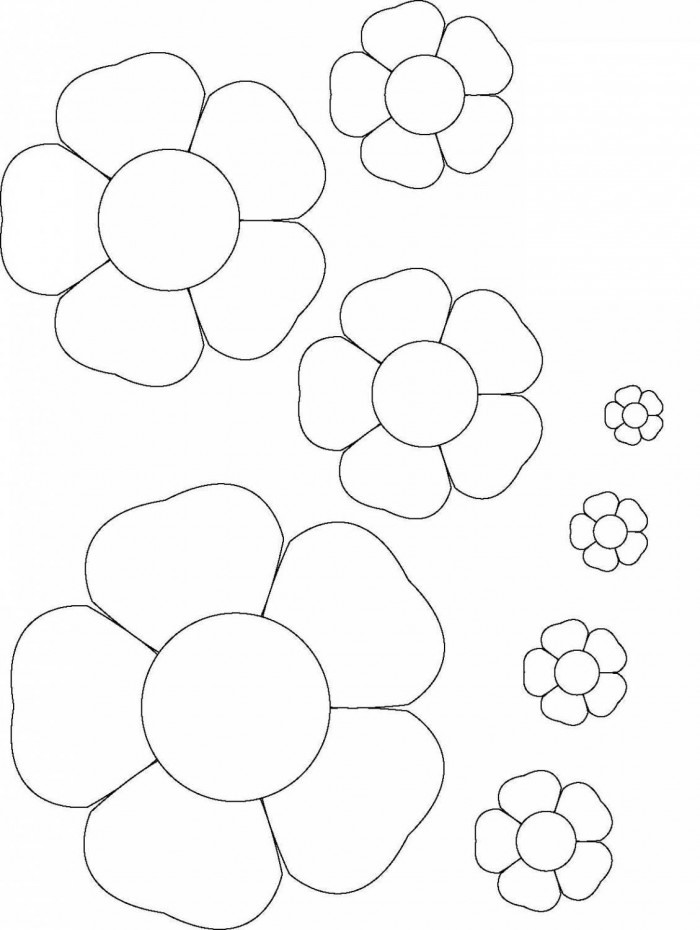
field Flowers from Foamiran do it yourself: Templates
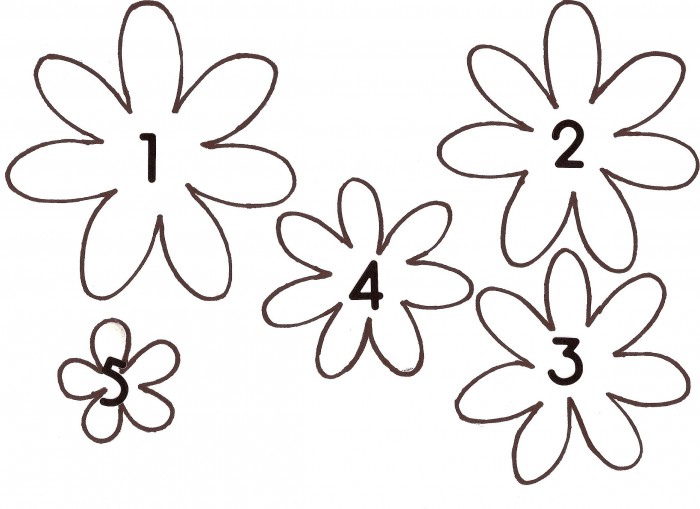
field Flowers from Foamiran do it yourself: Templates
Large Rose from Foamyran: Pattern Pattern
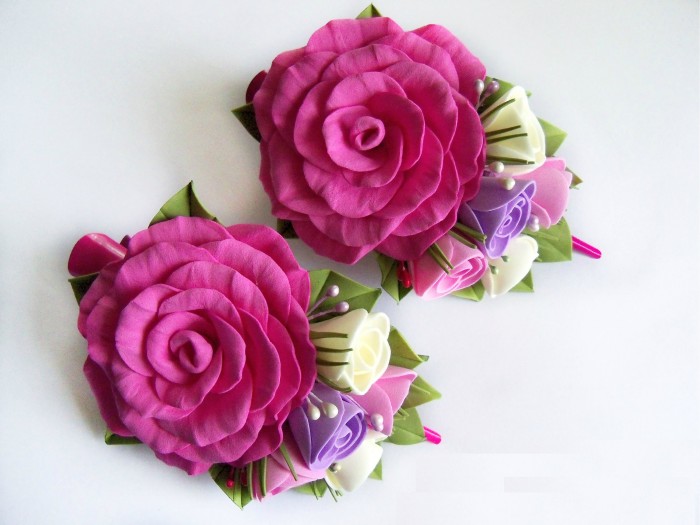
Large rose from Foamyran
Beautiful bouton is easy, but it looks quite realistic. Suitable for any age, and in the interior will become a unique decor.
For the manufacture of roses you will need:
- Two rubber sheet - red / pink / dairy at will and green
- Pekal (cardboard for them)
- A piece of foil
- Glue
The work is simply carried out, but for a long time, so before starting work it is worth stocking time and patience.
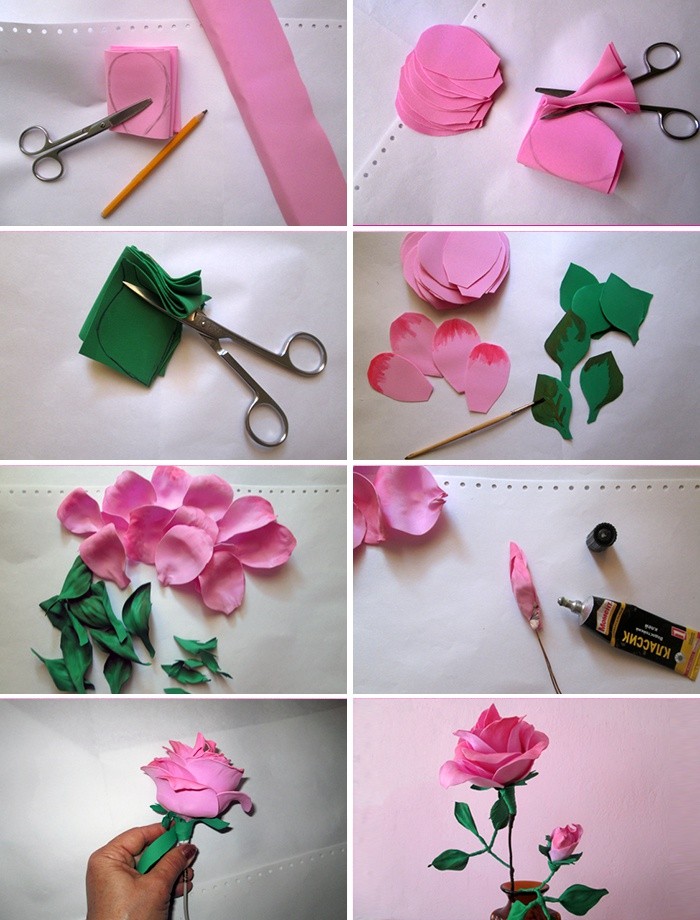
Large rose from Foamyran
- Cut the pattern: two petals of one form but of different sizes
- Unlock the FOM, we supply to the toothpick five times each leaf. As a result, 10 petals
- Turn on and warming iron
- We apply each petal, slightly warming up. I pull out first the middle, I warm up and stretch along the edges
- Basis: You can roll the ball from the foil, but if there is a wooden bead, we recommend using it
- Through the basis of the wire and twist
- The first small petals are sizing around the base
- The second we jeep around the first and tips pull and squeeze a little like in the photo
- Subsequent petals can be left so, but you can toned paint at will
- Each petal is glued to the first to the previous one. First small, then large
- From the green thomas cut out the leaves as in the photo, we give drying to dry
- Warm on the iron and form a leaf as in the photo
- Stick to roses branches
- Teip-ribbon we carry out the foundations of buds, leaves and all wires
Video: how to make a rose and rose bud from Foamiran. MK with patterns. / Foam Rose.
Flowers from Foamyran, Chamomile, Patterns
Gentle field flowers are decorated and complemented by field compositions. A simple master class must have to taste with needlewomen.
For a flower will need:
- White Foamyran.
- Cardboard for template
- Pastel Oil
- Line, pencil, transport
- Glue
So, go to step by step creation of a flower.
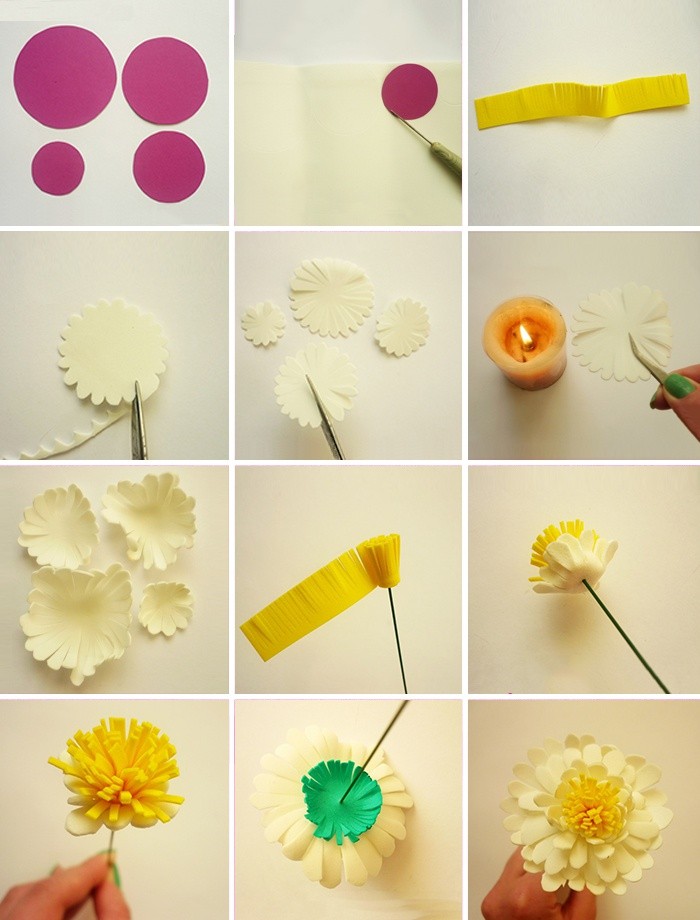
Flowers from Foamyran, Chamomile
- Take the cardboard and draw a circle with a diameter of 9.8.7 cm on it. Cut and transfer 3 times on the FOM. TOTAL 3 Thomas blanks in different diameter
- Core. Strip 2 * 27 cm. Drag in yellow and wait until it snacks
- I cut the entire strip in 1 cm with a fringe, twist tight and on the side where there are no cuts, we sample
- The circle needs to pierce the middle of the selection, and the edges of the cut, leaving the pristine diameter of 1 cm, round the edges
- Also to do with circles that are smaller
- Heat the iron, apply the petals and sprawl a little each
- Yellow middle permeate wire and fix
- On her you put on the smallest flower, then what is more, and the biggest
- Cut the green circle with a diameter of 5 cm, cut, like petals, but do not spin. Preheat, give a little form and ride a flower
- Over the candle heat the whole flower and form it completely
- I attach to the base, if necessary, turn the wire TEYP-ribbon
Video: Flowers from Foamiran, Chamomile, Patterns
Apple tree flowers, Apple tree branch of Foamiran, Pattern
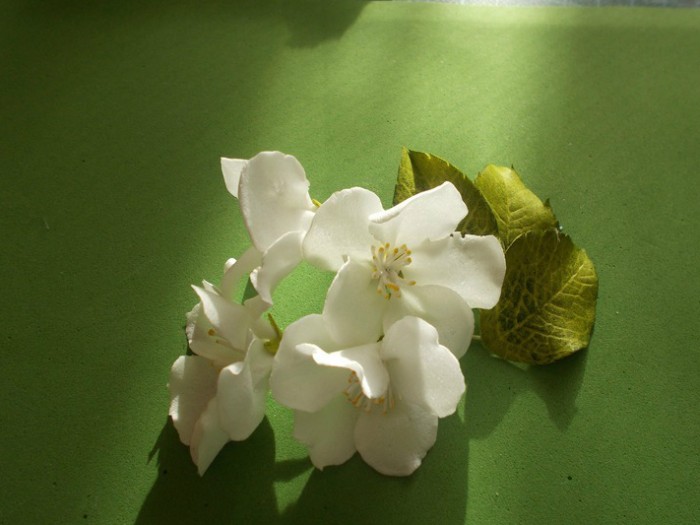
Apple tree branch from Foamiran
This master class is truly light and fast. We offer it to those who are willing to acquire some tools and not waste time on cutting with their hands. For those who are still ready - you must transfer the template on paper and cut enough carefully to not damage the petals.
We will need:
- Special holes
- Super-Kla.
- One toothpick
- Two froths of white and green
- Wire
- Teip-tape.
So, proceed to the manufacture of fast flowers of apple
- Piecol knock out flowers
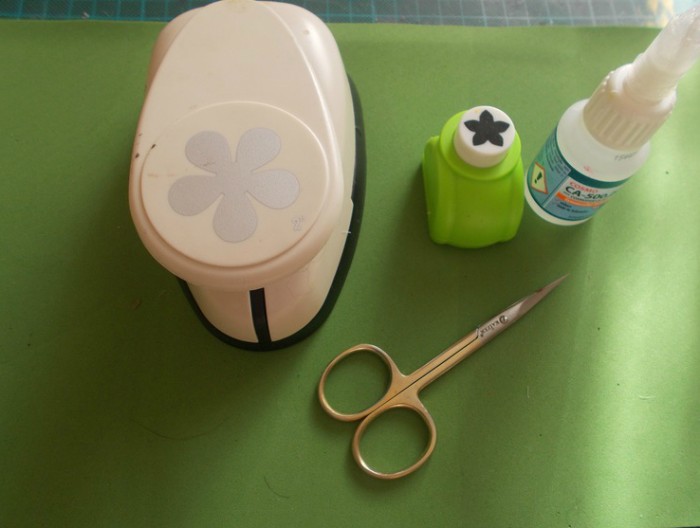
Apple tree branch from Foamiran: hole punch
- As in the photo, cut a little in the depth
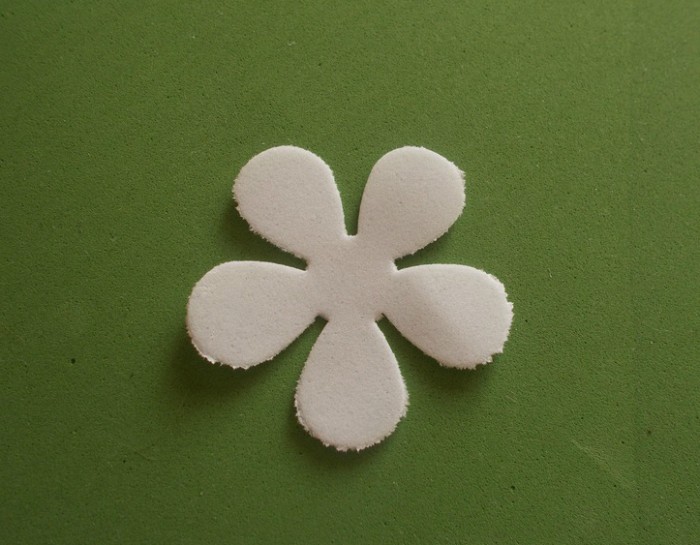
Apple tree branch from Foamiran: Detail
- Preheating with fom, stretch each petal, should work out as in the photo
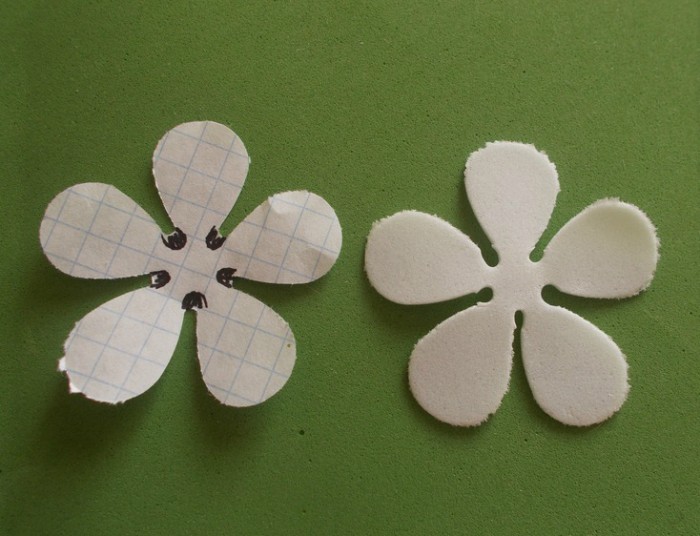
Apple tree branch from Foamyran: Cut the detail
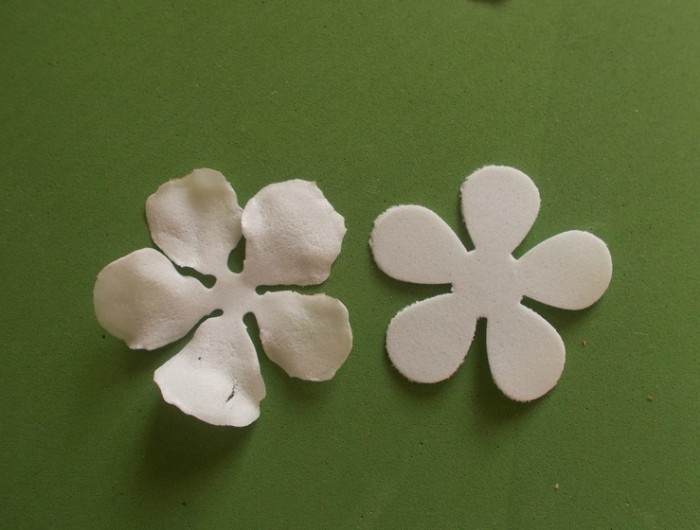
Apple tree branch from Foamiran: stretch the petals
- Toothpick spend a streak
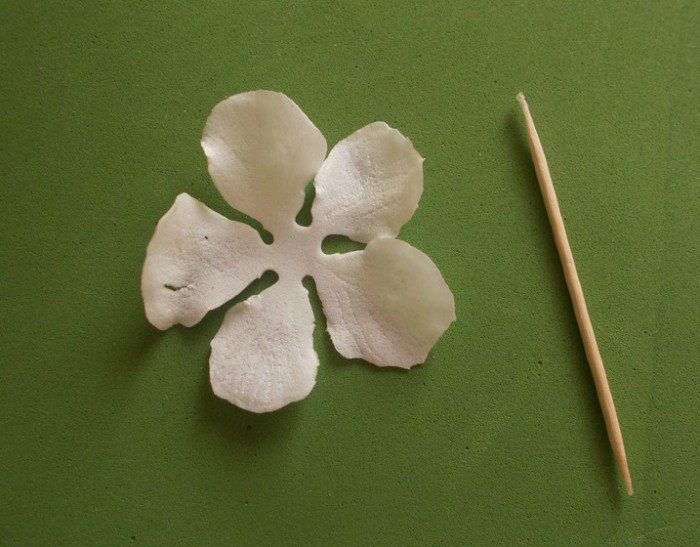
Apple tree branch from Foamiran: Drawn Stomach
- Near the middle lining each petal as in the photo
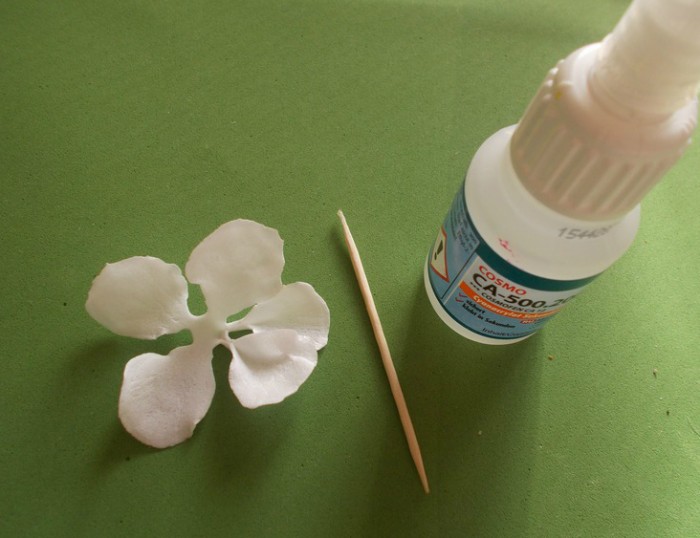
Apple tree branch from Foamiran: glue petals
- Cut off the thin strip of 1.5 * 1.5 cm, we make a fringe and twist pre-lubricating glue. Hold over the candle, reveal a little as in the photo. Dip the tips in yellow paint
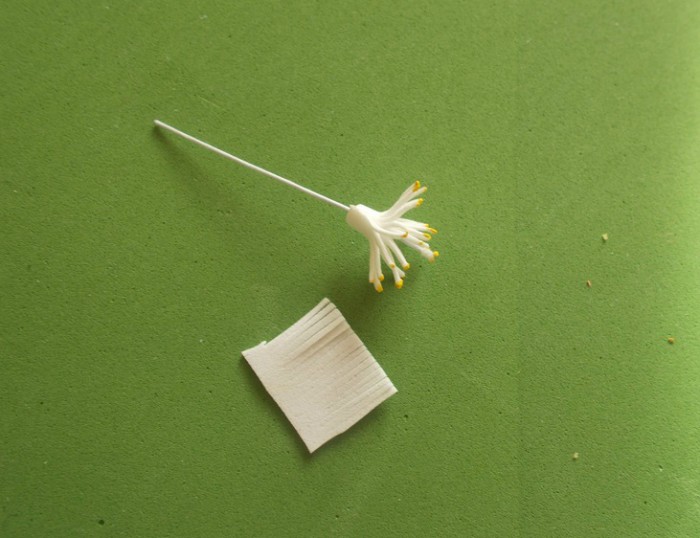
Apple tree branch from Foamyran: Making a tuchinka
- Welcome wire in white teip-tape
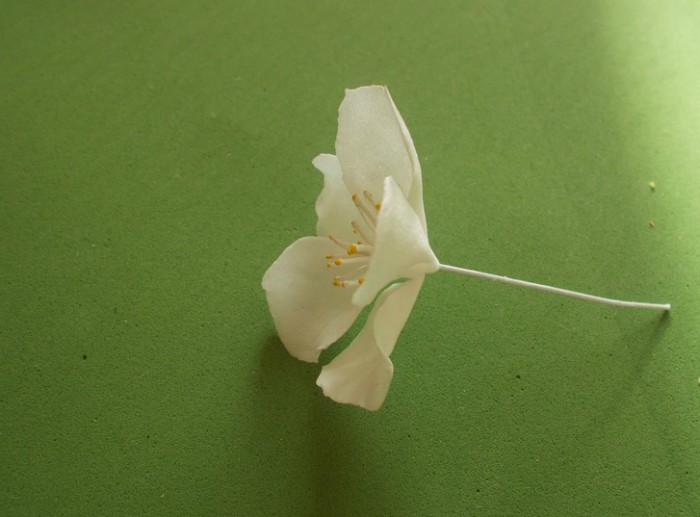
Apple tree branch from Foamiran: We ride petals
- We stick to the wire, we ride her flower
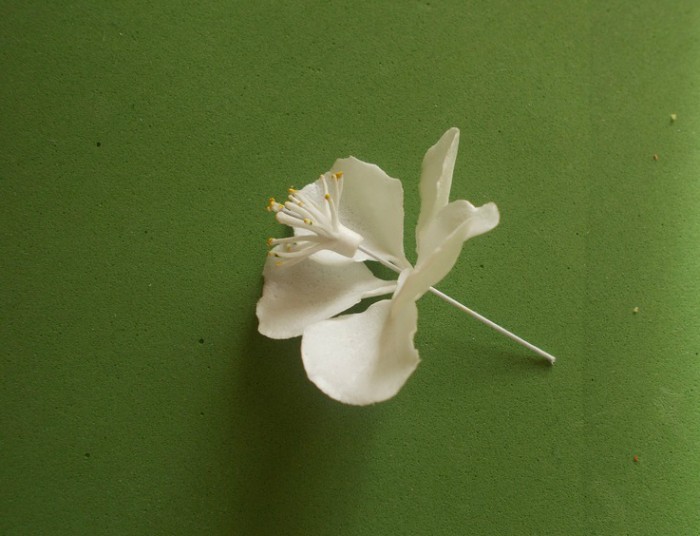
Apple tree branch from Foamirane: Roll out flower
- Cut out a hole punch with an asterisk, heating and drown with fingers
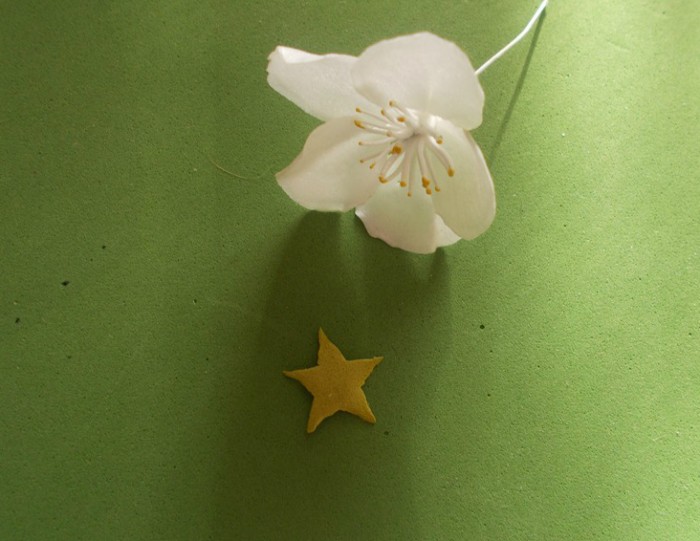
Apple tree branch from Foamyran: cutting up an asterisk
- We ride and glue to the flower
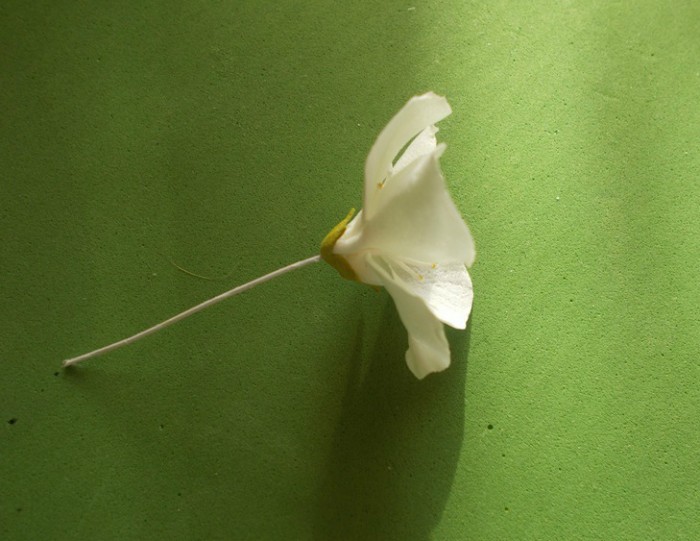
Apple tree branch from Foamiran: We ride the detail on the flower
- Attach to the product
