How to sew a hat and a snood from knitwear.
The content of the article
- Do -it -yourself knitting hats with your own hands: patterns
- Video: hat and snood
- Hat and knitwear snood for a girl, girls: Patter
- How to sew a hat and sniffing snood: a pattern for women
- Patter of knit -haired hats for a girl
- Hat stocking, knitwear sock: patterns
- Patter of a knitted cap for a boy
- DIY double -sided hazard cap
- How to sew a hat with a chatter of knitwear?
- Video: DIY Chalma cap
- Fleet hat with your own hands patterns
- Video: Fleet hat and scarf
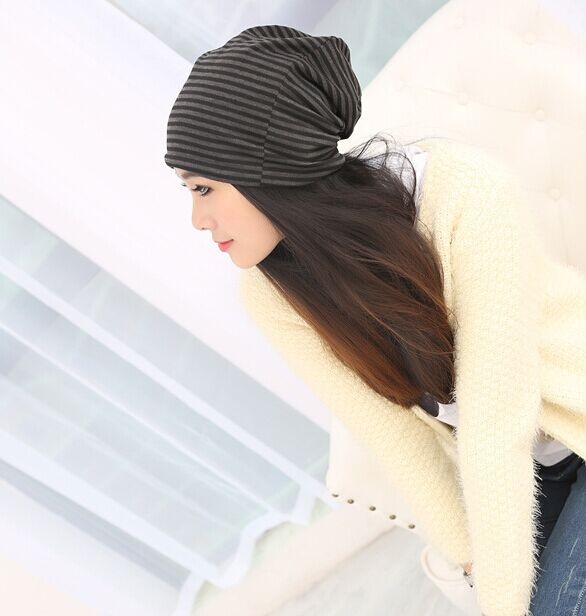
Hats sewn or connected by yourself can transform, emphasize individuality and style. In addition, proceeding to the creation of hand-made things, you will definitely have an exclusive headdress. From this article you will learn how to sew a beautiful, and most importantly, fashionable, hat for a girl or woman.
In the stores "fabrics" knitted steel, from which beautiful fashion caps are obtained, is in a large assortment. But even if you use a dense woolen fabric for sewing the cap, the result will delight you anyway.

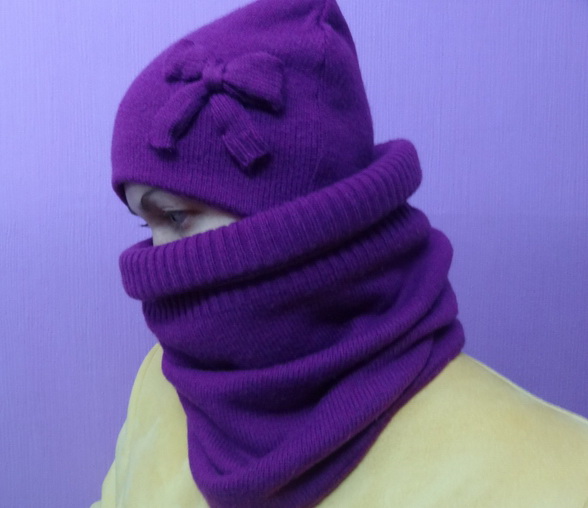
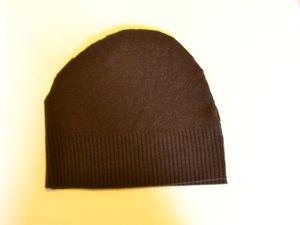
A fashionable hat can be sewn in 5 minutes
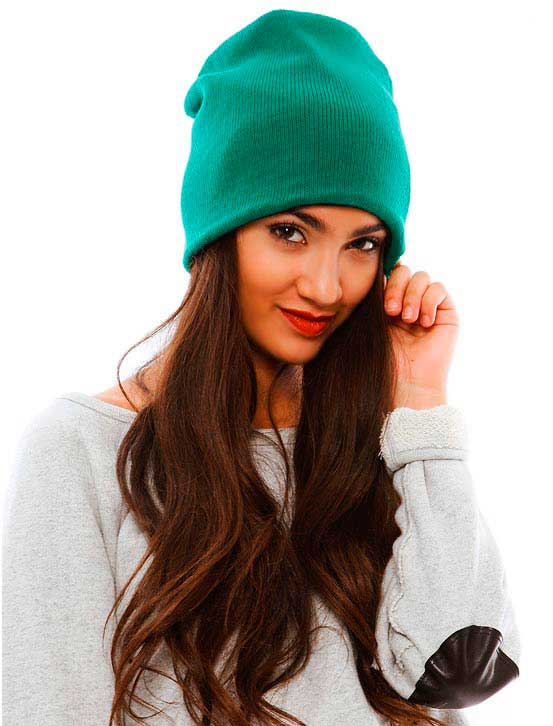
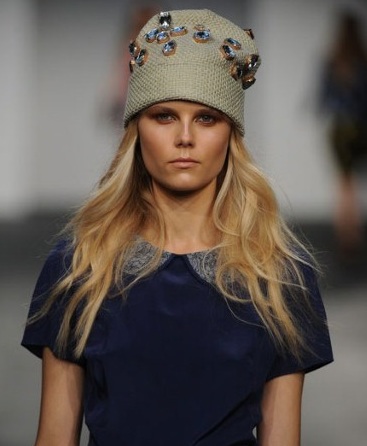
There are many models of fashionable hats that can be sewn on your own

Knitwear for a hat is better to take a stretch
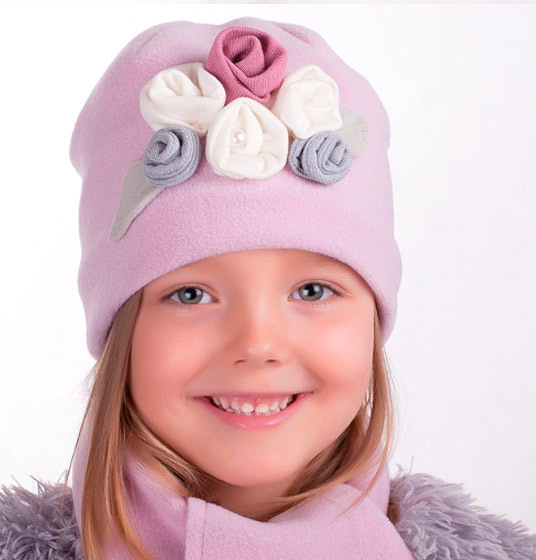
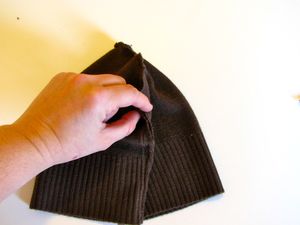
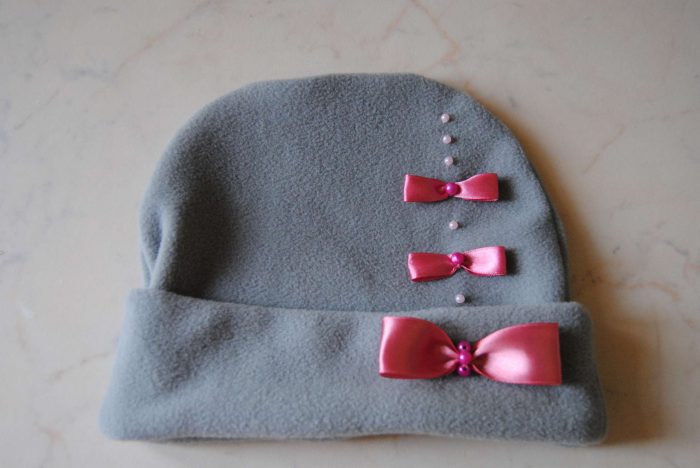
Garnish a cap, sewn with your own hands, can be anything. The main thing is that decorative elements look harmoniously on a hat
You get carried away with a creative process and sew a hat that is not on sale. You can decorate the finished product at your discretion: sew an application, a knitted flower or large beads, embroider an inscription.
Do -it -yourself knitting hats with your own hands: patterns
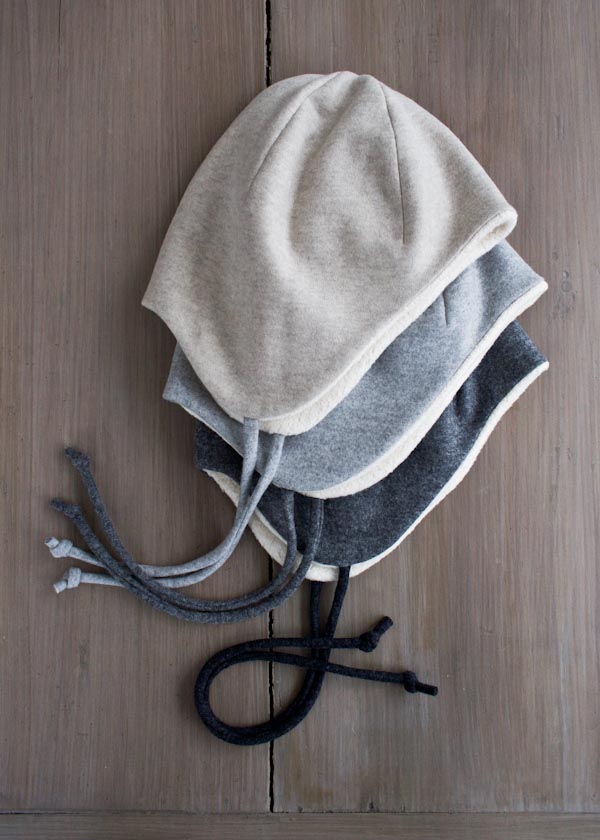
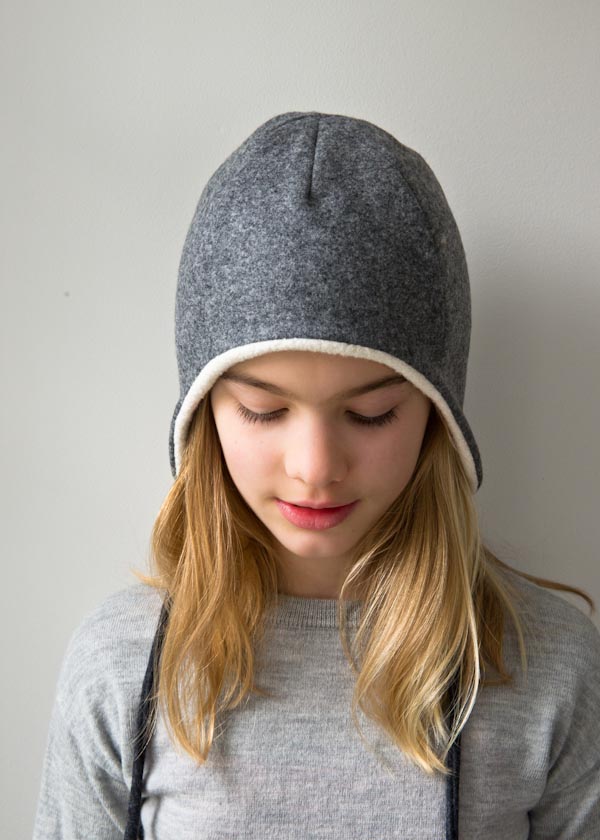
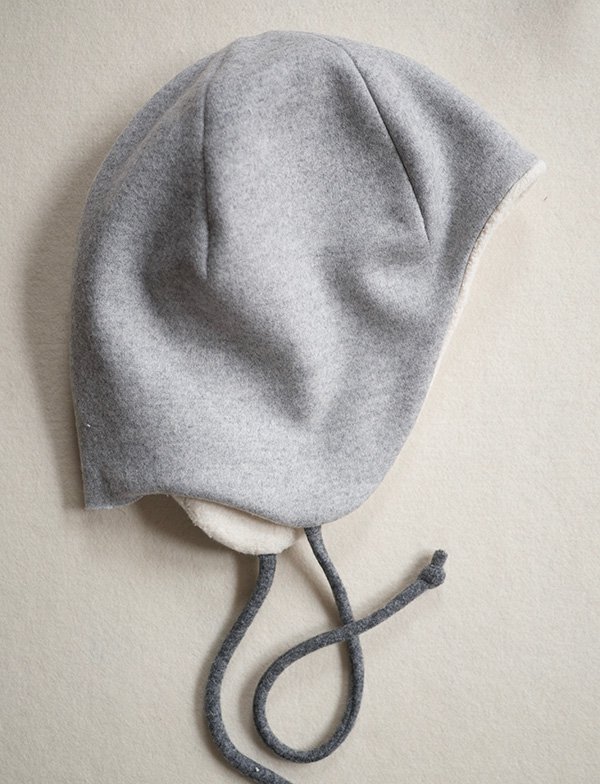
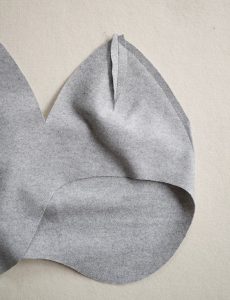
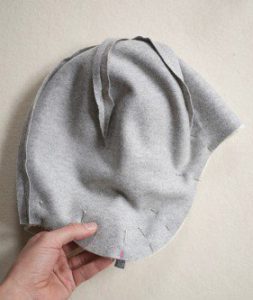
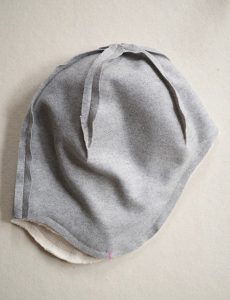
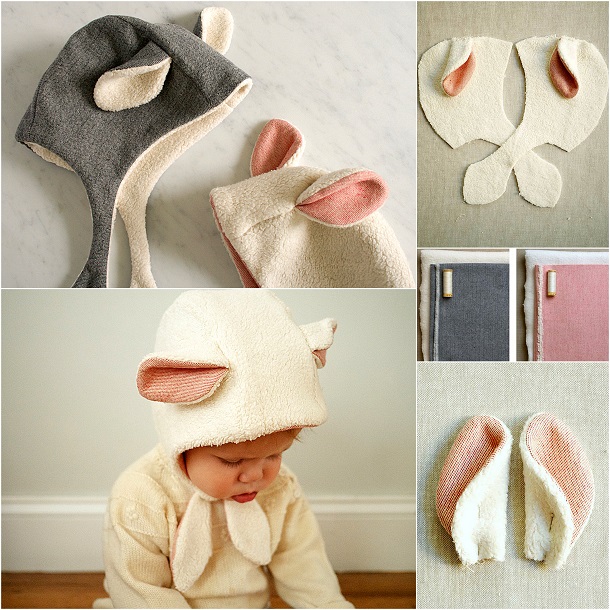
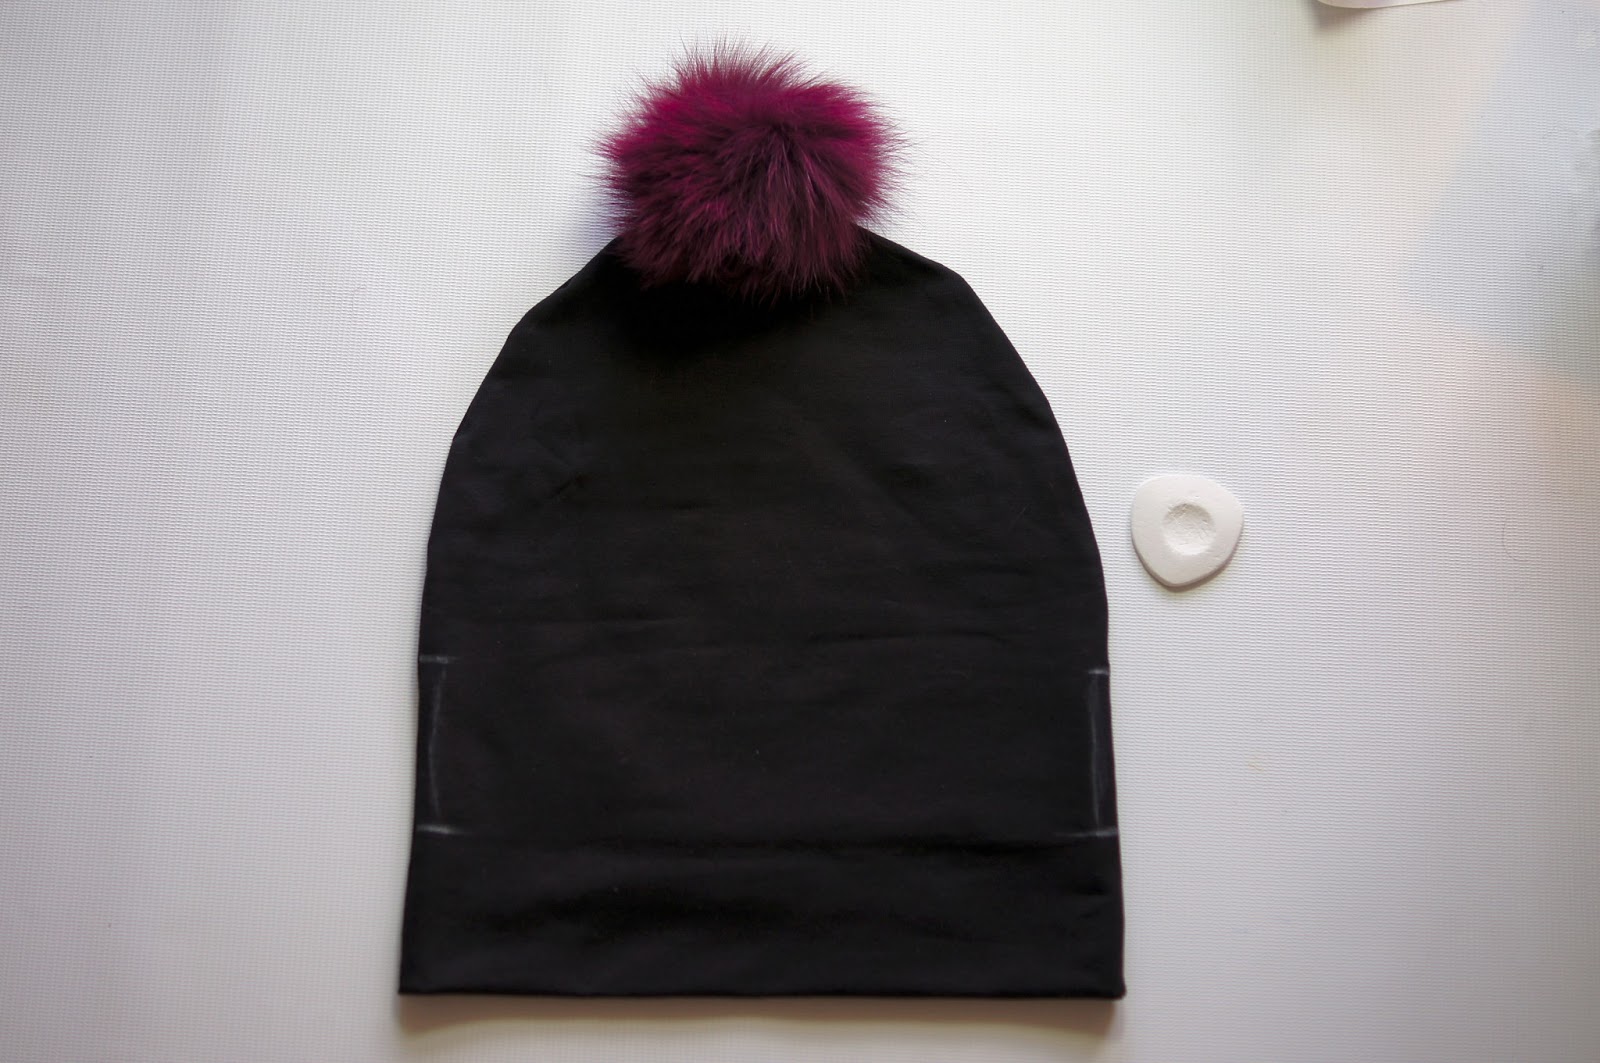
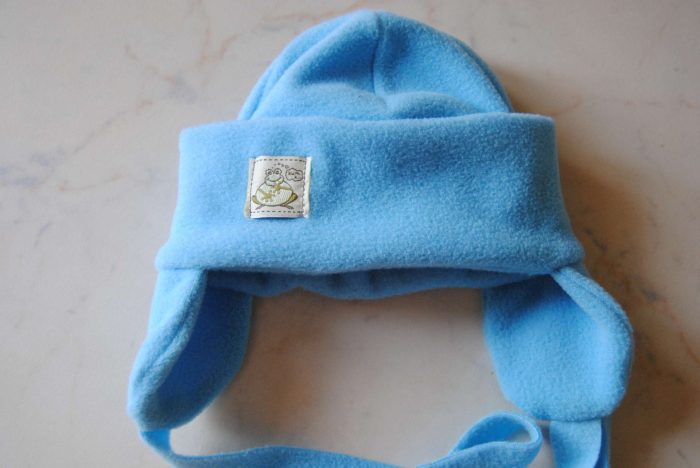
Hats with long ears is a great version of the headdress for the off -season. In such a hat, the girl will certainly attract attention.
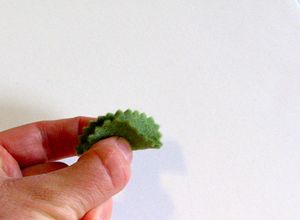
We will sew exquisite a cap with long ears.
The cap model is universal. It is suitable for a little girl and a teenage girl.
Header
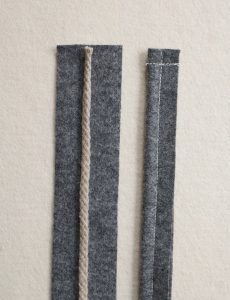
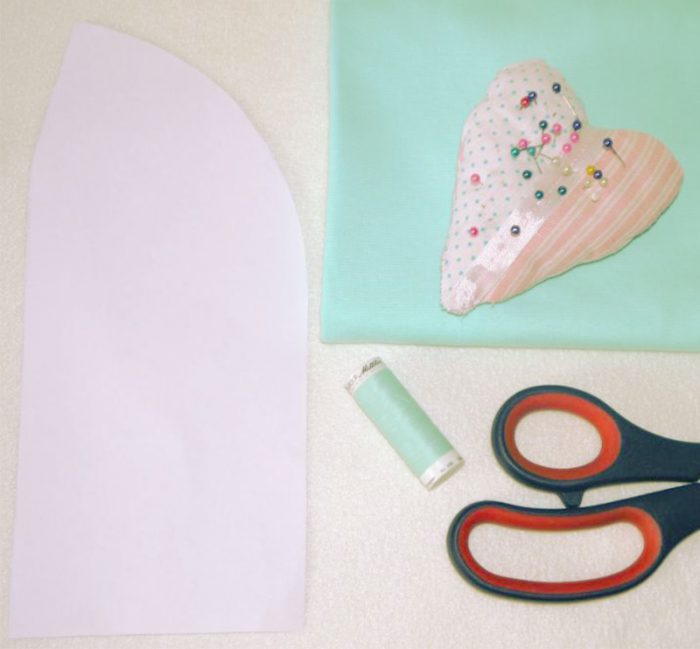
In order to sew a hat, you'll need:a monophonic knitwear and a small stretch of fleece (we will sew a lining from it). Thanks to the fleece lining, the cap will be warm, soft and cozy.
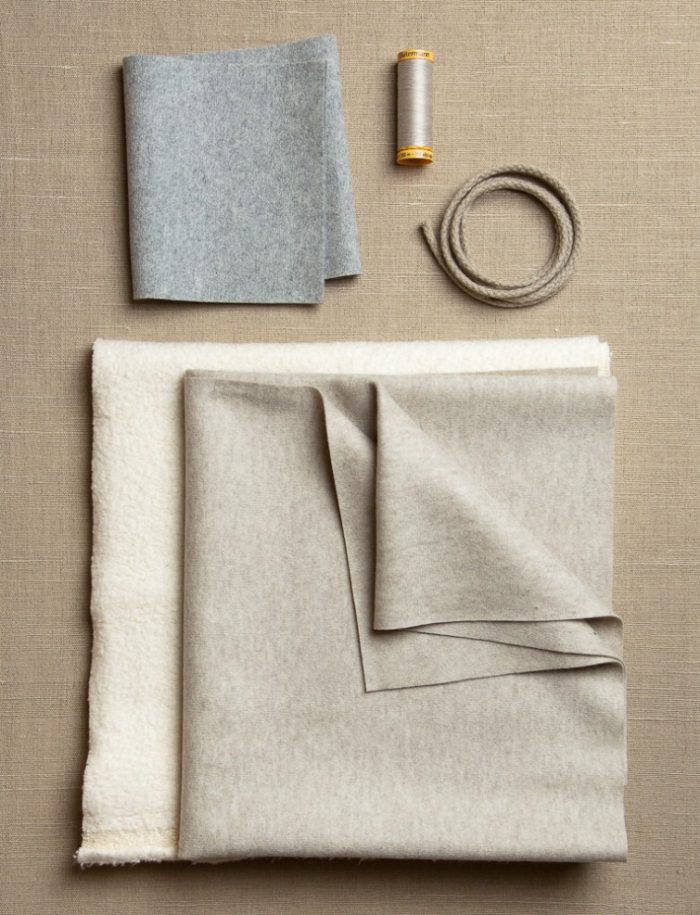
Necessary materials
Follow the step-by-step instructions of the master class and you can easily cope with the impossible, at first glance, task.
What you need to cook:
- Knitwear. In the photo, the cap is light gray, but you can choose a different color of the fabric. The only condition is that it should be darker than the lining.
- Fleece. Choose a segment of a light shade.
- The cord is 60-65 cm long. The cord color does not play a big role.
- Suitable color hats of thread.
- Sharp scissors.
- A small segment of dark knitwear. We will make a cord from it.
- It is advisable to have a sewing machine. But if you do not have it, then prepare a thin needle.
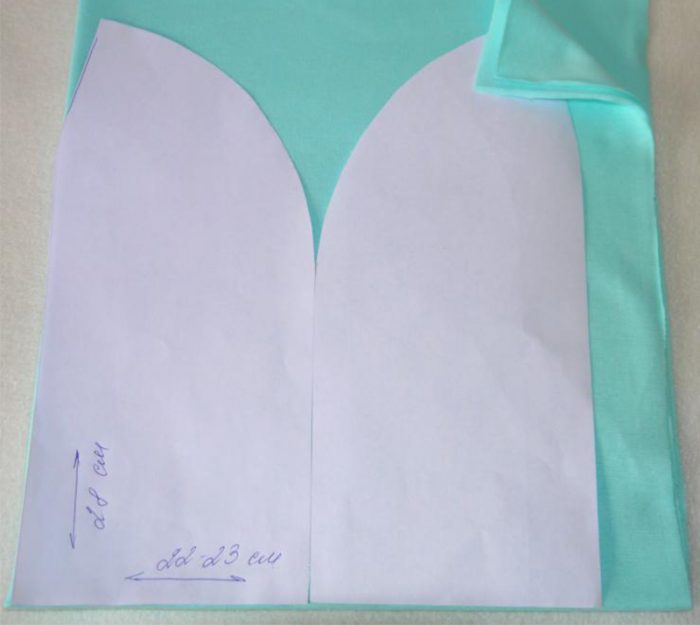
The size of our circle hats will be 51-52 cm, a height, taking into account the lower edge ear - 24.5 cm.
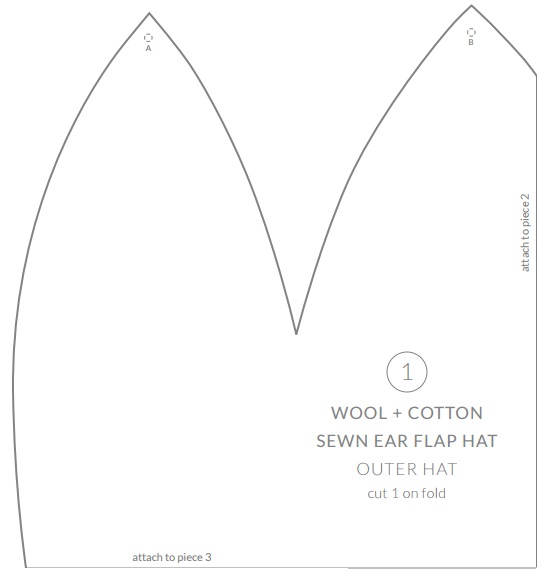
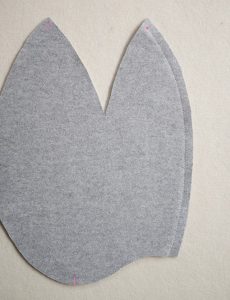
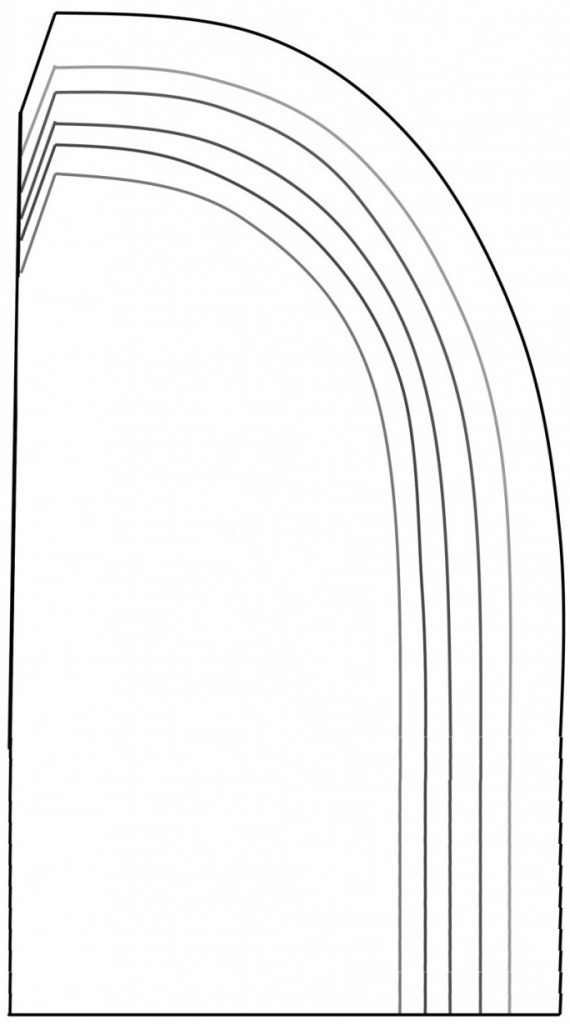
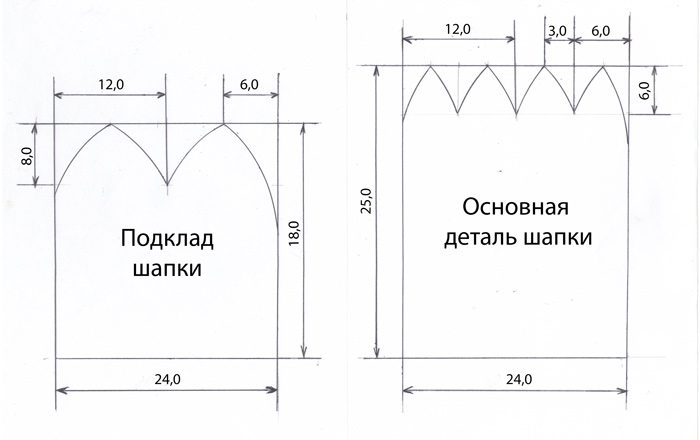
Pattern, part 1
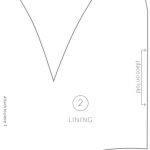
Pattern: Part 2
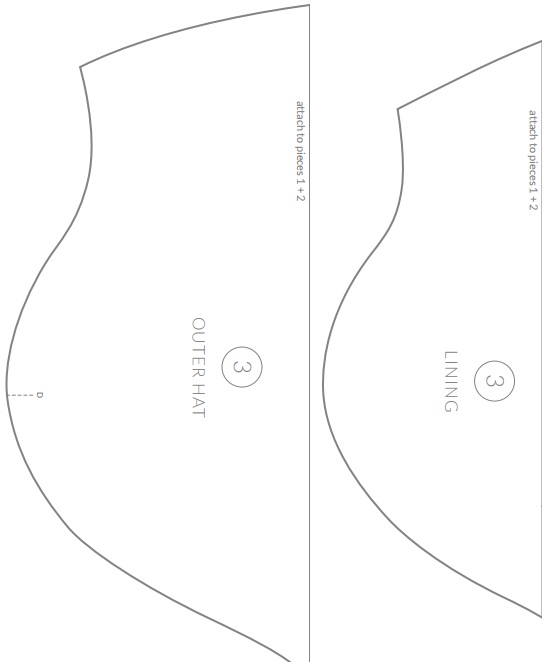
Pattern: Part 3
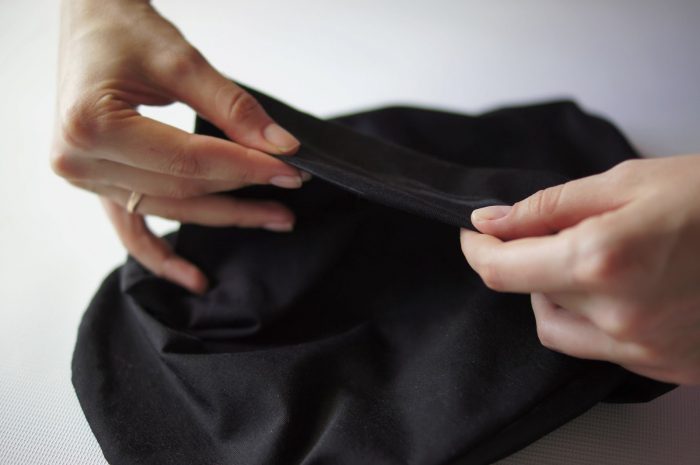
- We will sew on this pattern, which should be adjusted to the desired size. To do this, we measure the circumference of the head with a centimeter.
- We will determine how height should be our hat. We put the knitwear segment twice.
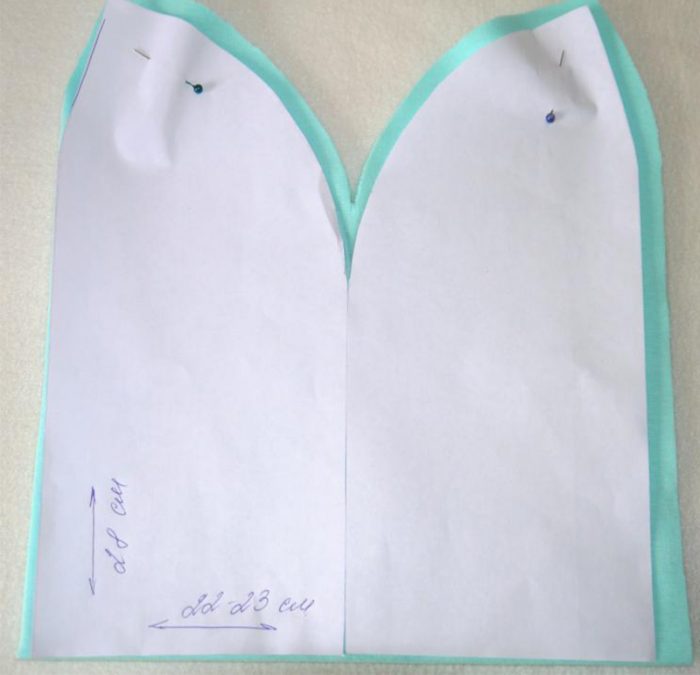
- We will attach a pattern to it and chopped with pins. After that, we cut out the parts, leaving allowances on the seams (0.7-0.9 mm).
Cut with a allowance for seams 0.7-0.9 mm
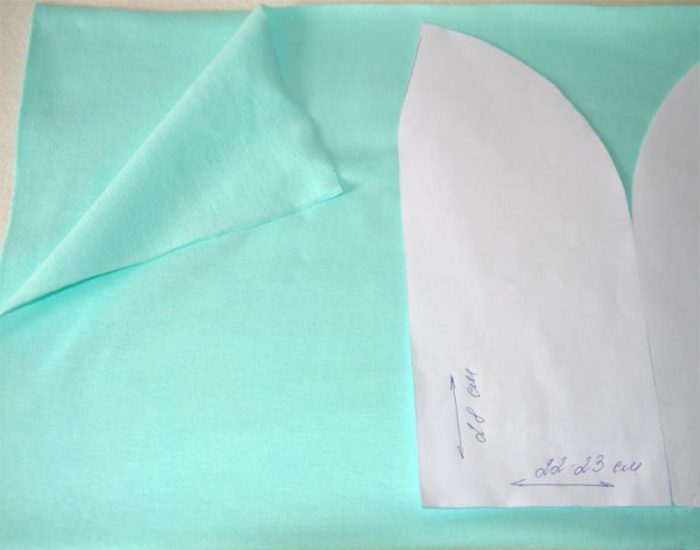
I figured out the pattern. We start work:
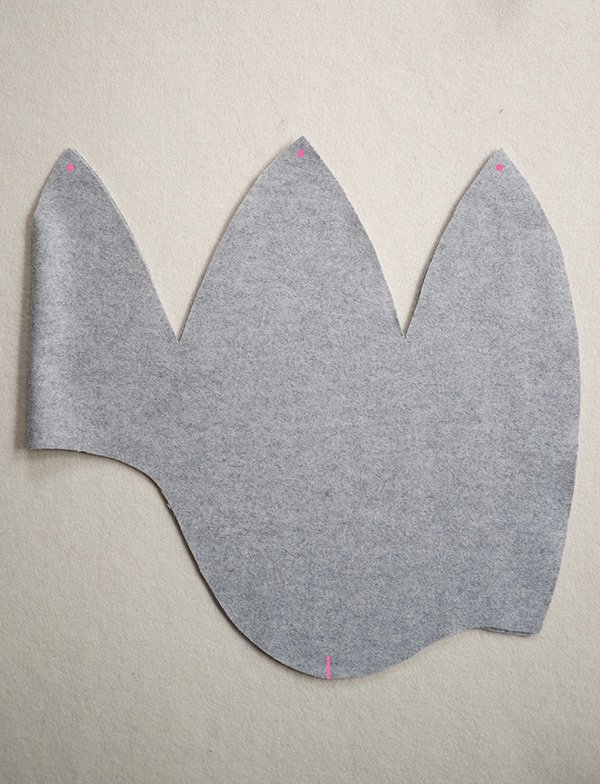
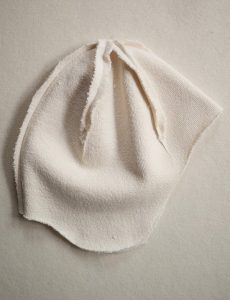
- We transfer the pattern to paper. Cut the details of the hats from knitwear. We act similarly with fleece, but leave the allowances for the seams more than with cutting knitted fabric (0.5-0.7 cm longer).
- Next, it is necessary to sweep fleece kant. How to do this is visible in the photo.
You need to sweep out of the fleece Kant, as in this photo
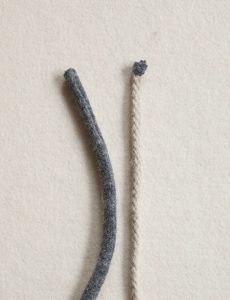
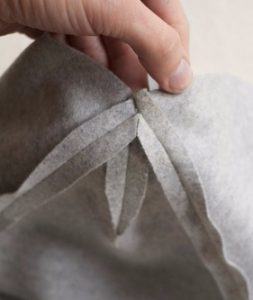
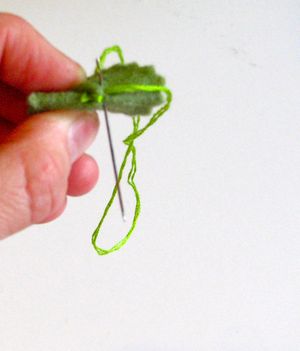
- We take a dark knitwear. We need to make 2 strips from it for ties 3 cm wide.
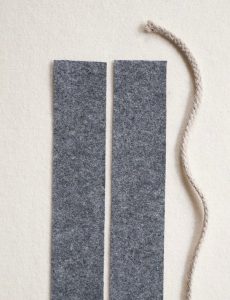
2 strips for ties
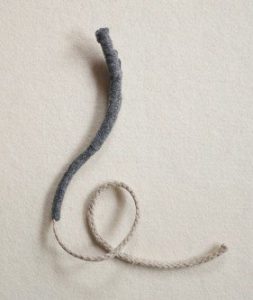
We put the cord inside the strip
- We cut off a segment 47.5 cm long from the cord and put it in half. Strips of knitwear are folded in half and sew. After that, turn the strips there. We enter the cord inside the future tie.
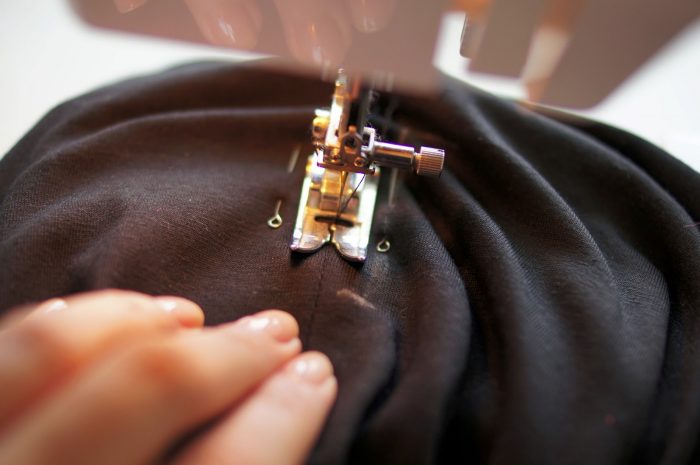
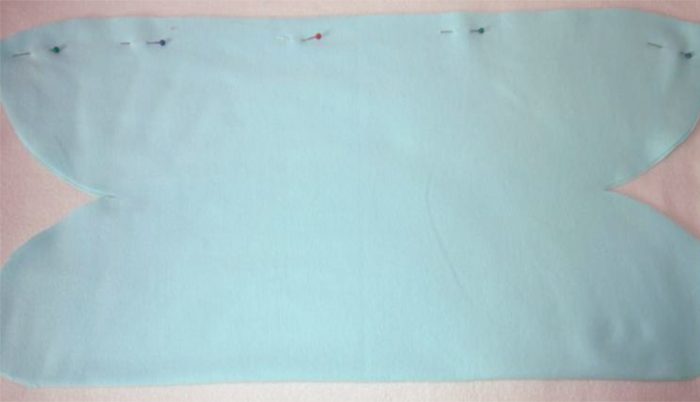
- We flash the side seams. After all the seams are sewn, iron them with an iron. The shortest seam should be ahead.
We sew the side seam
Rejoice
Sew the seams of the caps
We get the seams
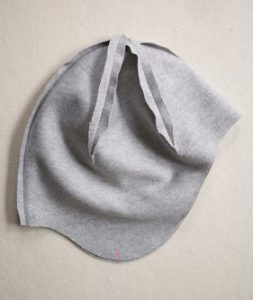
The shortest seam is in front
Sew the lining
- In the same way we act with a fleece lining.
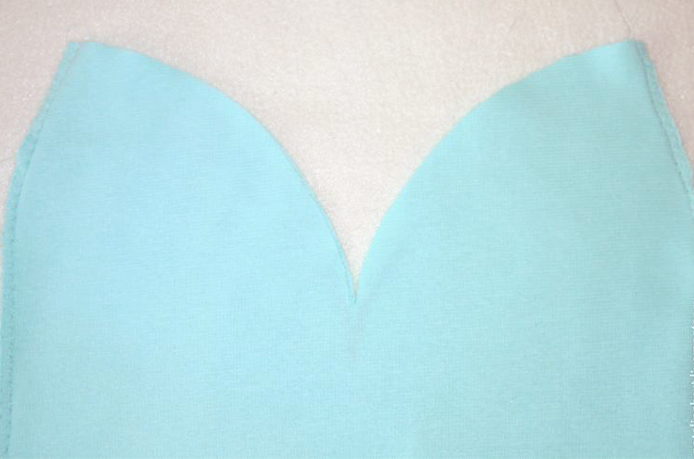
Now we apply a fleece lining and a knitted workpiece (the front side of the fleece is applied to the front side of the main fabric). We fix the details with pins. - We determine where we will have ties and outline with chalk. We connect the lining and the main fabric together.
- Do not forget about the ties. They need to be invested between the lining and the main fabric. We leave a small segment with unengated, so that later we turn the product with the front side.
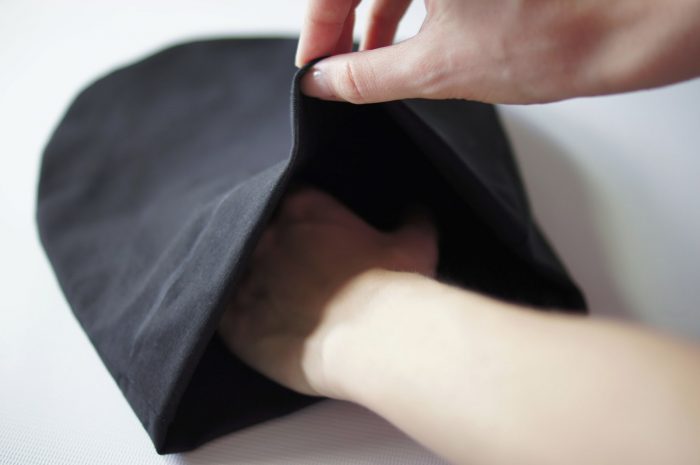
- Now it remains to turn the hat on the front side and sew the place left for the twisting of the product, with hidden stitches. We sweep Kant or just iron it.
We rolling up the lining and the main fabric with pins
We stuck the main and lining together, putting the ties
This hat is sewn on the same principle
From the video below, you will learn how to sew knitted hat and snood.
Video: hat and snood
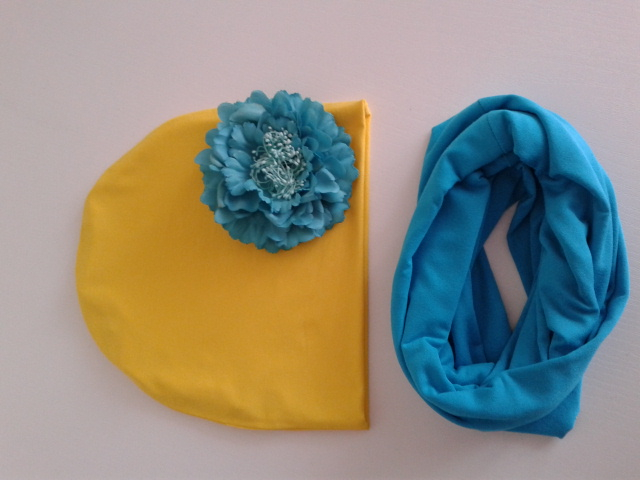
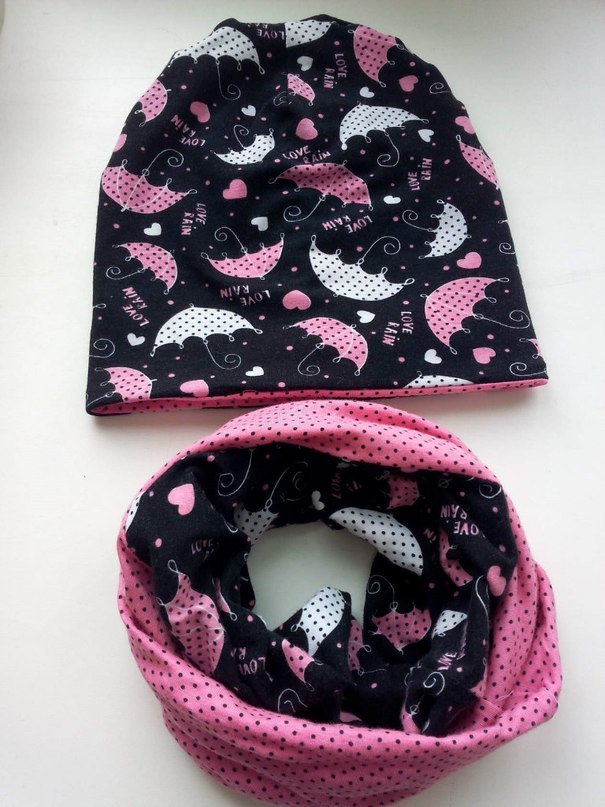
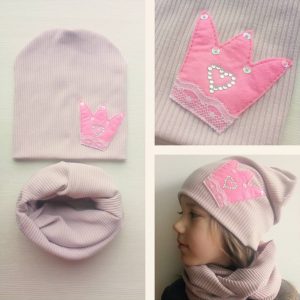
Hat and knitwear snood for a girl, girls: Patter
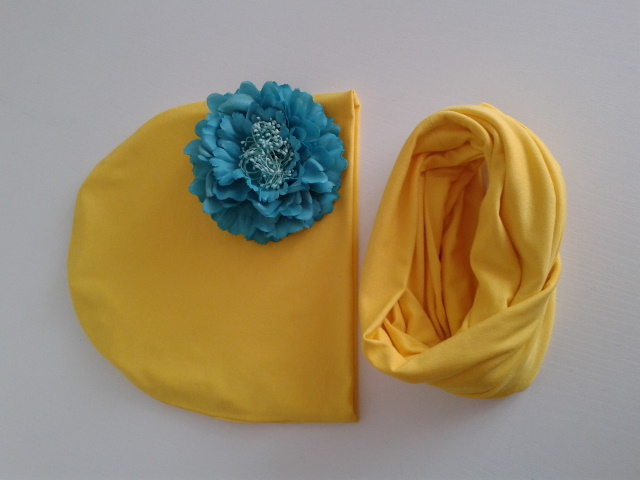
Such a fashionable hat with a pompon can be sewn on your own in one of the cloudy and free days. The process of its “creation” will take no more than 30 minutes, but how original you will look in it!
A cap with a pompon
We will need:
- knitwear segment 57/54 cm
- paper on which we will carry the pattern
- threads of the same color as knitwear
- scissors, needle, pins
Let's start!
Prepare pattern:
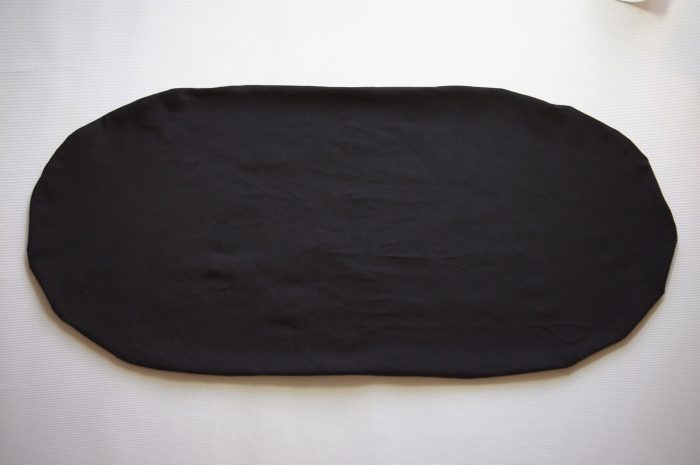
- We measure the head of the head, draw a rectangle of 55/26 cm. On one side of the triangle we draw a semicircle.
- On the other side we draw the same semicircle (you can simply redraw it by folding the fabric in half). As a result, the pattern should resemble an elongated oval.
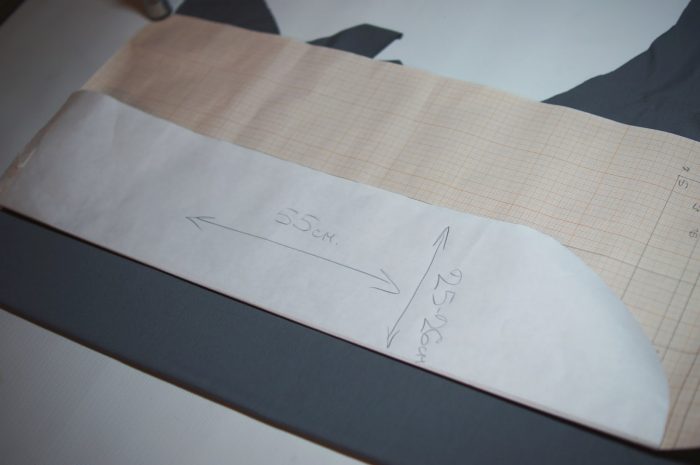
We draw a rectangle
We draw a semicircle on one side

We transfer to the other side
Now we start sewing the caps:
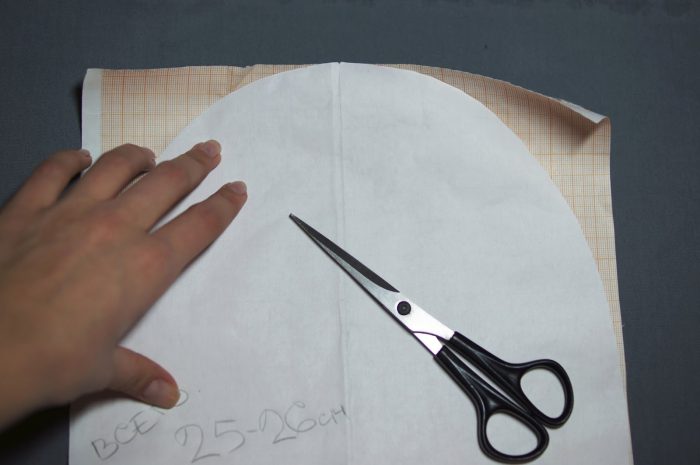
- We lay down the knitwear by half the front side inside, attach a pattern and circle with chalk. We leave the allowances on the seams 1 cm and grind (do not forget to leave the hole, then turn the product later).
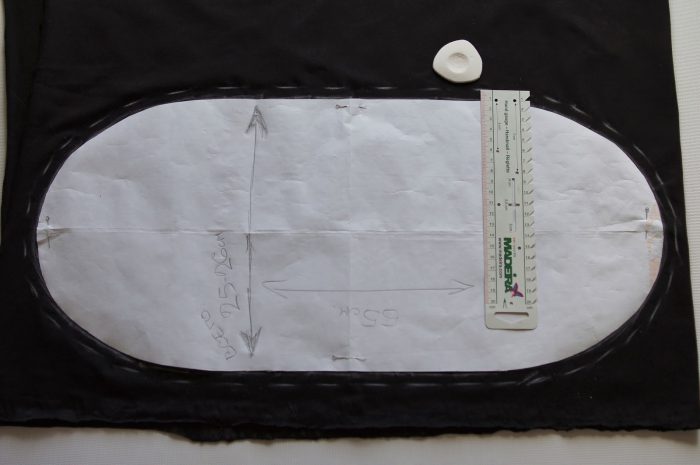
We transfer the pattern to the fabric
We grind, leaving a small hole
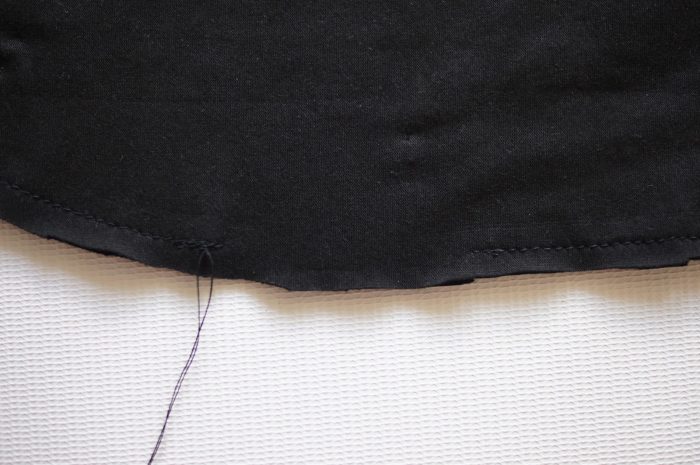
- Turn the hat on the front side and sew the hole with a secret stitch.
Turn the hat
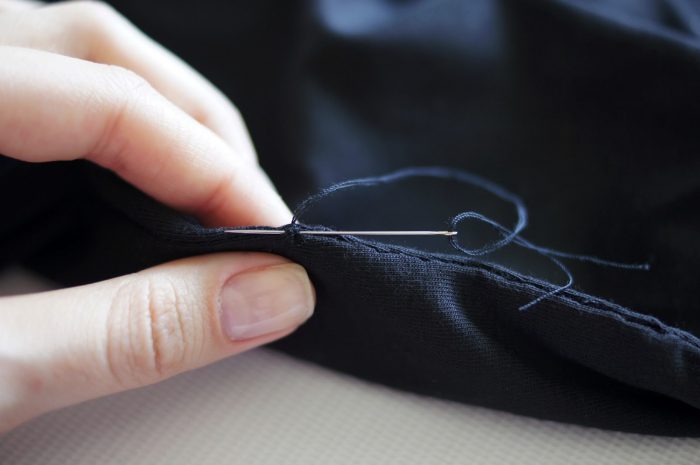
Sew a hole with a secret stitch
- The cap is almost ready. Put the hat in half and make a mark. We put the second mark after 3.5 cm.
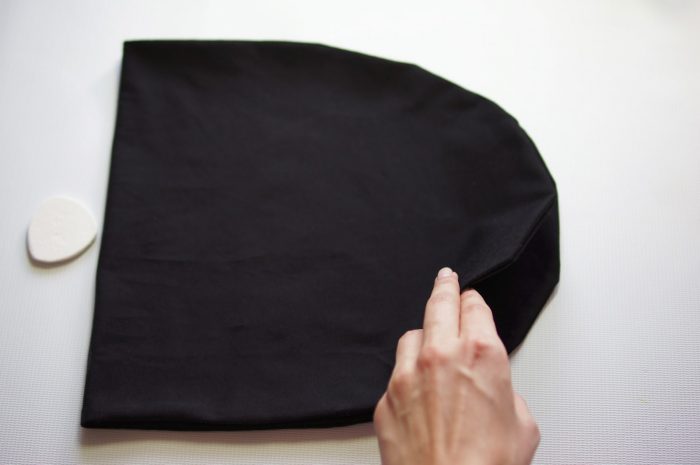
Fold the hat twice and make a mark
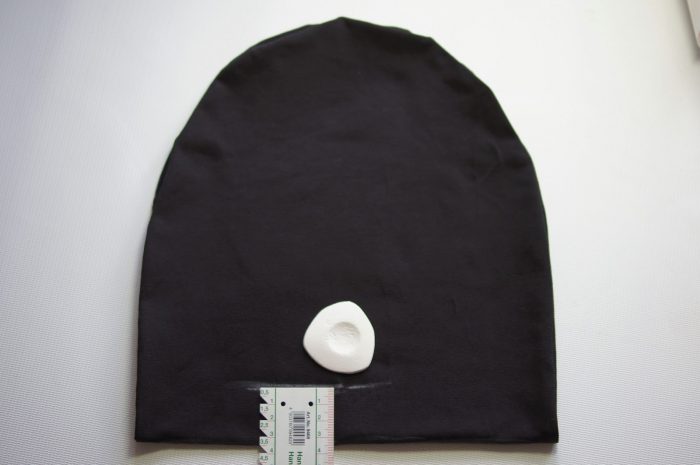
- Now, focusing on the first mark, we refuel the smaller half of the cap to the large one. It remains to bend 6 cm from the bottom side and sew the pompom.
- We fix both hats hats according to the marked dashes.
The second mark is higher by 3.5 cm
The smaller half tie the larger
We dress inside
We bend 6 cm
We sew the pompom
We fix on the intended lines

Walking in the evening
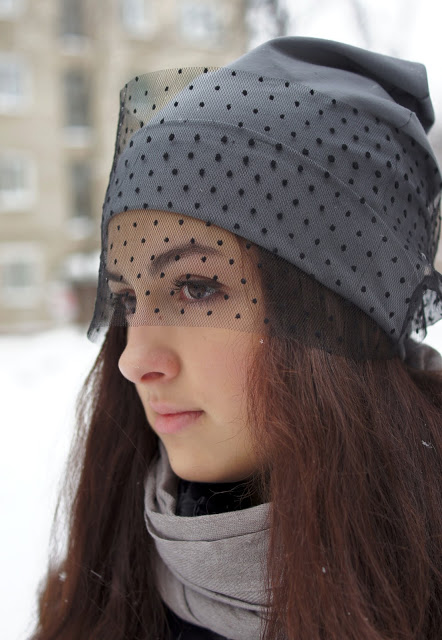
A cap with a veil is sewn on the same pattern
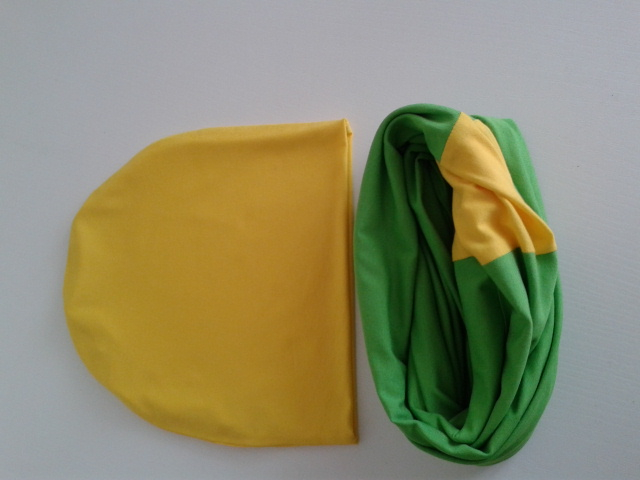
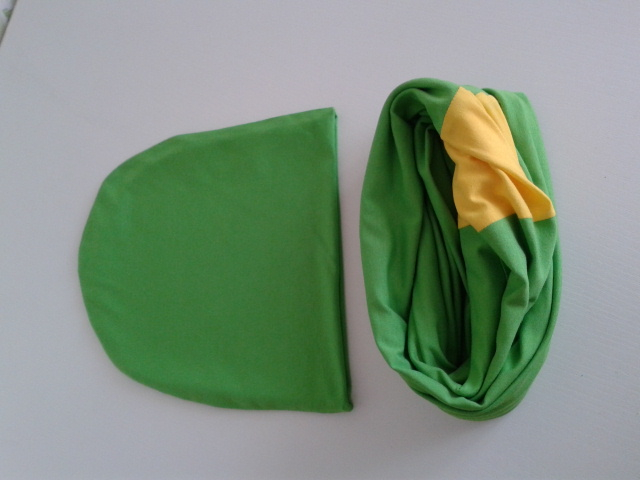
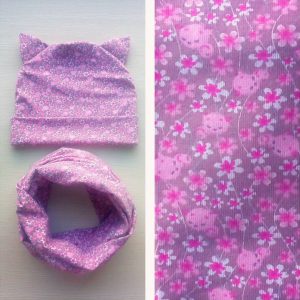
To sew snub from knitwearUse the following patterns:
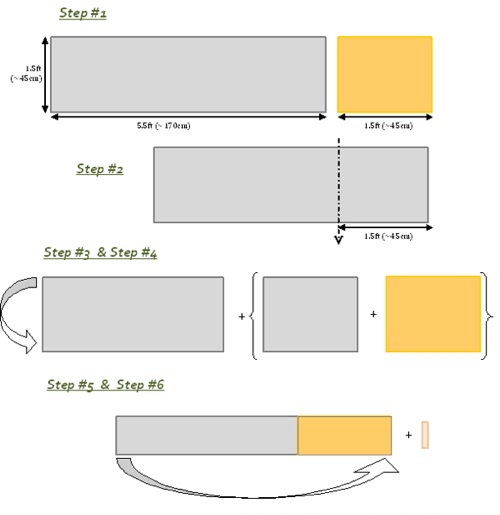
SCRECTION SCEMPE SCEEL
DIY snood
- It is not difficult to draw a pattern: this is a rectangle. Its length is 1 m, and the width is 50-60 cm. For the snood, select a fabric with an interesting print or in tone of the cap.
- Fold the fabric by the wrong side and sew the edges with a machine seam. Leave at the edges, 5 cm are impenetrable.
- We twist the workpiece with eight and connect the edges with a secret seam.
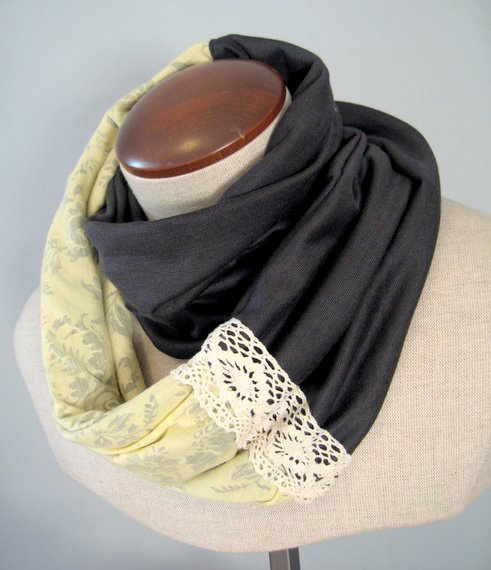
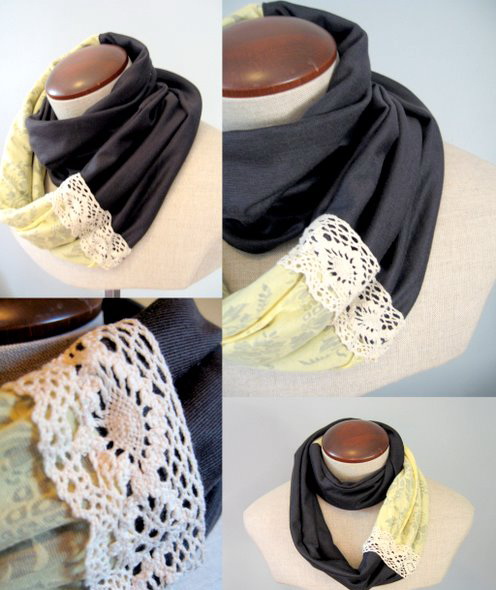
Here's how you can decorate a hat
Snood can be decorated with a tape of pompons
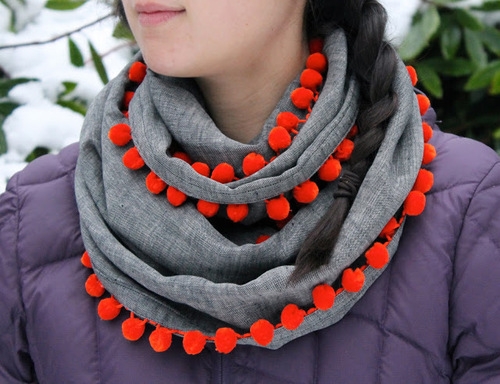
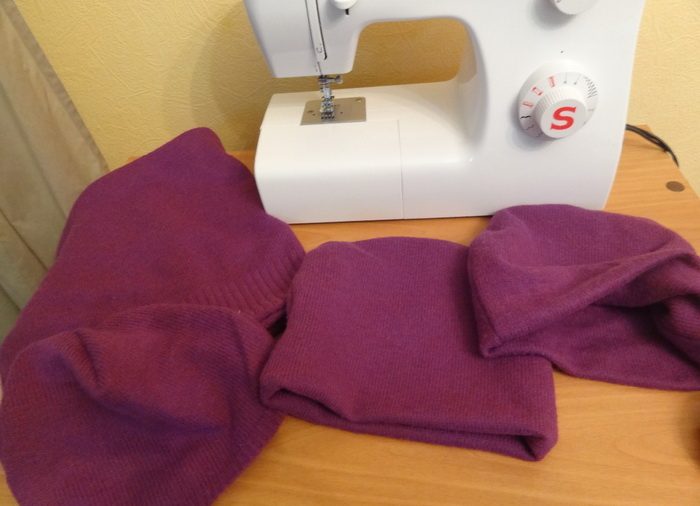
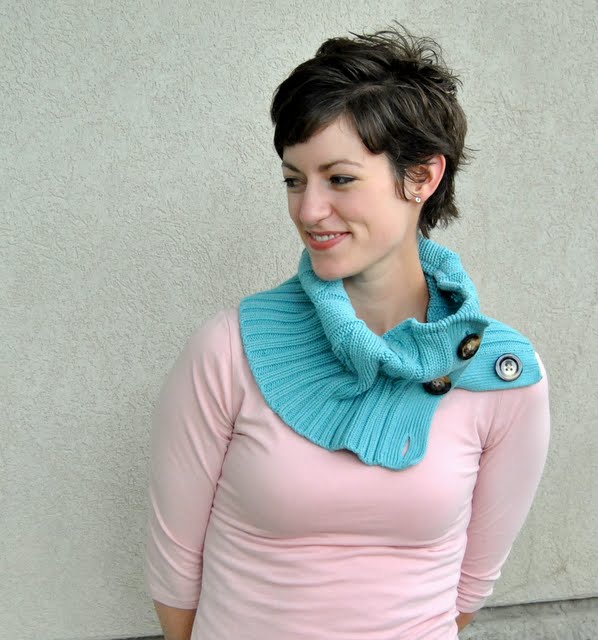
How to sew a hat and sniffing snood: a pattern for women
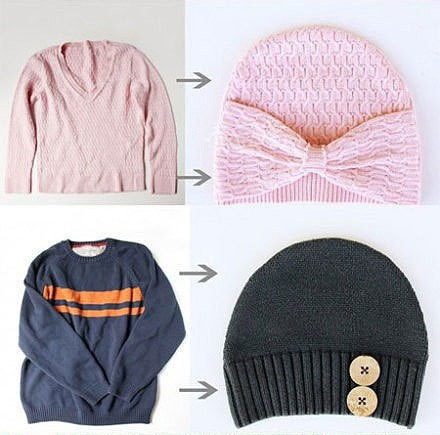
If you have a boring vest in order, you can turn it into a fashion accessory. From the same vest, a warm hat will be obtained.
We cut the details of the cap and snood.
We cut
We cut the details.
Sew
Ready cap
We steal a hat and snood.
We steal a hat and snood
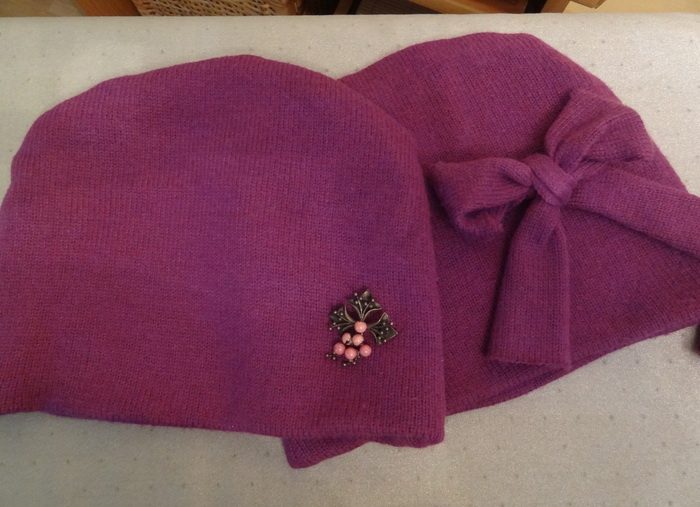
We decorate the hat with a flower or bow, who like it more.
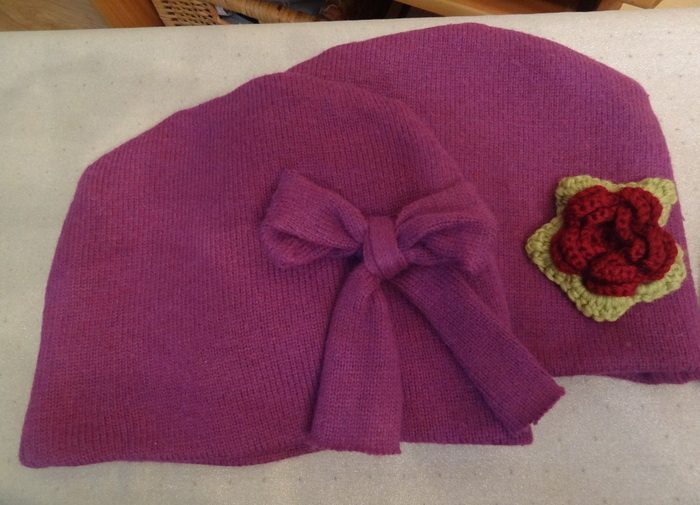
We decorate the hat
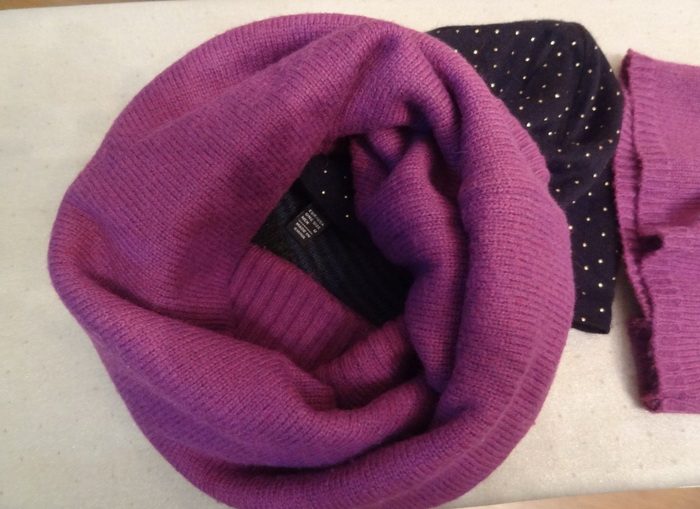
Snude
The snood can be sewn in another way:
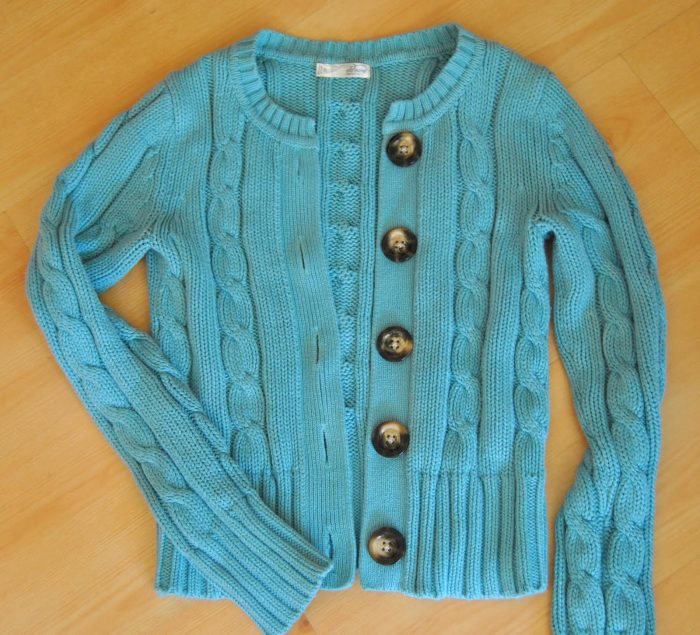
- An old sweater can be converted into a fashionable and necessary thing in cold days - in a stylish snood with a fastener on buttons.
- To sew a fashion accessory, prepare a sweater, sharp scissors, a needle, threads. We will sew on a sewing machine, and process the edges with an overlock.
Snub can be sewn from the jacket
- We cut off the top of the sweater and cut the cut with an overlock (you can do this on a typewriter using a zigzag line).
- After the edges are processed, we will wrap them inside out, and, by pins, the allowance 3-4 cm wide, we add it on the typewriter.

Cut the upper part of the jacket slightly below the armhole
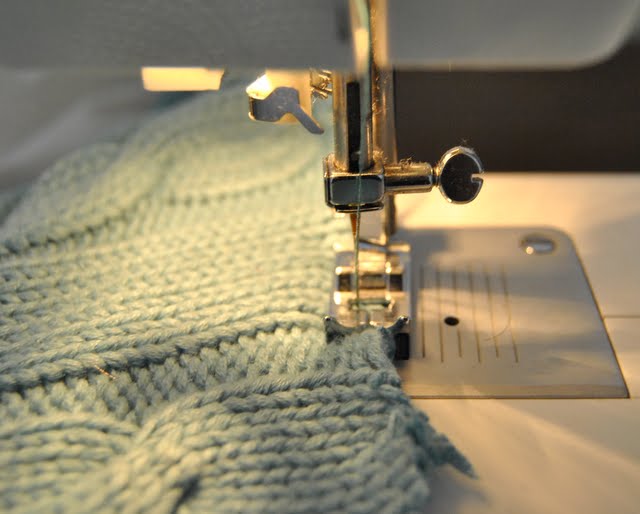
We process the edges with an overlock
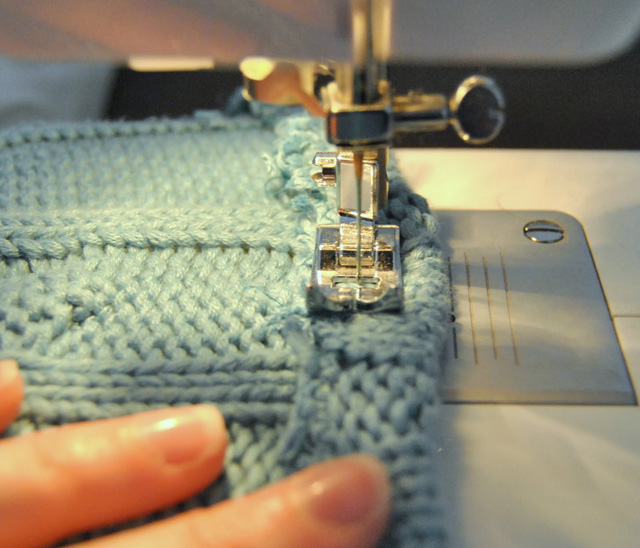
We make a cut on a sewing machine
Ready snood
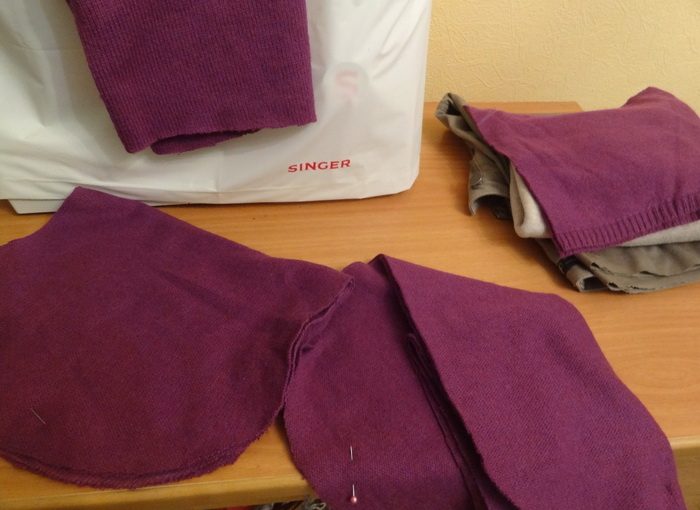
Patter of knit -haired hats for a girl
From a jumper or knitted sweater from which your baby has already grown, you get a wonderful hat. Of course, if the mother owns the initial sewing skills.
Two parts
The cutting segment is twice.
We twisted twice
We cook the pattern by measuring the circumference of the head. If you already have a hat, you can use it as a sample: attach to knitwear and draw a circuit with chalk. After that, cut the workpiece.
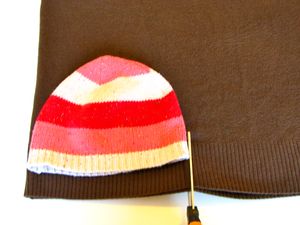
We apply a sample hat
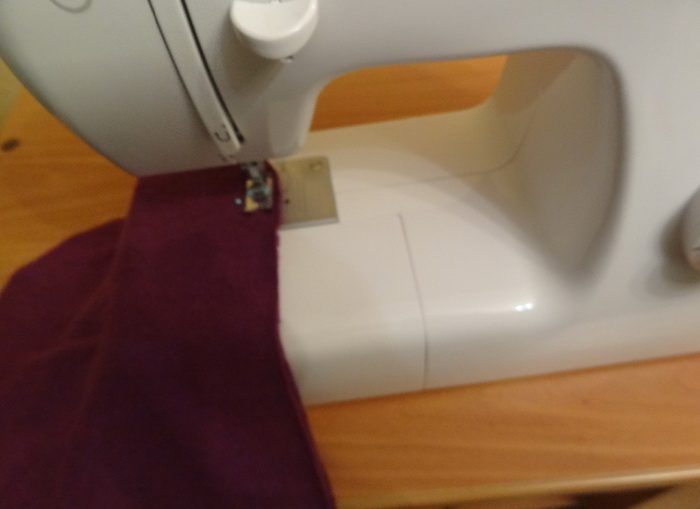
The side and upper seam are sewn. The cap is symmetrically so that the side seams coincide, and are sewn.
Sew the side and upper seams
We fold symmetrically, combining the side seams
Cut the edges with a semicircle and sew
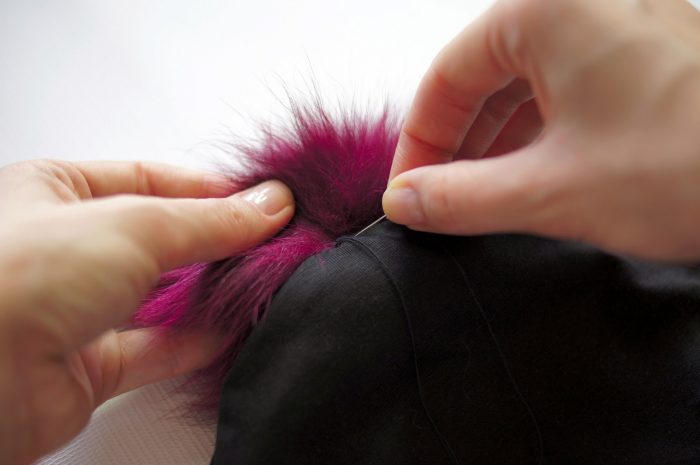
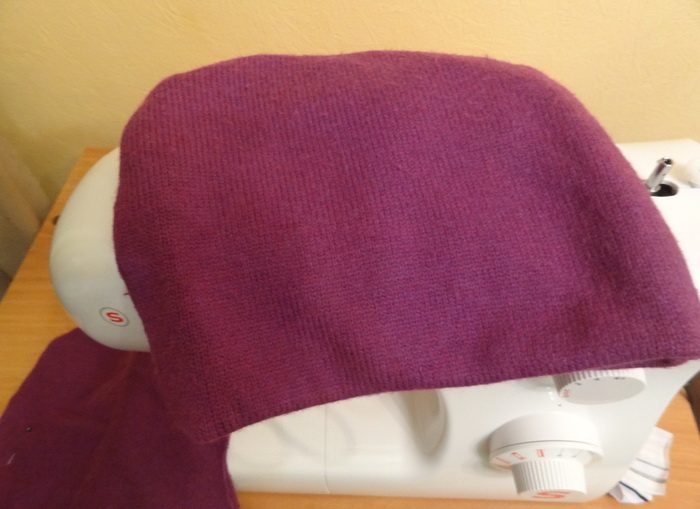
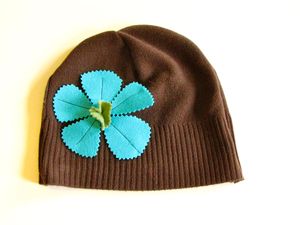
The finished hat must be turned on the front side and sew decorative elements.
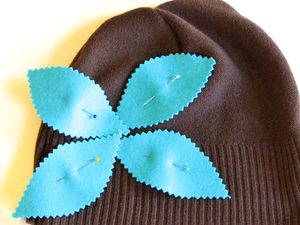
We decorate with a flower
The core of the flower
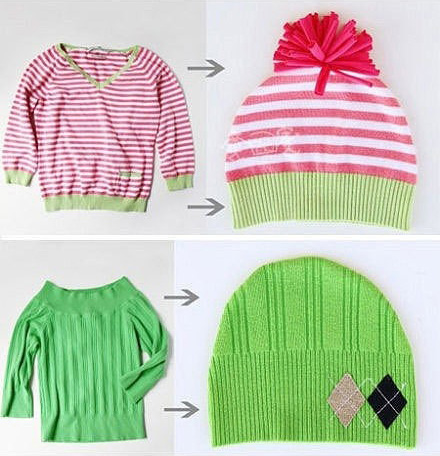
And so you can redo the boring sweater
Hat stocking, knitwear sock: patterns
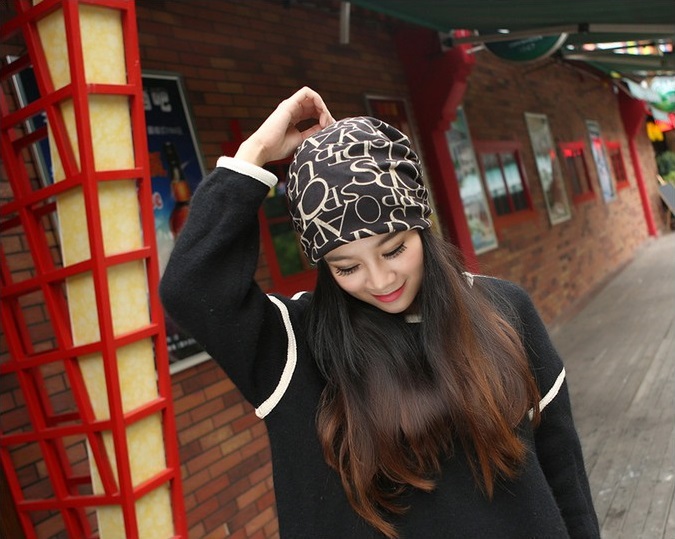
The knitted hat-chubs will not be difficult to sew even a novice needlewoman. It is easy to execute, but the model has recently very popular.
In autumn and spring, such a hat will be simply indispensable. The advantage of such a hat over other models is also that it is light and takes up little space in a backpack or handbag.

Hat-header

The fabric for sewing hats can be bought, or you can use a dense T -shirt. This model is sewn from double knitwear.
To sew hat, prepare:
- a segment of knitwear
- sharp scissors
- pins
- sewing machine
Prepare everything you need
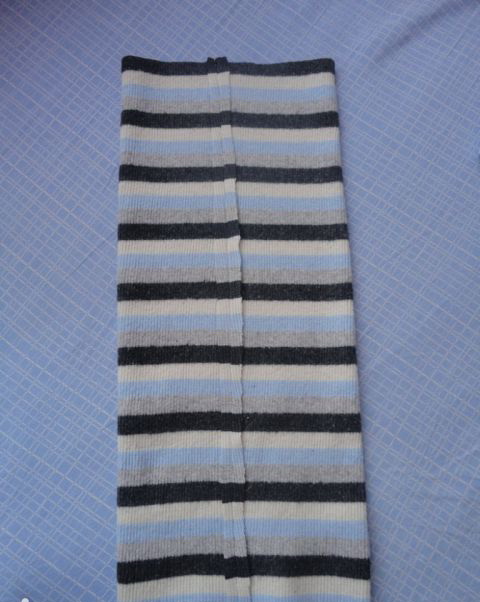
If we sew double hat-chubs in size 52-56, then we need a piece knitwear with sides 60/50 centimeters.
Fold the fabric by the wrong side, and from left to right.
We cook the pattern
Fold the fabric
The rear seam is located on the right
Thus, the cap of the cap should be on the right.
We carry out measurements of the head and adjust the pattern under them. Cut 4 paper parts.
The height of the hat presented in this master class is 28 cm, and the width is 45-46 cm.
The adjusted and cut out pattern is applied to the fabric and pin it with pins. We draw the patterns of the pattern with chalk, and cut out, adding 1 cm for allowances.
To look like this should be like this:
We fix the pattern with pins
And so, after we remove the pattern:

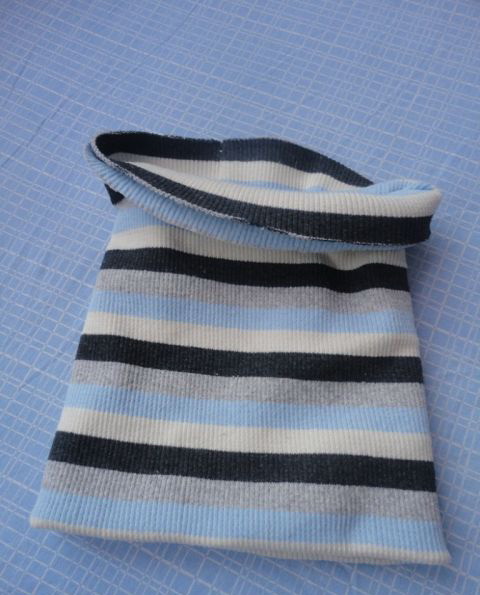
We will deploy a knitted workpiece in full width. Put the front side inside. We fix it again with pins and go over the rear seam.
We unfold knitwear in the entire length

We process the rear seam overlock
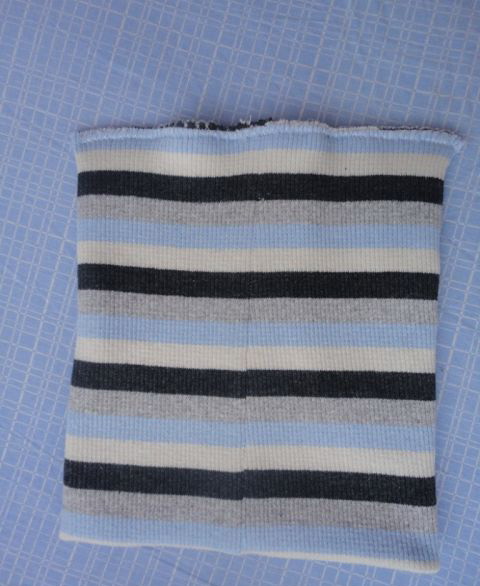
We sew the upper part of the cap and turn it out to the face out.
Sew the top of the hat
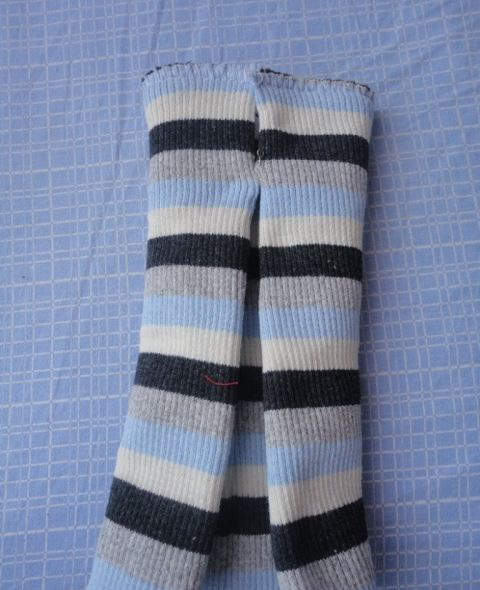
We put one half of the caps into the other so that the seams definitely match and fix with pins.
We turn out the work on the front side
We sew the seam located on top of the machine, completely closing the rear seam. Turn the hat.
We stitch the upper seam on a typewriter
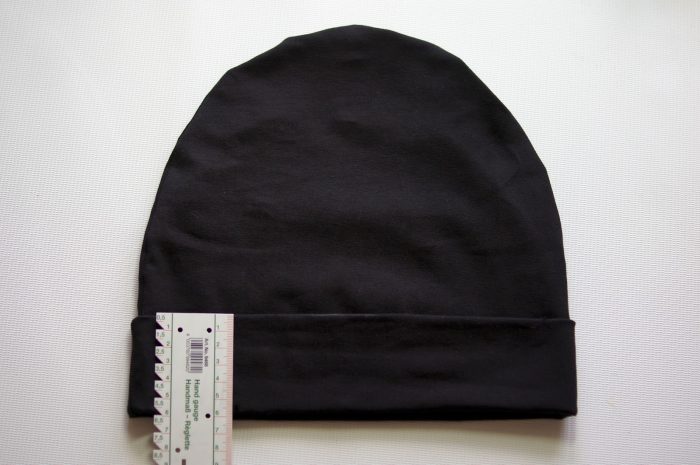
Ready cap
How to sew a hat-pendant for a child?
For a child, the cap is sewn in the same way. But the pattern needs to be done several sizes smaller. To determine which a segment of the fabric for a header hat, the volume of the head and height of the cap is measured. The pattern changes in accordance with the data obtained.


You can sew a hat-chubs on this pattern:
 It is designed for a head of the head of 52 cm. It is necessary to add allowances to the seams (the upper cut for 1 cm and the lower with an average of 1.5 cm, 0), which are not taken into account here.
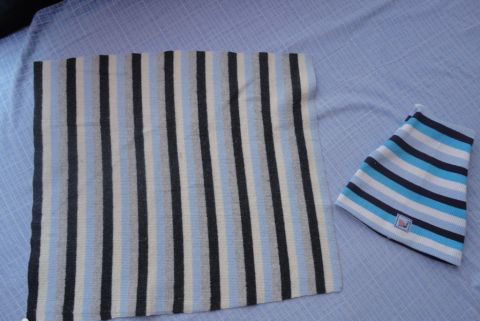
Patter of a knitted cap for a boy
For a hat you need a knitwear that stretches.
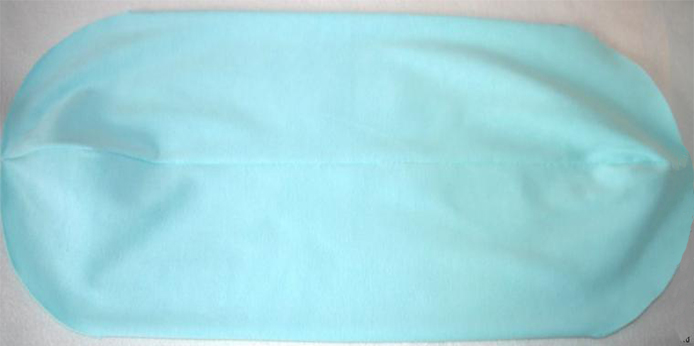
We cut a rectangle from a knitwear segment. We fold four times (we will have a double hat).
Cut the rectangle
We sew the middle seam.

Fold four times
We sew the middle seam
We got a pipe. We walk around the seam with an iron to get a rally.
We form a double hat
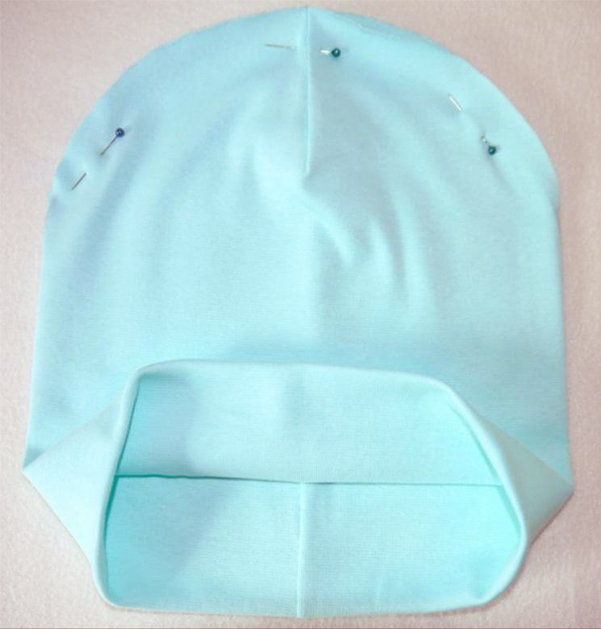
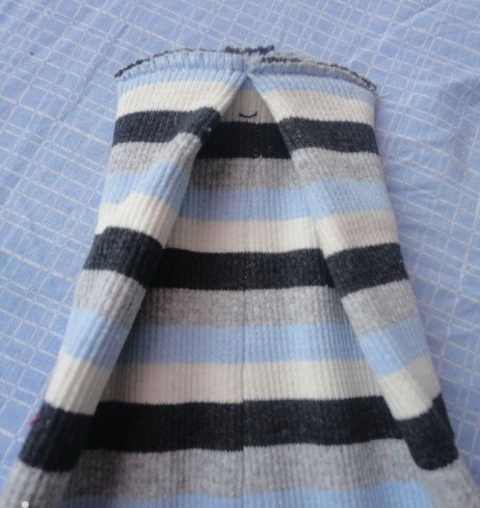
Turn the pipe on the front side. We fold a double hat so that the middle seam is clearly in the middle.
Sew the top of the hat
We sew the top of the cap. The corners of the hat are tied to the middle (they should be on both sides of the middle seam).
Wrap corners to the middle seam
We fix everything with a straight line
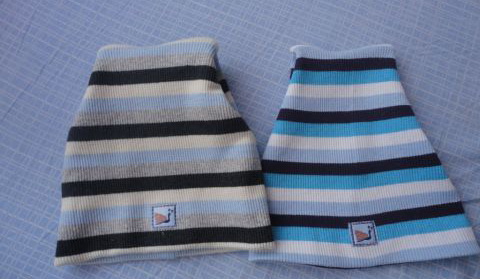
We glue the label
We sew a straight line. Turn the hat on the front side. You can glue the thermo-hint in the area of \u200b\u200bthe forehead or application.
DIY double -sided hazard cap
See how two -sided warm hats can be sewn.
Other hats options:
Fleas hats on lining

How to sew a hat with a chatter of knitwear?
You will learn about how to sew a hat-hat from a detailed master class.
Video: DIY Chalma cap
Fleet hat with your own hands patterns
See how to sew a hat and a scarf from a fleece.