In this article I would like to talk about how to make beautiful soft toys yourself. If you know all the nuances and have patterns on hand, this will not be difficult.
The content of the article
- DIY soft toys from fabric: patterns
- How to fill a soft toy with your own hands?
- DIY soft toys from felt patterns
- DIY soft toys
- Video: soft toys from fleece with your own hands
- DIY soft toy from fur
- DIY soft toys from socks
- DIY pig's pigtail soft toy pattern
- Make a soft toy with your own hands chicken
- How to make a soft toy with your own hands a spider?
- Video: soft toy cat, cat, kitten with your own hands
- Video: How to make a soft toy with your own hands of a bunny?
- Soft toy owl with your own hands patterns
- DIY Bouquets of soft toys
- Soft toy monkey with your own hands patterns
- Video: DIY soft toy
- Video: Soft toy with your own hands
- How to sew a soft toy with your own hands Bear patterns?
- Video: Soft toy fish with your own hands
- DIY soft toy DIY cat-cup pattern pattern
- Video: soft toy caterpillar with your own hands
- Video: soft toys pillows with your own hands patterns
- Video: DIY dash patterns
- Video: DIY soft toy Fox toy
Previously, women attached particular importance to toys that were made on their own - they put their souls and meaning in them. In the age of technological progress, everything is much easier, but why buy a finished toy, if you can make a soft miracle yourself?
DIY soft toys from fabric: patterns
Anyone can cope with the manufacture of a soft toy, but you can’t do without a pattern. So, we present to your attention a few patterns:
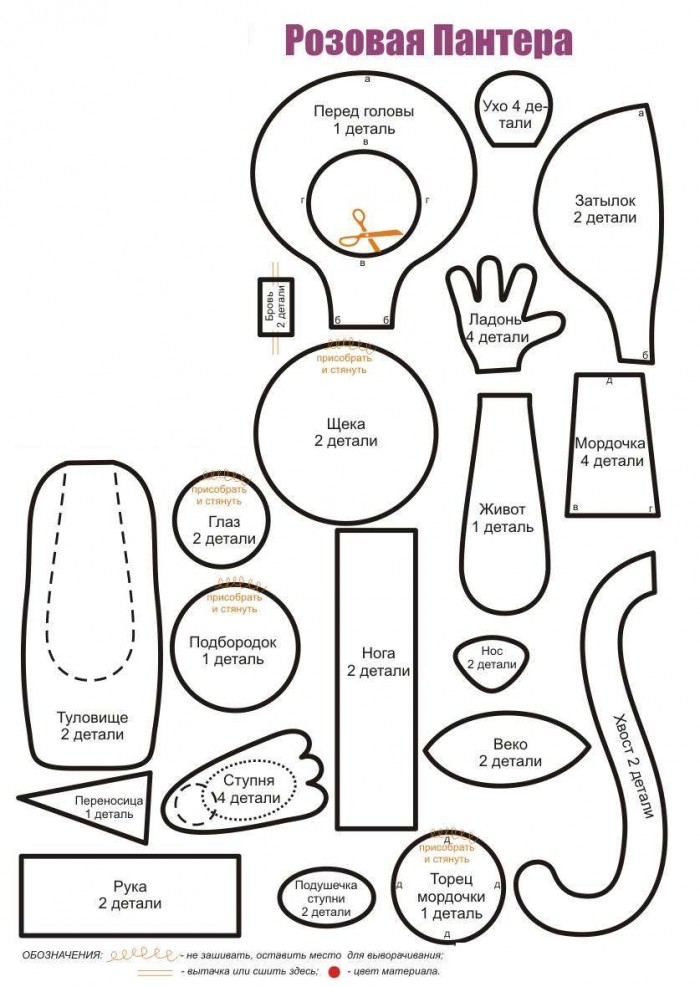
Soft toy pink panther
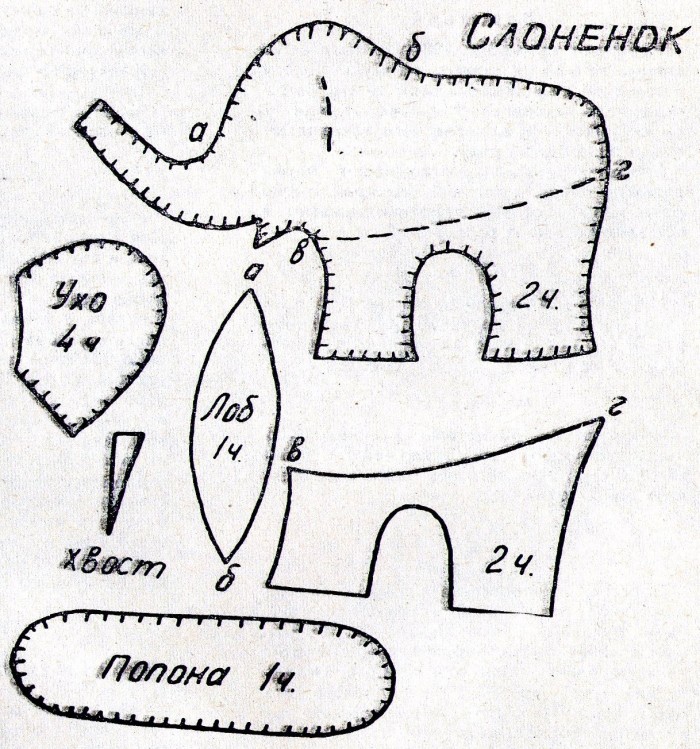
Soft toy-slice

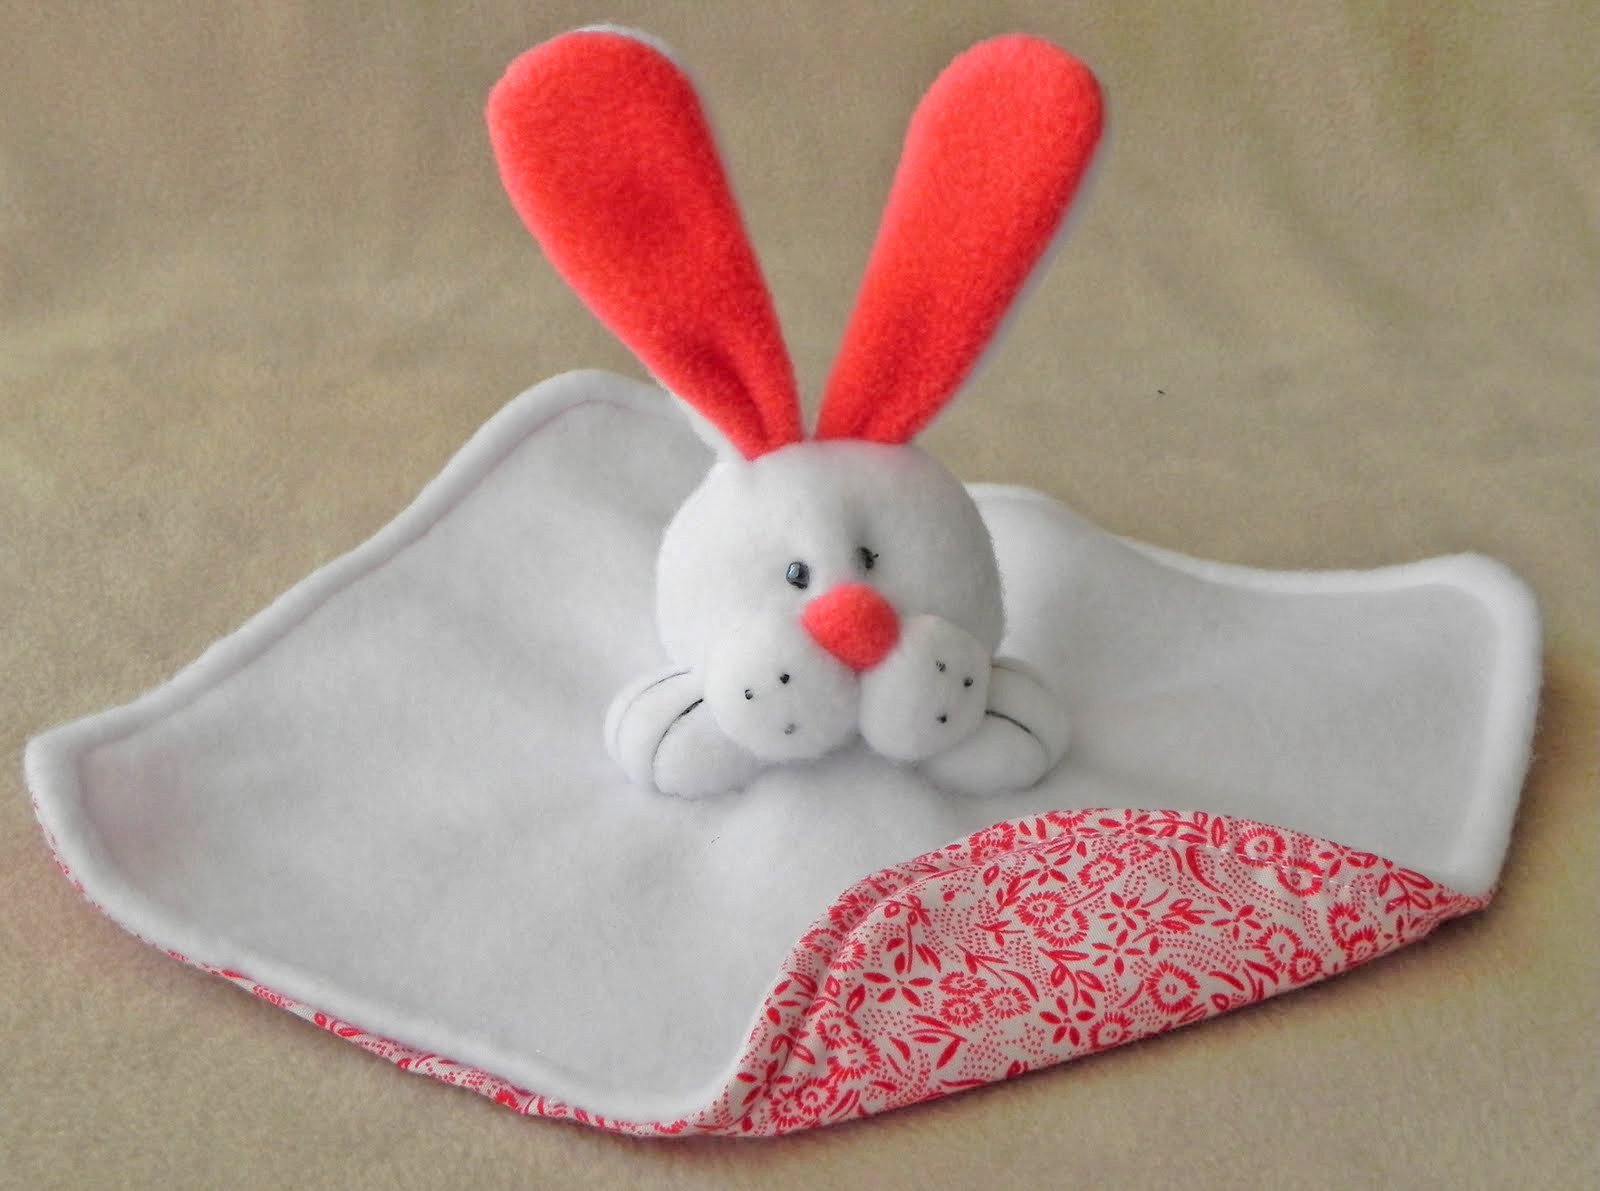
Soft toy hare
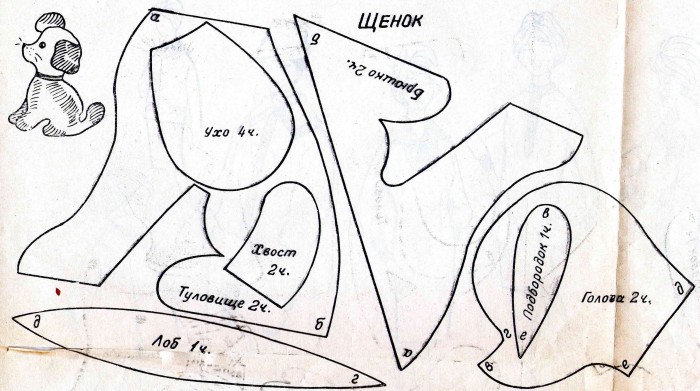
Soft toy puppy
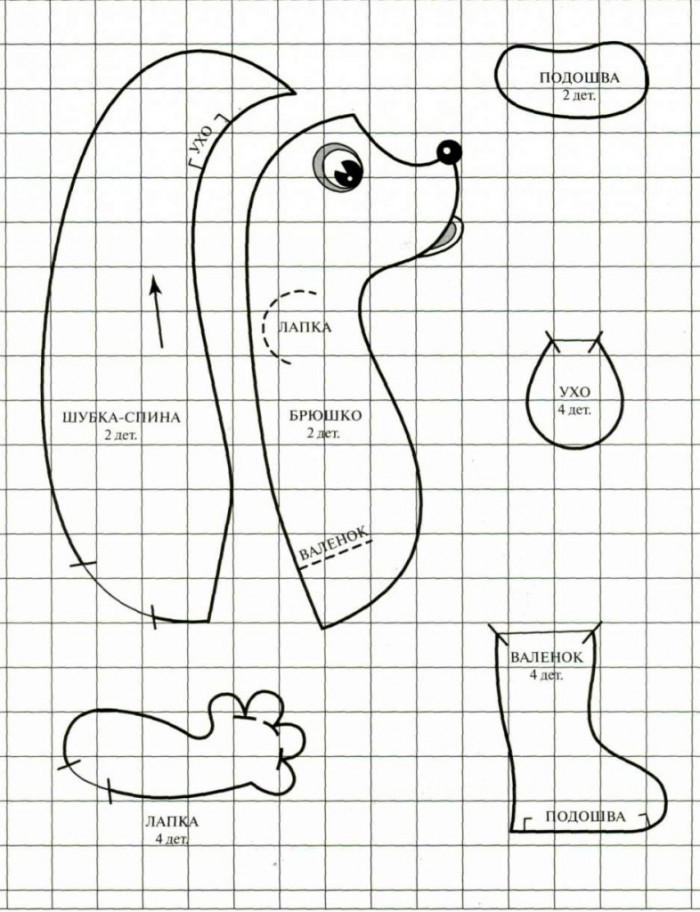
Soft toy Hedgehog
How to fill a soft toy with your own hands?
To natural fillers relate:
- Vata - The most commonly used material due to its availability, cheapness and the inability to cause allergies. However, there are shortcomings - uneven distribution inside the product, frequent rolling, the appearance of stiffness after washing
Important: keep in mind that cotton wool absorbs moisture well. And this means that mold and decay toys are inevitable, which, of course, is dangerous for health.
- Wool - Good material due to lightness and softness. However, on some products, irregularities formed due to woolen filler may be too noticeable. Therefore, give preference to this material either when the toy is made of the same wool, or when it is made of dense material
- It is best to use sloverwhich is a cleaned sheep wool. It is just ideal for soft toys. However, there is a small nuance - sliver is sold by large rolls, so it makes sense to stock up only with far -reaching plans
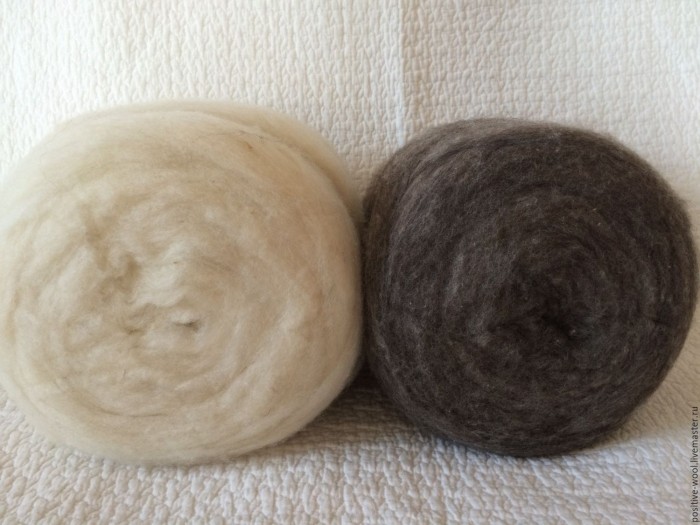
Sliver for soft toys is sold in large rolls
- Fanding fillers - These include small sawdust, salt, seeds, sand, husk, various cereals, small shells, peas. The plus of such materials is that they help the baby develop motor skills. However, such toys cannot be soaked, and even better to use bulk fillers as an addition to weighting
Important: cereals often attract bugs, so you should process the filler in a red -hot dry frying pan before needlework.
- Herbs - Jasmine, rosemary, chamomile, lavender, lemon balm, oregano are recommended. They can be mixed either separately, but in any case, you need to put them in a bag of flax or calico, and the bag itself - in the toy. It is worth making a zipper in order to periodically change the filler

Oretean - an excellent filler for soft toys
Concerning synthetic fillers, then they have a whole several advantages In front of natural ones, they are easier to distribute inside toys, do not cause allergic reactions, do not serve as a place of accumulation of insects, things are allowed to wash with them. You can choose the following fillers:
- Syntephop - One of the most common materials. It is recommended to tear the canvas of synthetic winterizer with your hands - this will give pieces airiness. True, there is a danger that over time, the synthetic winter filler slides and somewhat deforms the thing. But here you can find a way out - it is enough to purchase a siliconized synthetic winterizer, which is more elastic in structure
- Syntepuh - It looks like the previous option, but is considered more convenient. Due to its lightness, filling toys is much easier. However, if you plan to make a light fabric toy, it is advisable to purchase a siliconized filler
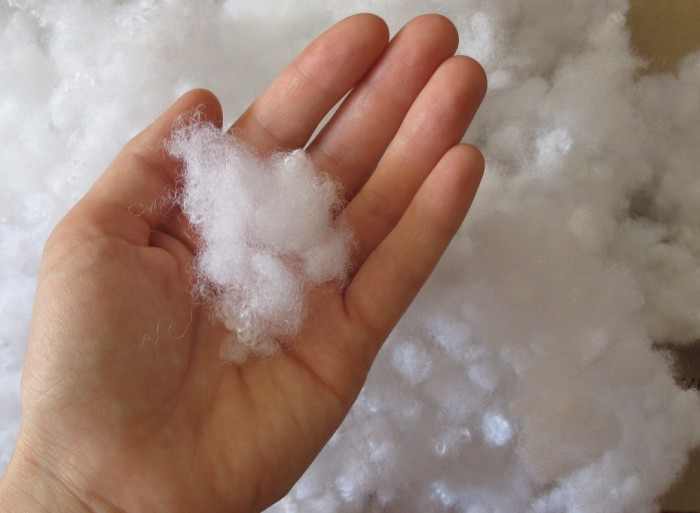
Syntyupuh - light and convenient filler for a soft toy
- Balloons - A variety of syntepuh, designed specifically for filling soft toys. There are at least disadvantages of such material, and of the pluses - the lack of stiffness and rolling over time
Important: however, to fill with such material toys either made of dense fabric or knitted ones.
DIY soft toys from felt patterns
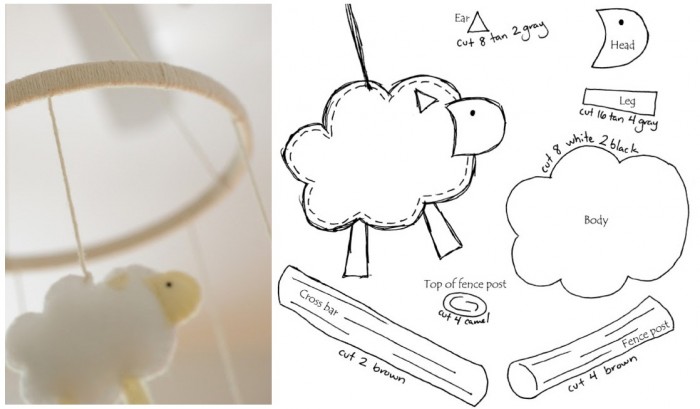
Soft toy Sheep made of felt
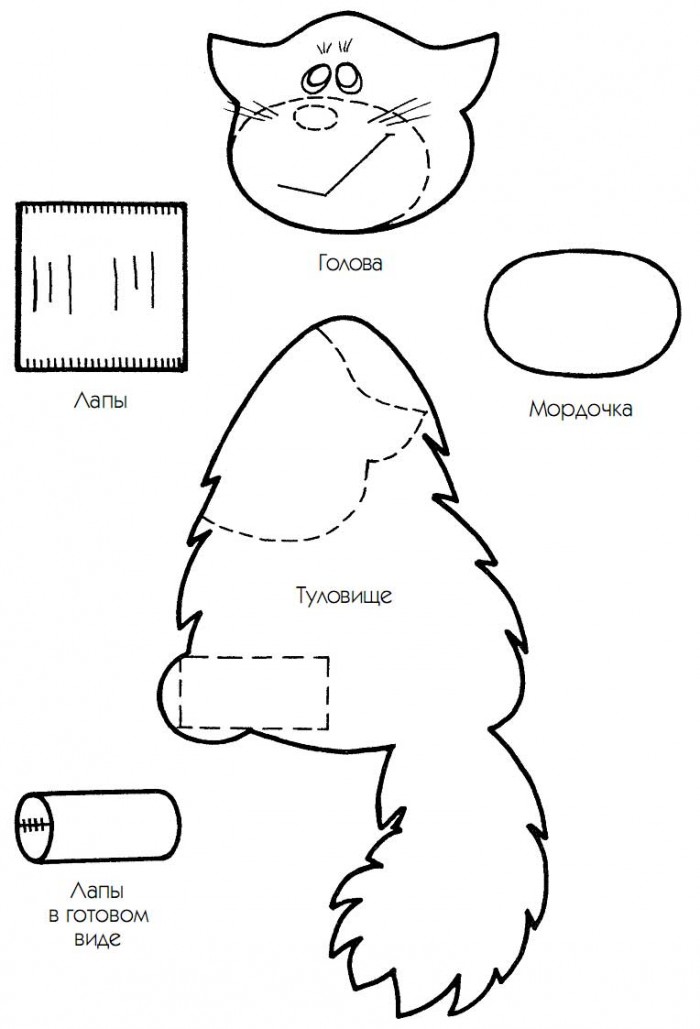
Soft toy cat Fetra
Soft toy Pig made of felt
DIY soft toys
To begin with, you can try to tie something light-for example, a train. So, we proceed:
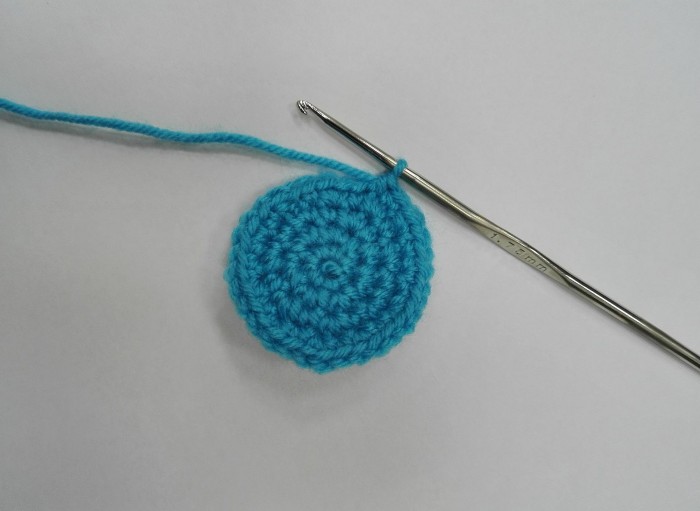
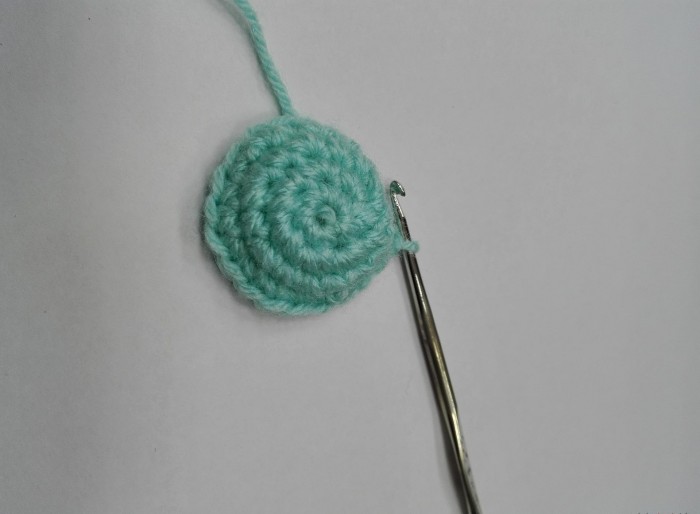
- For the car To begin with, you will need to tie six columns without crochet in a loop. At the same time, in each of the loops of the second row, two columns without crochet are knitted in total. Thus, rows are created
Creating a trailer in a soft toy
- Now, one crude column without a crochet is spreading into each separate loop. On this principle, ten rows are formed, of which will consist train trailer
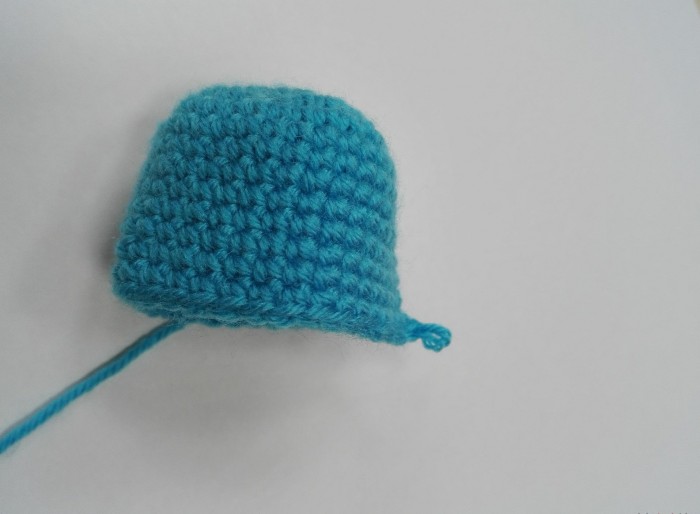
Giving the trailer a soft toy volume
- In order for the trailer to be the necessary shape, it needs gradually reduce. To do this, in each row, three decreases should be done at once. And when the hole becomes small, you will need to score the car with the filler
Important: filler pieces should fit tightly to each other, otherwise the toy can over time change the original shape.

A soft toy trailer is filled with a filler
- We proceed to the manufacture another detail of the steam locomotive. Six blocks without crochet are placed in one loop. In this case, two columns are placed in the loops at the previous row
For a soft toy, the steam locomotive is knitting another part
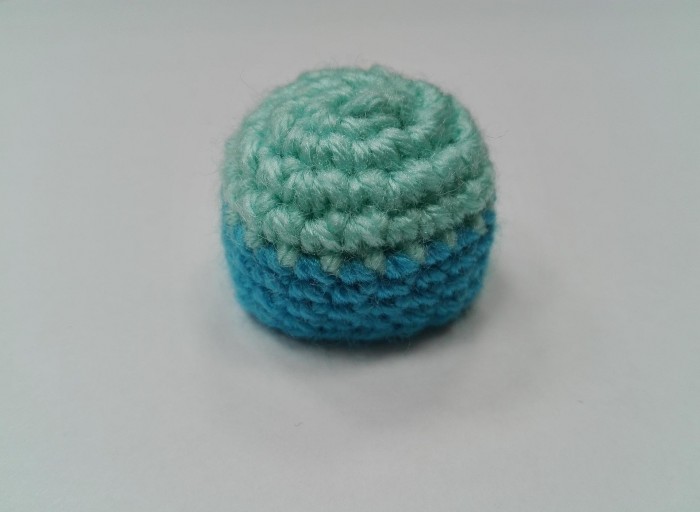
The detail of the knitted toy can be arranged in different colors
- Next is knitted pipe, and for a start with blue yarn. When the knitting of the pipe continues with black yarn, one column will need to be placed in each loop. As for the red threads, only one row will have to arrange them
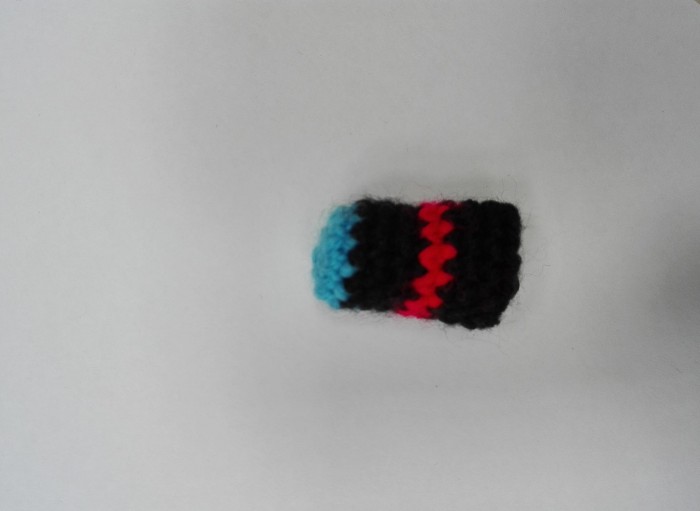
Pipe for a soft toy steam locomotive
- Now we are doing wheels. As for black threads, six columns are placed in one loop. And in red threads in a loop, two columns are threaded
Important: the exclusion will be the last row - there two columns or one will stand in one loop.
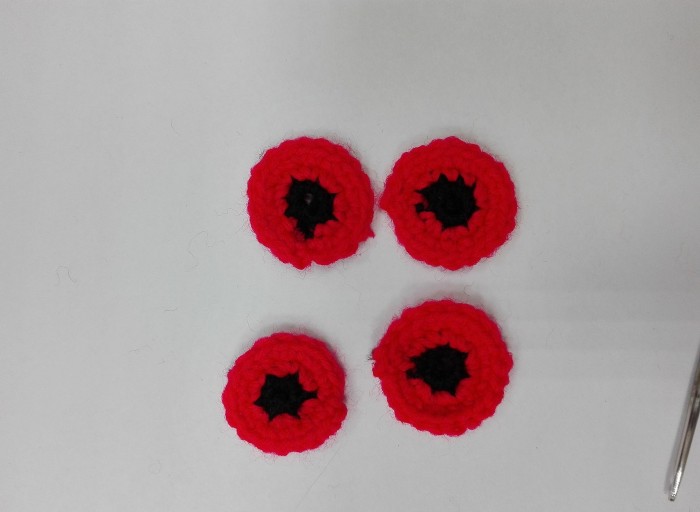
Wheels for a soft toy
- The final stage - Connection of all parts into a single toy. Supplementing knitted parts is worth the special eyes that are sold in any store for creativity
Important: if you want to make a smiling steam locomotive, a smile should be created with yarn - the part in this case will turn out more clearly.
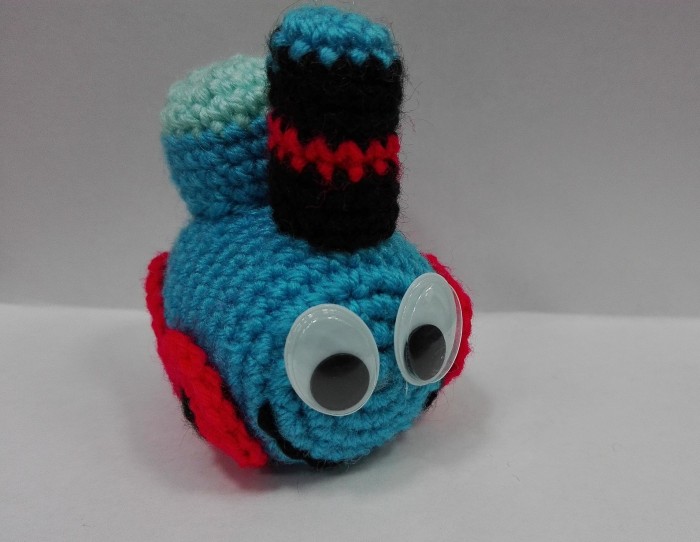
Soft knitted toy steam locomotive is ready
Video: soft toys from fleece with your own hands
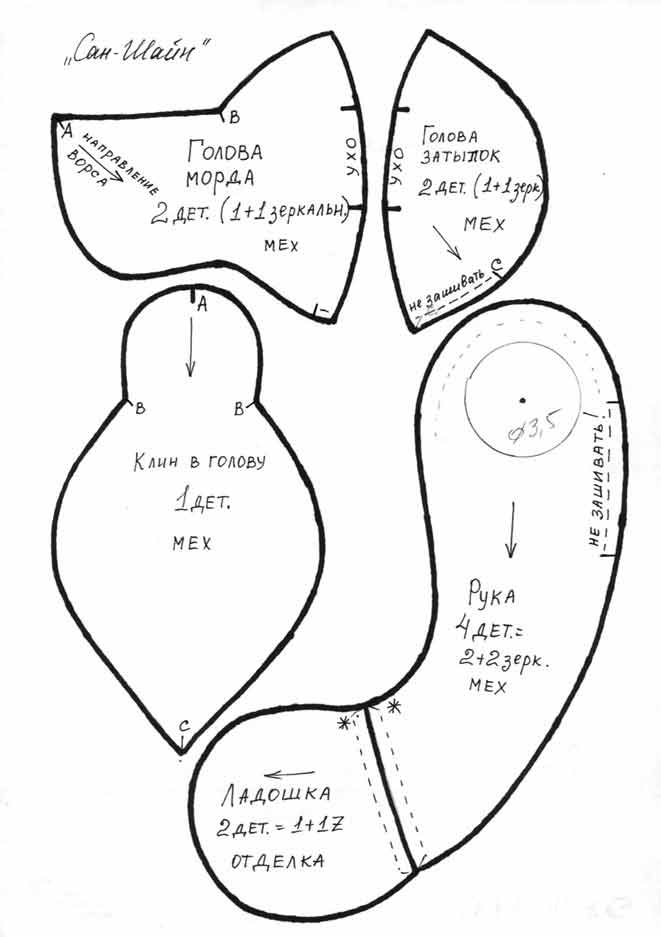
DIY soft toy from fur
- First you need to carefully cut all the parts from the pattern
Parts are cut out from the pattern for the manufacture of a soft toy
- Forehead, eyebrows, inflames and cheeks are sewn together, and formers are processed
- Now you need insert the side wedges heads, ears, chin
- Details of the abdomen are sewn between themselves
- Featers are sewn to the wings. The rear parts of the wings should not be cut
- Further tail, back, abdomen and wings are connected
Important: in the process of stitching, do not forget to leave the hole in order to stick the filler. Ready -made parts for stuffing are turned inside out.
- The head, tail and wings are sewn to the body. In this case, the tail is laid out by a fan. Eyes are attached to the head, which can be made of adhesive tanker, inflames
- The paws are lined with fabric, claws are attached to each
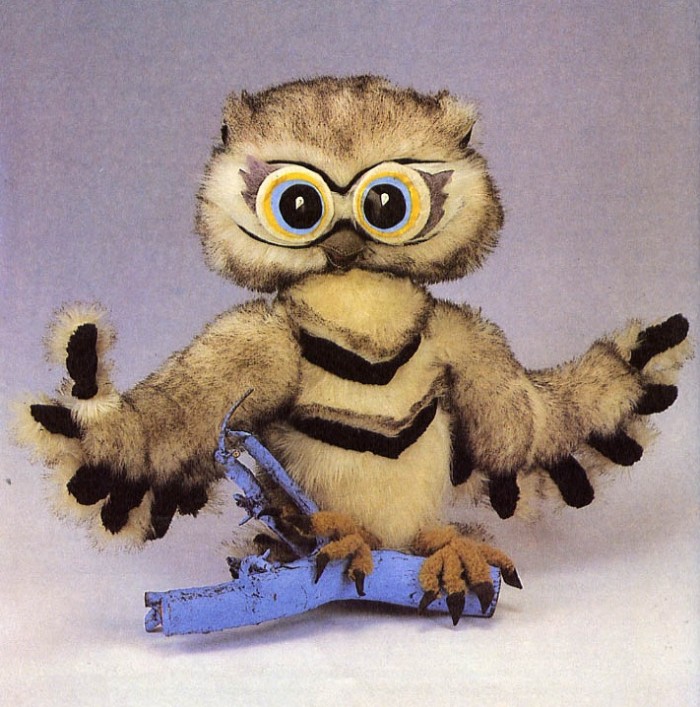
Soft toy made of fur owl
DIY soft toys from socks
So, for toys-cat you will need:
- Sock
Important: it is better not to use excessively rubbed socks, since toys from them will not have an attractive look. But the so -so -so -so -sock sock is what you need!
- Syntipon stuffing, shreds
- Scissors
- Needle and thread
- Yarn, buttons and other things that can fit for the decor
So, we proceed:
- First thing the length of the toe is regulated - It depends on how much the toy you need
- Now The filler is distributed on the torso and head
Important: the body should be filled better, because it should be larger than the head.
- Wrap inside the edge, fasten them with a pin
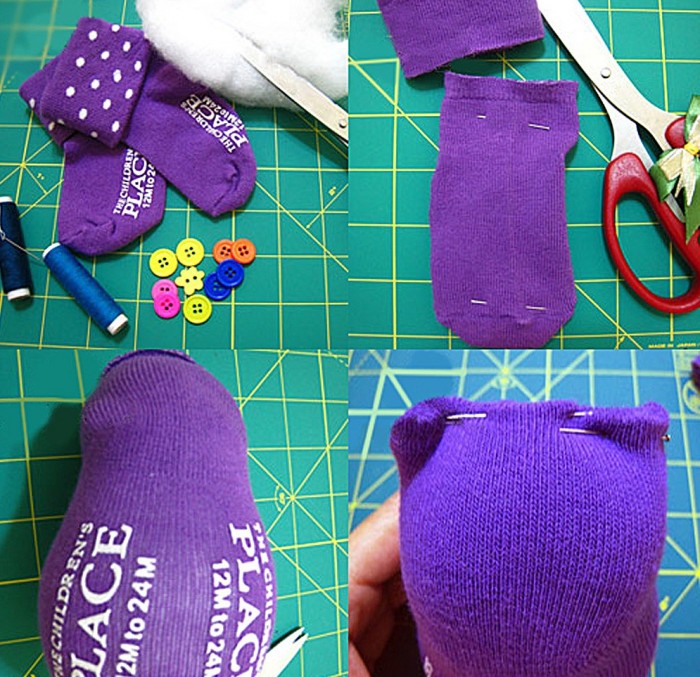
This is how the torso and the head of a soft toy from the sock are formed
- Now the edges of the sock are sewn. Corners straighten up so that they resemble cat ears
- Give your fingers to the head and body the final round shape
- Marker designate the muzzle. And then mark it with threads
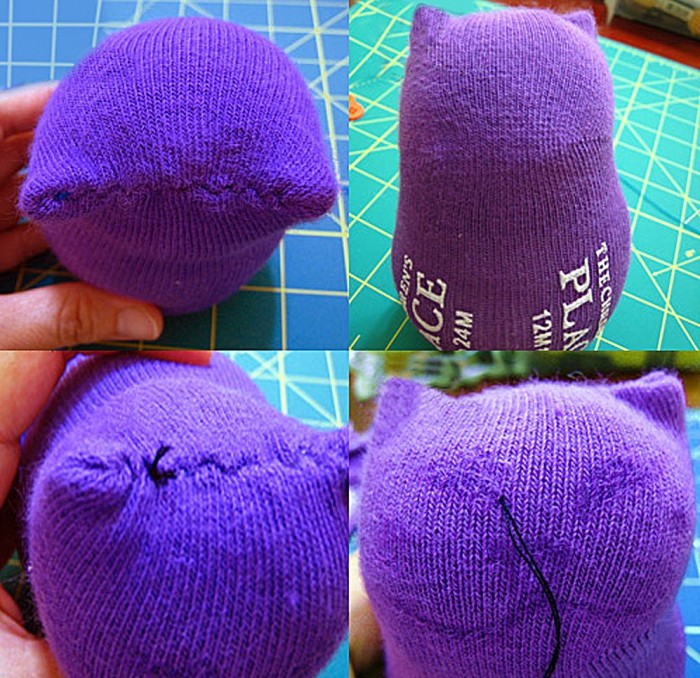
Formation of a muzzle of a soft toy made of sock
- If there is a thread for knitting and a beautiful button - fine! They will serve as a material for a tie - so the toy will be decorated, and the head with the body will be better indicated
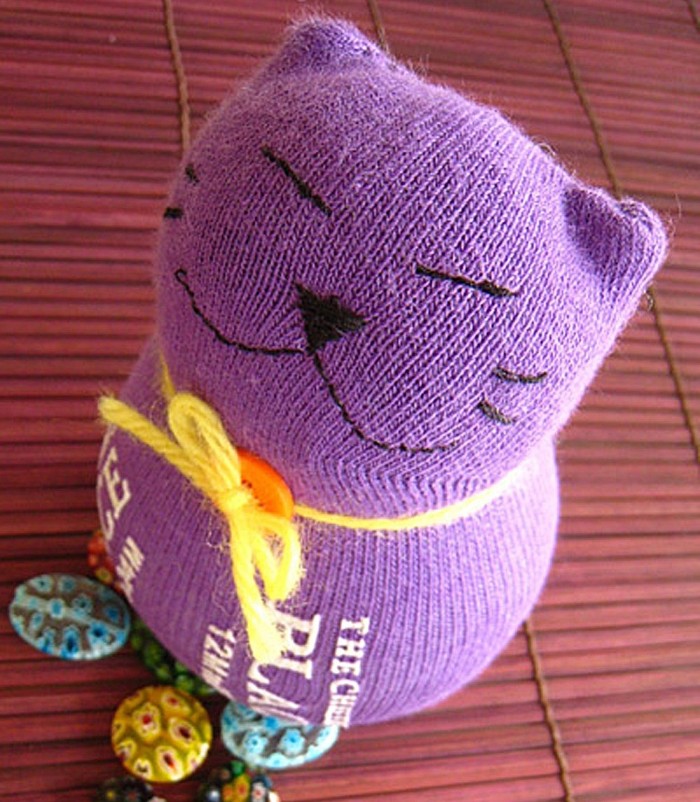
Ready -made soft toe
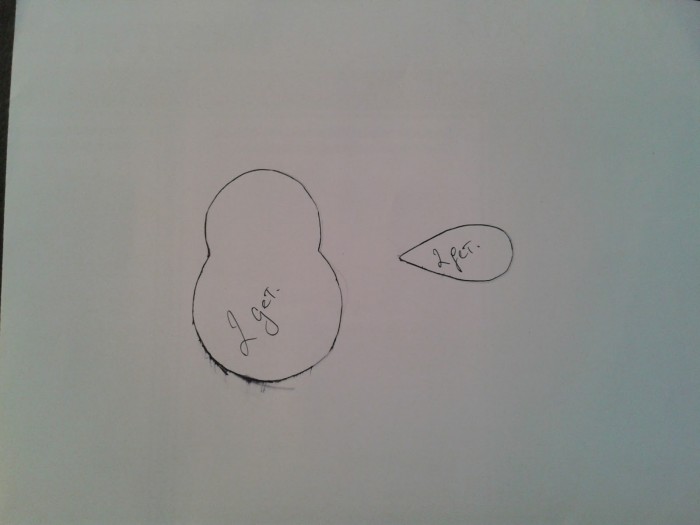
DIY pig's pigtail soft toy pattern
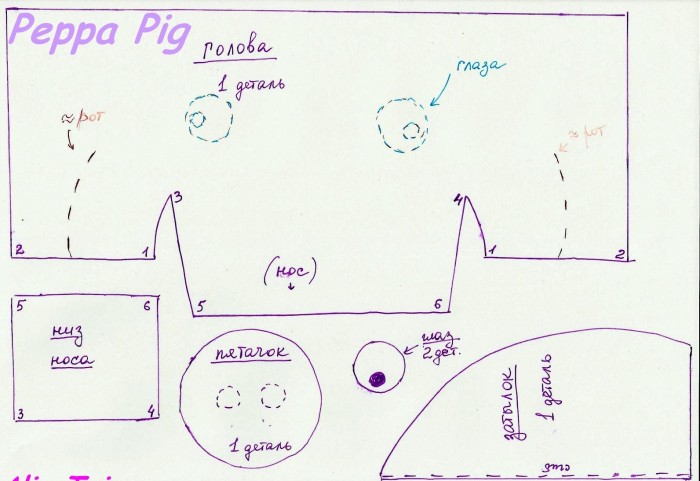
Patter of a soft toy in the form of Peppa
Make a soft toy with your own hands chicken
For making chickens from felt you will need it Stand up:
- Fetter of yellow and red flowers
- Yellow, black and red threads
- Filler to your taste
- Some kind of squeak or rustle
Operating procedure:
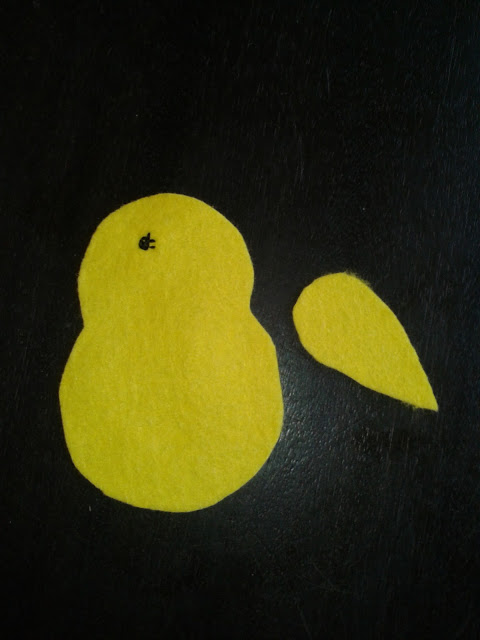
- For starters, it is worth it Draw a pattern
Pattern of soft toy chicken
- With soap or marker the pattern is transferred to the material. Do not forget that the details should be made in duplicate
Important: the marker should be selected such that is well washed off.
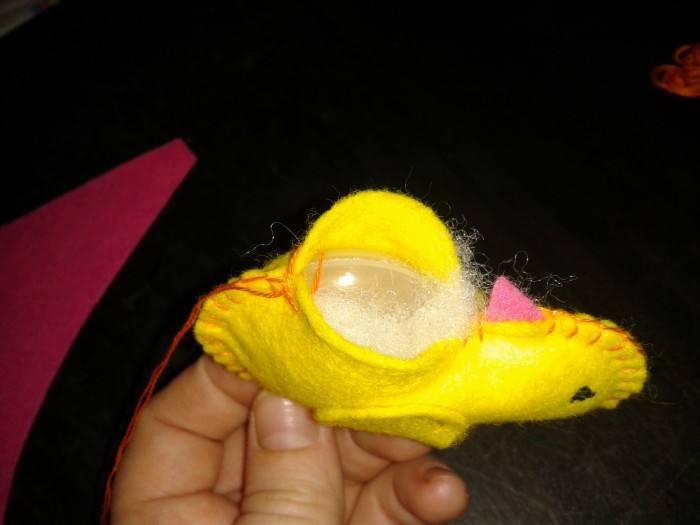
- High a small cross in the area of \u200b\u200bthe head, and then a circle along its perimeter. This is how the toys are formed. You can still sew cilia
Eye formation in a soft toy
- With the help of three or four stitches wings are sewn
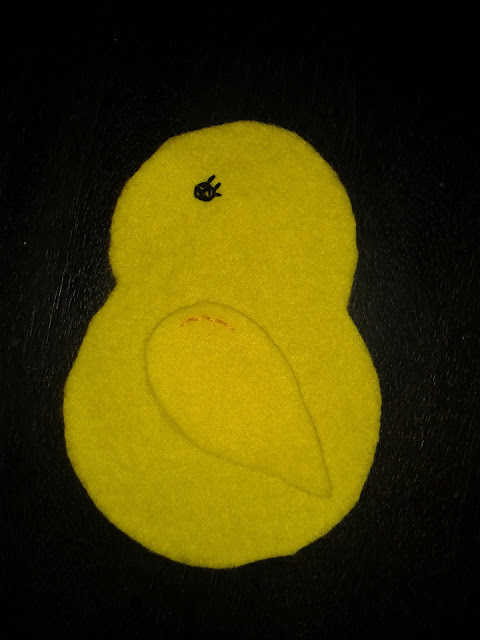
Sewing wings with a soft toy
- The beak is sewn to the head At the stage when parts of the toy are not yet connected to each other
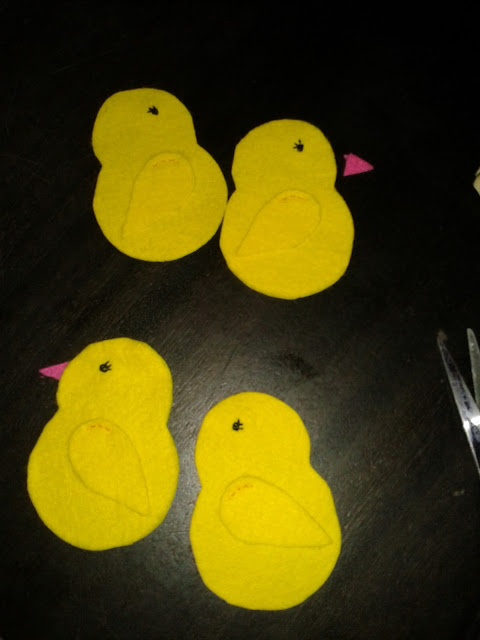
Sewing the beak of a soft toy to the head
- Vermber seam parts of the chicken are connected. And it is better to do this with a contrasting thread. A place for filler is left
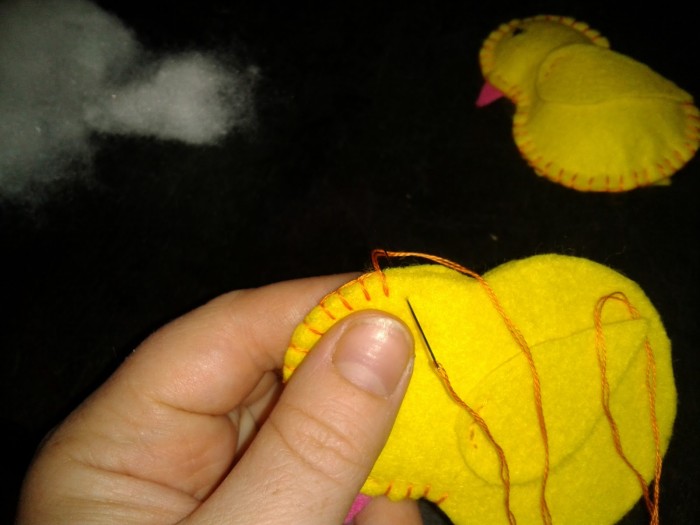
Sewing parts of a soft toy
- The filler clogs the head. The torso is also clogged, but you also need to insert a rustle or squeak - small children will be delighted with such a toy
- Now the toy is finally sutured
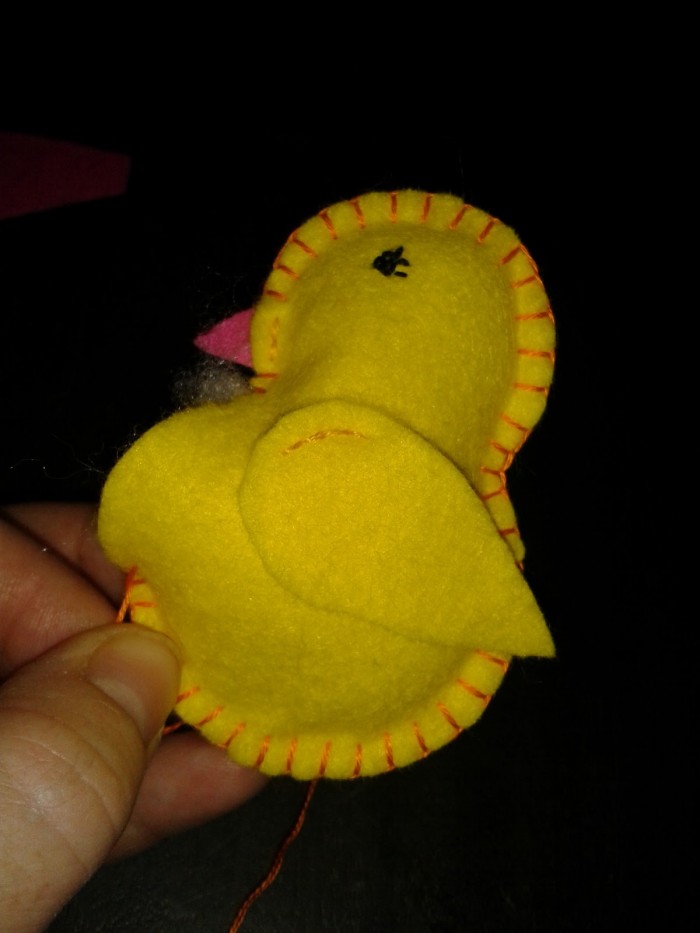
Soft toy is finally sutured
How to make a soft toy with your own hands a spider?
The spider is completely easy to do, and for this you will need:
- Fabric, artificial fur
- Foam sponge
- Woolen threads
- Wire of small thickness
- Scissors, threads, needle
- Glassry, a variety of beads, foil
We start work:
- From synthetic fabric Cut the blanks for the body, and from fur - for the head
- Give the sponge that formwhich is planned at the body and head of the spider
- Two tissue blanks for the body are tightened by one sponge. Parts of the blanks are sewn
Important: the firm part of the sponge is located below - this avoids deformation of the toy.
- For the manufacture of legs It is necessary to divide the wire into three parts. They must be equal and located across the body. After the location, the pieces are given the appropriate shape, they are tightened with black wool threads
- The filler clogs the head. She is sewn, her eyes are attached. The nose and mouth are indicated
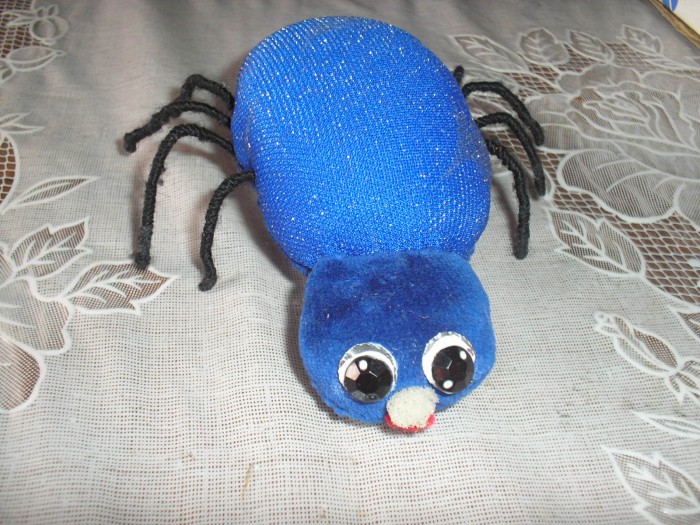
Here is such a soft spider toy in the end
Video: soft toy cat, cat, kitten with your own hands
Video: How to make a soft toy with your own hands of a bunny?
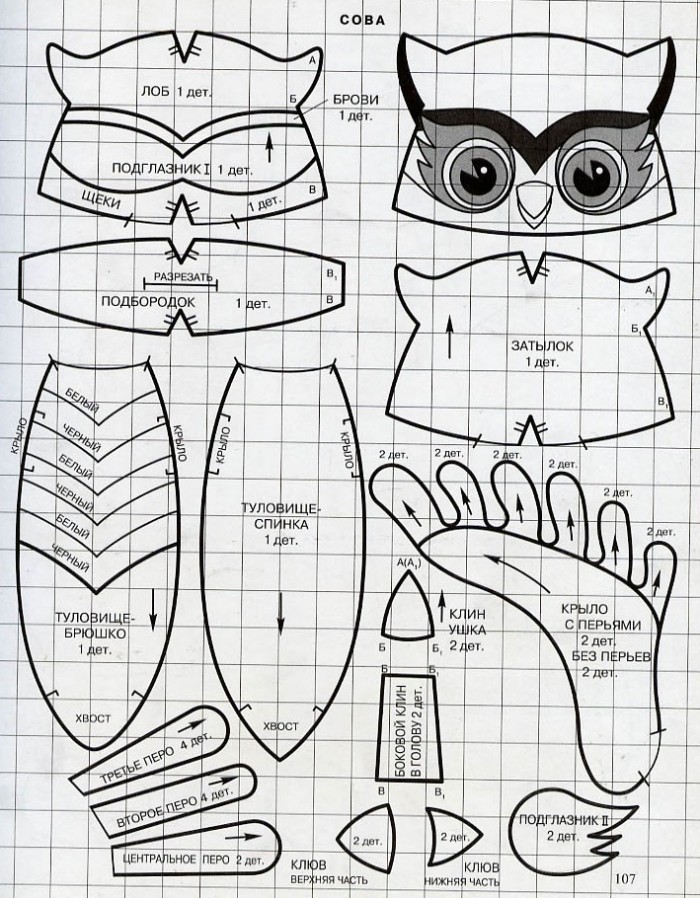
Soft toy owl with your own hands patterns
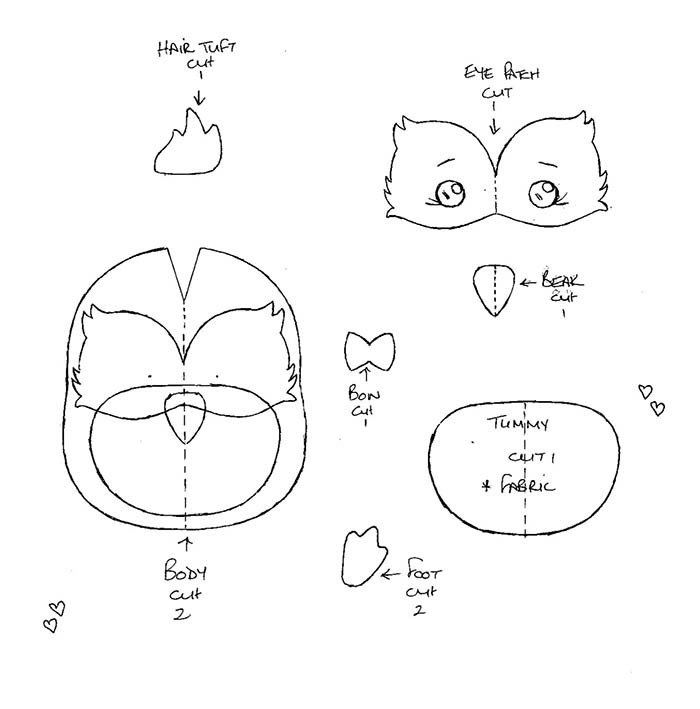
Owl soft toy patterns
DIY Bouquets of soft toys
For the manufacture of such an unusual gift you will need:
- Stuffed Toys
- Dense foam
- Cardboard, aluminum or plastic tube - it is useful for a pen
- Wire
- Some kind of fabric
- Corruption effect
- Various elements that can decorate the bouquet
You can proceed:
- A truncated cone is cut out of foam - This will be the basis. The smallest part in the diameter will be converted down. Holes are cut below
- A tube is attached to the holes, which will be The handle of the bouquet
Important: it is recommended to add the bottom of the cone with glue.
- Glue dries, after which the cone is covered with some kind of fabric And again it is connected by glue. However, you can also use a stapler, pins
- With the help of floristic wire to the bouquet toys are attached. However, bamboo sticks for fasteners will also fit
- Free place between toys is filled a variety of decor elements
- The bouquet turns around corrugated paper
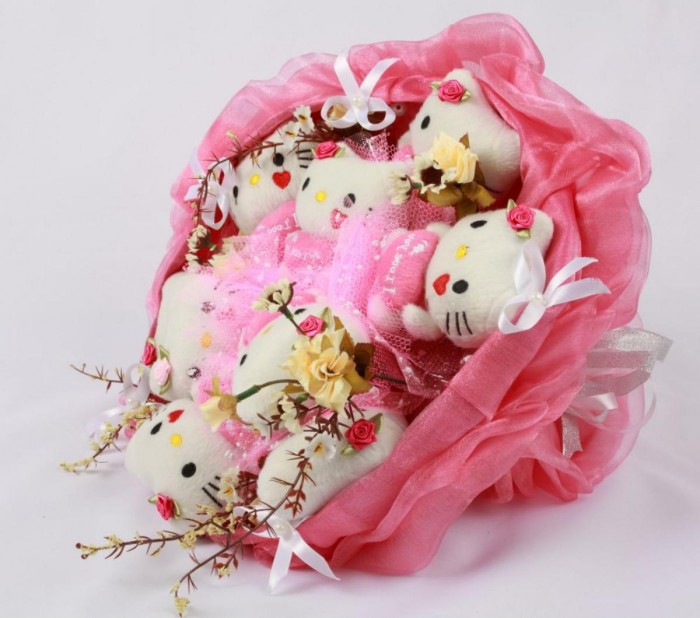
A bouquet of toys-kosy
Soft toy monkey with your own hands patterns
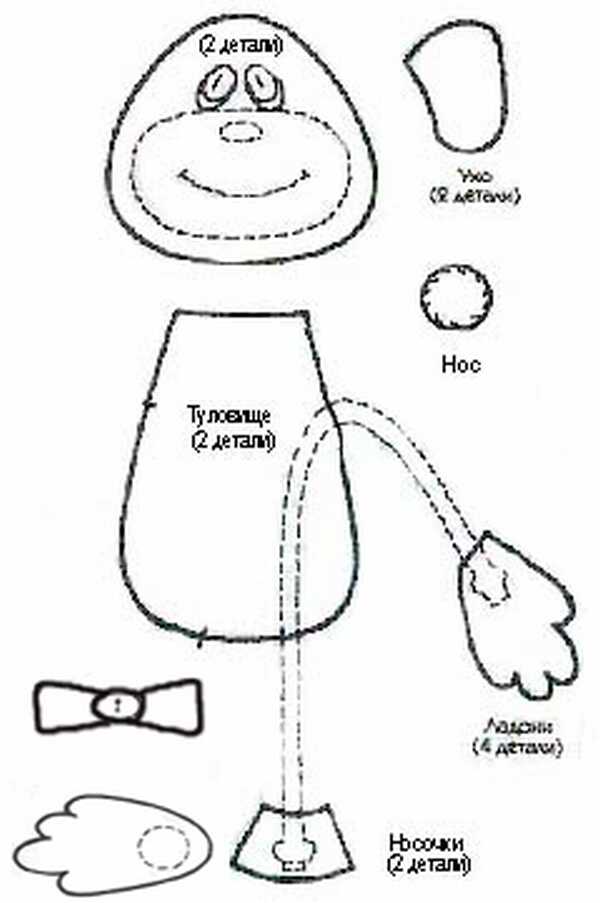
Patter of a soft toy monkey
Video: DIY soft toy
Video: Soft toy with your own hands
How to sew a soft toy with your own hands Bear patterns?
Patter of a soft toy of a bear
Video: Soft toy fish with your own hands
DIY soft toy DIY cat-cup pattern pattern
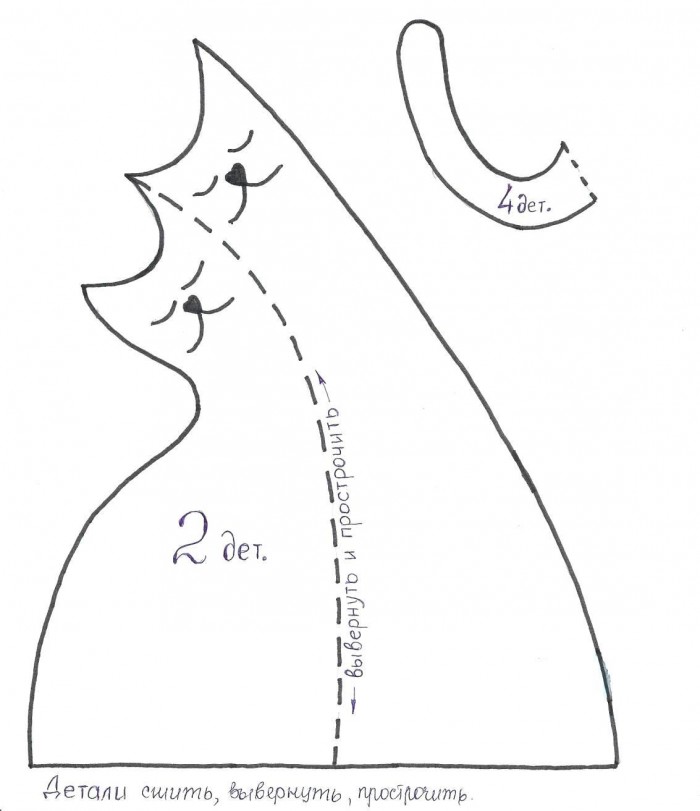
Patter of a soft toy cat-cup
Video: soft toy caterpillar with your own hands
Video: soft toys pillows with your own hands patterns
Video: DIY dash patterns
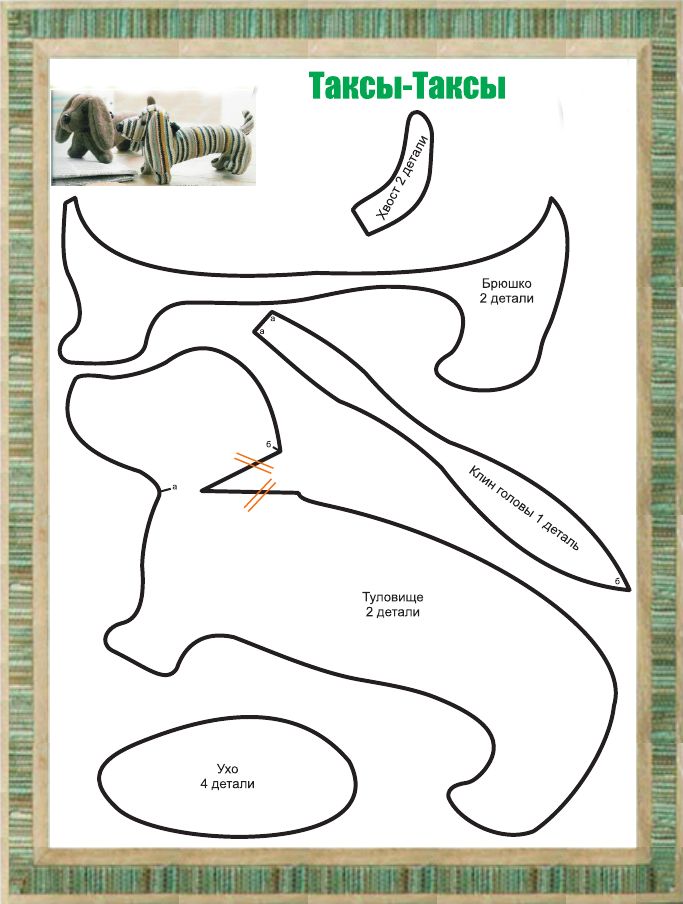
Patter of a soft toy of a dash
Soft toys made independently is an excellent gift! And not only for children, but also for adults who will certainly appreciate a similar souvenir. It is only important to stock up on the necessary materials and a drop of patience.