It is always nice to buy new clothes to your child, and it is even more pleasant to make her herself. This article will talk about hats for a boy, crocheted.
The content of the article
- Warm winter hat for a boy Crochet: Description and Scheme
- Crochet hat for a boy for spring and autumn: description and diagram
- Crochet Bini hat for a boy: description and diagram
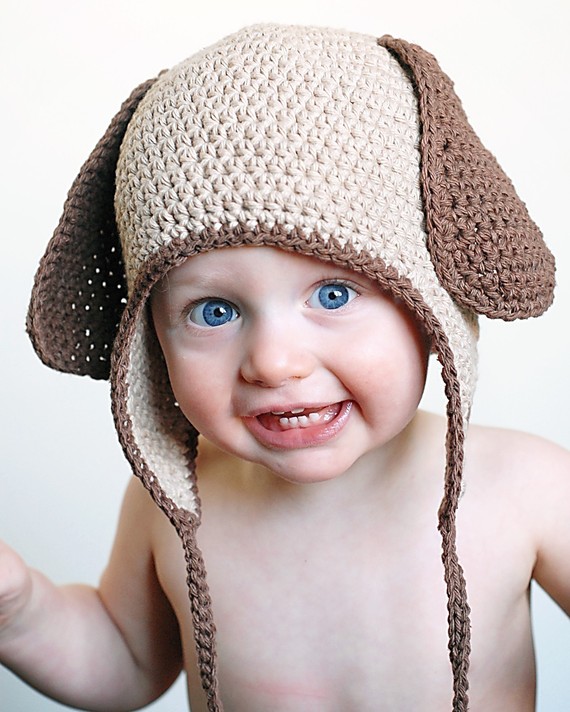
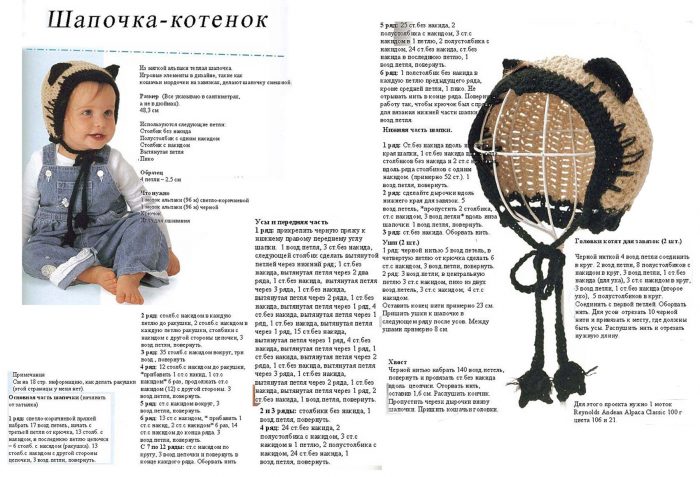
- Hat for a boy with ears Crochet: Description and Scheme
- Hat Mishka Teddy Crochet: Scheme and Description
- Hat helmet for a boy Crochet: Description and Scheme
- Hat with a muzzle for a boy Crochet: Scheme
- Crochet owl for a boy: description and diagram
- Crochet cap for a boy: description and diagram
- Crochet Ushaka hat for a boy: description and diagram
- Video. A mignon hat for a boy
Warm winter hat for a boy Crochet: Description and Scheme
In order to tie a hat to the child, it is necessary to make measurements of his circumference of the head. Below in the table they are indicated by age.
| Age | The height of the cap | Diameter of the bottom |
| 0-3 months | 13 cm | 9 cm |
| 3-6 months | 14 cm | 10 cm |
| 6-18 months | 15.5 cm | 12 cm |
| 18 month | 18 cm | 13.5 cm |
| 2-6 years | 19 cm | 14.5 cm |
| 3-8 years | 19.5 cm | 15.5 cm |
| 8-16 years | 21.5 cm | 16.5 cm |
A cap with ears
Crochet hat for a boy for spring and autumn: description and diagram
Hat for spring/autumn
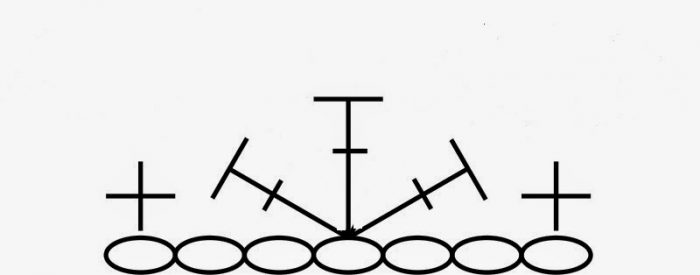
Crochet Bini hat for a boy: description and diagram
Bini's hat is now the most fashionable, everyone is worn. For its knitting, you do not need to measure the volume of the head, because Its main part is an elastic band. The principle of knitting on the picture does not depend. You will need a half -wool yarn 100 g and hook No. 4.5. So, the scheme of work:
*drawing "shell"
- 1st row: 12-14 V.P. + 1 V.P. rise.
- 2nd row, etc.: Art. b/n for the back of half -flow, we finish 1 V.P. rise.
- We turn each new row.
- How the length is connected will be connected, we fold the 1st and last row, and knit in half-stolks. The number of rows should be a multiple of 6 minus 3.
- We turn the product across and knit a number of Art. b/n.
- Then we begin to knit a pattern according to the scheme and continue up to 17 row.
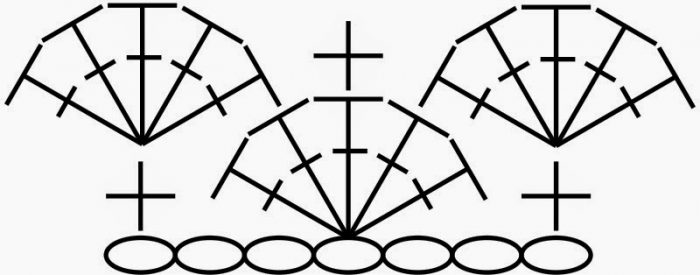
Scheme of pattern "shells"
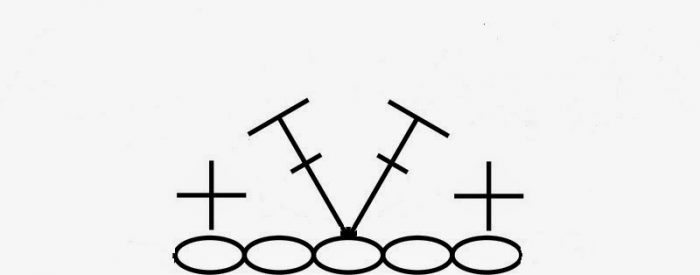
- From the 18th row we begin to reduce the loops. A shell of 3 tbsp.

18th row
- 19th row: Reduce. A shell from the 2nd century.
19th row
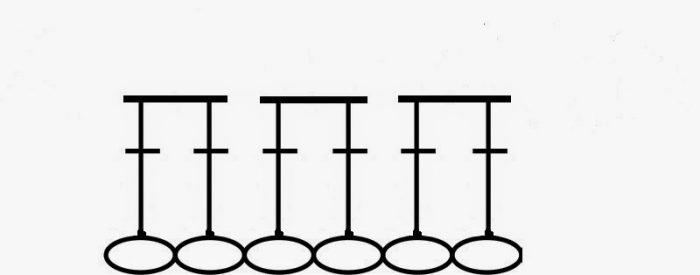
- 20th row: we knit 1 tbsp s/n into each loop, but we will connect with a common loop.
20th row
- We fix the thread and tighten the top of the cap. Ready.
Hat for a boy with ears Crochet: Description and Scheme
A cap with ears
Hat Mishka Teddy Crochet: Scheme and Description
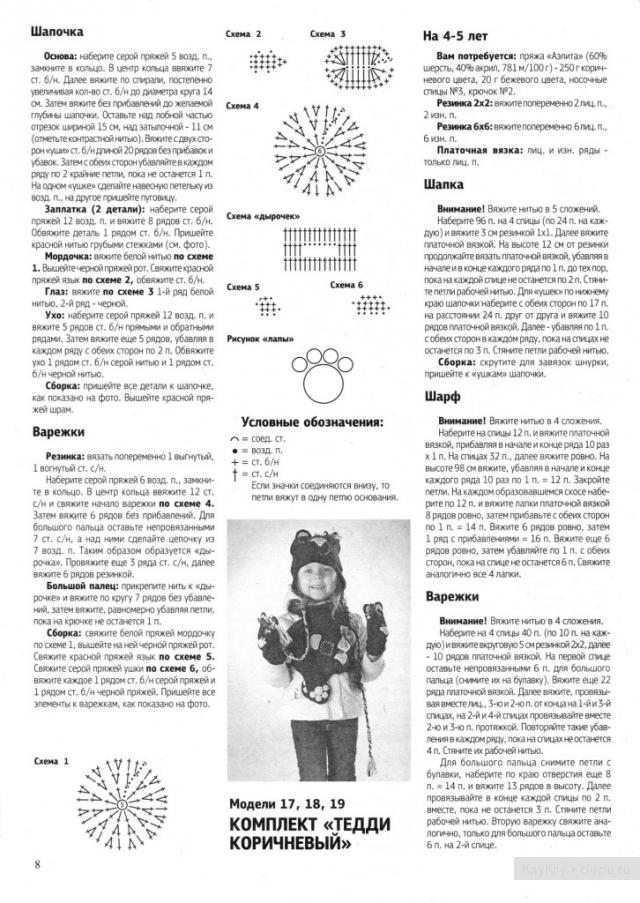
Hat Mishka Teddy
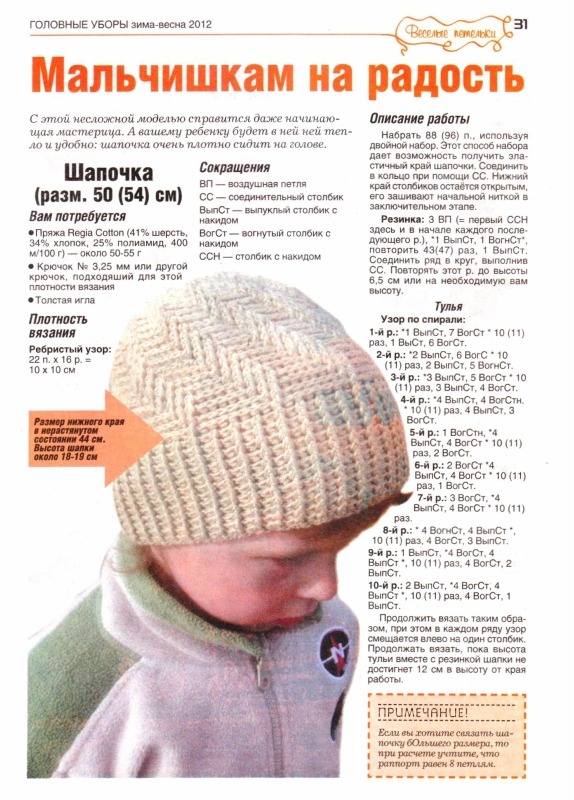
Hat helmet for a boy Crochet: Description and Scheme
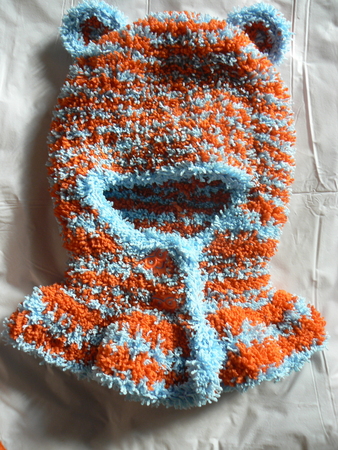
Helmet
The hat-hat is convenient in that it will replace both a hat and a scarf. Your baby will always be warm. A cap of woolen yarn, mixed, gelding or moher is knitted. For work, hook No. 4 is required (or the one indicated in the recommendations for the selected yarn).
Knitting pattern (head girth 44-48 cm):
- Start with the crown:
1st row: 6 tbsp. b/n connect in the ring
2nd row: double the columns, in each for 2 tbsp. b/n \u003d 12 tbsp. b/n
3rd row: 18 tbsp. b/n
4th row: 24 tbsp. b/n
5th row: 30 tbsp. b/n
6th row: 36 tbsp. b/n
7th row: 42 tbsp. b/n
8th row: 48 tbsp. b/n
9th row: 54 tbsp. b/n
As a result of the addition, a circle with a diameter of 14-16 cm should be obtained - Main part: We knit another 13 rows of Art. b/n, on the 22nd row we should have 54 tbsp. b/n. We continue to knit to the height of the product 16 cm.
- The occipital part: We miss 19-20 tbsp. In the front, 35 tbsp.
23rd row: 1 V.P., the rest of Art. b/n;
24th row: 3 V.P., 5 tbsp. s/n, 25 tbsp. b/n, 5 tbsp. s/n;
We knit 3-4 rows. - Throat: We return to the part of the product that closes the throat and in the new row on each side we add 5 V.P. We knit a number of b/n. It turns out 45 tbsp. b/n. We knit five rows. After that, in the subsequent rows, we double the number of columns, knitting 2 tbsp. b/n in each. The loops will be more than 90 pieces. Further knitting depends on the length you need.
Hat with a muzzle for a boy Crochet: Scheme
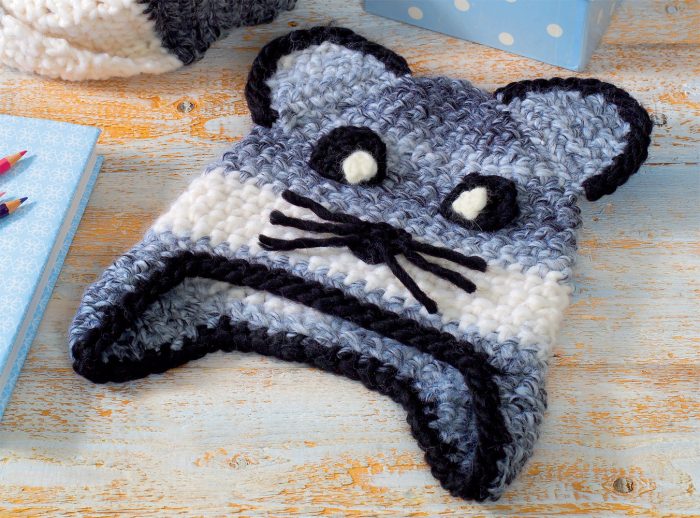
A hat with a muzzle
A cap with a muzzle is knitted from 100 g of gray-white-black yarn, crochet No. 7. The main pattern is the crochet columns.
Knitting scheme:
- We type a chain of 40 loops and close in a circle with a connecting column. Further knitting will be in a spiral.
- In a row, after 14 cm, we knit every 7th and 8th loop together. There should be 35 loops at the end.
- In the next row-we knit the 6th and 7th loop (30 loops).
- Thus we reduce 4 more times, i.e. 4 rows, so that in the end it turns out 10 loops.
- We tighten 10 loops with a working thread.
Eyes:we make a ring of 8 st/n. We start each circle with 1 additional V.P. and finish 1 connecting Art. In the 1st Art. b/n. In the 2nd circle, you need to bind 2 tbsp b/n into each loop.
Nose: We knit a chain of 5 V.P., tie it Art. b/n. In the 2nd and 3rd row, we reduce 1 p. On each side. The nose is ready.
Ears: On the facial neckline, we measure the caps of 15 p. And on both sides of them we tie 9 loops with the main pattern. In the 3rd row, we reduce on each side 1 p. After 7 rows of binding, we leave the last 3 p.
For each ears, we make a chain of 9 V.P., and tie the main pattern.
After 2 p. From the initial we decrease on both sides in each 2nd r. 1 p.
After 7 p. From the initial last 3 p. We leave it untied.
Rounding the ears and the lower edge of the cap are tied with a black thread 1 p. Art. b/n.
Assembly: sew all the elements. The ears are like in the photo, we make eye apples with a white thread inside the eyes and embroider a mustache.
Crochet owl for a boy: description and diagram
An original and cheerful hat in the form of an owl, highlight your child and cheer him up. Knitting technique is simple. If you wear a hat in the spring or early autumn, it is better to choose acrylic or cotton threads.
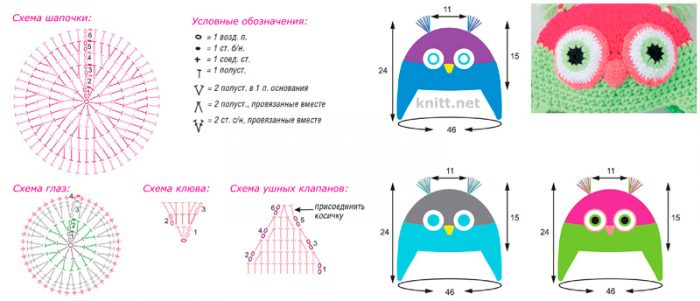
Crochet owl cap
Crochet cap for a boy: description and diagram
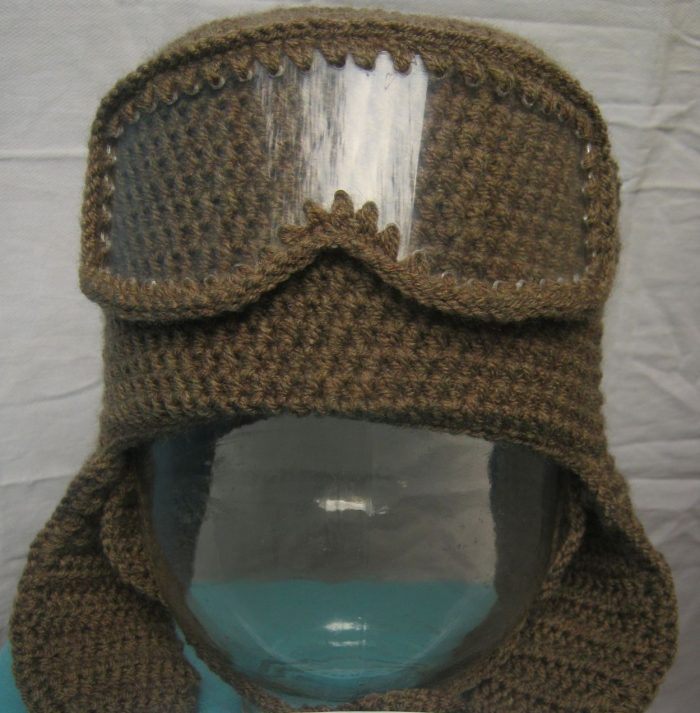
Crochet pilot hat
In order to connect such a stylish hat, you need to take 50 grams of yarn of one color and 100 g of the other. You will also need a fleece for the lining. We will crochet number 4.
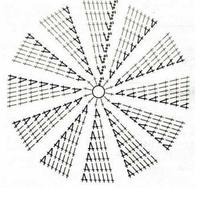
Knitting scheme
The number of wedges depends on the density of the yarn and the diameter of the circumference of the child’s head (the example of knitting is designed for 8 wedges). Knit in half -stolks (p/t)
1st row-8 loops
2nd row-double each loops
3rd row and subsequent-double each 2nd, i.e. 8 loops are added in each row
The process of increasing the loops continues until there are 72 loops. After that, we knit one row without an increase. Then add in the same way to the desired diameter (+/- 80 loops). We knit to the required height.
Ears: In the left and right side of the seam, we count 24 loops and knit 2-3 rows on them. On both sides of the frontal part, we count 16 loops, they will be in the ear.
We knit as follows: on the front side we make an increase after the crum loop, from the occipital, on the contrary, reduce it. 8 rows will be enough. We knit the desired length, at the end you can make ties or on one ear of the strap, on the other a button.
Glasses: Cut out of a plastic bottle and make holes with a hot needle at a distance of 0.5 cm. Tie with a hook. We sew the strap on the back of the head so that the glasses do not fly.
We sew a fleece lining and a hat ready.
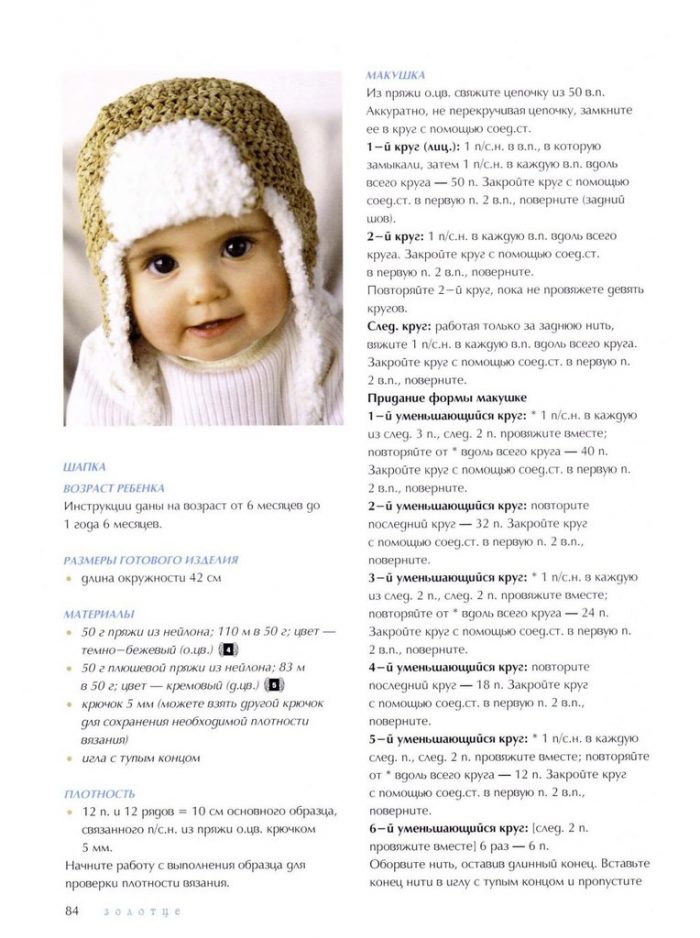
Crochet Ushaka hat for a boy: description and diagram
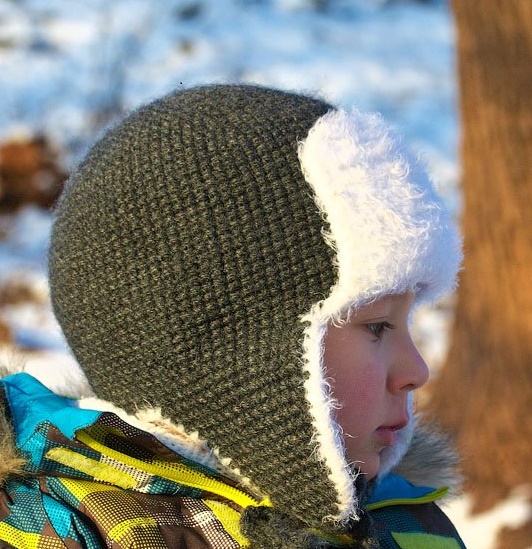
Hat with ear flaps
The earflap is a practical and convenient model that will protect in winter from cold and wind, and at the same time it will “like” the knitting technique to any child, the complexity depends on the selected pattern.
First you need to measure the size of the child’s head, then purchase the right amount of yarn and the hook.
The yarn can be used by Stay Wise, Yarn Art Angora Ram or Alize Baby Wool.
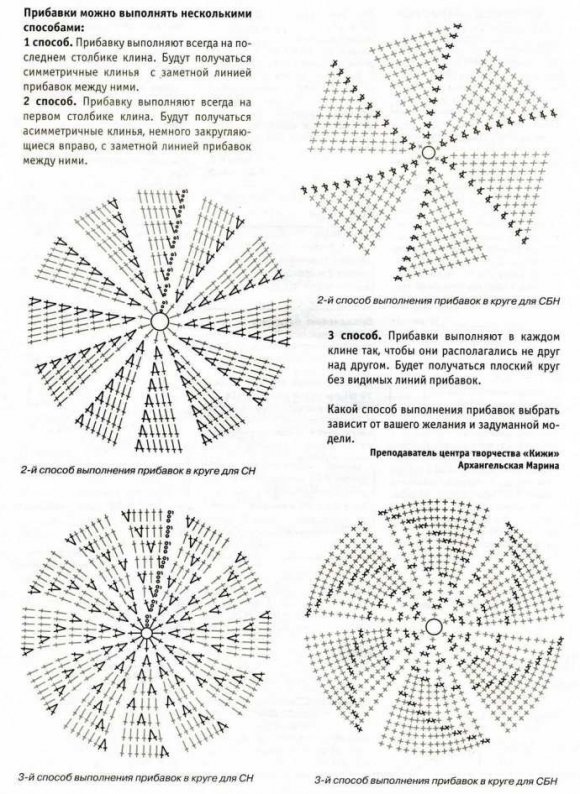
Knitting scheme hats
After the base is connected, we go to the ears. The distance between them should be 25 loops. For this:
- 1st, 2nd and 3rd row: 1 loop of lifting and 14 st.
- 4th and 5-1 row: 1 loop of lifting and decrease, 10 st/n and decrease
- 6th row: 1 loop of lifting and 10 st.
- 7th, 8th and 9th: 1 loop of lifting, decreasing at the beginning of the row, then 1 tbsp b/n and decrease at the end of the row
- At the end there will be 3 loops in which you can pass the ties