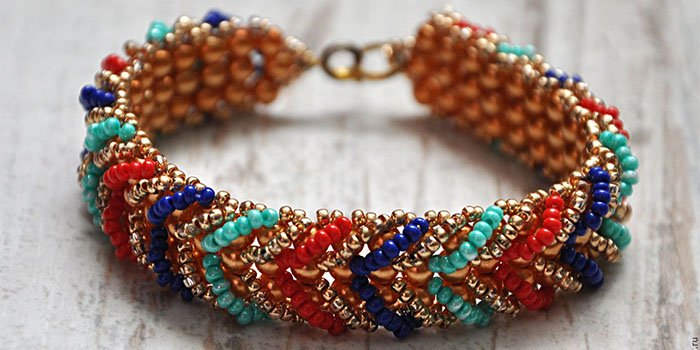
Bright, beautiful products from beads with their own hands is an excellent gift or a personal trinket.
The content of the article
Weaving from beads - an ancient and in demand type of creativity, whose roots originate during the invention of glass in ancient Egypt. This interesting material is widely applicable in various types of decorations and decorations. Earrings, necklaces, brooches, bracelets, decorative flowers and trees, Embroidery on fabric and creation of paintings, Volumetric figures, bags, wallets and cases for glasses or office, ties and butterflies, buttons and braided beads, hairpots, separate clothing items or Outfit in general - all this is involved in weaving beads.
How to weave the products from beads: bracelet in the technique of alternation
Needlewomen do not cease to amaze their skill, constantly improving the technique of weaving and creating new directions in the application of this material. So the technique of knitting from beads of dolls appears, braid interior items, woven beads, hats, shoes. Those who wish to master this kind of needlework should take care of the necessary tools and materials, without which the newcomer can not do.
- In the course of learning they may need: Leskening, soft copper wire, threads of different colors, a spiral wire - in the manufacture of bracelets, basics for earrings or rings - to create jewelry, thin long beaded needle, scissors, and beads of various colors.
- To get acquainted, it is better to stop your choice on a simple classic bead shape. - It will be easier to understand the principles of work. It is important to take into account the material from which the beads are made. Any type of material is suitable for adults. To class with children, it is better to choose a plastic beads that is lightweight and does not have chips.
- Also should not immediately be taken for labor-intensive products. - The newcomer is to start learning from simple in the manufacture of crafts. The simplest performed is the technique of alternation. To do this, it is necessary to ride the beads on the thread or fishing line, alternating various shades.
- Of these beaded threads, many bright bracelets can be created. And if you connect a few long threads, collecting the edges into a common node - it turns out a necklace. The technique of alternation is applicable in creating simple crafts.
For such a bracelet, a minimum amount of consumables is required: strong threads, beads of any shape and color, scissors, one button.
Beaded product:
- To begin with, determine the size of the bracelet. It is possible to calculate it by simply reception: measure the wrist girth, wrapped it with a thread and cut off the required length. It will take three such measurements.
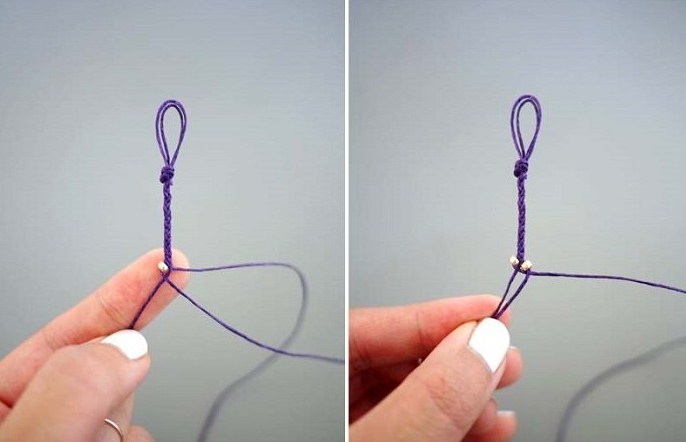
- Connect threads with each other so that a wide loop is formed. Check how it goes through the loop of the button - if necessary, pull, or weaken the loop.

A loop
- From the obtained workpiece you need to weigh the braid from several centimeters. Spit must be a tight density.
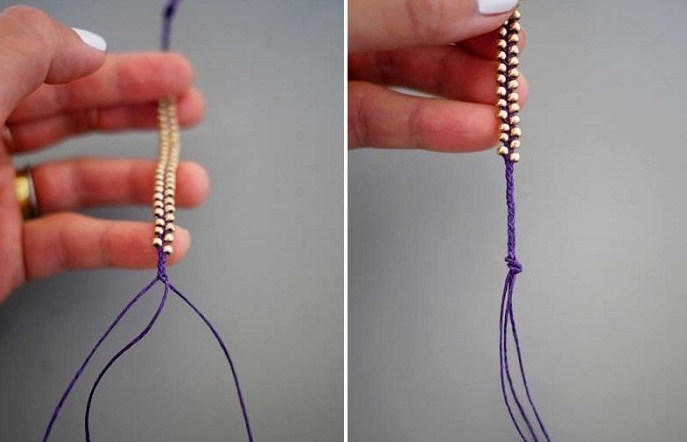
- Next Add to bead product One bead is to wear on the side threads and climb into the braid. It is important to monitor the symmetry of the picture and tighten the thread well.

Crowd
- Strong weaving a simple oblique. Remains filaments to the node, consolidating the button.
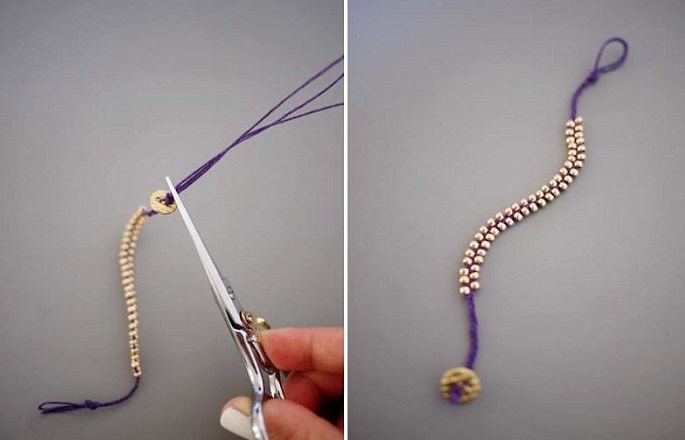
Ready
To wear such a bracelet is very simple - the button and the loop perform the function of the fastener. After the method of banding and alternation is mastered, and all devices and materials at hand - you can go to the weaving according to the scheme. This type of creation bead products Allows you to reproduce various forms and drawings.
Each experienced needlewoman before starting the work draws a scheme for the location of the elements - it helps not to get away from the account and to withstand the pattern shape in the work. For beginners there are ready-made schemes with which you can create simple crafts. However, to use the schemes, you should learn to understand them.
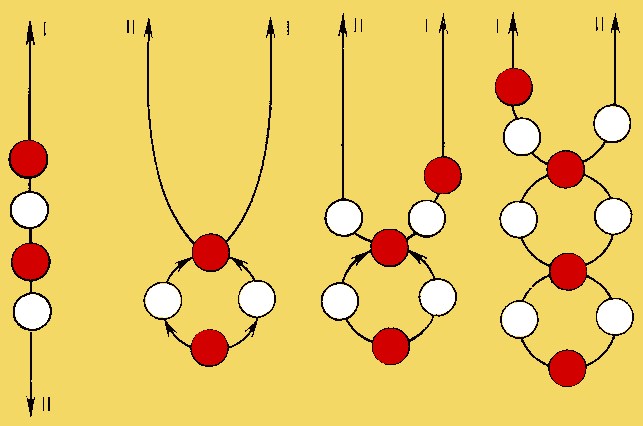
Scheme
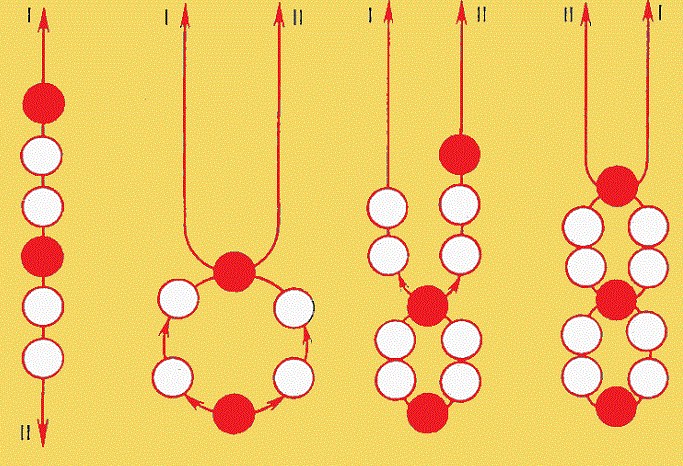
The same principle, another pattern
Schemes for reading schemes:
The main designations in the construction of the schemes for this type of needlework are always the same. So learning to read them - you can collect products from beads with their own hands According to any scheme. Here are the main points to remember:
- The beginning of the scheme and the first working series - always denote numbers 0 and 1.
- The arrows indicate the direction in which the set of elements during operation will be moved.
- If the conditioned threads in the diagram form a circle within which the pair of beads contains that they need to be combined with one common part in the subsequent row.
- Coming from one bead or in the distance between the details two arrows - indicate the need to add one or more details in this place.
- Arrows from multiple turns shrew along the beads - indicate the pattern for assembling harnesses.
Bead bracelets:
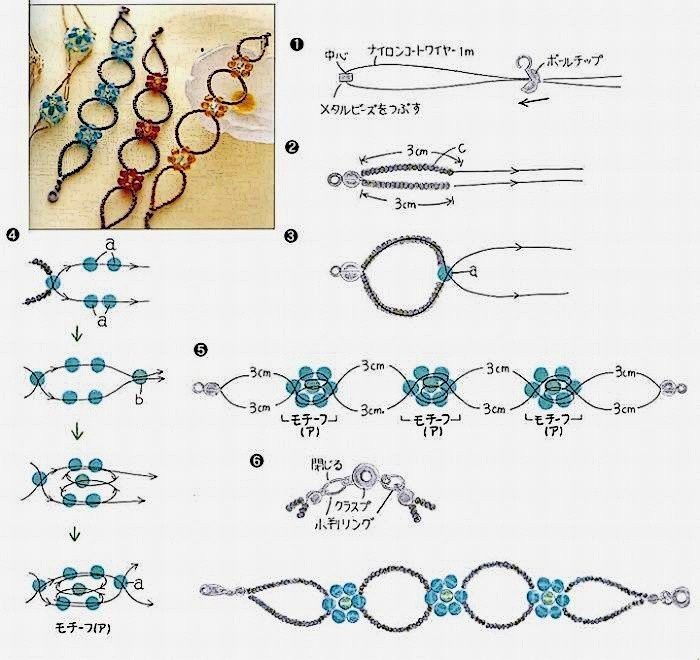
Bead product
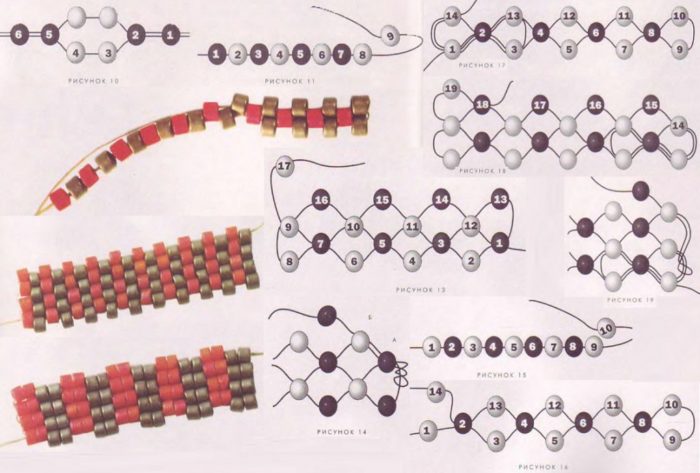
Bead product
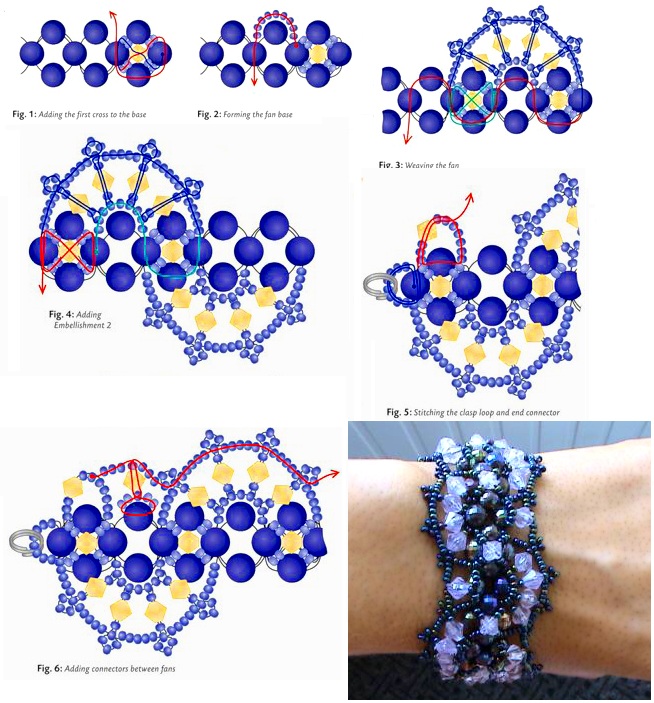
Bead product
How to weave the products from beads: Keychain "Fish"
The creation of goldfish figures is performed using equipment for creating volumetric forms. To work, you will need:
- A set of beads size - 2.9 mm (No. 8) in two different shades of orange - dark and light, as well as in one shade of yellow. And two black bispers.
- Thin 0.3 mm soft wire.
- Leske or durable thin thread.
- Thin needle for firmware.
Approximate wire consumption for this product - two meters. Choosing the length of the wire segment must be focused on the size of the planned figure. If it is supposed to increase the size of the figure - the wire cut should be extended.
Important: the principle of volumetric creation bead products It consists in placing weaving in two layers: the upper part will be located on the left side of the weaving, and the lower ones on the right side.
It is also necessary to take into account the alternation of levels from the lines - first it is necessary to perform the actions of the first row and the level located on top, then it is the level of the same number in the lower part, after which it, too, with the levels from the next line.
And weave according to such a scheme:
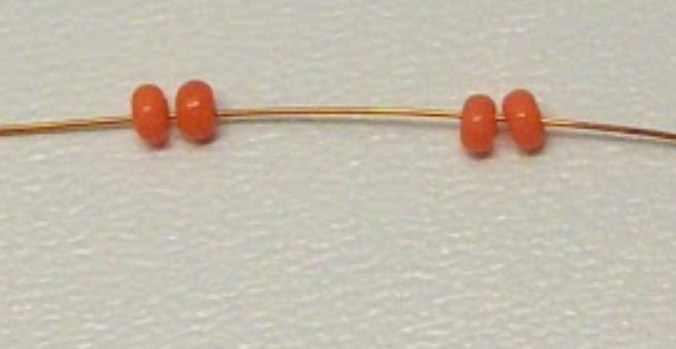
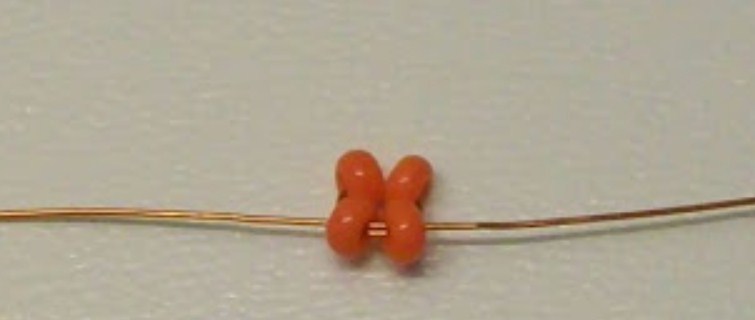
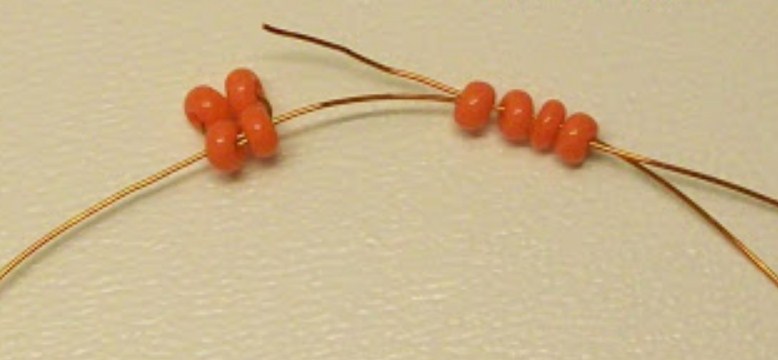
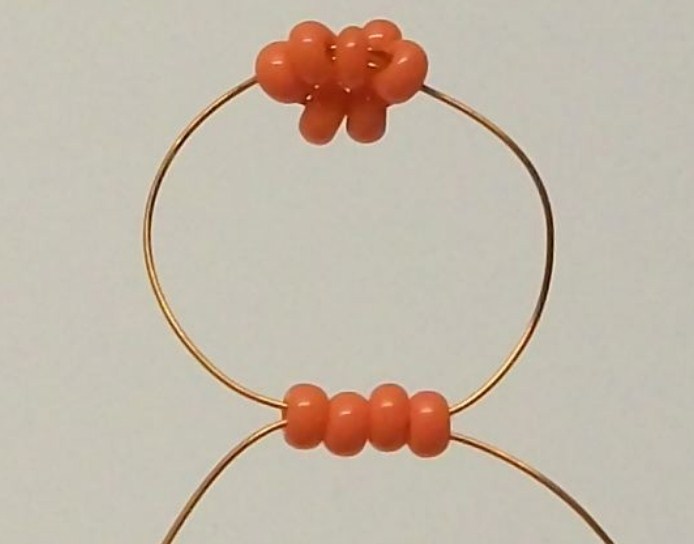
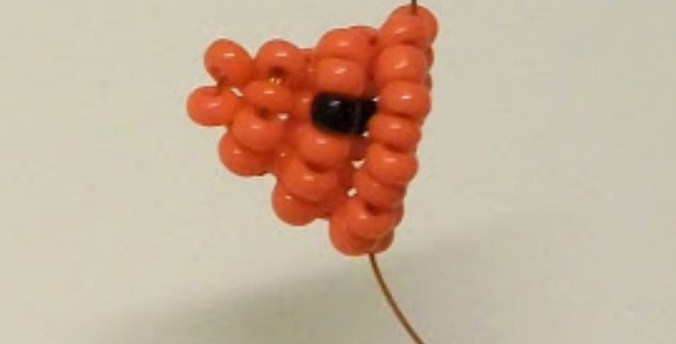
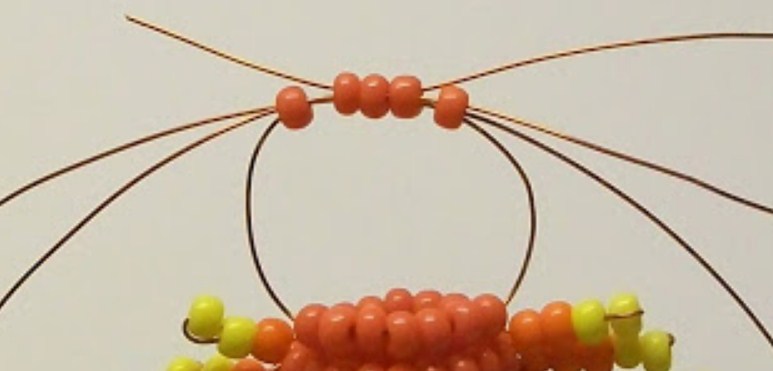
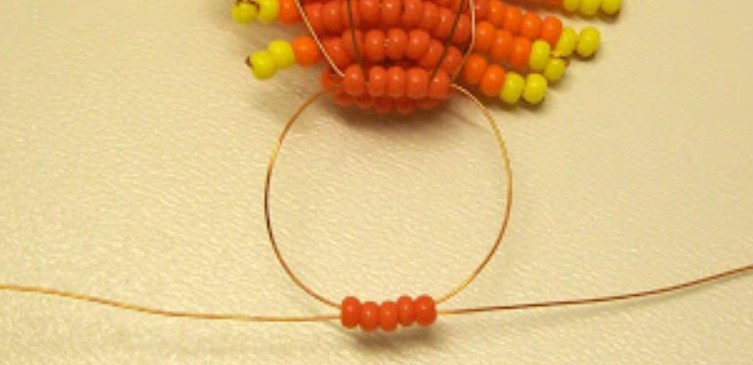
- In the first line, it is necessary to ride a wire cut in pairwise four pieces of dark orange color: first one, then, after a short distance - ride the second pair. All Elements Place the Cut Center. In one of the steam, skip the opposite end and tighten into the loop. It is important to keep the location of the beads strictly in the center. This will be the first line of set in the torso figurines. At the same time, beads with wire, it should be considered as the level located at the bottom of the work, and the neighboring beads are perceived as those belong to the top level of weaving.

Start

CENTER
- In the second line, you need to dial 4 pieces of the main shade one way and turn through this composition, the remaining intact end of the wire. It is not very tight of the edges of the segments and lay this fragment so that it turns out to be at the top of the lower tier from the first part.

Wear beads
- We also do with the lower tier: in 4 scored beads of the same color stretch the second end and drag into the loop, placing it in the lower position relative to the upper tier in the second part.

Create a loop
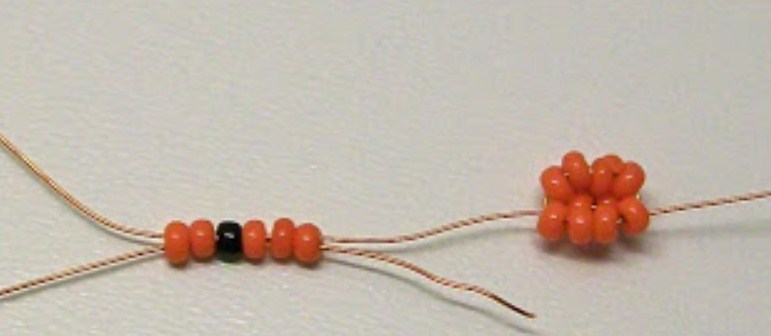
- In the third line - first use the left side of the segment, gaining a combination: 3 pcs. The main shade, 1 black and 2 main colors of beads. The right side is to penetrate this combination of parts and the resulting ligament to place above the lower level.

Start
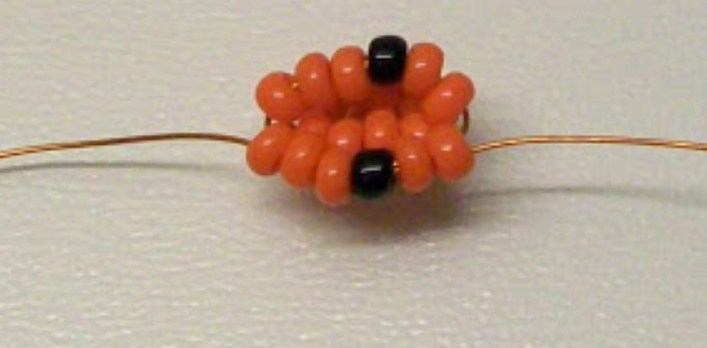
- For the lower tier in the third line - use the left side of the segment with a similar combination of details, as in the previous version. Right segments through the holes of all elements and also pull into the loop, determining it under the top tier.

In loop
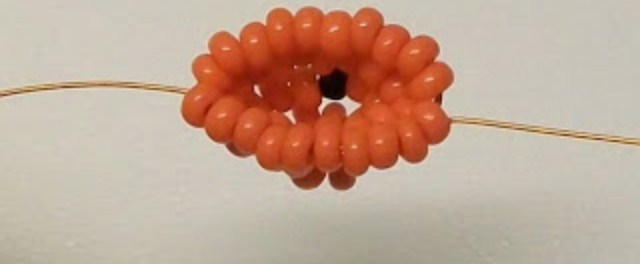
- Continue the set and location of the parts in the same order as the previous ones, increasing the number of beads each time in accordance with the numbering of the line: in the fourth - 8 beery, in the fifth - 10 beery.

Tier 4.

Tier 5.
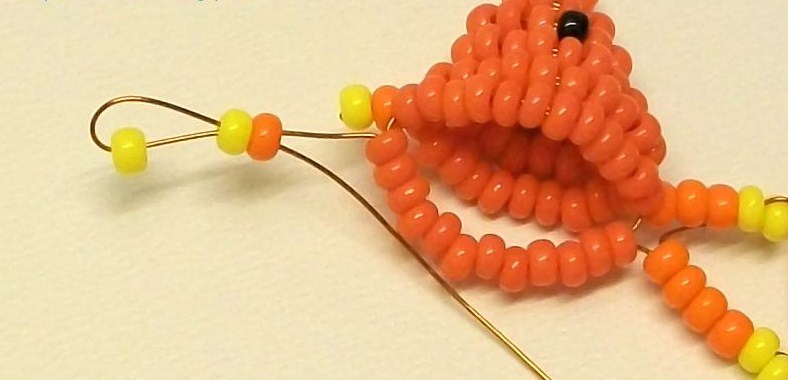
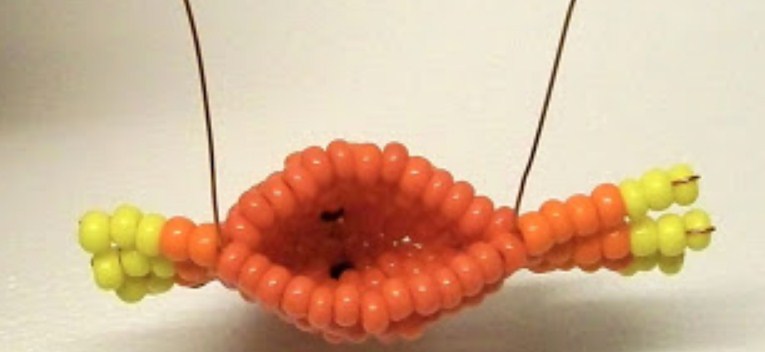
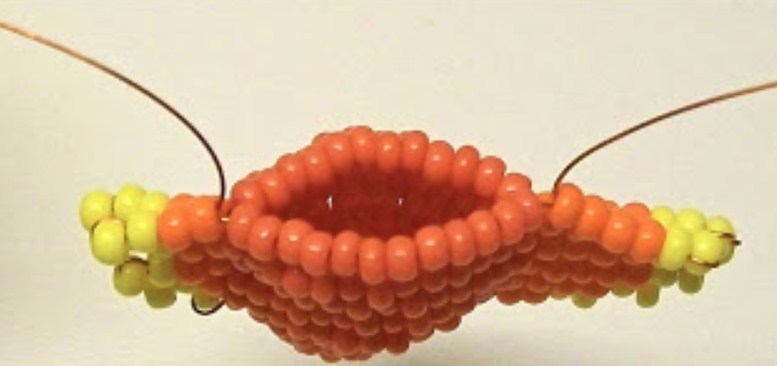
- After the fifth line - make a fragment for the fin: 3 light orange and 2 yellow beerts to ride on the right end of the wire. Then, fixing the yellow part, return the end of the wire through other four beads. Gently tighten the end and compact everything among themselves. It should turn out a wand - this is one fragment of the top fin. Such fragments should be built after each layer of the figure of the figure on both sides.
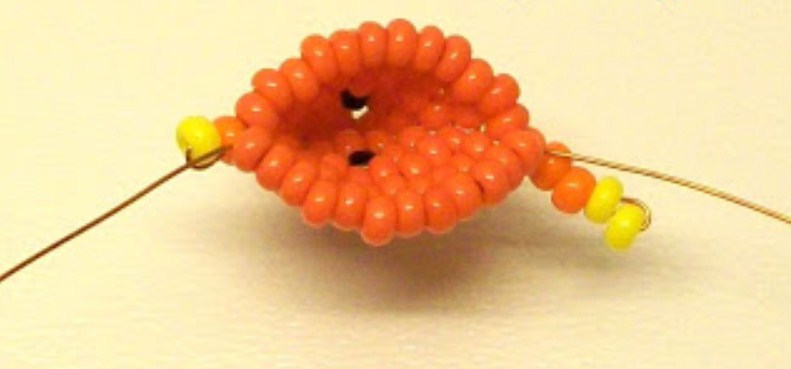
- The lower fin is performed on the same principle: to dial on the left edge on one light orange and yellow beerink. Then, return the end of the wire through the orange part, and the yellow lock and pull the fragment to the body of the figure.

Finnish
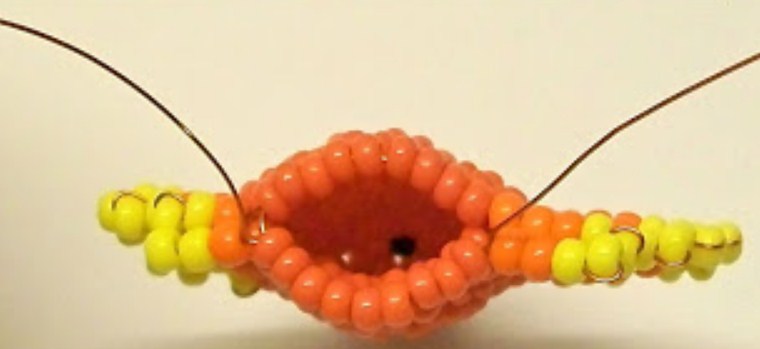
- After performing the first pair of fins - return to the execution of the sixth part of the case. To do this, dial 12 beads of the main color for both levels. Weave as in previous parts.
- Having made both levels of the sixth line, two rods of the fins are needed again. This time, typing 4 bright and 2 yellow beads. The assembly method remains unchanged. For Niza: 1 Light and 2 yellow, and repeat the same actions.

Continue
- All subsequent actions and alternations are similar. The addition of beads in each part is carried out according to this calculation: from 7 to 9 - 13 bisper in each level.

Up to 9 rows
- In 10 parts - 12 pcs., At 11 - 11 pcs., At 12 - 9 pcs., At 13 - 7 pcs.

10-y.

12-y.
- For fins, the calculation of this: after 7 lines, the upper rod is 5 light and two yellow beads, in a smaller rod - 2 pieces of both shades. After 8 and 9 parts: Large fins - 4 light and 3 yellow beads, small - 2 light and 3 yellow beads. Following the 10th part, the large fin consists of: 4 light and 2 yellow elements, the lower - both colors of two elements. For 11 fines of the fin: top - 3 light and 2 yellow elements, bottom - one light and two yellow. Fulling 12: The upper fin - two pieces of the same color, the lower fin is one light and two yellow beads. In the 13th row of the fin not.
- At this stage, it is necessary to insert a pencil into a pencil inside the body, giving the desired shape. Then proceed to the final parts.
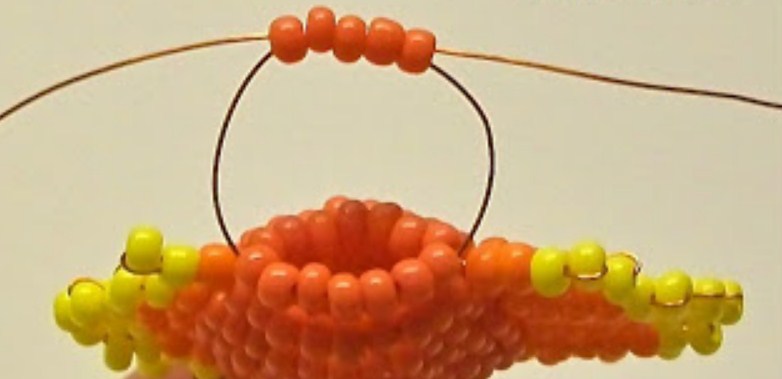
- Having reached up to 14 lines - weave its top side: from either side of the segment to strip 5 elements of the main dark shade. Then prepare three additional segments - 30 cm each.

Skip through 5.
- Skip one part through the 5th recent bisper, and the second is through three central beads of the last row.

And after 3.
- Attach the edges of additional segments and then tighten the end row loop tightly. Next, to leave the main wire ends in the center of the work, and the additional getting to the side.
- To the main end to strip 5 darine orange bispers and skip the second end through them. As in the first case, not tightly tighten into the loop.

In loop
- Insert into three central bispers the remaining extra segment and hold the loop tight. The body of the fish is ready and can be started to weaving the tail.
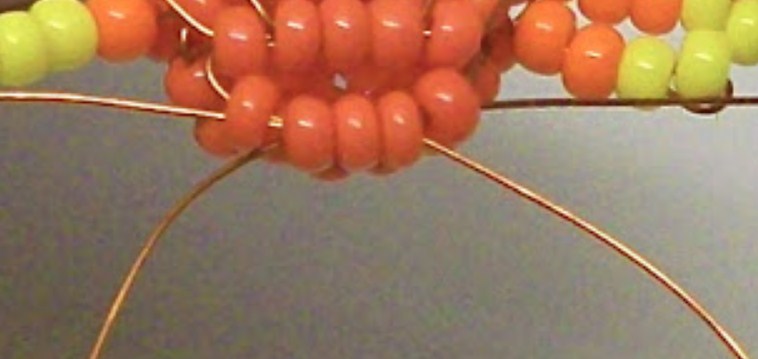
Complete the housing
To weigh the tail of the fish, it is required to locate the body of the fish on the table in the natural position - up the large fin. And straighten all available wire segments.
- Next, the straightened twigs must be distributed from top to bottom to each other in pairs, in the sequence in which they stick out from the body - there should be four pairs.
- The sequence of execution of tail fragments in products from Bead Such: on a double segment to type the desired number of parts, then stretch through the different edge of the wire in the opposite direction. Tighten the loop the resulting and spin the edges with each other. Crop the surplus wire, leaving several millimeters of twist. So deal with all the remaining edges of the wire.
The calculation of the beads for the tail of the fish is:
- The first pair: 16 light orange, 33 yellow and 16 light orange bisperin.
- In the second pair: 17 bright orange, 21 yellow parts and again 17 bright orange bisperin.
- The third pair is all three color sets for 15 pieces.
- Fourth steam - three colors in a ratio of 13: 9: 13 Beerin.
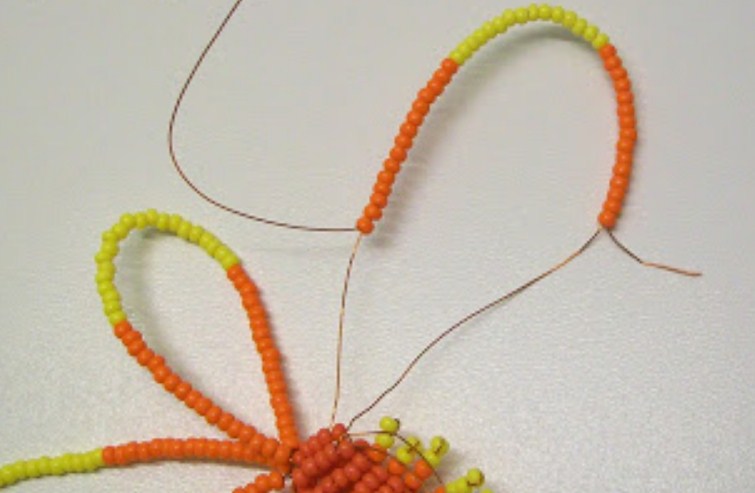
We recruit and twist
After the formation of the tail, it is necessary to give it the appropriate shape - slightly stretch and bend the loops, the ends of the twist hide into the body of the fish. The final stage of the manufacture of the product is - firmware of the body of the fish. There is no need to flash if the rows of beads are tightly adjacent to each other - without forming lumens.
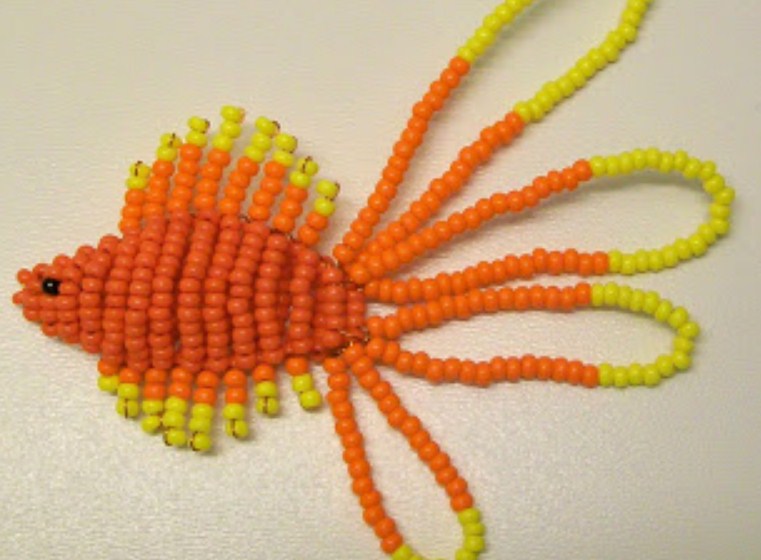
Ready
However, if rows are loose, you can control such a flaw or fishing firmware. To do this, you need to walk with a needle with a thread or a fishing line between the rows, tightening them among themselves. The product will acquire a more holistic and neat look. In the future, such a fish can be squeaked for key fob.
Other schemes of bead products:
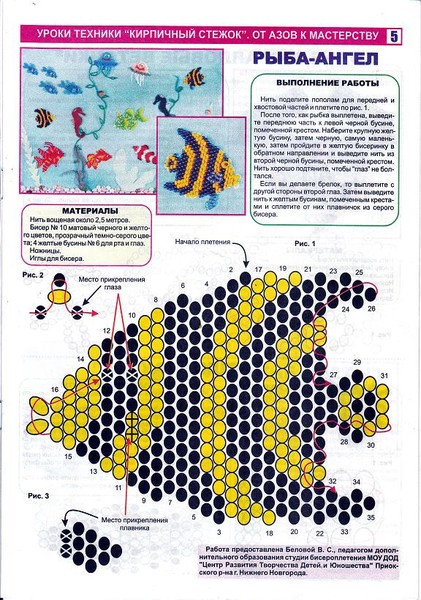
Scheme
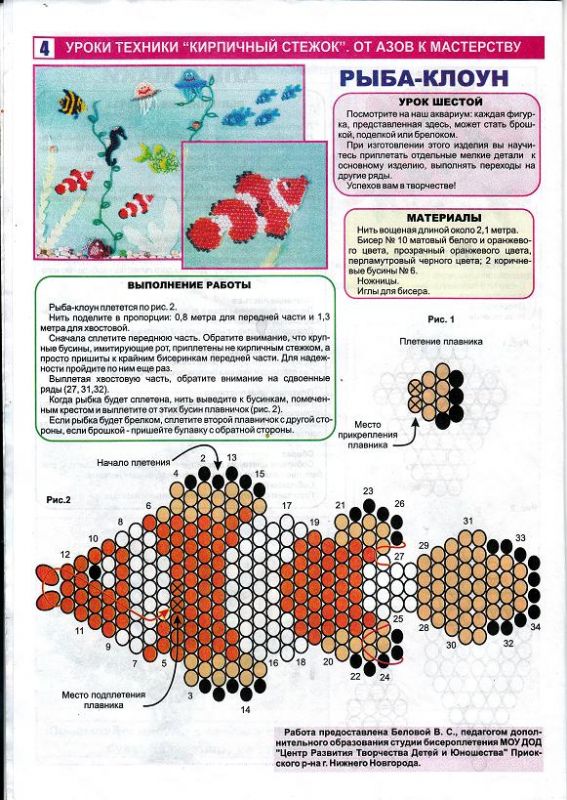
Scheme
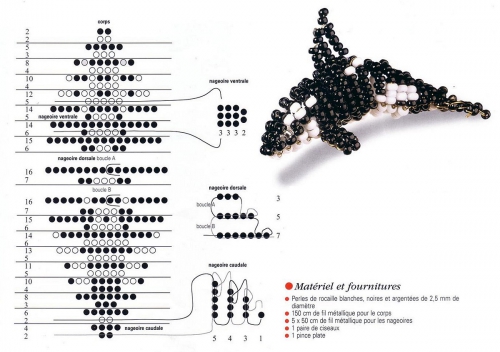
Scheme

