Make crafts with your own hands very simple. This time we create beautiful postcards.
The content of the article
Prepare gifts native and loved ones - the most responsible thing before any holiday. At first glance, everything is simple, since you know a person and know what he loves. But in fact it is very difficult, because the closer the person, the more soul you want to invest in a gift or congratulations. And what could be pleasant and soulful than creating a postcard with your own hands?
Modern postcards are a whole art. It combines photos, live and dry flowers, the ancient art of origami and a lot, a lot more. In fact, today the only restriction in the creation of a postcard is your fantasy.
Ideas for greeting card grandmother
Grandma is always waiting for you, thinking about you, and the smallest manifestation of attention on your part - happiness for her. Whatever you do with love and from a pure heart - everything will be in the joy of grandmother. Do not regret your time, spiritual heat and care for her. We picked up the warmest and cute ideas of cards for your grandmother, which you can make the whole family, and which will definitely get it.
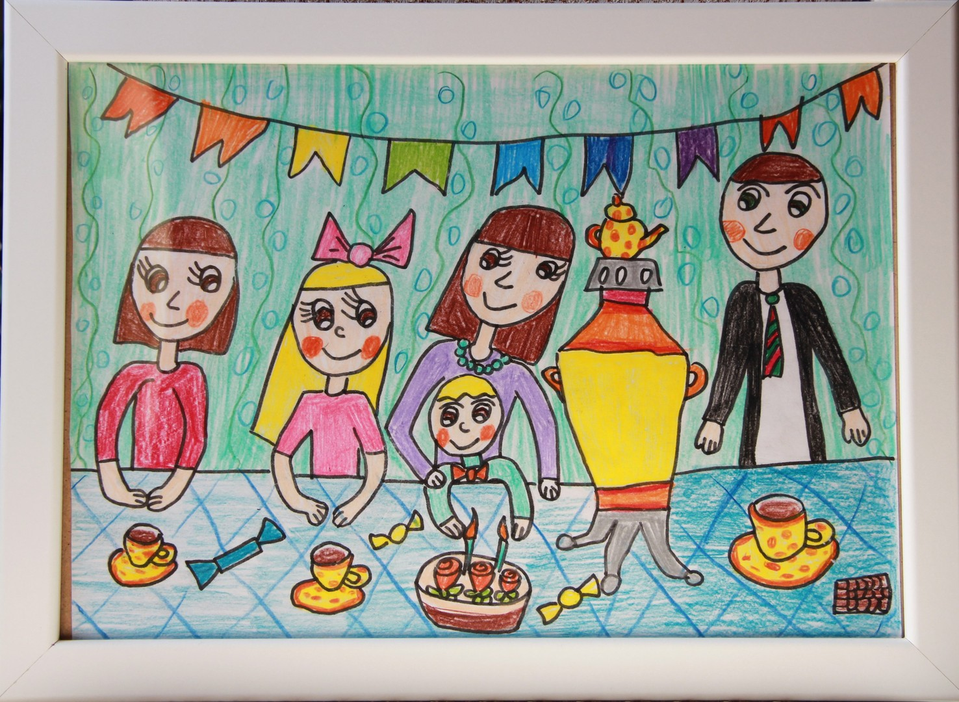
Card with children's drawing
If you have little children - the grandmother rejoices each of their new steps and action. And how she will be delighted with a postcard drawn by their favorite grandchildren!
What do you need?
- 1 sheet of double-sided color cardboard.
- 1 Tube PVA glue.
- 1 Tassel for glue.
- scissors.
- 1 sheet of landscape paper To draw a drawing.
- 1 packaging of decorative scotch.
- 1 Tube of multicolored finger paints (for each kid).
- 1 Geliac handle golden color.
- 10 cm Satin tape.
- lighter.
Family
What do we have to do?
- To begin with, it is worth drawing a drawing so that he can dry and could use it. If you have older children - ask them to draw a grandmother or family. If the children are small - dry their handles in different colors and put a print on landscape paper.
- Take a sheet of color cardboard and fold it in half. This is a blank for our postcard.
- Gently glue the glue pattern to the front of the postcard.
- On top of the drawing, get decorative tape so that it turns out a beautiful frame.
- Make a bow of satin ribbon, and process the edges of the tape lighter.
- Stick in the upper or lower corner of the frame of a bit of scene.
- Sign up a postcard.
Convert card with family photo
Warm and joyful memories of the closest - the best holiday greetings.
What do you need?
- 2 leaf of double-sided color cardboard.
- 1 Tube PVA glue.
- 1 Tassel for glue.
- scissors.
- 1 family photo.
- 1 gel handle suitable color.
- 10 cm Satin tape.
- lighter.
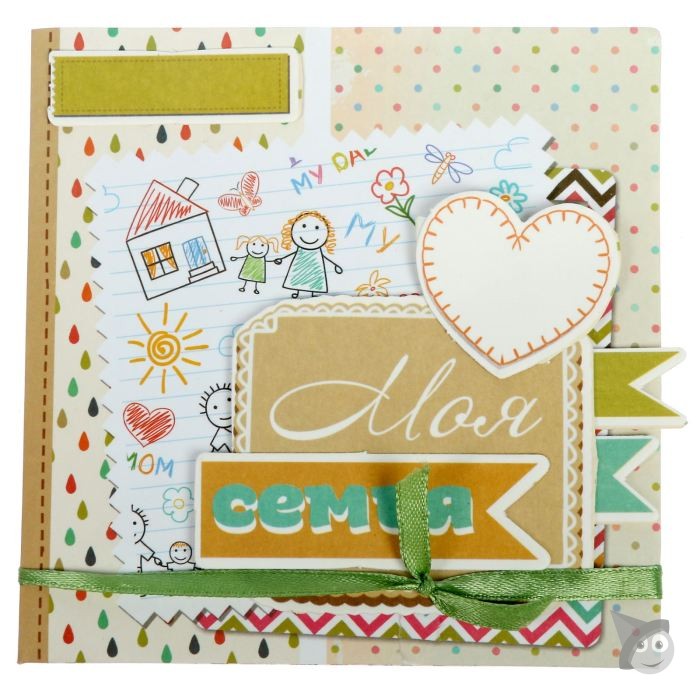
With a place for a photo
What do we have to do?
- Fold one cardboard sheet in half. It will be a blank for our postcard.
- Second cardboard sheet in half.
- Attach photos to half of the cardboard and pencil. Mark the place for the window so that there are 1 cm indents from all sides on the glue seams of pocket.
- Cut the window on the marked lines.
- Stick from the front side of the postcard half of the cardboard with the window so that you can attach a photo from above, draw cute drawings.
- Make a bow of satin ribbon. Treat edges with a lighter.
- Stick a bow to a postcard, put a photo.
- Sign up a postcard.
Greeting card with bulk flower
Our favorite grandmothers in the soul - also girls and, of course, love flower. Make your grandmother with a drawing with flowers with your own hands - and the magic mood of the birthday name for the birthday will be provided.
What do you need?
- 1 sheet of double-sided color cardboard.
- one sheet of double-sided colored paper of green, pink, yellow, white and red colors.
- 1 Tube PVA glue.
- 1 Tassel for glue.
- scissors.
- 1 gel handle suitable color.
- white or metallic beads for middle of colors.
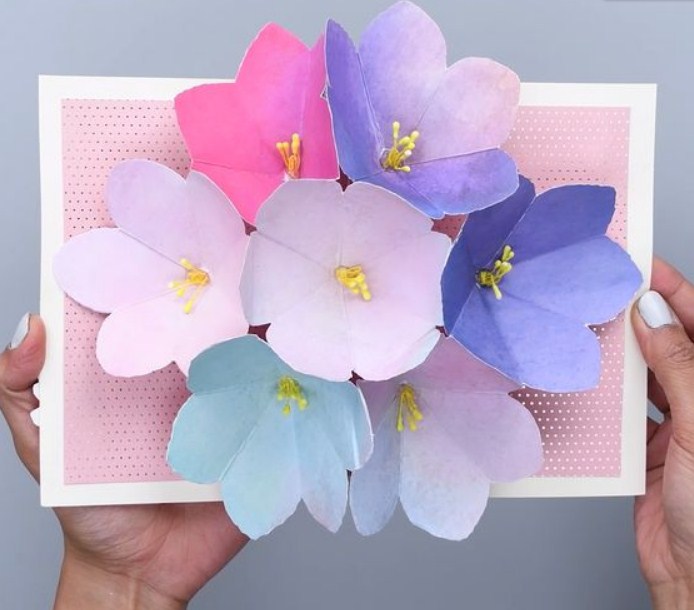
Volume
What do we have to do?
- Cut from bilateral color cardboard Rectangle 20 by 15 cm.
- Fold it in half.
- Alternately glue white flower petals, pink flower, yellow, blue and blue.
- Stick the middle of the floweries - beads.
- Sign up a postcard.
Hobbly Card
If your grandmother likes to cook, or knit, or embroider - you can create a postcard based on her hobbies. For example, today we will make a postcard apron.
What do you need?
- 1 sheet of double-sided color cardboard
- 2 sheets of double-sided colored paper
- 1 Tube Glue PVA
- 1 Tassel for glue
- scissors
- 1 packaging of decorative scotch.
- 1 gel handle suitable color
- 20 cm thin satin ribbon or decorative braid
- lighter
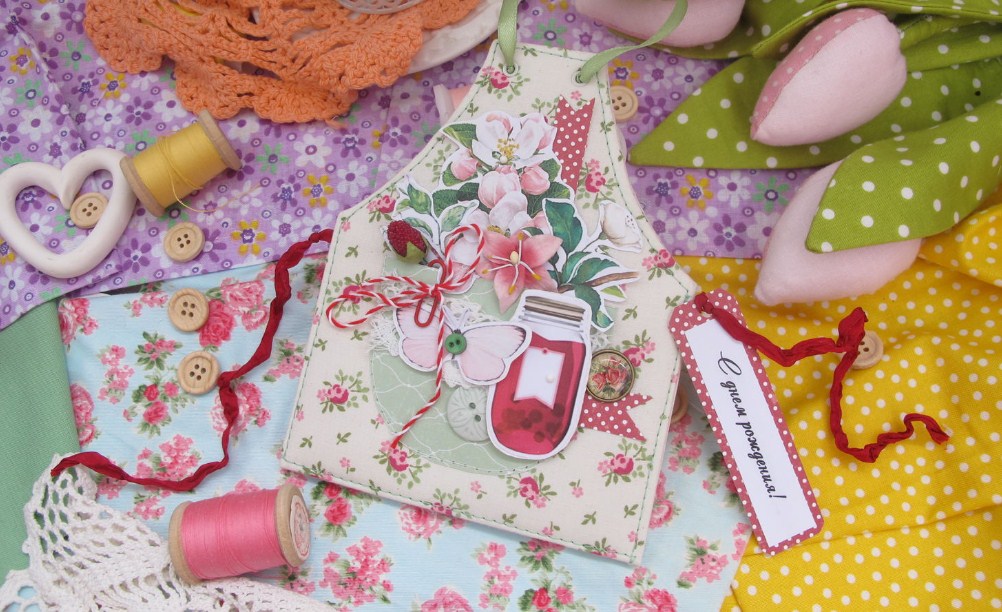
By hobbies
What do we have to do?
- Fold one cardboard sheet in half. It will be a blank for our postcard.
- Draw on one sheet of colored paper apron and cut it out.
- Draw on the second sheet of paper pocket for apron and also cut it out.
- With the help of decorative adhesion, shook on the apron from above and bottom of the strip.
- Make holes with scissors in places where the apron is mounted on top and sides.
- Stretch the satin ribbon in the apron so that the sides turned out to be strips, and the loop was formed on top.
- Treat the edges of the tape lighter.
- Sign up a postcard.
Ideas for mom cards
Mom is the most expensive person in the life of everyone and, of course, I want her to give her the most cute postcard in the world. We will offer you some interesting ideas that you can please Mom.
Postcard with dress
All women love dresses, and everyone dreams of a pair of other new dresses in the wardrobe. A postcard with a dress will create a festive mood and make mom smile in the morning of his birthday. In this master class we will tell about a simple paper dress. If you wish, you can find a master class on creating an origami dress and make such a bulk dress for this postcard.
What do you need?
- 1 sheet of double-sided color cardboard
- 1 sheet of double-sided colored paper
- 1 Tube Glue PVA
- 1 Tassel for glue
- scissors
- 1 Skin Skin Decorative Lace
- 2 small wooden clothespins
- 1 Packaging of Decorative Scotch
- 1 Golden gel pen
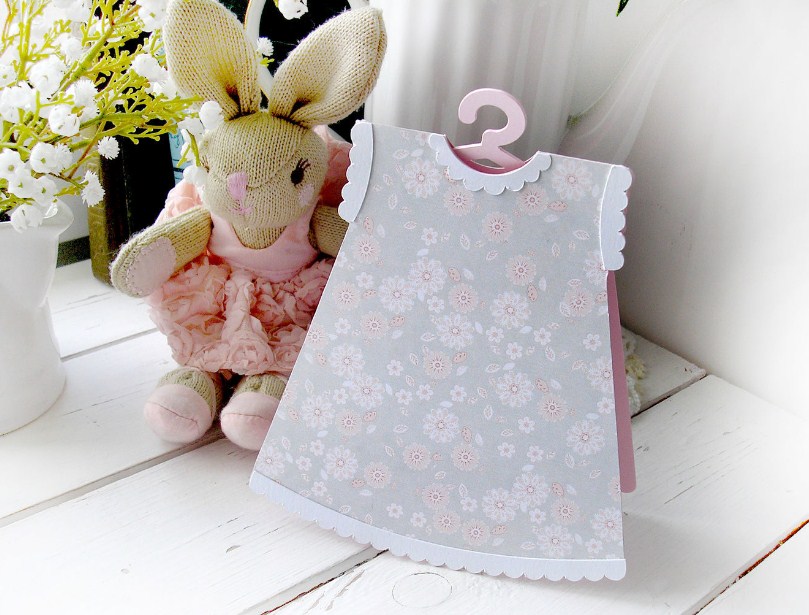
The dress
What do we have to do?
- Fold one cardboard sheet in half. Make a half, which will be facial, two holes on the edges.
- Stretch the lace in the holes and tie the nodules inside the postcard.
- Draw a dress on a sheet of colored paper and cut it out. Stick to it decorative tapes according to your taste in the form of braid.
- Lubricate the clothespins with glue for more reliable fastening, secure the dress on the rope using the clothespin.
- Sign up a postcard.
Postcard with bouquet of dry flowers
What do you need?
- 1 sheet of decorative cardboard white.
- 1 sheet of paper for colors or newspaper.
- 1 Tube PVA glue.
- 1 Tassel for glue.
- scissors.
- 1 gel handle suitable color.
- 20 cm thin satin ribbon or decorative braid.
- lighter.
- three branches of dry lavender and other colors and dryness according to your taste, pre-dried.
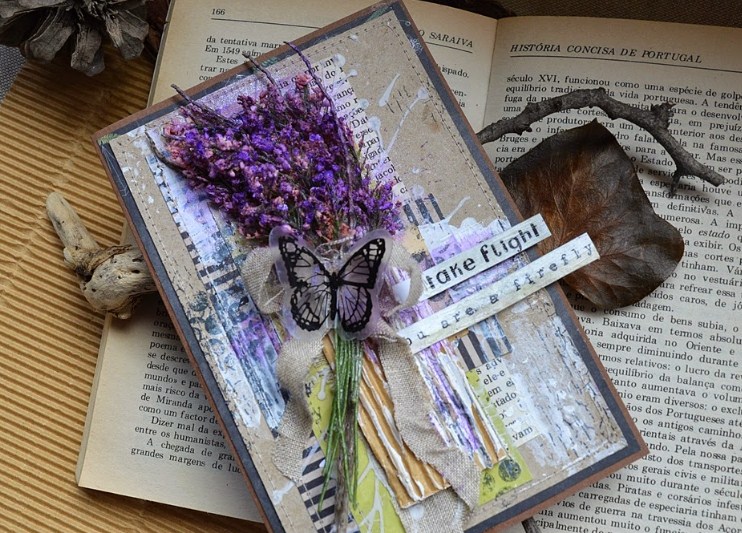
Lavender
What do we have to do?
- Collect flowers and dry bouquet.
- Wrap a bunch in decorative paper or newspaper and tape. Tie a bow on the ribbon.
- Enclose bunch on decorative cardboard.
- Sign up a postcard. If you are planning to sign on the other hand, it is better to sign before sticking the bunch.
Photo based card
For this postcard you need to pre-photograph the whole family in special postures. There are two options - as if everyone is kept in the hands of balloons that fly away, or - as if you stretch my mother's flowers. In our master class, the child in the photo should "hold" the balls and look at them.
What do you need?
- 1 sheet of decorative cardboard
- 1 photo of a child appropriate pose
- 1 Tube Glue PVA
- 1 Tassel for glue
- scissors
- 1 Bilateral Scotch packaging
- packaging of small inflatable balls
- 1 gel handle suitable color
- motok black thread

Balls for postcard
What do we have to do?
- Stick a photo on a decorative cardboard with a brush and glue PVA.
- Inflate the balls are not completely, but so that the balls are adequate to the size of the character in the photo. Tie the ball threads and leave the tail tilt is long enough to put the character in your hand. Cut an excess part of the ball.
- Glue the balls with double-sided tape to the decorative cardboard and postcard.
- Collect threads together and "put" in the hand of the character in the photo with the help of glue.
- Sign up a postcard.
Ideas for postcards dad
Dad is not just feeding in the family. He is the most important and favorite massac of the family in the family and it is he who allows mom to rest, and the kids tremble nothing. Make him a bright postcard reflecting his interests or just a stylish postcard in deep beautiful colors.
Postcard with ties
If your dad works a lot in the office and wears ties - such a postcard is exactly for him!
What do you need?
- 1 sheet of double-sided color cardboard dark gray
- 1 sheet of decorative paper cream-white
- 4 sheets of colored paper of different colors with prints (on tie)
- 1 Tube Glue PVA
- 1 Tassel for glue
- scissors
- 1 gel handle suitable color or marker
- motor thin aluminum film
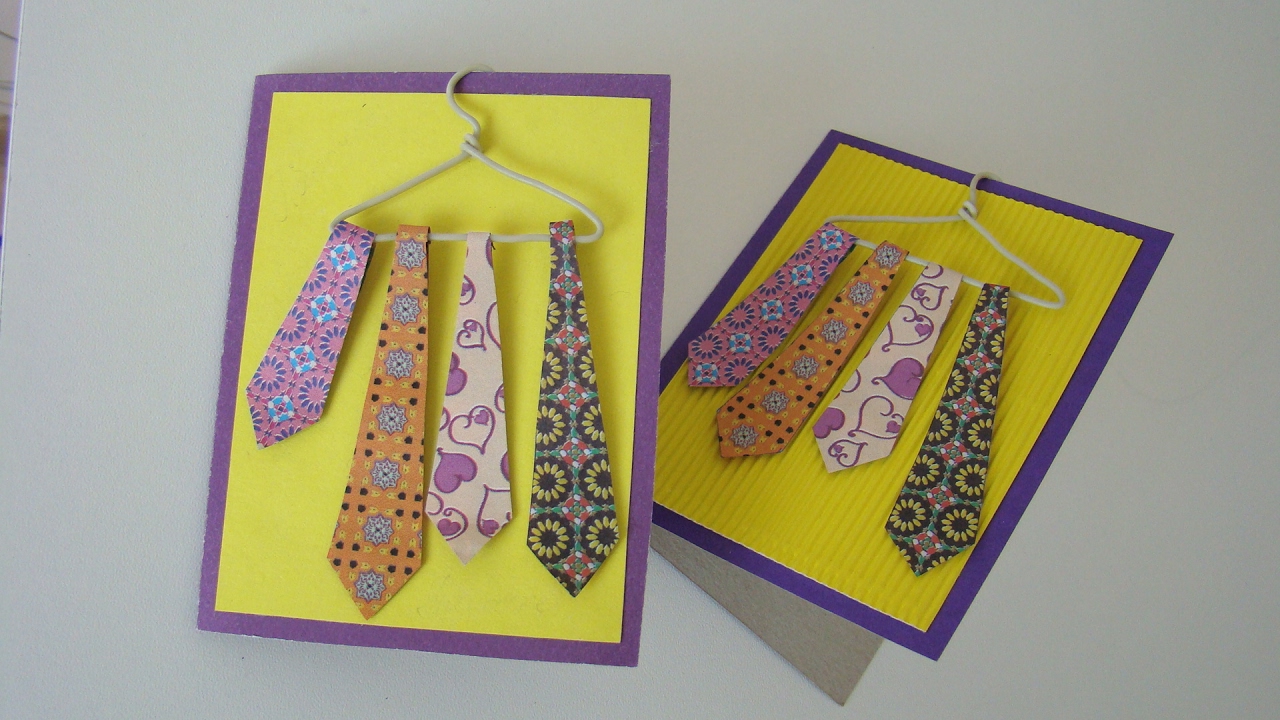
Ties
What do we have to do?
- Fold a sheet of gray paper in half.
- From decorative paper cut a rectangle a little less than the front side of our postcard to leave beautiful gray edges.
- Enclose decorative paper on gray blank. From above in the middle, leave a bit unpromising places under the shoulders.
- Make small shoulders from the wire - we will hang our ties on them. Make a hook a little longer than usual to get better to secure it on the postcard.
- Cut out 4 gusts from colored paper. "Hang" them on the hanger and stick.
- Hanger with ties hang on a white layer at the top of the postcard, looking there a long tip of the hook and glue everything.
- After placing the hanger, glue the ties to the white layer.
- Sign up your postcard.
Postcard on passion
We invite you to make a postcard for dad, loving nature and camping.
What do you need?
- 1 sheet of double-sided color cardboard black or dark blue
- sheets of books or album
- one sheet of double-sided colored paper
- 1 Tube Glue PVA
- 1 Tassel for glue
- scissors
- 1 gel handle suitable color
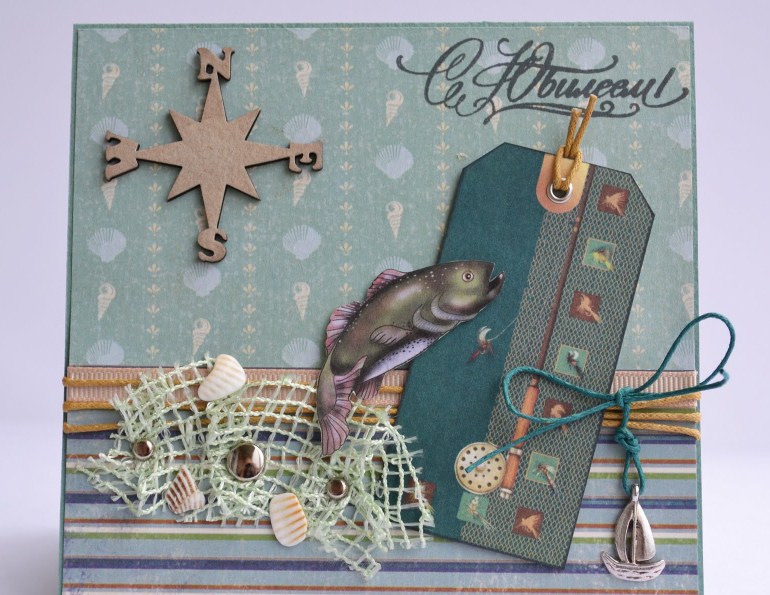
Card
What do we have to do?
- Pencil mark on a sheet of cardboard where you will have a tent, teddy bear, bonfire, moon and stars and other postcard attributes.
- From books, albums and photos Cut characters.
- Cut from the book network, compass. Stick in the place where then put the tent.
- Stick all other pictures on the postcard.
- Sign up a postcard.
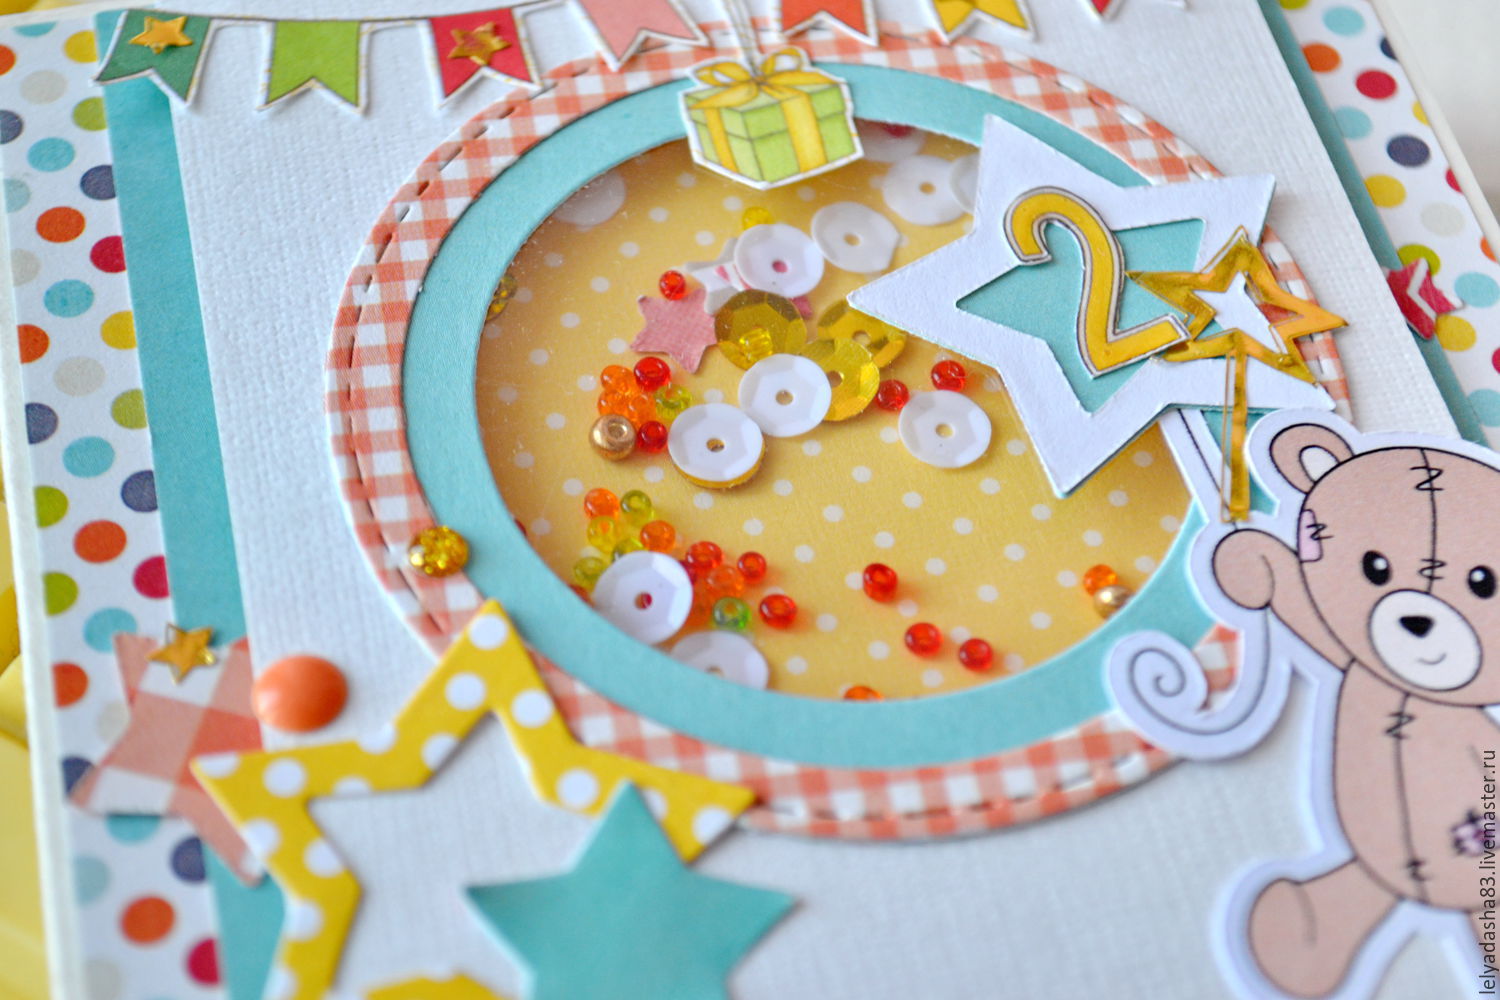
Postcard with flags
What do you need?
- 1 sheet of double-sided color cardboard blue.
- 4 leaf of duplex colored paper yellow, green, red and blue colors.
- 1 Tube PVA glue.
- 1 Tassel for glue.
- scissors.
- 1 packaging of decorative scotch.
- 1 gel handle suitable color.
- motor decorative thin lace.

With flags
What do we have to do?
- Fold the cardboard in half.
- Open the postcard and make holes in the postcard on both sides in three rows.
- Cut out of colored paper molds. These will be our flags.
- Cut three slices of lace in the width in the width of the postcard in the open form. Leave a little to be binding.
- Rhombiki alternately fold in half and honey to shoelaces.
- Laces with flags tie to a postcard stretching through holes.
We hope our master class will help you to please your loved ones. After all, the most important thing we can give - our attention and care.