To make a box of paper will need quite a bit - just follow the advice below.
The content of the article
Today, more and more people try to do anything with their own hands. On the one hand, this occupation is useful for motility, feelings of taste and, oddly enough, it will sound, intellectual human development. On the other hand, the creation of certain things with their own hands allows a person to immerse itself into creativity and take a break from the overaffect of information and negative, which are pours on us today from all sides. Of course, one of the undoubted advantages is the ability to not only save, but also to create something truly unique, for which the store would have to lay out a considerable amount of money.
Modern people learn to restore or sew alone clothes and furniture, knit, embroider, create incredibly original products literally from nothing. And all this is supported by tons of information about everything in the world, which is today available to everyone thanks to the Internet.
Today we bring to your attention the idea to create boxes with your own hands. It does not matter whether you have made someone's gift to someone and want to pack it, or you simply need organizers for any little things - in this article you will find what you need.
Paper box in the form of a bunny
Such a box will be useful if you plan to give sweets to a child or for the Easter decor of the table. Also in it you can bring Easter hotels.
What do you need?
- 1 sheet of white decorative paper
- printing template boxes
- 1 black marker
- 1 Pink pencil
- scissors
- 1 Glue PVA
- 1 brush
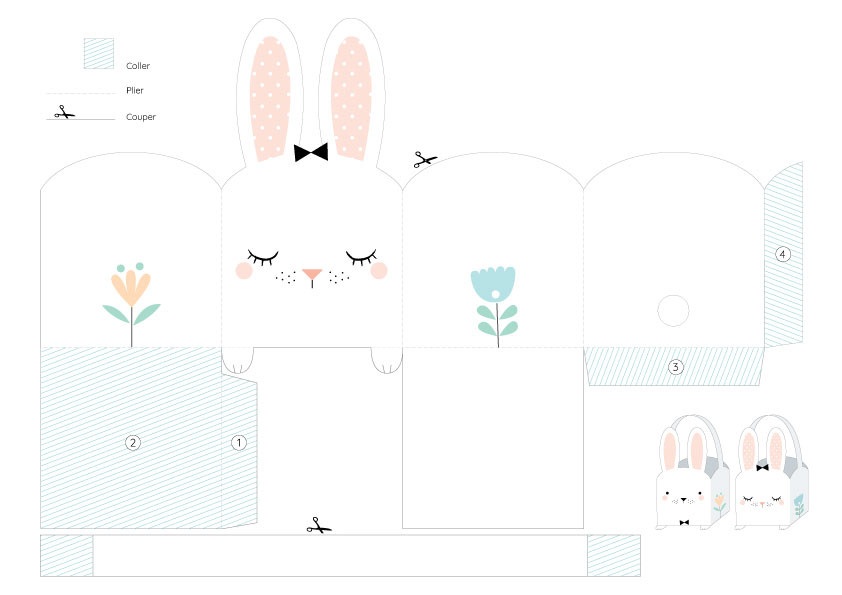
Cut by template
What to do?
- Print box template
- Attach a template to decorative paper and cut all the necessary details on it.
- Take the marker and draw mustache, spout, mouth and eyes.
- Take the pink pencil and draw, and hide the middle of the Ear.
- Next to the assholes slightly plugging the pink cheeks bunny.
- Collect the box, carefully impose the details of the glue and let's dry.
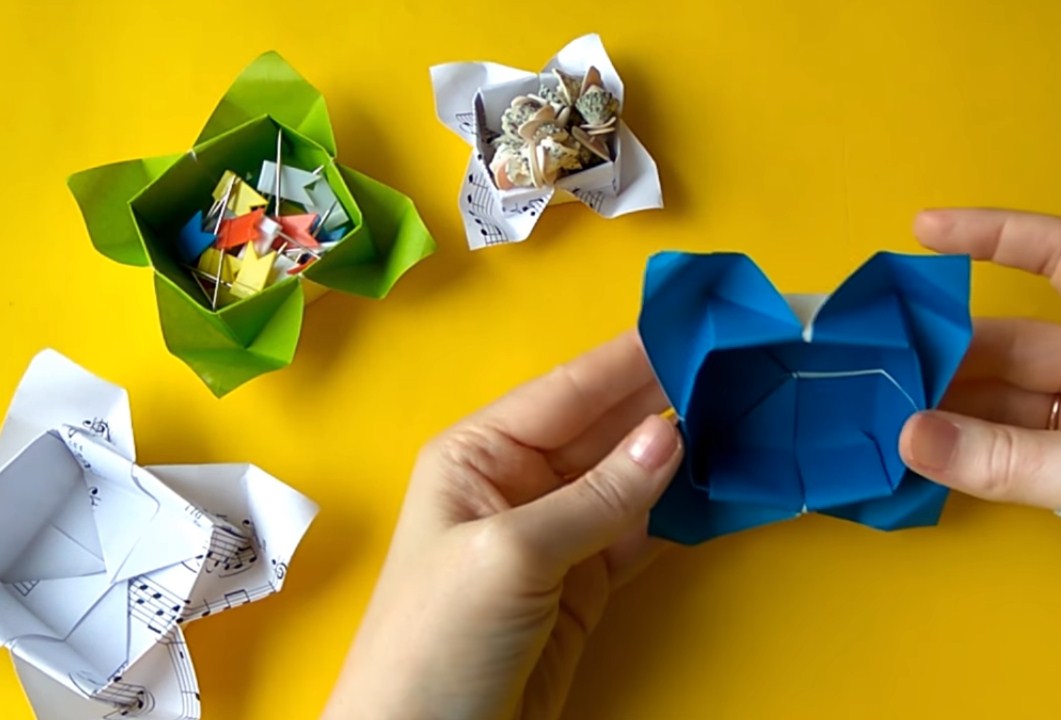
Paper box
To create this box, we use a popular technique for working with paper origami. It will be an excellent decoration of your home or a gift to someone close. For example, in such a flower you can fold things as a gift to the newborn. And if you make such a box of dark colors, it can serve as an excellent and stylish organizer for trifles or jewelry, which will not be ashamed to leave everyone.
What do you need?
- 1 leaf of double-sided color red paper square shape (from a leaf of 15x15 cm with a box 4 per 4 centimeter)
- scissors
- 1 Glue PVA
- 1 brush
Flower
What to do?
- Fold the leaflet in half in two directions - along and across.
- After that, bend it diagonally also in two directions.
- For one, insert the corners of the square to its center.
- Now divide the resulting triangles in half to height and remove the top part of the triangles outward.
- Turn over the future box on the other side and again bend the corners to its center.
- Now divide the lower part of the square horizontally in half and the lower half adjust to the middle of the square. Do the same with the top of the square. Expand the square again.
- The right and left side of the square also divide in half and generate to the middle. Thus, the bottom of the box has emerged.
- Turn to the parties two corners - left and right.
- Starting those form the wall of the box on the right. To do this, we first drive the ones on the right and below the triangles inside. Outdoor corner Inside the boxes, on its bottom.
- Repeat the same with the left side.
- Clear parts inside with brushes and glue so that the design is stronger, and leave to dry.
- Box-flower is ready.
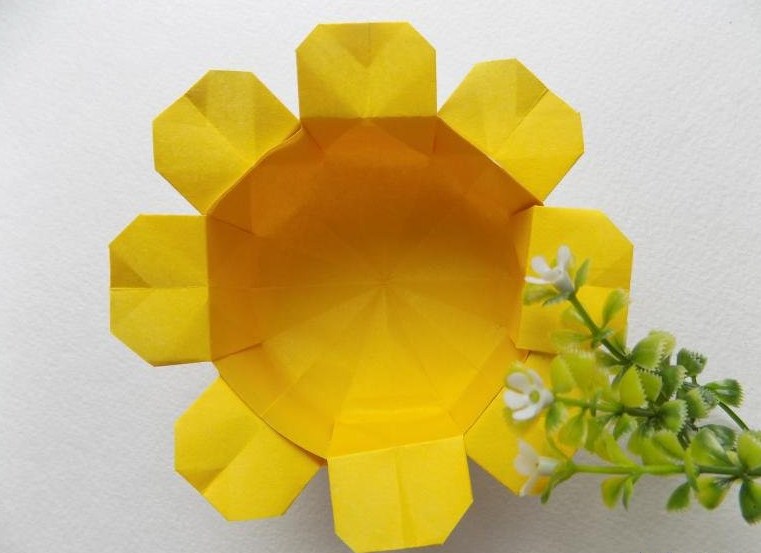
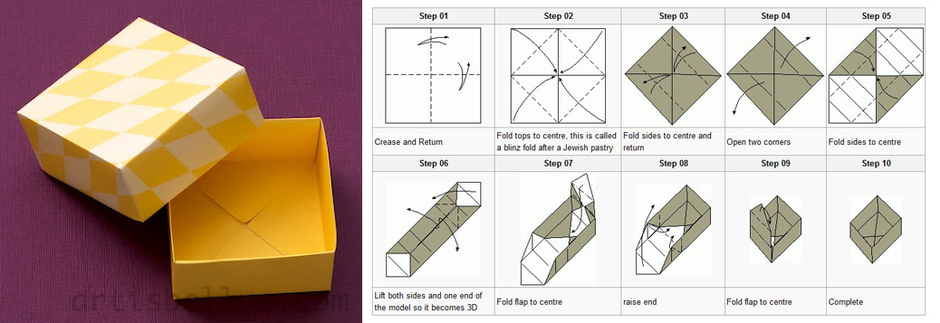
Sun-box of paper
A bright and cheerful box is suitable for gift packaging, and for storing different baby trifles. Attract the creation of such a box of a child - such joint crafts bring together and teach children of love for creativity. Well, of course, the child will also like the process, and the result.
What do you need?
- 1 sheet of double-sided color yellow paper square shape
- scissors
- 1 Glue PVA
- 1 brush
Sun
What to do?
- Fold the yellow square diagonally.
- Fold the resulting triangle in half to get a little triangle.
- Scatter the top layer of the triangle and give it the shape of the square.
- Turn over the workpiece to the other side and do the same with the lower layer.
- Now it is necessary to straighten the squares that you have turned out. Start from the top square. In the process of work, make sure that the folds of the folds coincide.
- Enter so with each of the layers.
- Next, turn the layers and proceed to the formation of rays.
- Bend the right corner of the upper rhombus, without forgetting while combining horizontal folds of folds. Then symmetrically start the left corner.
- Generate a small part of the top corner.
- Bend the upper part down. It turns out the first ray of the sun.
- Similarly, form three more rays.
- Fold the workpiece in half, bending the bottom corner up.
- Now disappear the workpiece. The bottom form should be octagonal.
- Repeat the same with the second sheet of paper.
- Find the bottom of the workpiece that will be inside with glue, and insert into another workpiece so that the rays do not impose on each other. Wait to glue.
- Box ready.
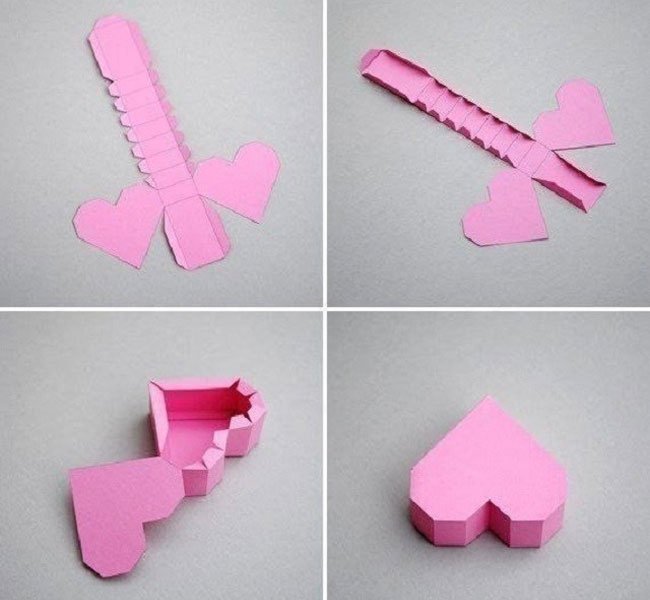
Little paper box with camp in the form of a heart
This box looks very cute and ideal for a gift packaging for St. Valentine's Day, an anniversary of dating or wedding and other romantic reasons. There you can pour your favorite sweets or put something more valuable.
What do you need?
- 1 sheet of double-sided colored paper of red or pink
- 1 sheet A4 for printing layout
- scissors
- 1 Glue PVA
- 1 brush
- printer
- ruler
- clip
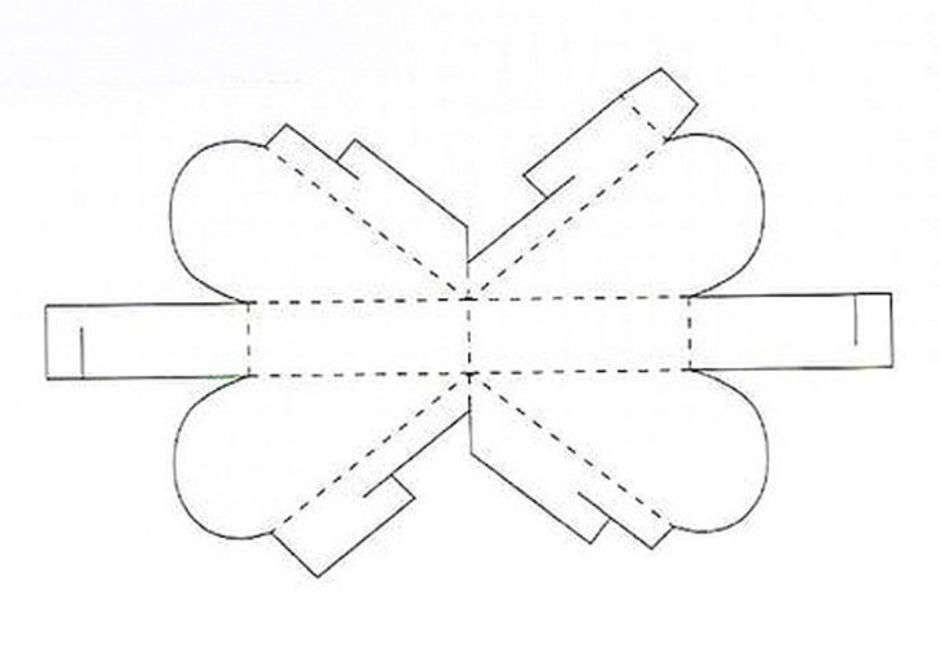
Layout
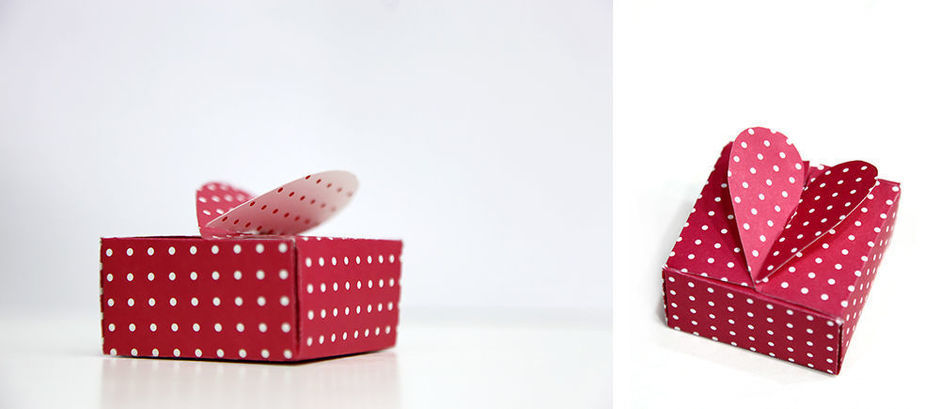
Result
What make?
- Find, download and print a box-heart layout on the Internet.
- Attach the layout to color paper and secure the clips. We do not recommend transferring the layout on paper, since traces may remain on the front side of the product.
- With the help of scissors, make cuts over thick lines and bends where on the mock-up lines.
- Collect the box at the same time fixing the detail glue.
- Hearts in this box protrude with a lock. You can fasten them now, and you can later.
Cute box from a package of cereals
This is a box for those who care about nature and does not like to throw away the paper. Of course, such a box of bright new colored paper will also look excellent, but also made from the usual old box from under the cereals. It will not lose your gentle look.
What do you need?
- 1 box from under the cereals or leaf of duplex colored paper of any color that you like
- 1 sheet A4 for printing layout
- scissors
- 1 Glue PVA
- 1 brush
- printer
- ruler
- clip
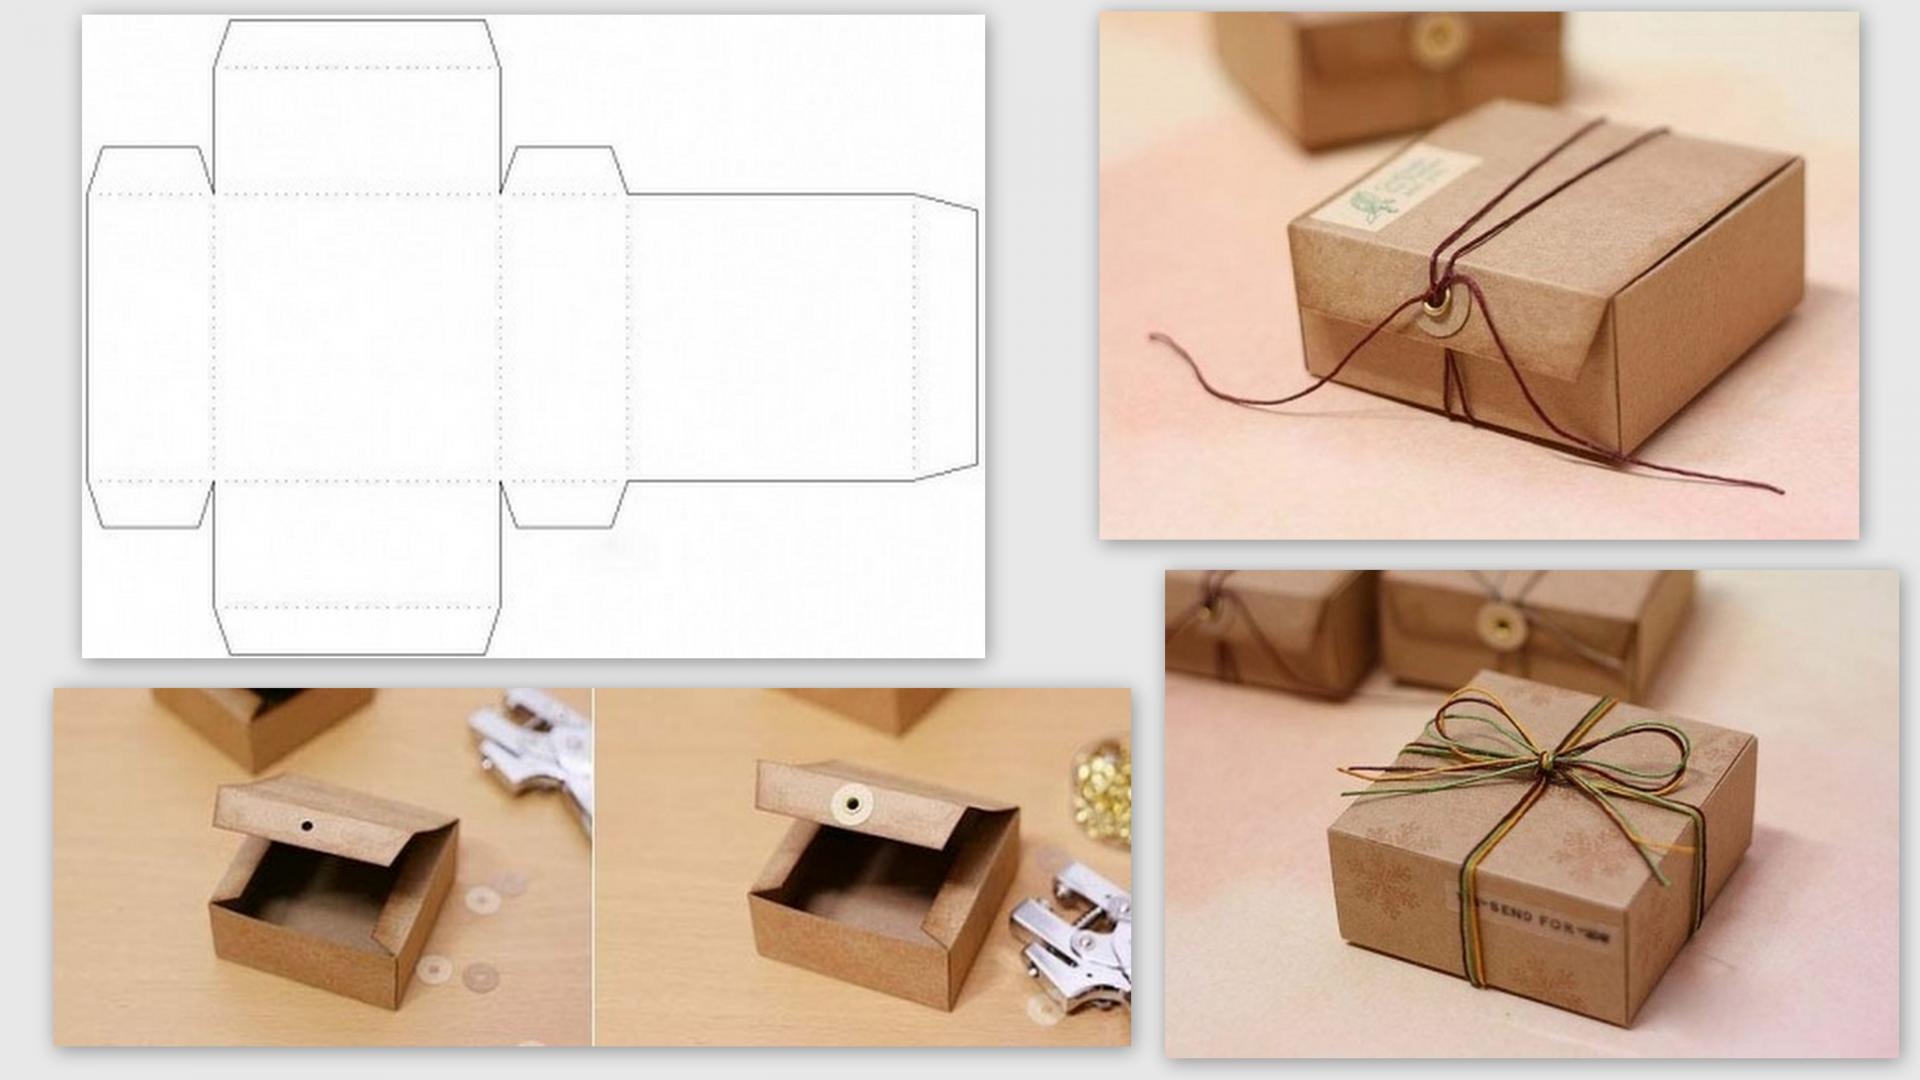
Cute box
What to do?
- Find the boxes on the Internet and print it.
- Gently disassemble the box from under the cereals.
- Attach the layout to the box. Fasten up the clips. Cut the layout over thick lines and bend with a seat line where the lines are thin.
- Collect and glue the box. Wait until everything is driving.
Paper Pad Box
This box is ideal in order to take into it jewelry. The pad can be made of different sizes, so that it is suitable for a small cat, and for a large necklace or bracelet.
What do you need?
- 1 sheet of double-sided colored paper of any color according to your taste
- 1 sheet A4 for printing layout
- scissors
- pVA glue
- brush
- printer
- ruler
- clip
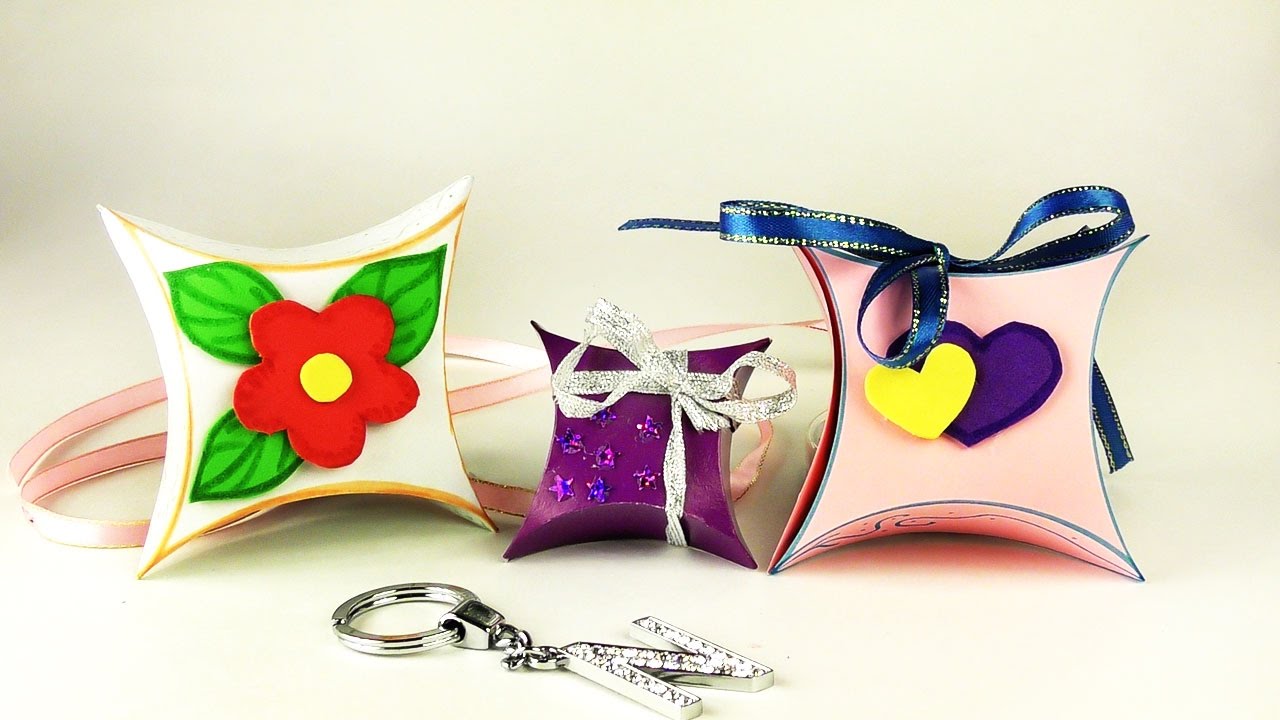
Pillows
What to do?
- Print the layout of the pad.
- Attach the layout to a sheet of colored paper, secure the clips in the quantity you need, and make the necessary cuts and bends.
- Collect the box and glue where you need. Leave the box until the glue will dry.
The box can be decorated at will or leave without decor, if the paper you used is quite beautiful.
Heart-shaped box
This box has a heart shape and suit for both a romantic occasion, and for a gift to a child or decorating a children's room. You can prepare a few such boxes for the holiday for relatives, colleagues and children.
What do you need?
- 1 sheet of duplex colored paper green or cardboard
- 1 sheet A4 for printing layout
- scissors
- 1 Glue PVA
- 1 brush
- printer
- ruler
- clip
Heart
What to do?
- Print the box of the box. Attach to colored paper and secure the clips. Of course, you can translate the layout on paper or make a layout with a pencil right on paper, but there is always a risk that traces will be visible on the surface of the finished product.
- The resulting workpiece cut over the contour.
- Generate the details of the layout, with which the box will be fastened.
- Alternately lubricate the box item with glue and glue it.
- Leave the box for the time to flow glue.
- Decorate the box to taste if necessary.
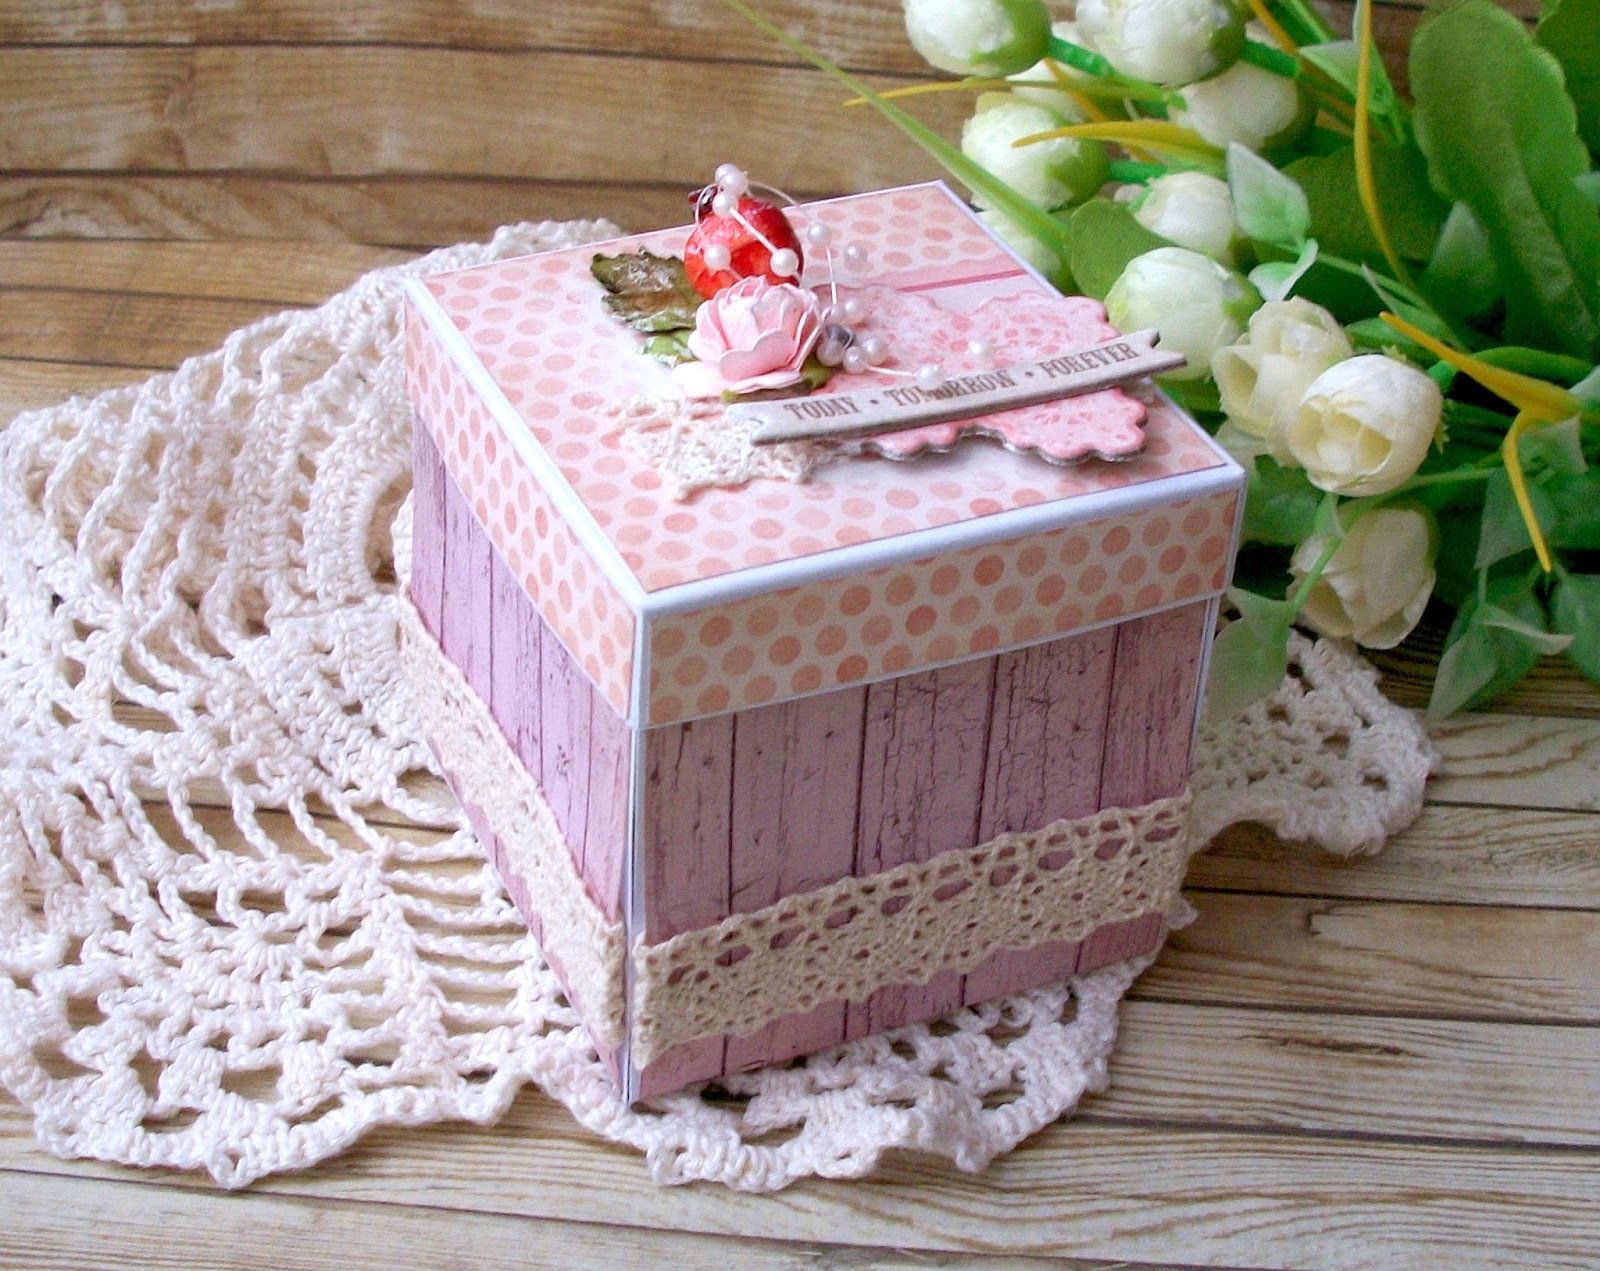
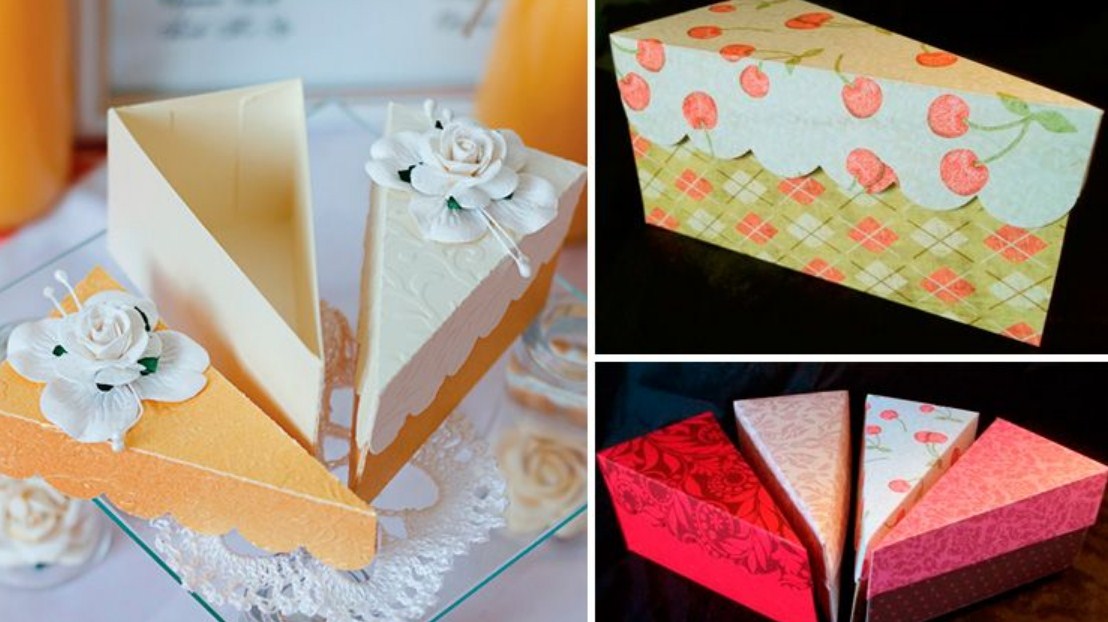
Paper box cake with removable lid
This box is suitable for all occasions of life - and on the birthday of a friend or colleague, and for the holiday to children and as a decor of a small sweet table for a wedding. Depending on the occasion, it is possible to collect in such a box - from sweets to jewelry or silk scarf.
Cakes
What do you need?
- 2 White Decorative Paper Sheet
- 1 sheet A4 for printing layout
- scissors
- pVA glue
- brush
- printer
- 20 cm of decorative tape or satin braid white
- lighter
- dry or Artificial Flowers for Decor
- ruler
- clip
What to do?
- Find on the Internet layout and print it on the Internet.
- Carefully attach a layout to paper and secure the clips. If you use white paper is especially important not to use on its front surface of the pencils or markers, so that there are no traces left. If you want to decorate the surface of the cake of drawings - give them time to absorb well and dry so as not to smear the drawing in the process.
- Cut the necessary items and glue the box.
- Give the box to dry, before decorating it.
- Take the box cover and glue dry or artificial flowers on it.
- Catch the lid of the box atlantic ribbon gently gluing it. Do not use a lot of glue so that there are no ugly wet traces on the ribbon. Tie a bow, and process the edges with a lighter. Leave the lid dry.
- The box is ready, you can now fill it and close it.
Simple paper box
In fact, this box is only conditionally called simple. Depending on your imagination and needs, it can be anything and an organizer into the kitchen, and the storage location for your needlework, and the organizer for things or the office.
What do you need?
- Tight-paper sheet A3 or cardboard (so that the box is stable)
- 1 Superclay tube
- 1 brush
- printer
- scissors
- ruler
Simple box
What to do?
- Print the layout of your box and transfer it to paper.
- Make the necessary cuts and bends. If you have a very dense paper, in the seats of folds you can use the technique of raging.
- For gluing thick paper it is better to use superclauses. Drip to the places where you need to glue, and alternately glue the items. You can also first collect the box, and then take carefully.
- After the box gets up, you can decorate it to your taste. The easiest option is to attach it with strips of decorative scotch. They also use decor with cloth, felt, decorative paper and even skin.