Features of sewing the dolls of Tilda, the Snow Maiden, the growth and the like from the fabric with their own hands. Master class and patterns.
The content of the article
- How to sew a tilde doll with your own hands from fabric: patterns, master class, photo
- Video: Tilda doll from fabric-master class
- How to sew your own doll with your face with your face: patterns, photo
- How to sew your own body with your own hands?
- How to sew your own dolls and arms with your own hands?
- How to sew an elza doll with your own hands from fabric: patterns, photo
- How to sew a rost doll with your own hands from fabric: patterns, photo
- How to sew a New Year's doll Snegurochka with your own hands from fabric: patterns, photo
- Fabric dolls: photo
- Video: How to sew a fabric doll?
Since childhood, we have been playing dolls. It's nice when there are a lot of them and each has its own story.
However, dolls from the store often have a high price and often we, adults, are not always ready to buy them. Especially pleasant and joyful when mom loves needlework and makes interesting crafts herself.
Since ancient times, our ancestors created dolls from fabrics. Only then were they called motans and made without a needle. And now the needlewomen successfully mastered sewing puppets from fabrics, for example, Tilda.
Let's talk about the features of their own creation in the article.
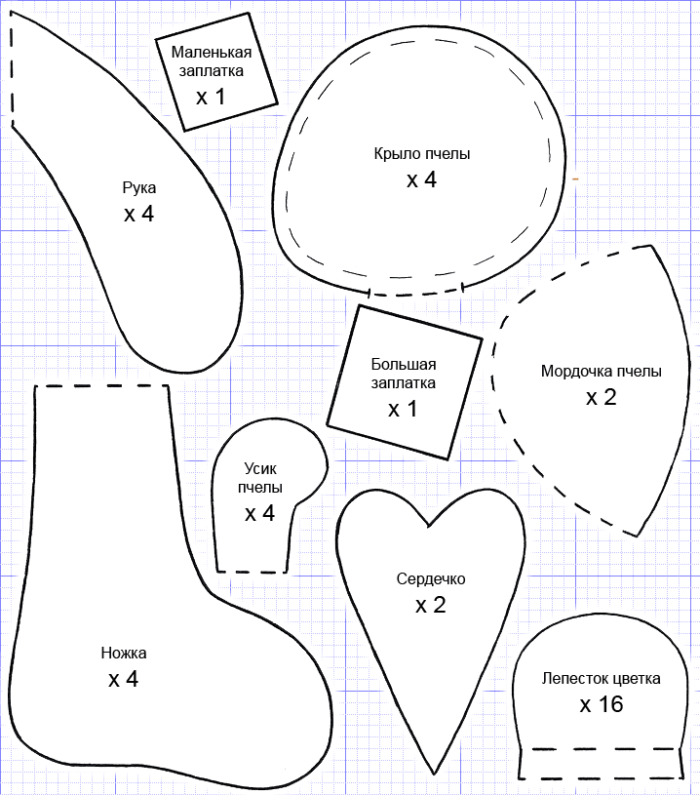
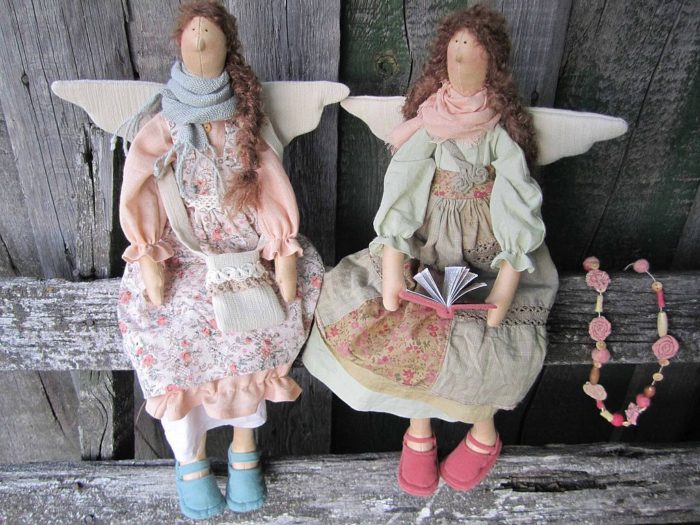
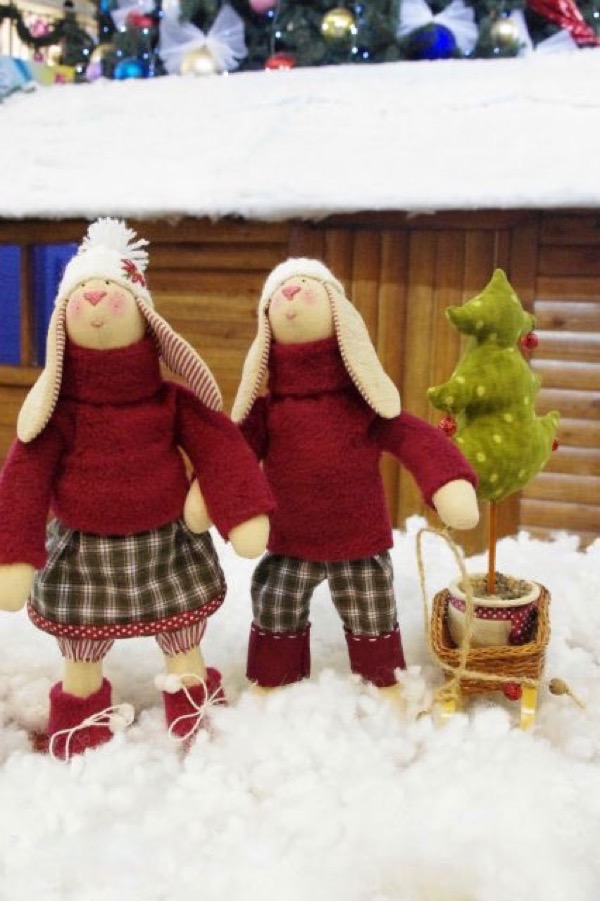
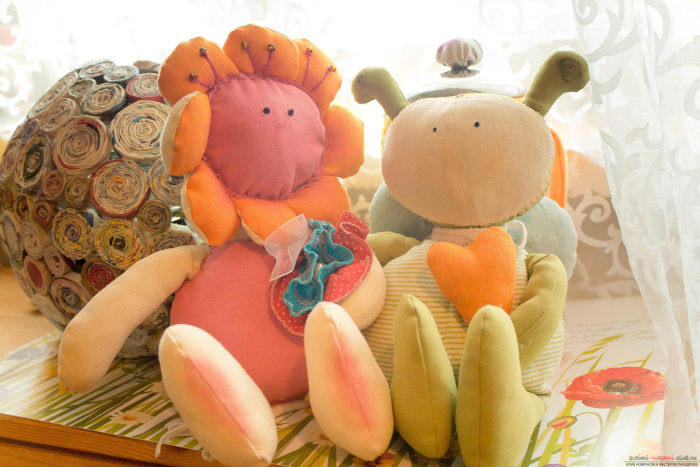
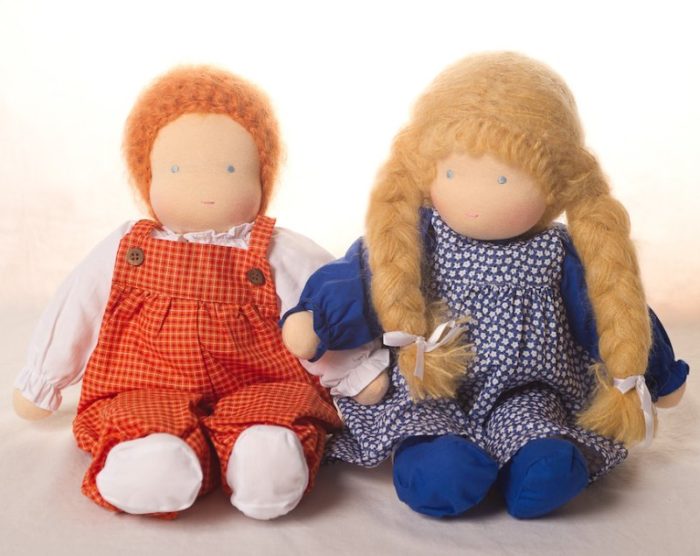
How to sew a tilde doll with your own hands from fabric: patterns, master class, photo
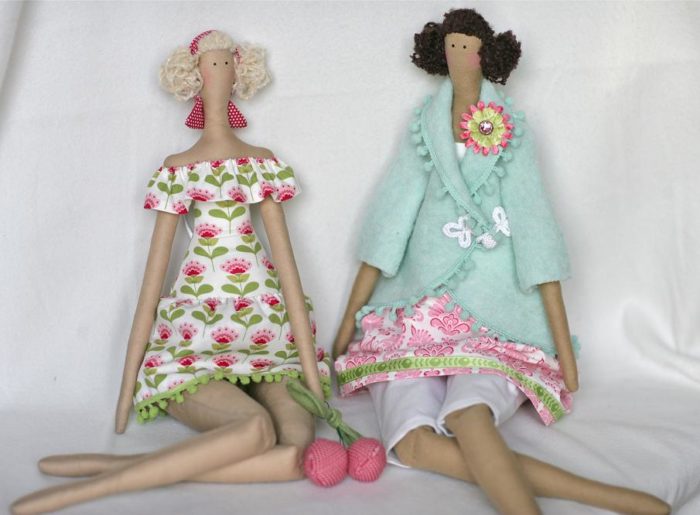
two cute tildes from fabric are sitting nearby
Before proceeding to sewing, consider a number of points:
- the cloth. Take dense and comfortable in work, for example, cotton and cotton,
- furniture and jewelry. Small beads, beads, sequins, buttons, fabrics of other species for clothes dolls are suitable,
- fabric seal - provides the desired density and strength of specific parts of the body,
- filler - will add softness and forms of the doll,
- tools to work during the creation of Tilda - a wooden stick, a marker, an adhesive tape, needles for holding the edges of the patterns, paints for fabric, muline.
The process of creating tilda from fabric has the following sequence:
- draw/select the pattern
- transfer it to the fabric
- cut and fold the parts sequentially
- connect the edges of each from the inside with stilettos
- perform the seam manually, leaving a doll on each part of the body to turn off
- fasten the seams on the typewriter
- gently turn out the details of the body of the doll with a wooden stick
- fill them with a filler
- sew holes and connect the details among themselves
- decorate with fittings
Read more Master class on sewing tildes from tilde from fabric, watch the video.
Video: Tilda doll from fabric-master class
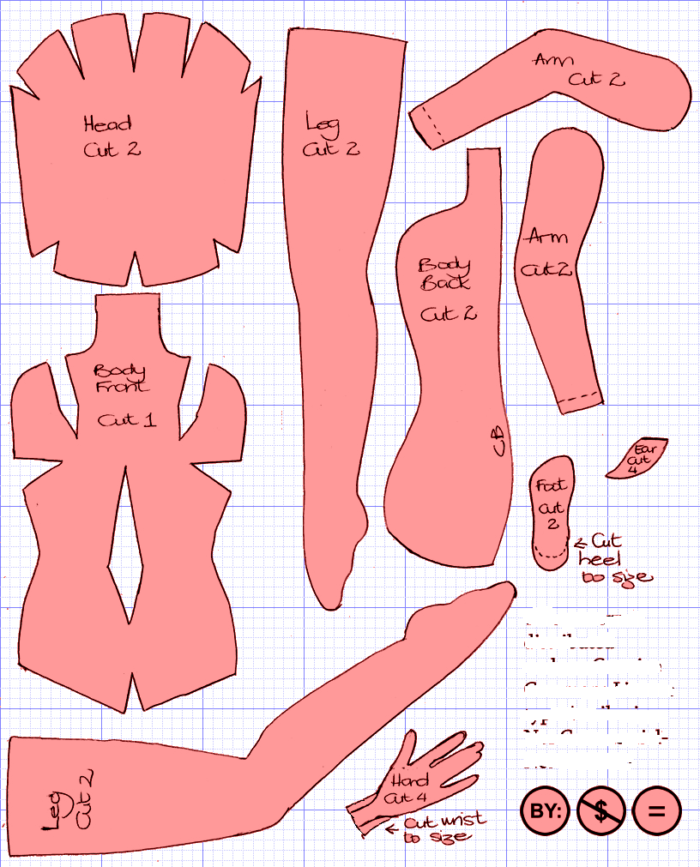
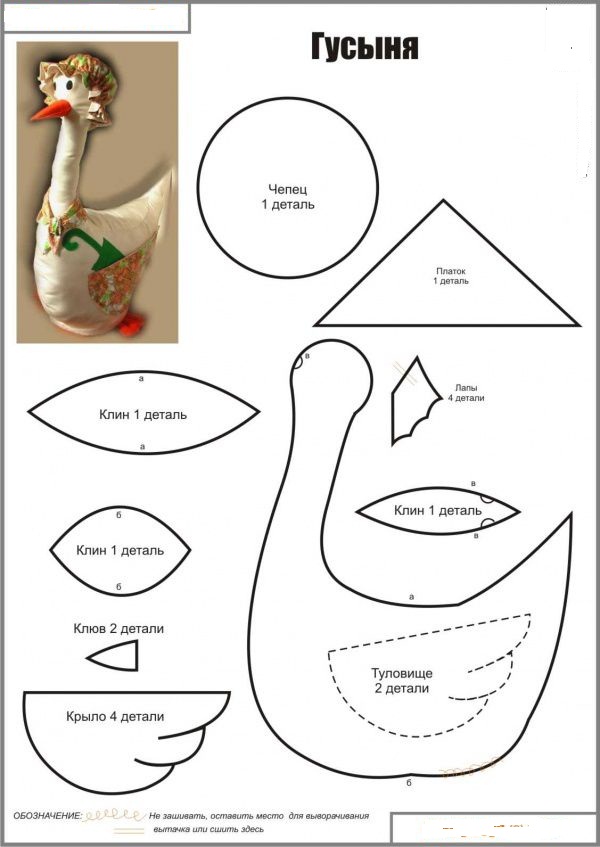
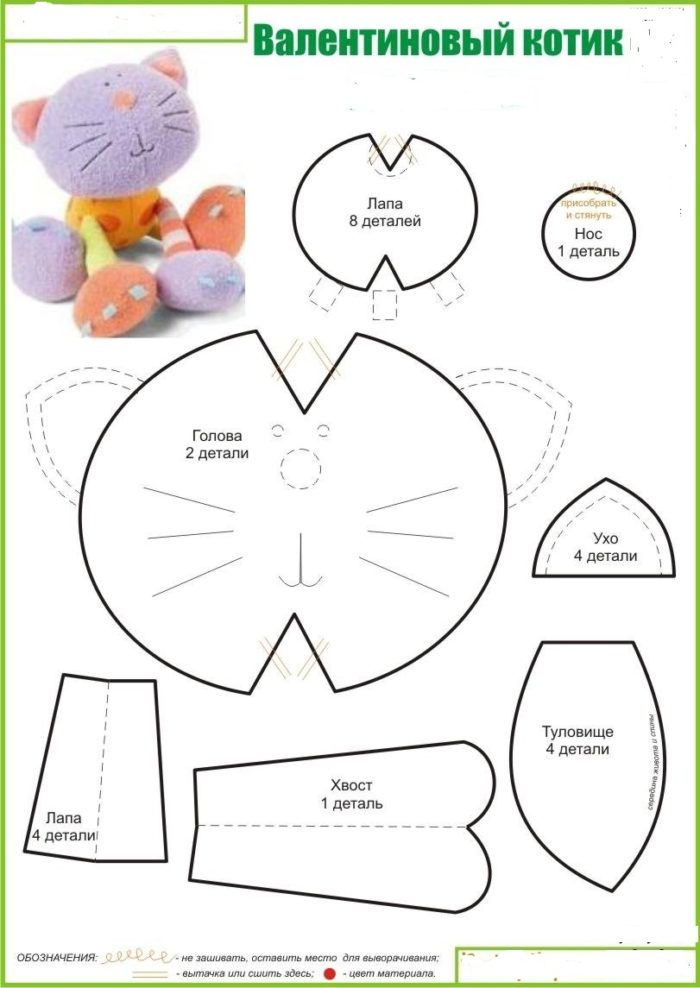
Add the patterns in the photo below.
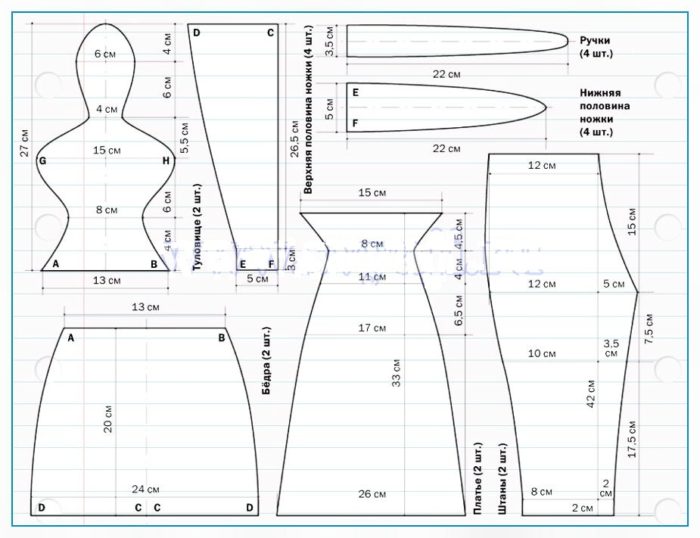
tilda doll patterns, example 1
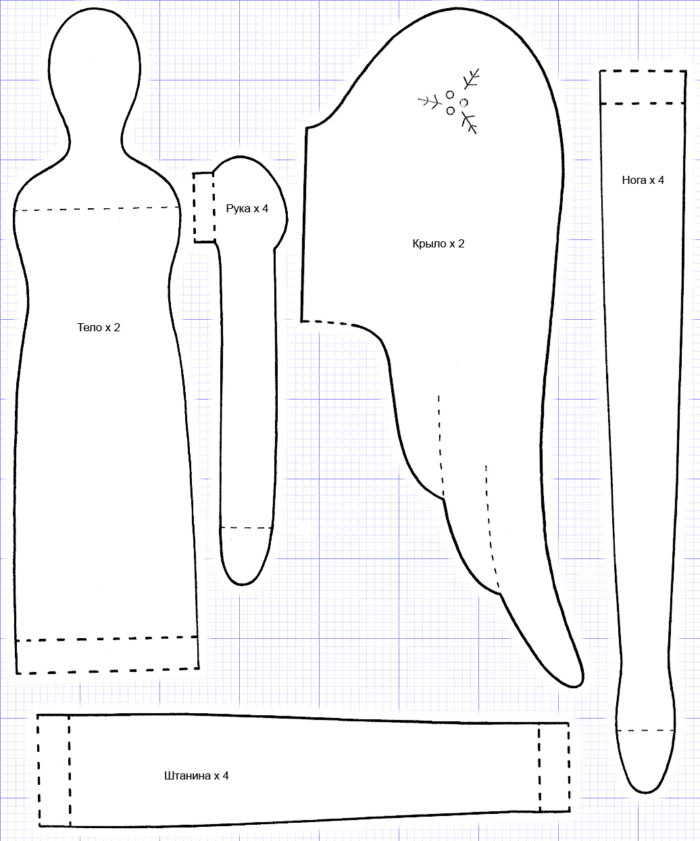
tilda doll patterns, example 2
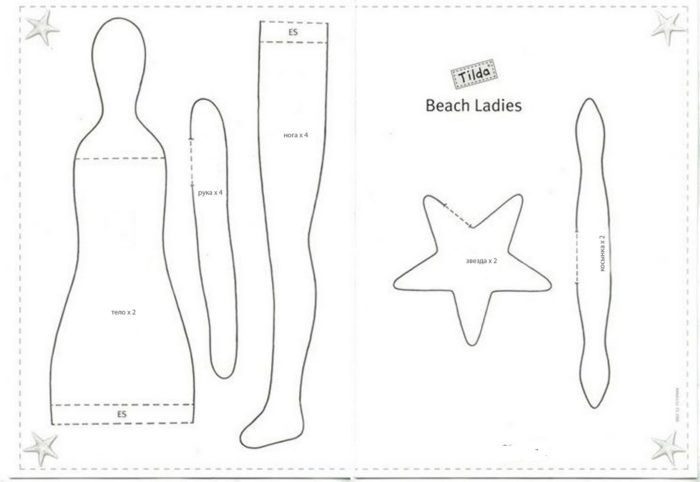
tilda doll patterns, example 3
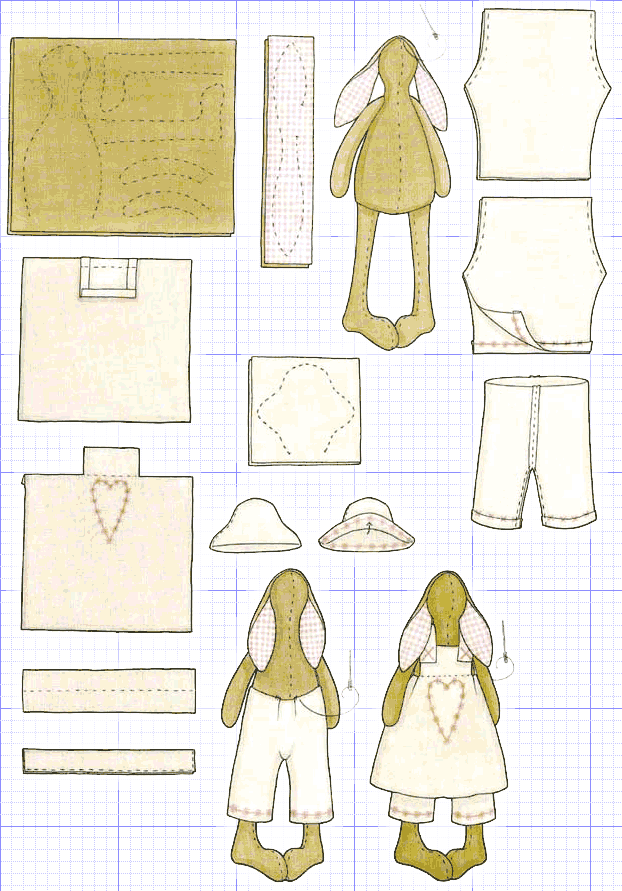
tilda doll patterns, example 4
tilda doll patterns, example 5
tilda doll patterns, example 6
tilda doll patterns, example 7
tilda doll patterns, example 8
tilda doll patterns, example 9
tilda doll patterns, example 10
tilda doll patterns, example 11
tilda doll patterns, example 12
tilda doll patterns, example 13
tilda doll patterns, example 14
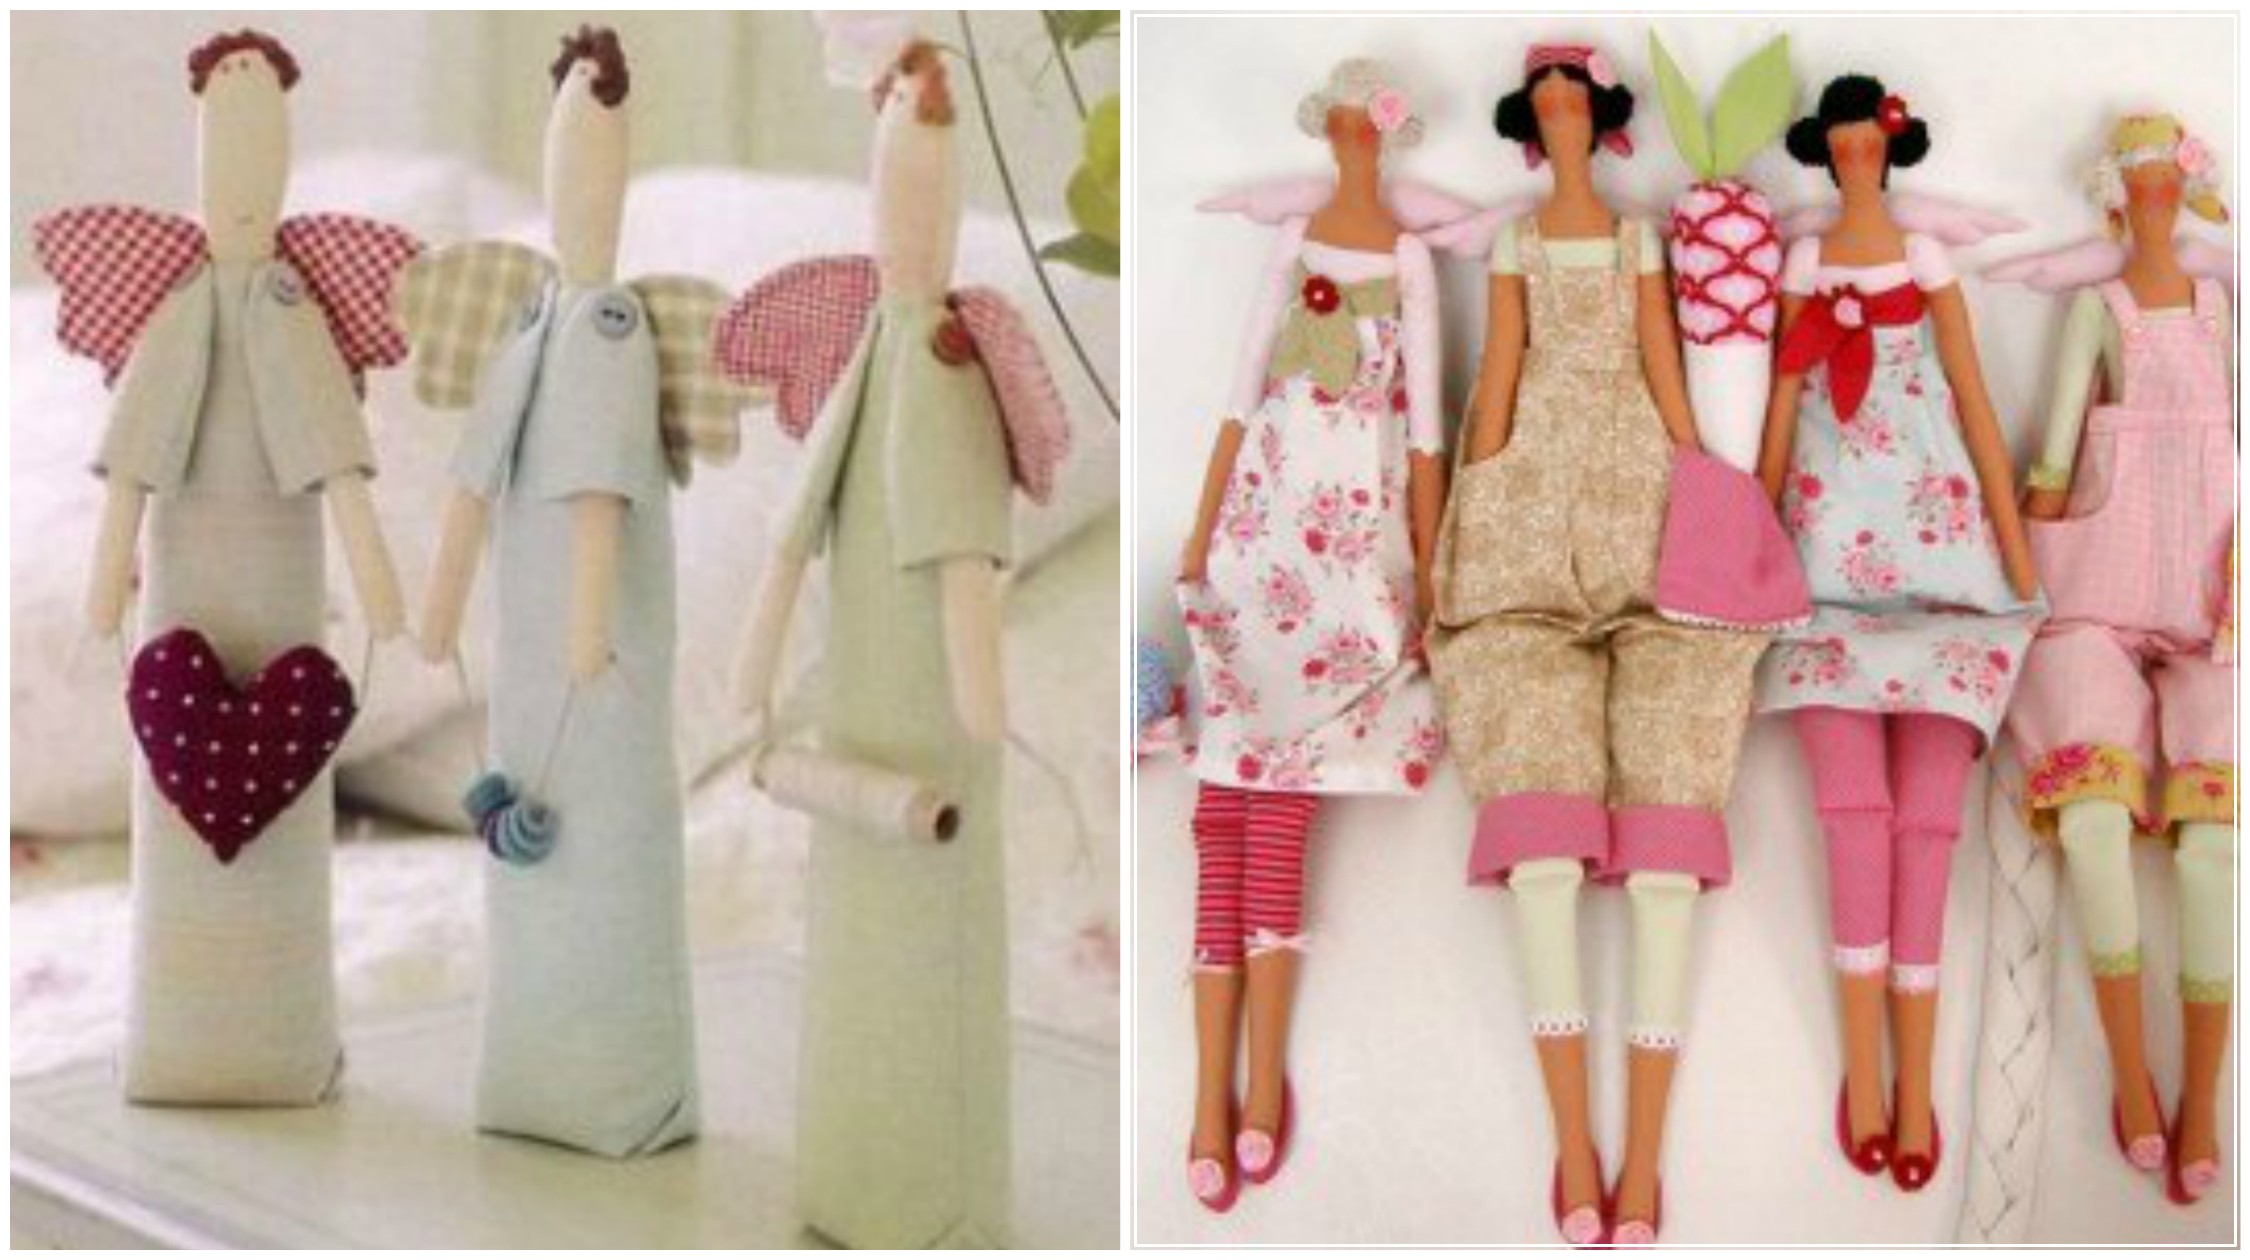
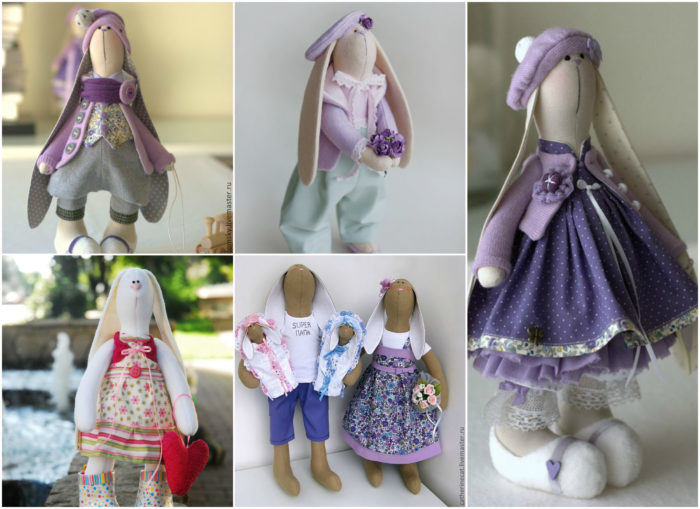
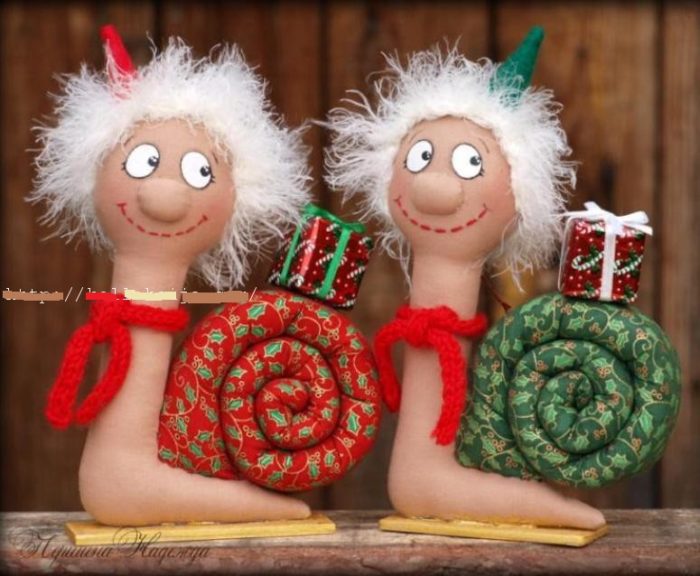
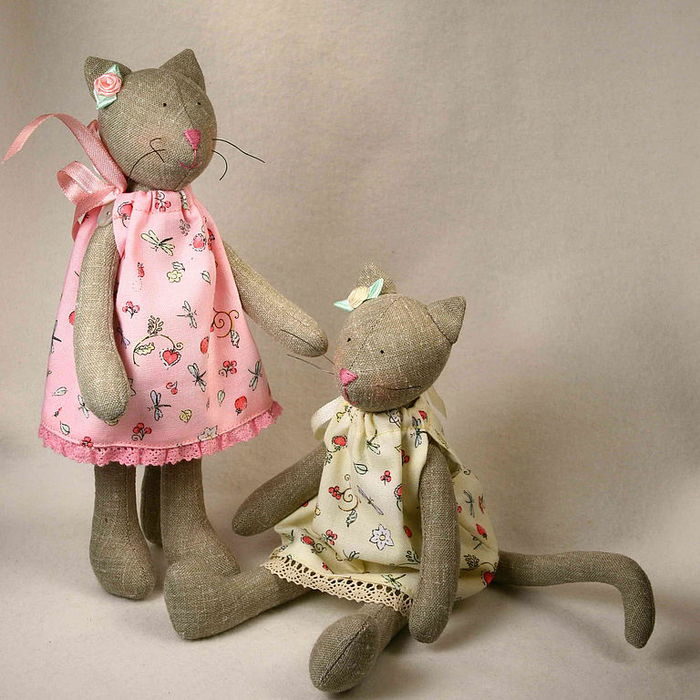
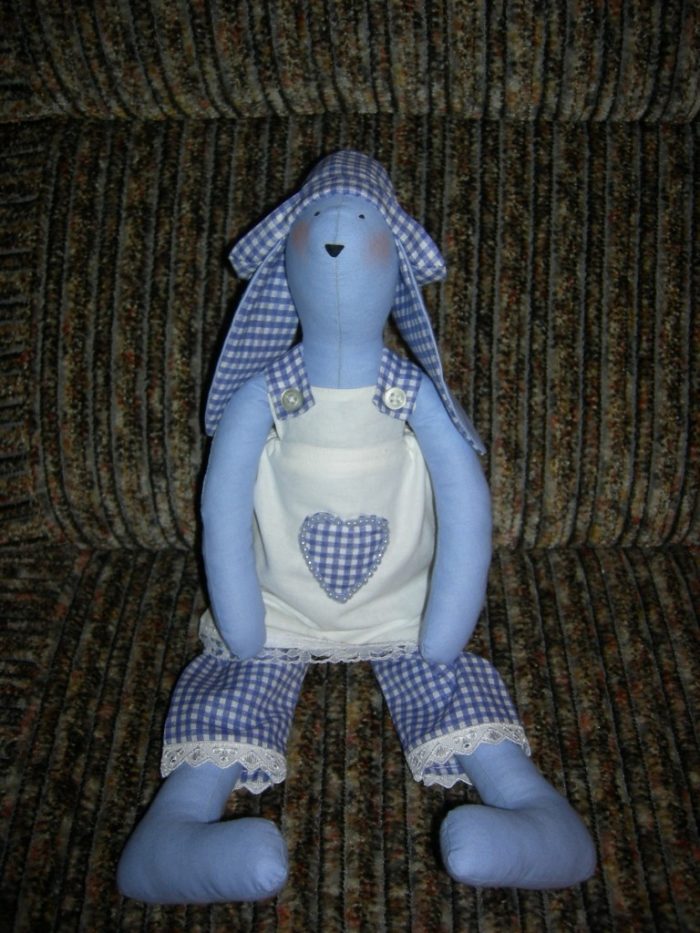
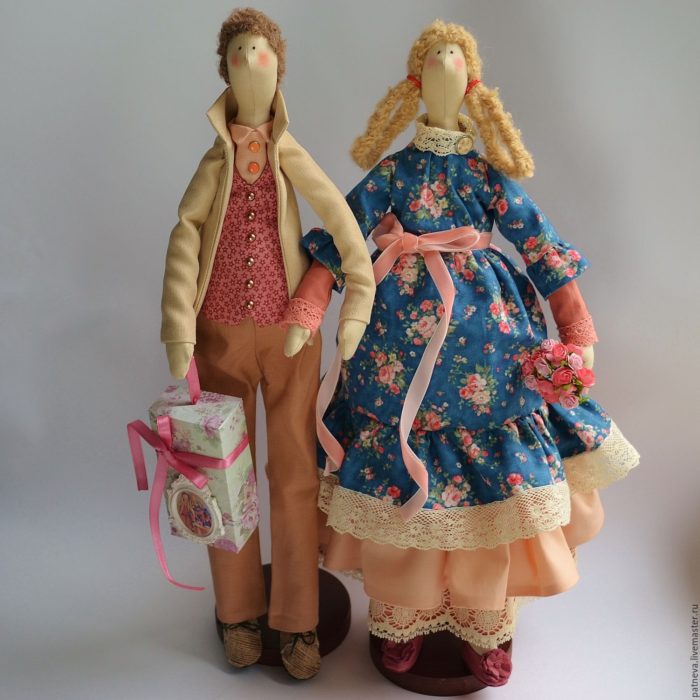
And a small selection of ready -made soft dolls.
ready -made tildes from fabric, photo 1
ready -made tildes from fabric, photo 2
ready -made tildes from fabric, photo 3
ready -made tildes from fabric, photo 4
ready -made tildes from fabric, photo 5
ready -made tildes from fabric, photo 6
ready -made tildes from fabric, photo 7
ready -made tildes from fabric, photo 8
ready -made tildes from fabric, photo 9
ready -made tildes from fabric, photo 10

ready -made tildes from fabric, photo 11
ready -made Tilda dolls from fabric, photo 12
ready -made tildes from fabric, photo 13
ready -made tildes from fabric, photo 14
ready -made tildes from fabric, photo 15
ready -made tildes from fabric, photo 16
ready -made tildes from fabric, photo 17
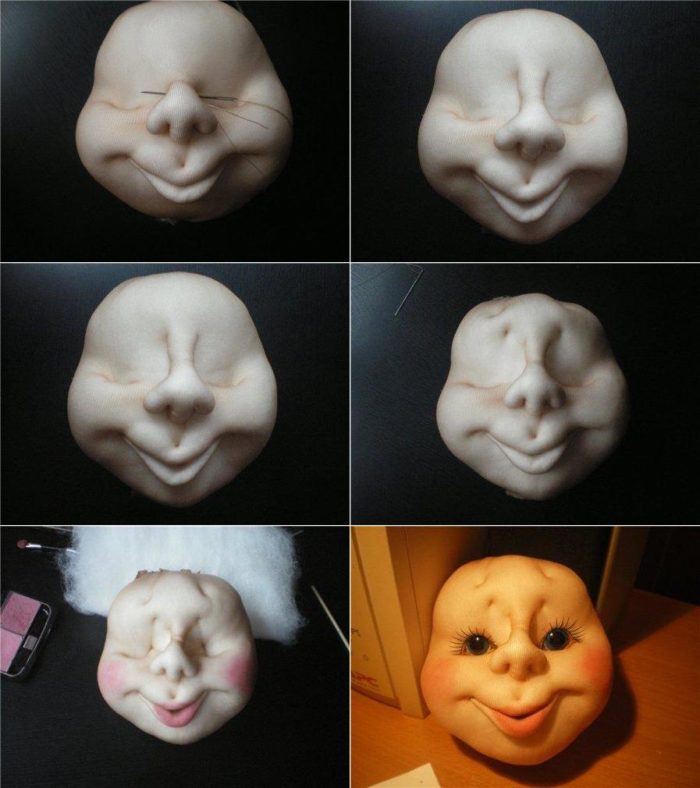
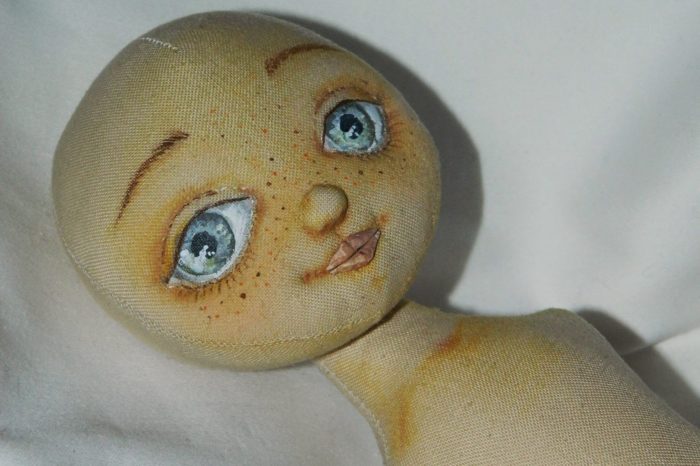
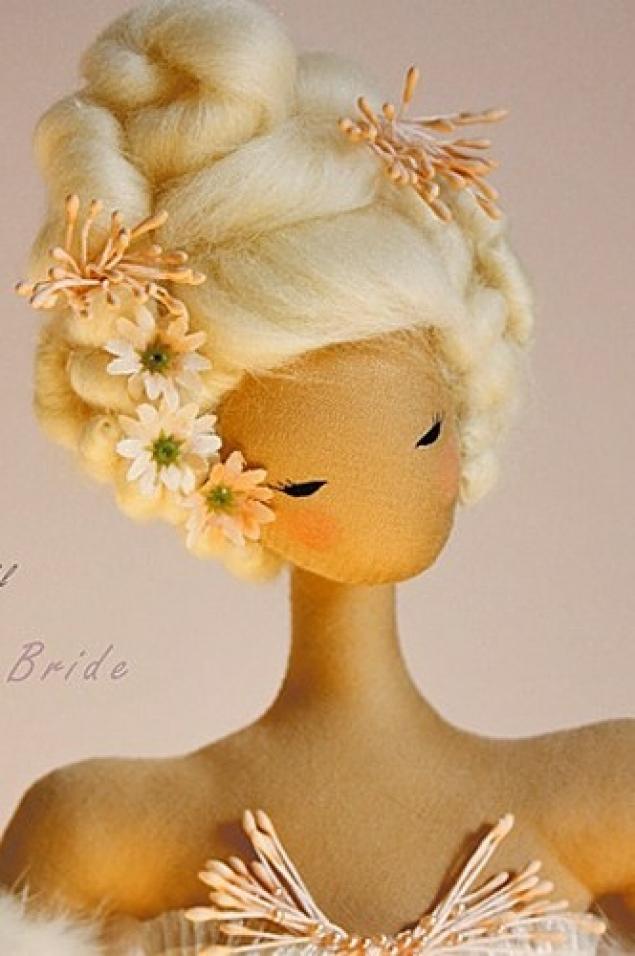
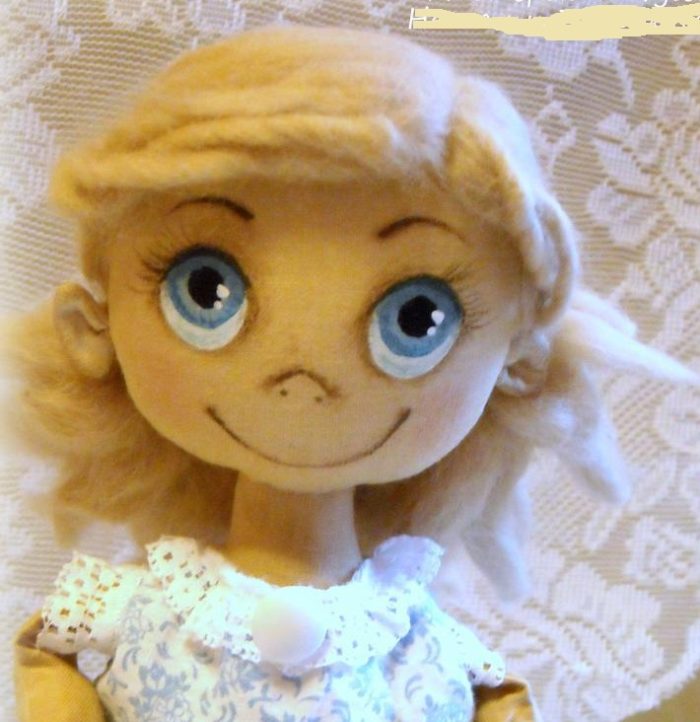
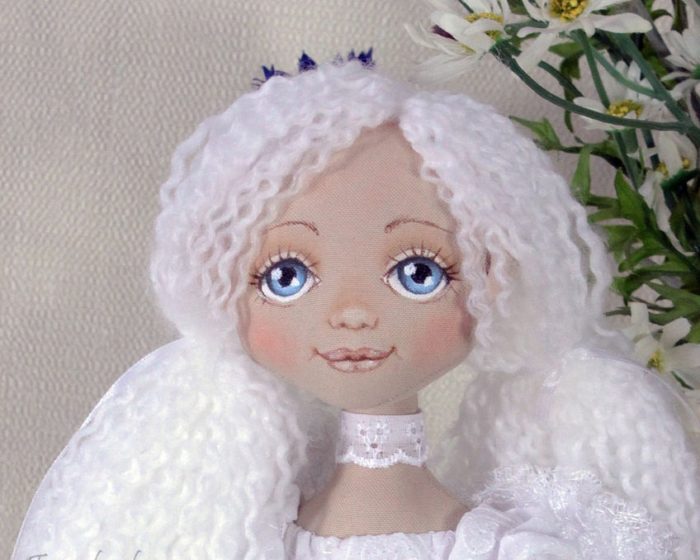
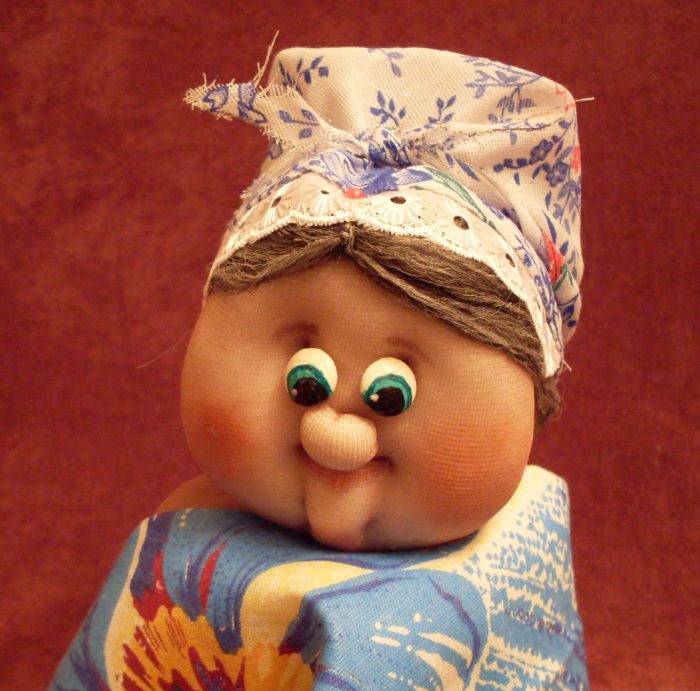
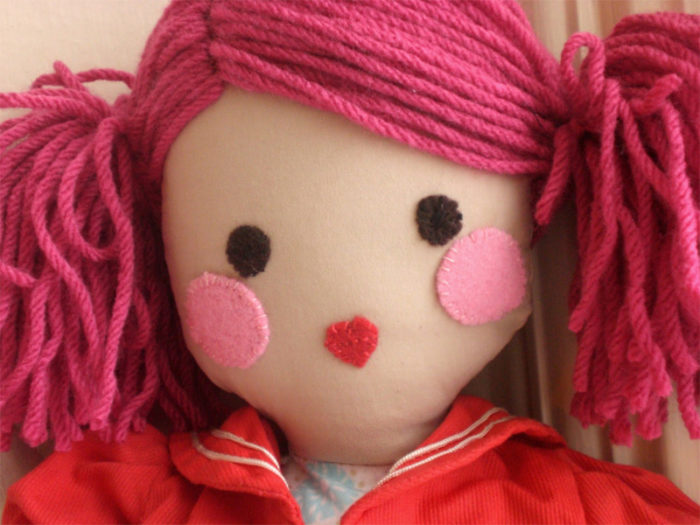
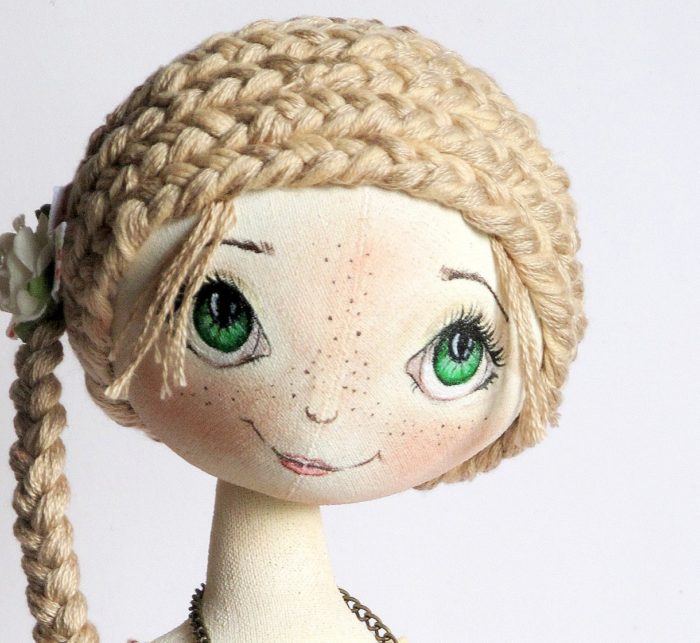
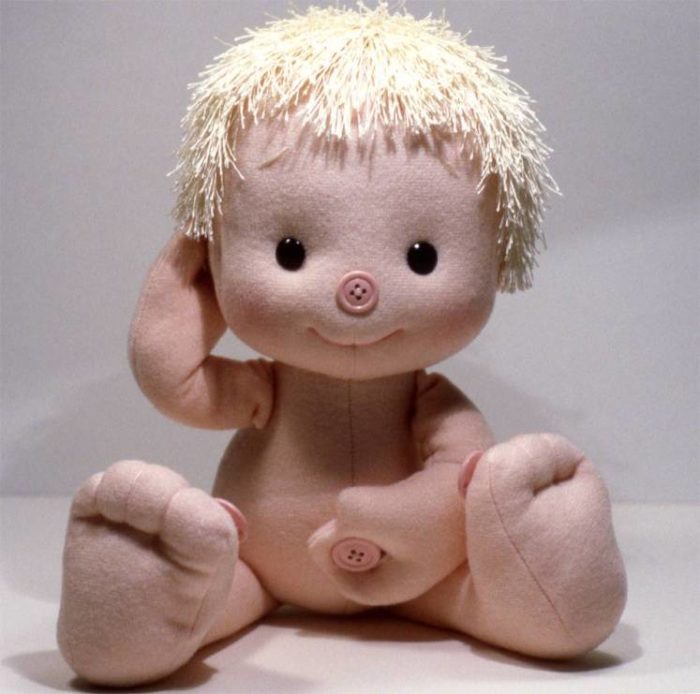
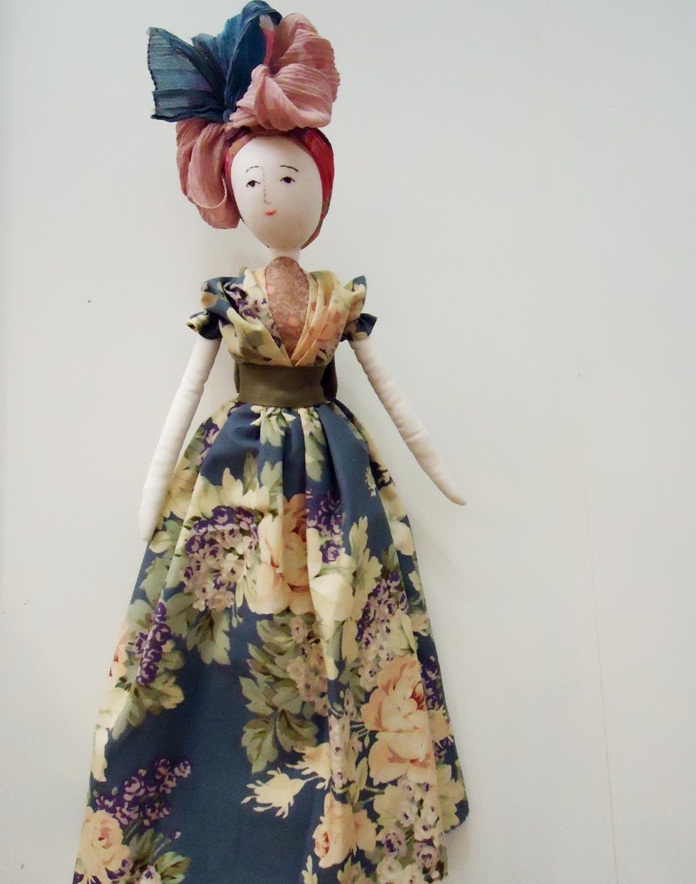
How to sew your own doll with your face with your face: patterns, photo
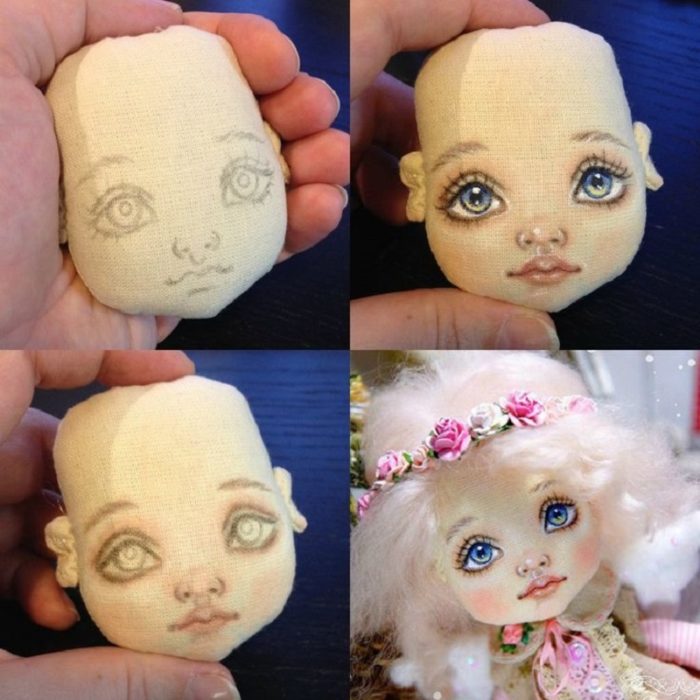
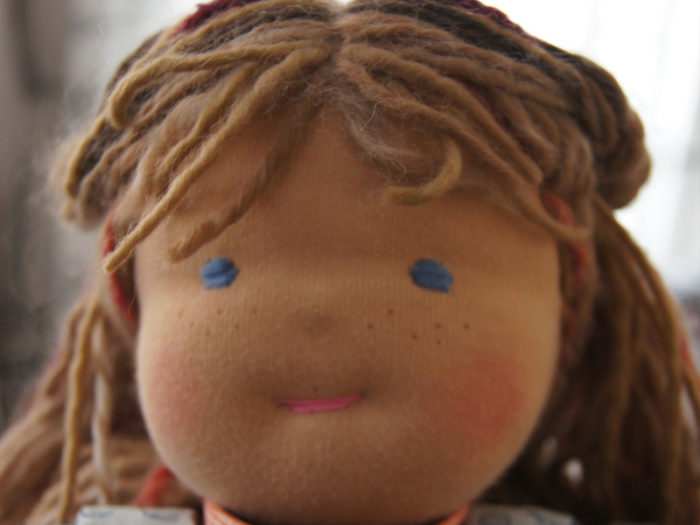
phased painting of the face of a doll sewn from fabric
Start creating your doll from fabric from the head:
- sew the edges of the fabric, turn out and add filler
- add a headdress if desired
- form your ears
- fasten your hair on the head with hairpins
- sew them so that they cover the space you need
Start creating a face:
- draw a doll with paints for fabric
- perform several stitches in the nose zone
- draw lips and blush on the cheeks with lipstick and/or blush
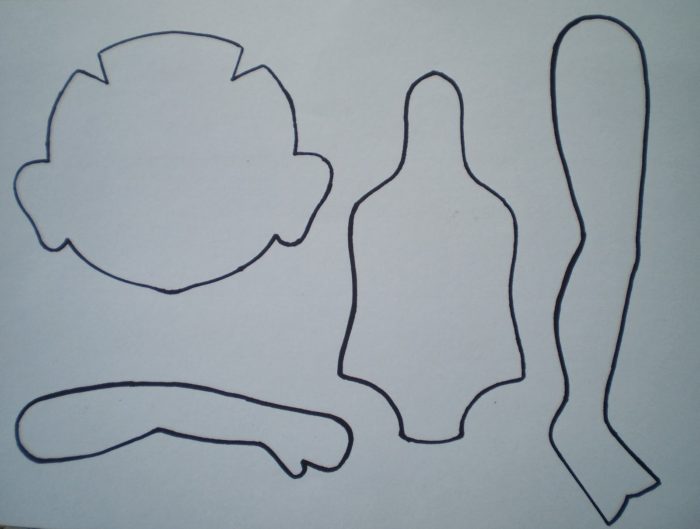
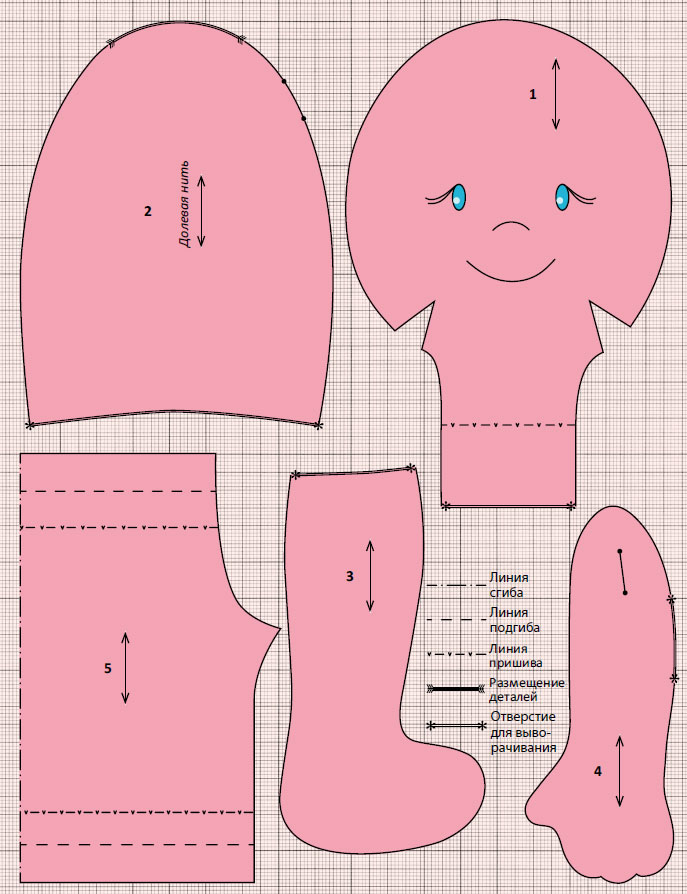
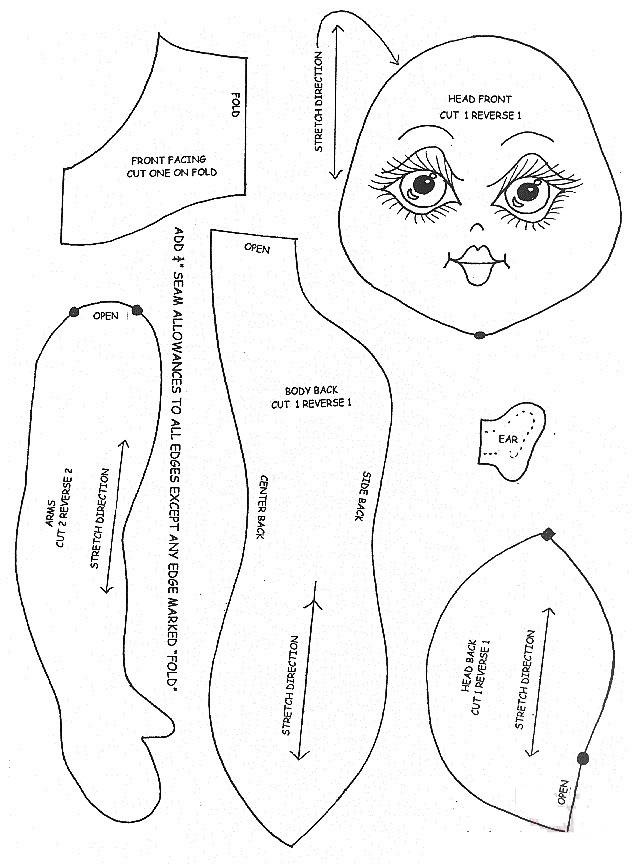
Below we add a few patterns of dolls with an accent on the head.
patterns for dolls from fabric with an emphasis on the head, example 1
patterns for dolls from fabric with an accent on the head, example 2
patterns for dolls from fabric with an accent on the head, example 3
patterns for dolls from fabric with an accent on the head, example 4
patterns for dolls from fabric with an accent on the head, example 5
patterns for dolls from fabric with an accent on the head, example 6
patterns for dolls from fabric with an accent on the head, example 7
patterns for dolls from fabric with an accent on the head, example 8
patterns for dolls from fabric with an accent on the head, example 9
patterns for dolls from fabric with an accent on the head, example 10
patterns for dolls from fabric with an accent on the head, example 11
patterns for dolls from fabric with an accent on the head, example 12
patterns for dolls from fabric with an accent on the head, example 13

patterns for dolls from fabric with an emphasis on the head, example 14
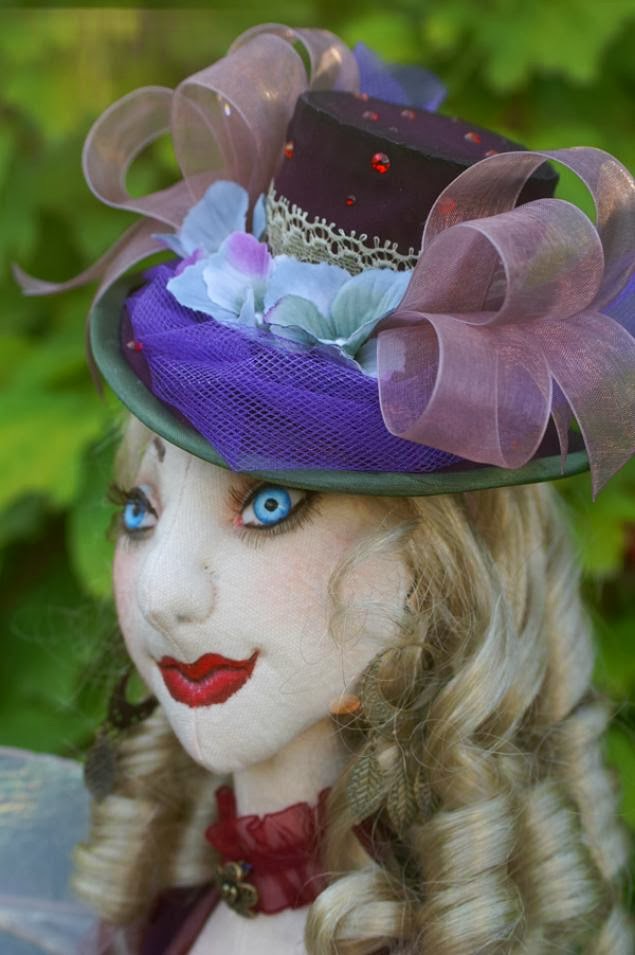
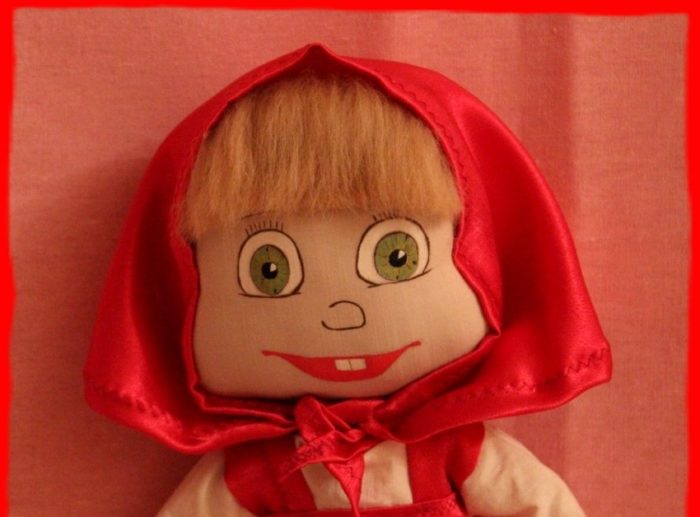
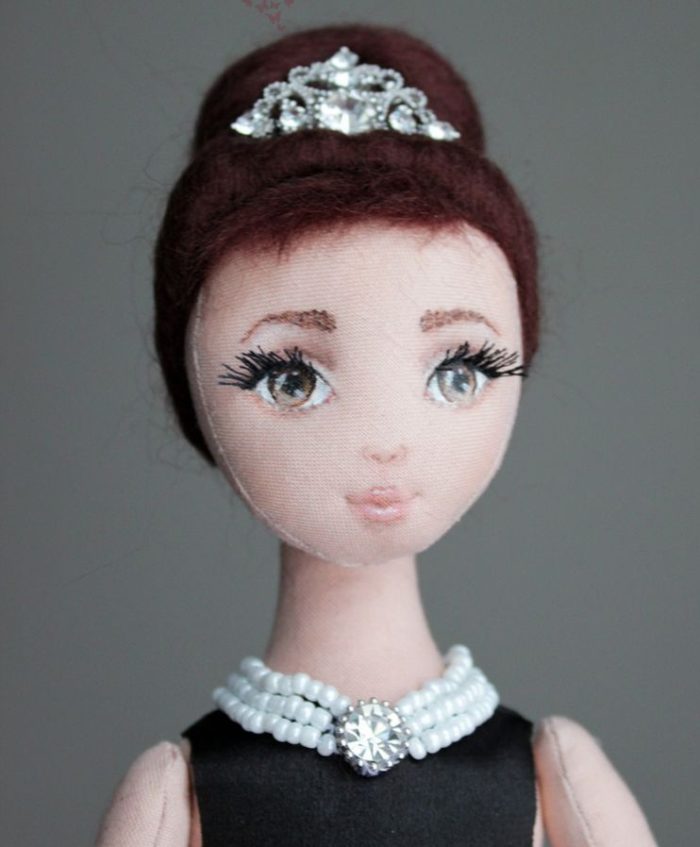
And photo of the finished product.
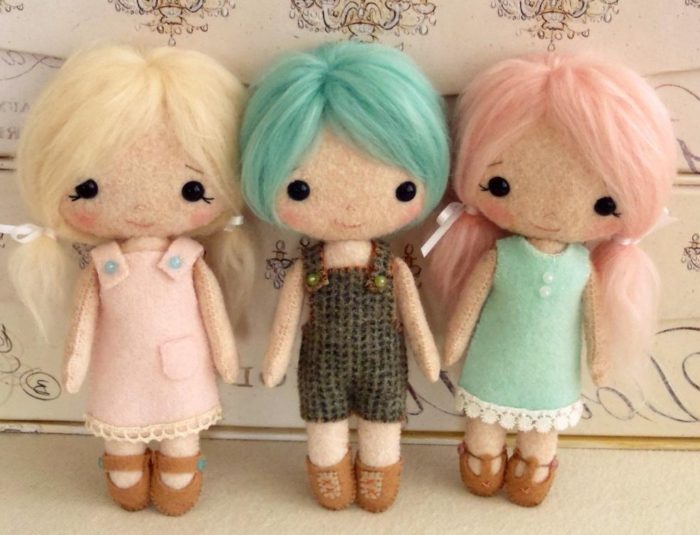
ready -made heads of fabric dolls, photo 1
ready -made heads of fabric dolls, photo 2
ready -made heads of fabric dolls, photo 3
ready -made heads of fabric dolls, photo 4
ready -made heads of fabric dolls, photo 5
ready -made heads of fabric dolls, photo 6
ready -made heads of fabric dolls, photo 7
ready -made heads of fabric dolls, photo 8
ready -made heads of fabric dolls, photo 9
ready -made heads of fabric dolls, photo 10
ready -made heads of fabric dolls, photo 11
ready -made heads of fabric dolls, photo 12
ready -made heads of fabric dolls, photo 13
ready -made heads of fabric dolls, photo 14
ready -made heads of fabric dolls, photo 15
ready -made heads of fabric dolls, photo 16
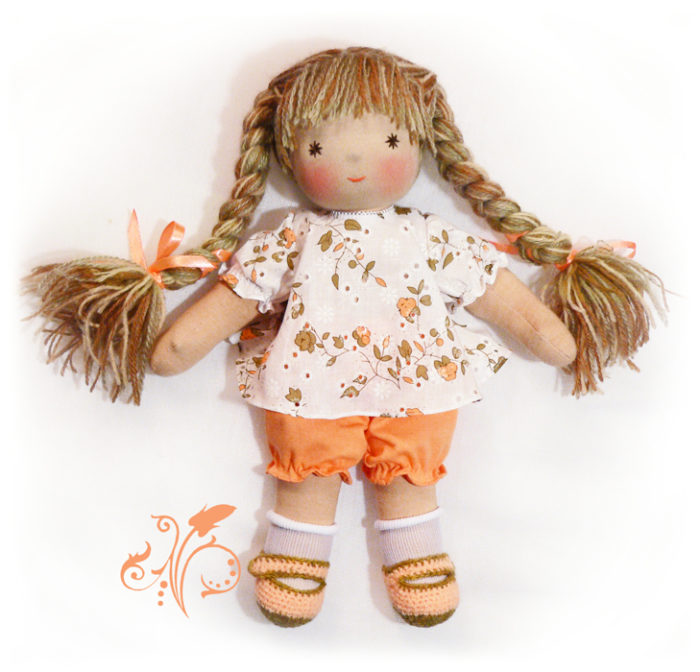
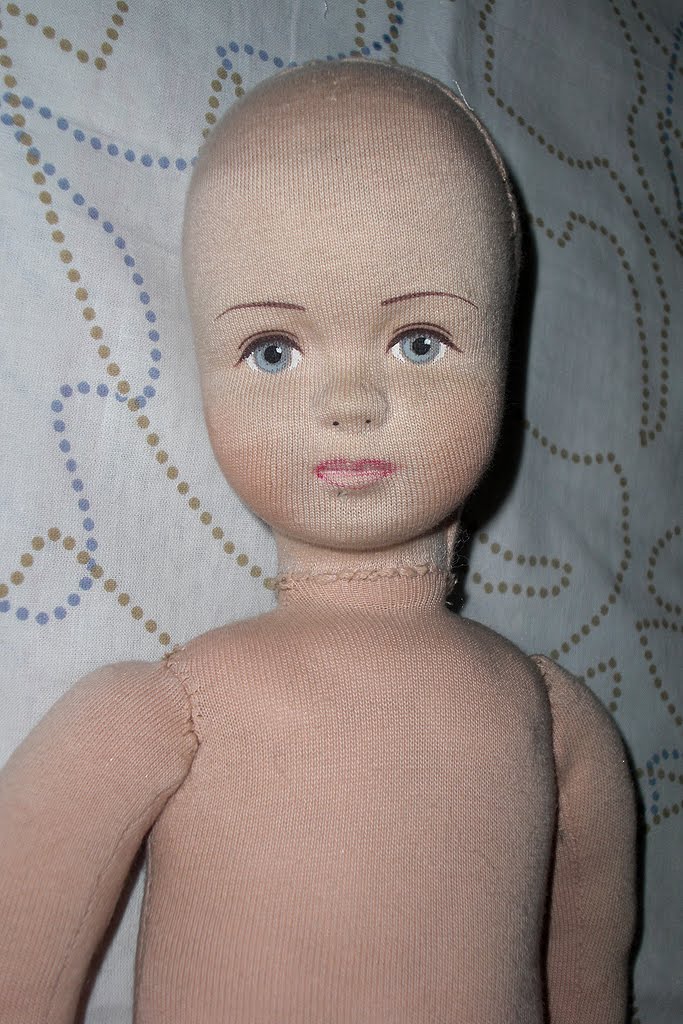
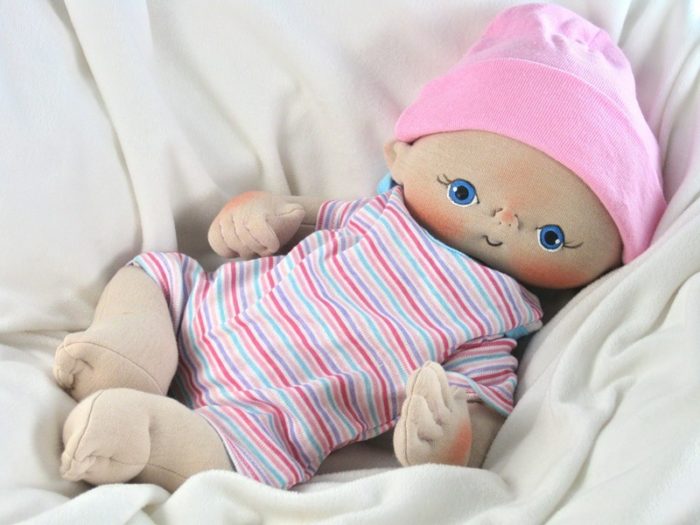
How to sew your own body with your own hands?
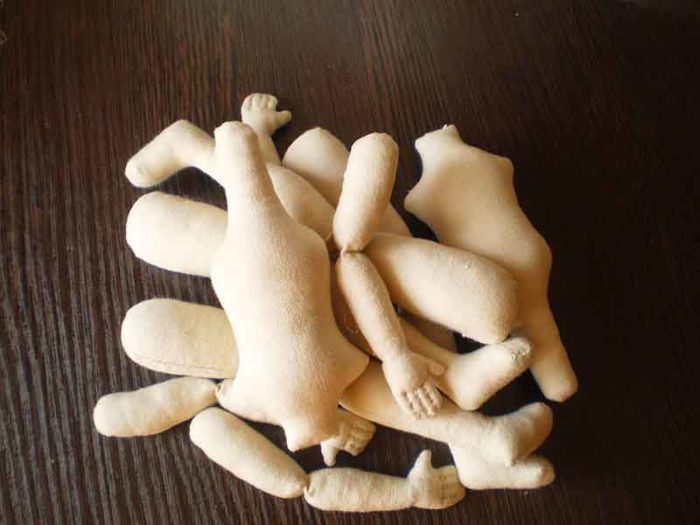
fabric sewn from the body of the body of the doll
The body of the doll begin to sew with your hands and legs. First, cut them down by the pattern, fold them, connect with a needle with a thread, turn out, add filler.
Further directly engage in the body. On the selected pattern, sweep the edges of the fabric and turn out.
- Gently fill the void with the filler.
- Spread the seams and pour a hole.
- Combine the arms/legs with the body with a hidden seam.
- If desired, add clothes for the doll in stages. Use detailed patterns.
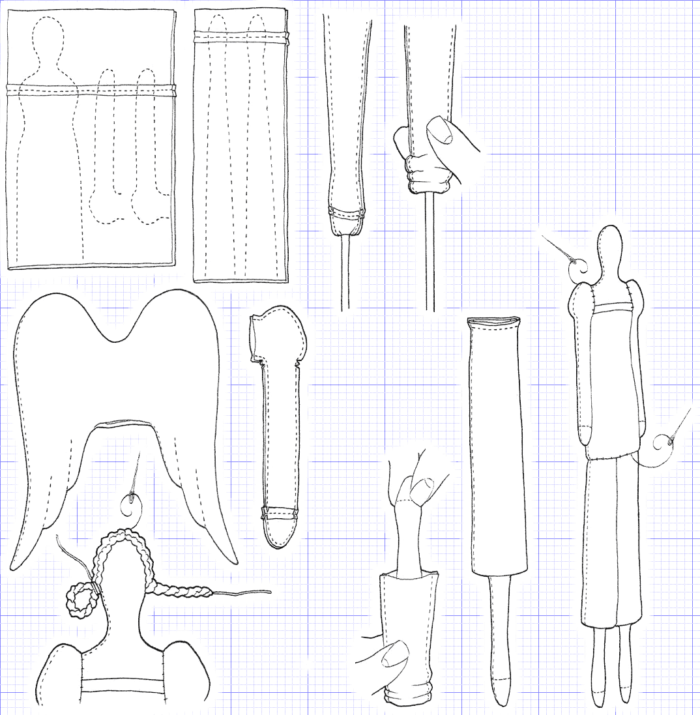
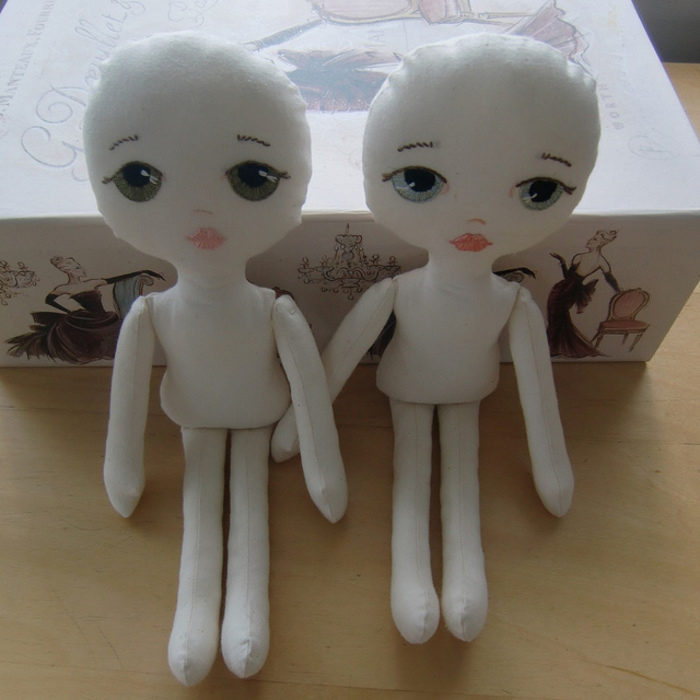
How to sew your own dolls and arms with your own hands?
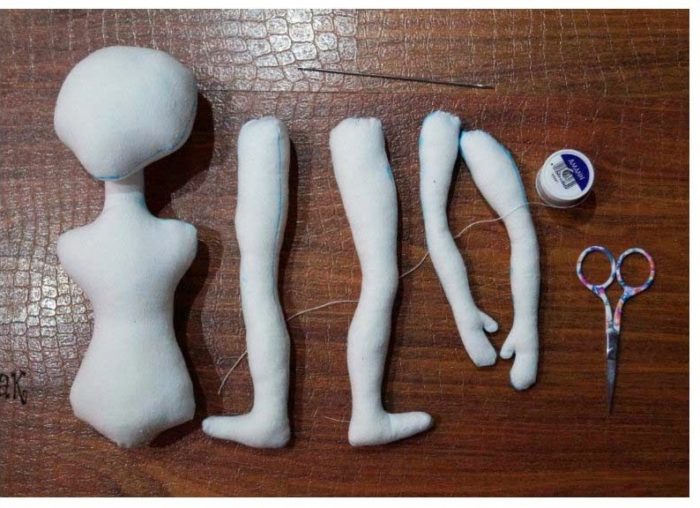
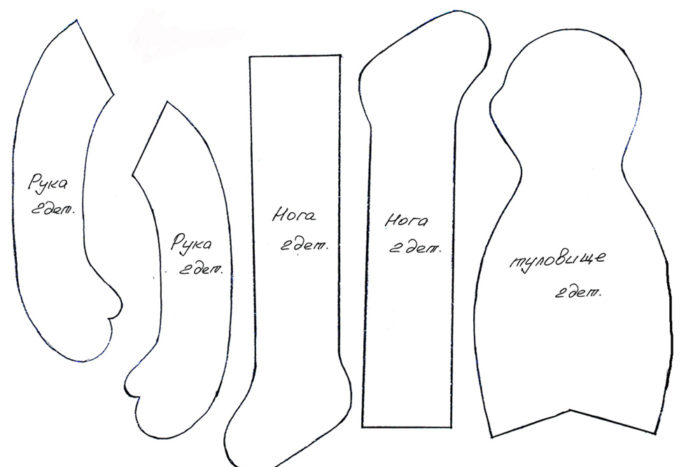
statched from fabric separately arms, legs, torso and head of a doll on the table
If your doll is not an animal, but looks like a person, take the fabric of 2 colors - white and bodily. The latter will display the open parts of the arms/legs.
- By the pattern, cut parts of the hands and legs from both tissues.
- Fold the flaps with the front part.
- Sour the edges on the wrong side.
- Turn out the result and add the filler.
- Follow the proportions of the body of the doll and correctly place the accents. For example, emphasize your knees with a slightly large amount of filler and a pair of stitches with a needle.
- Wrap the ends of the arms and legs with a white cloth. Add a decorative ribbon on top of the transition or decorate them to your liking.
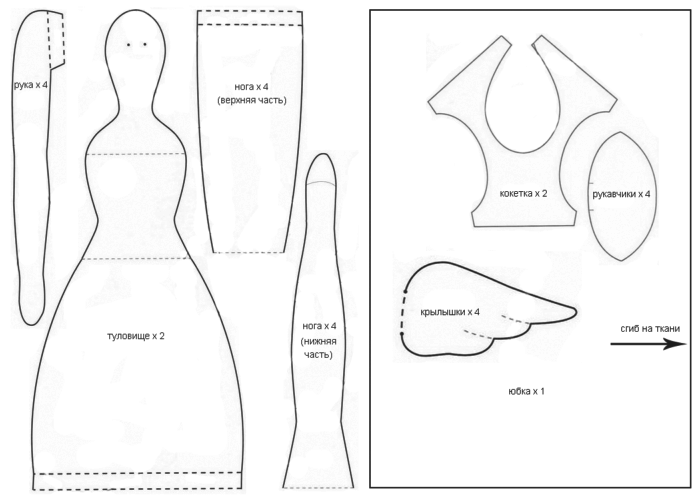
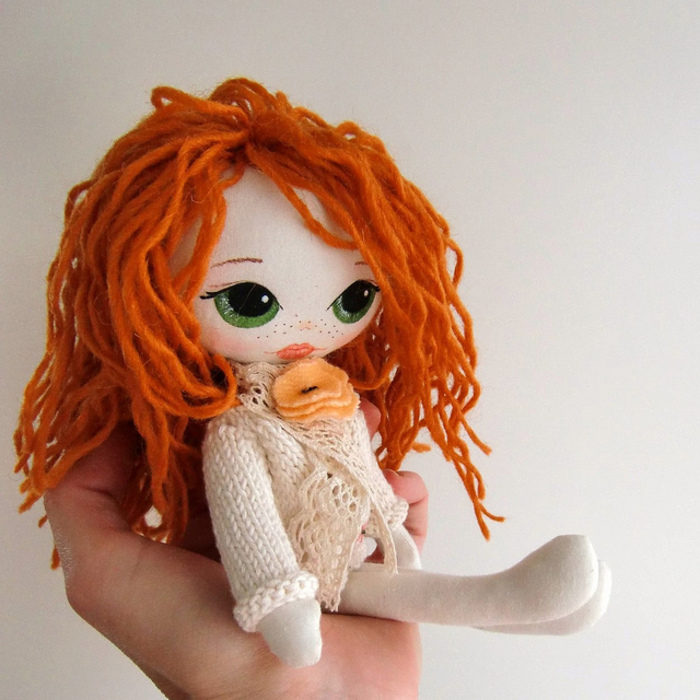
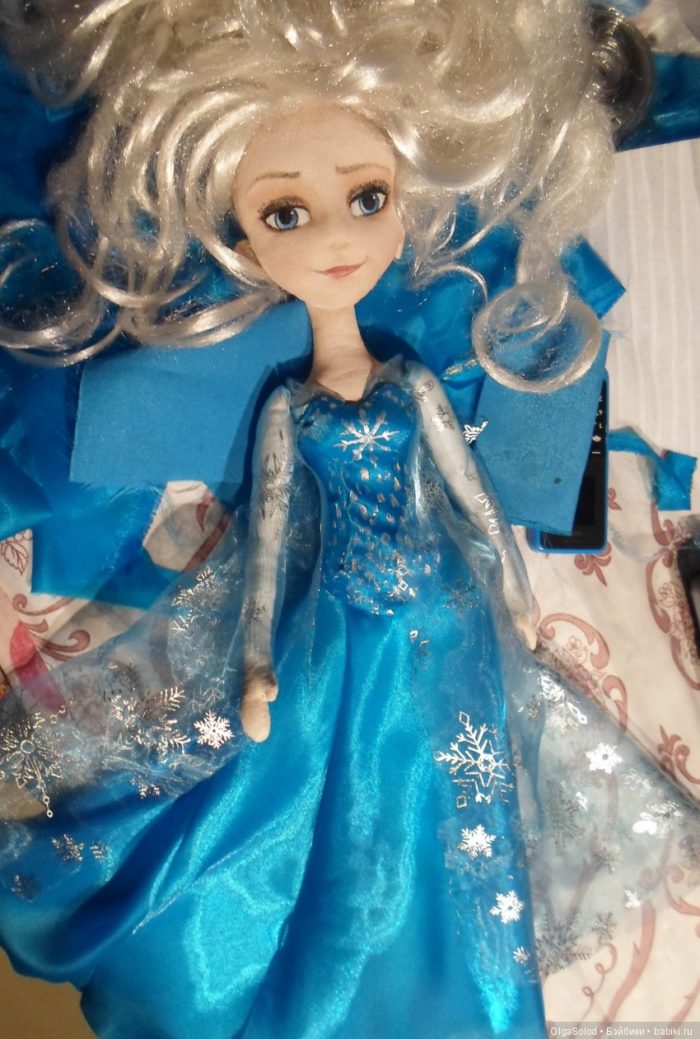
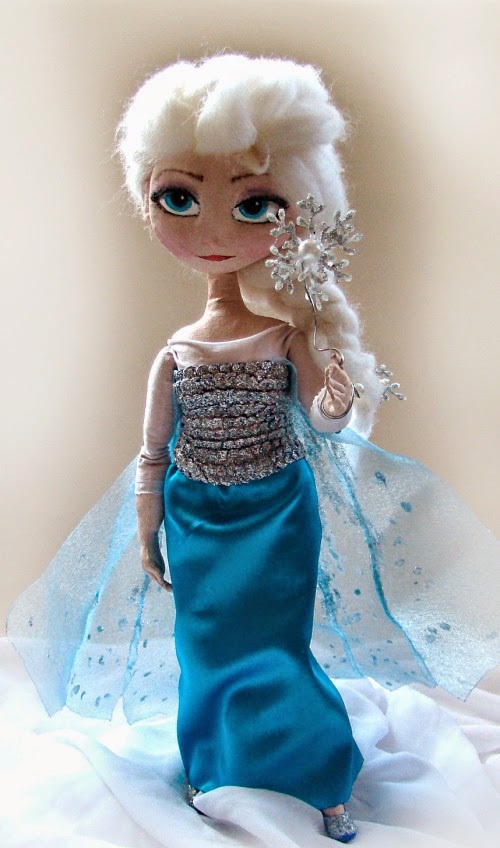
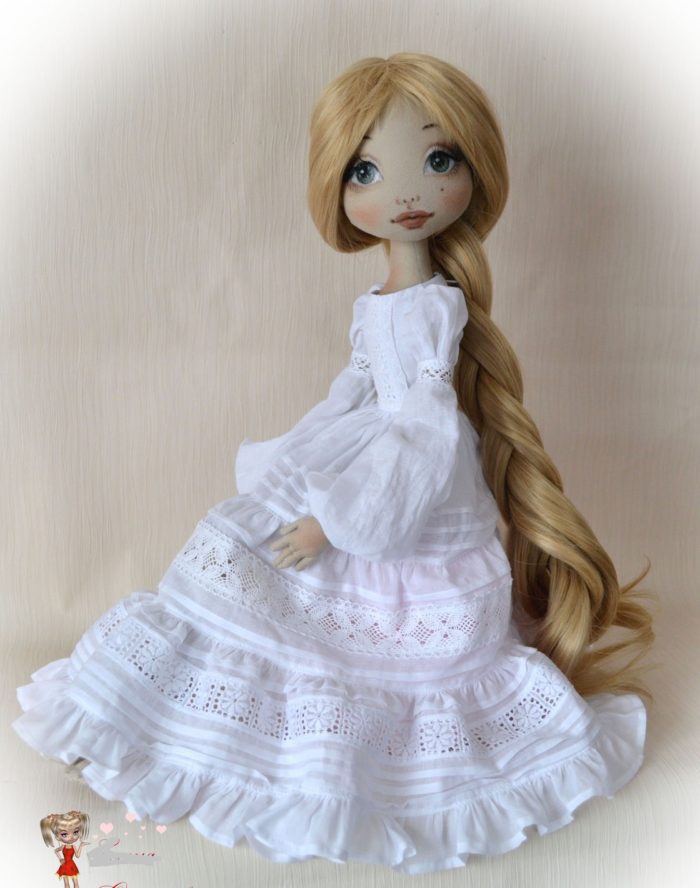
How to sew an elza doll with your own hands from fabric: patterns, photo
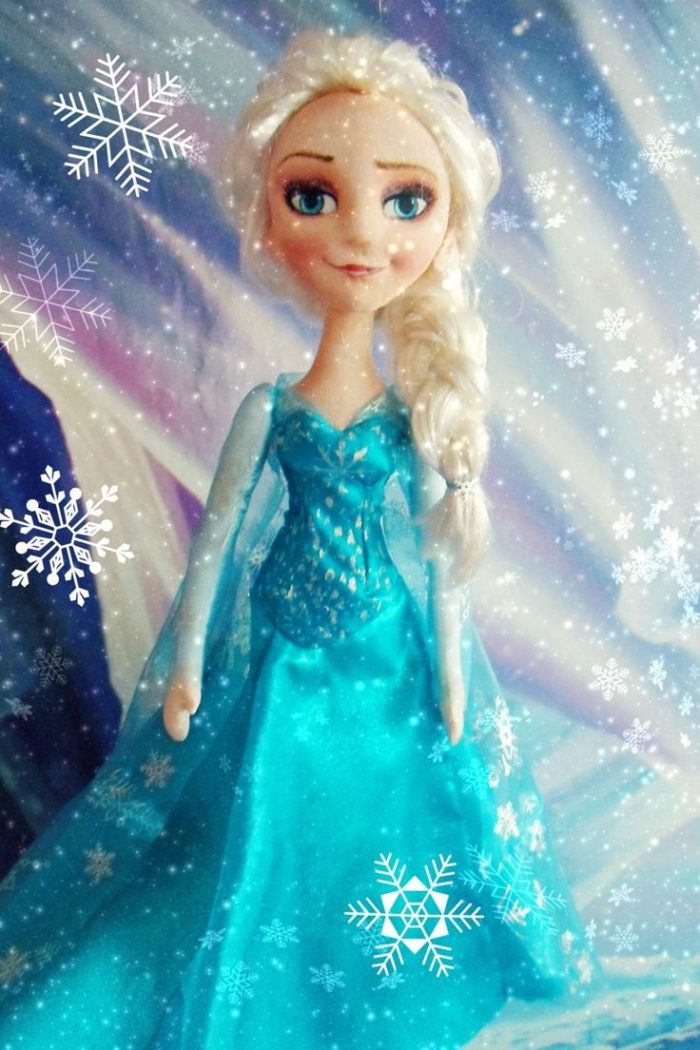
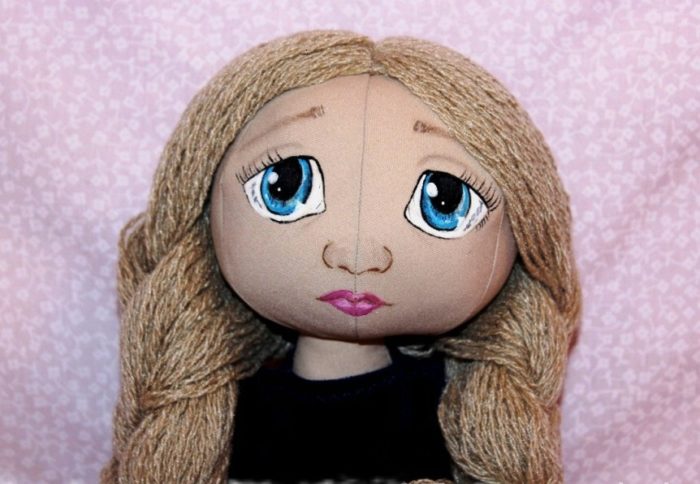
ready -made from the fabric of the Elsa doll
Remembering that Elsa is dressed in a long dress, it will be quite simple to sew a doll made of fabric. The most painstaking work awaits you face.
- So, cut the head, body and hands by the pattern.
- Fold their edges and sign.
- Turn out the parts of the body and give the form using a filler.
- Sew your head, body, arms, legs.
- Treat the head, zones of the shoulders, arms, over the chest and the upper back with a solution of PVA glue, acrylic paints and soil. So your doll will have a persistent white skin tone.
- Next, proceed to drawing your face. Take acrylic paints and a thin brush. To comply with the proportions and realism of appearance, open a portrait of a cartoon of the heroine on the laptop/tablet/smartphone screen.
- Fasten the desired shade of artificial hair on Elsa’s head, sewing them with strands. If desired, cut them to the desired length and pay in a braid.
- Pick up the fabric for the Elsa outfit. For example, an organza is suitable for a lush dress. It is well wound around the body, holds shape and volume.
- On the doll, fasten the fabric of the dress with hairpins on the figure or immediately sew it.
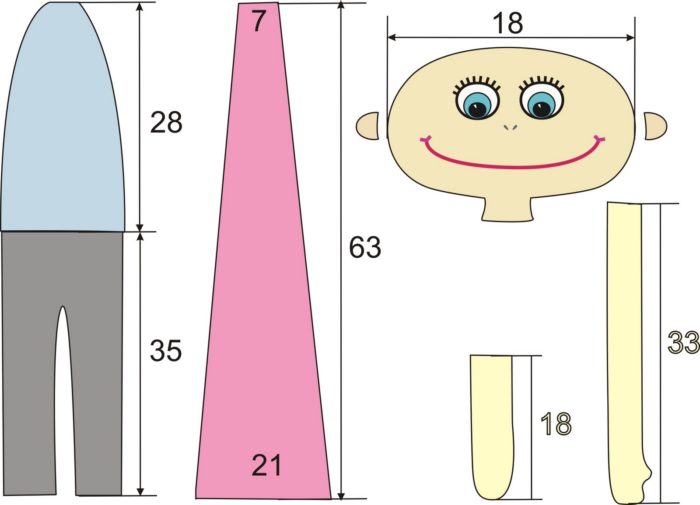
Add Elsa doll patterns:
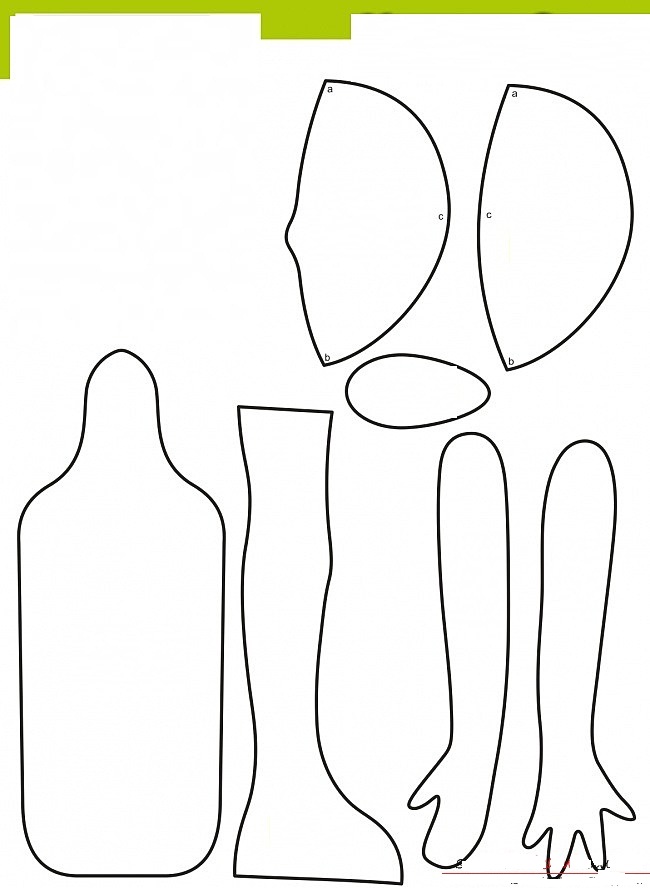
patterns for the doll of the Elsa of fabric, example 1
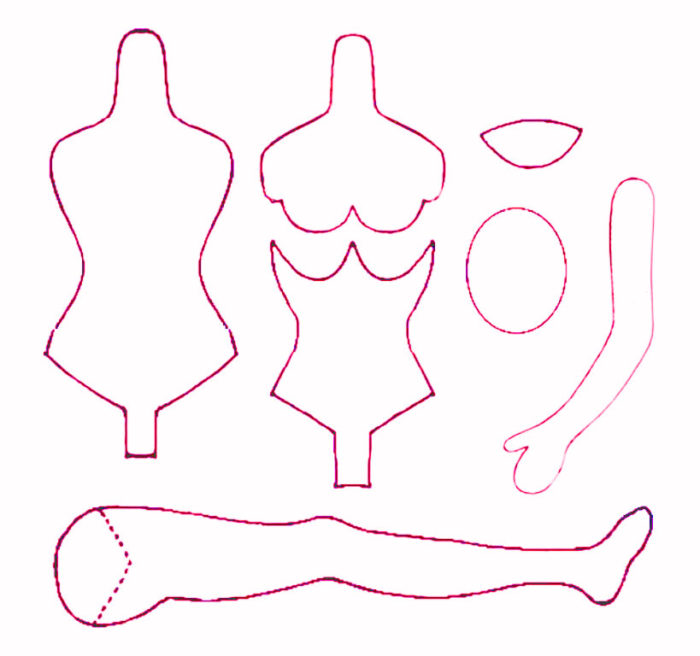
patterns for Elsa doll from fabric, example 2
Or take any of those considered in the sections above.
And photos of ready -made dolls:
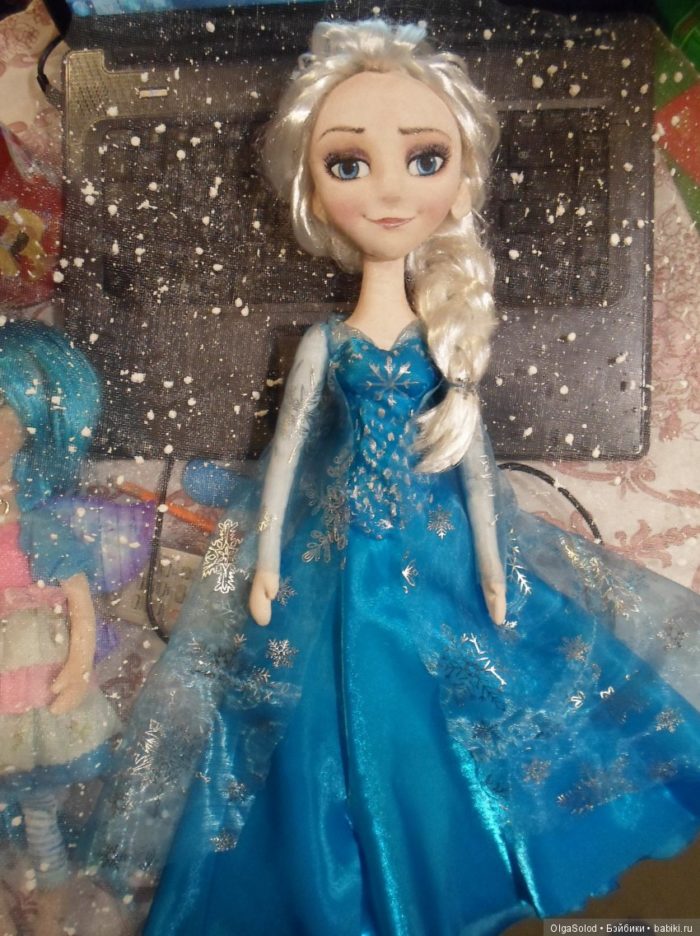
elsa doll sewn from fabric, photo 1
elsa doll sewn from fabric, photo 2
elsa doll sewn from fabric, photo 3
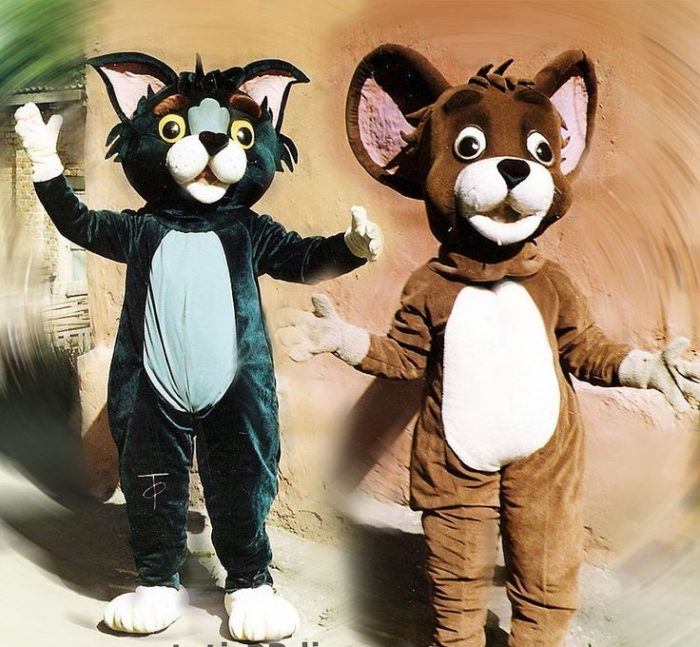
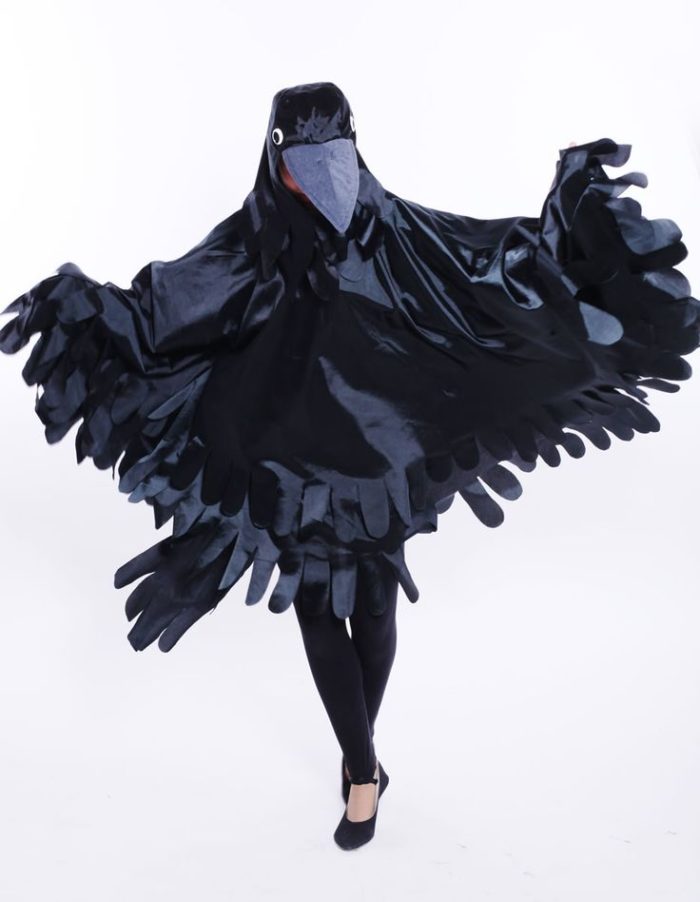
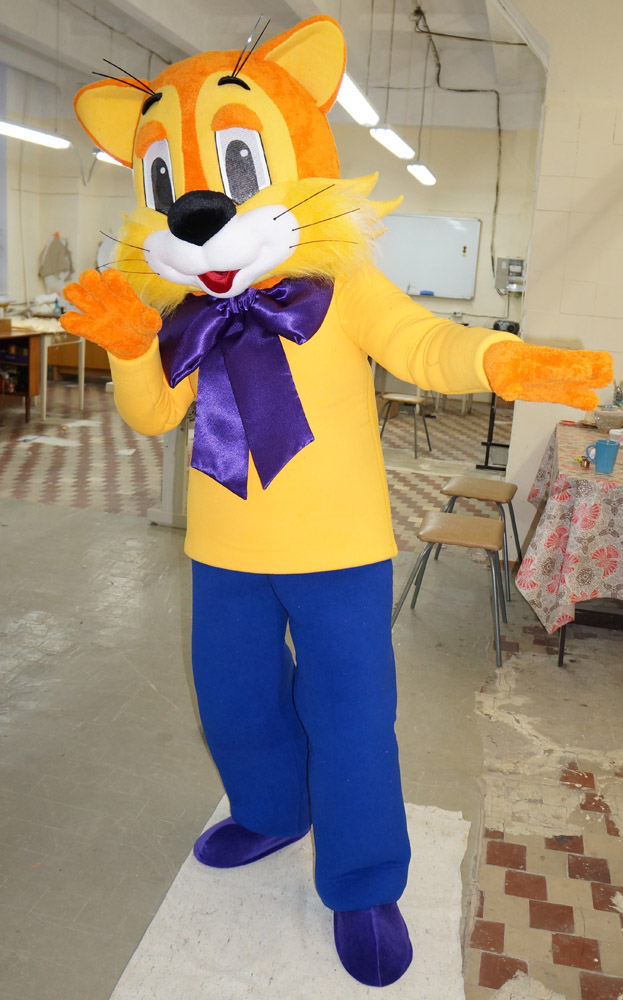
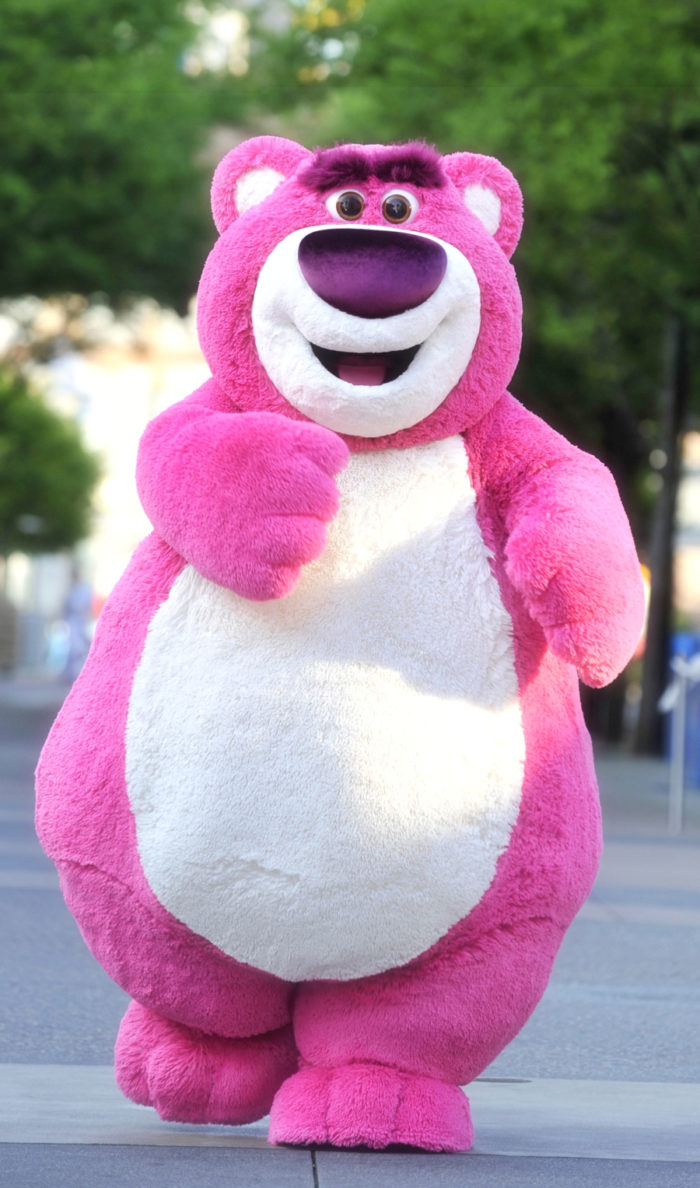
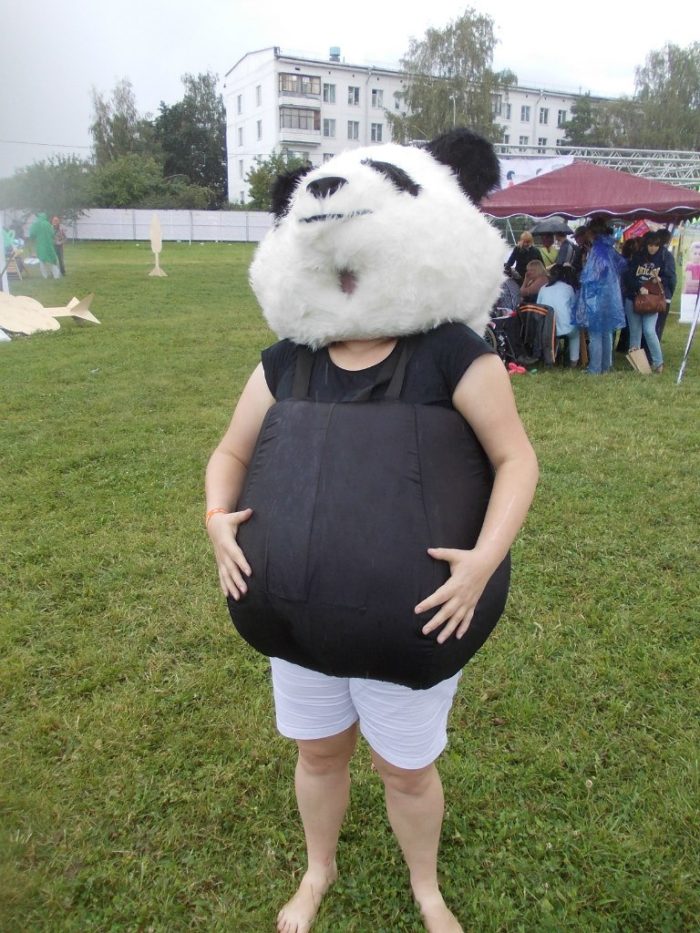
How to sew a rost doll with your own hands from fabric: patterns, photo

a growth doll in the form of a cartoon of a hero, sewn with your own hands from fabric
Rosty dolls have growth equal to the human. In other words, they are the decoration of any event and entertainment for its participants.
To sew such a doll yourself, you will need:
- materials for the head of the doll - foam, synthetic winterizer, plastic, mounting foam, isolon, polystyrene foam,
- for the front part of the head - Lycra, bodily knitwear,
- body and limbs - cotton segments, artificial fur and/or wool, fleece, felt
- auxiliary materials and tools - adhesive pistol, knife, foam, paints, airbrush, black mesh for closing the face of the person who dresses the doll.
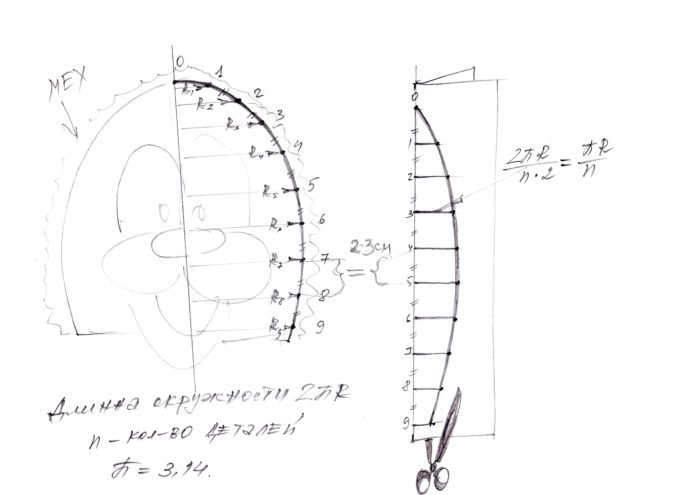
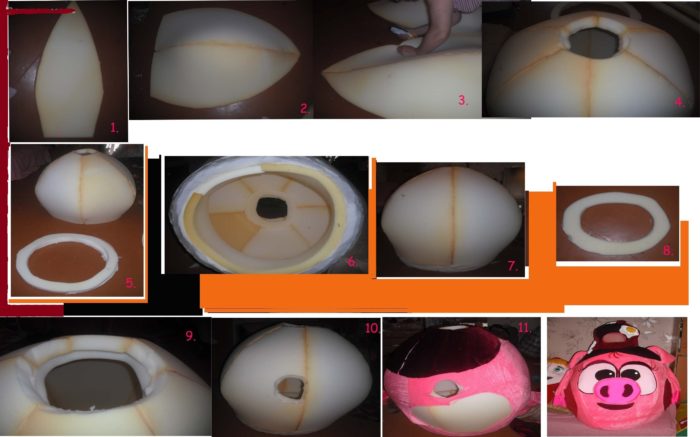
The order of its manufacture:
- put the pattern on the dense material from which the head will consist
- cut and glue it along the contour
- sew a hat for the head of the animator
- glue with fabric or decorate the head of the doll
- if necessary, add foam glasses or similar heroes of the hero
- make sure that the edges of the fabric are hidden in the inside of the head of the doll
- separately sew a suit for the animator to match the color of the head
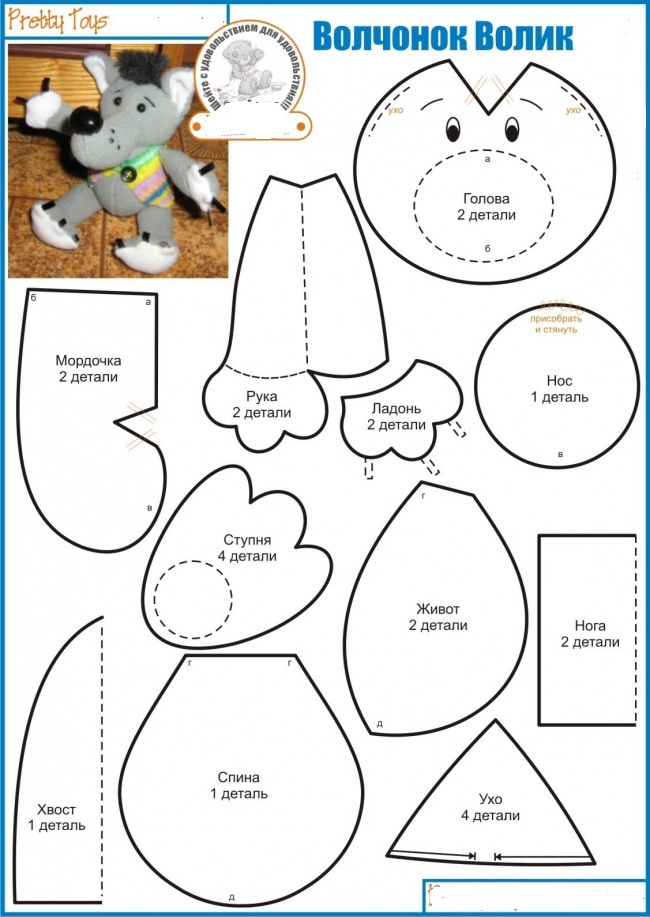
For example, for the mignon doll, keep in mind a combination of yellow and blue, and for a wolf - villus on the entire surface of the body and limbs.
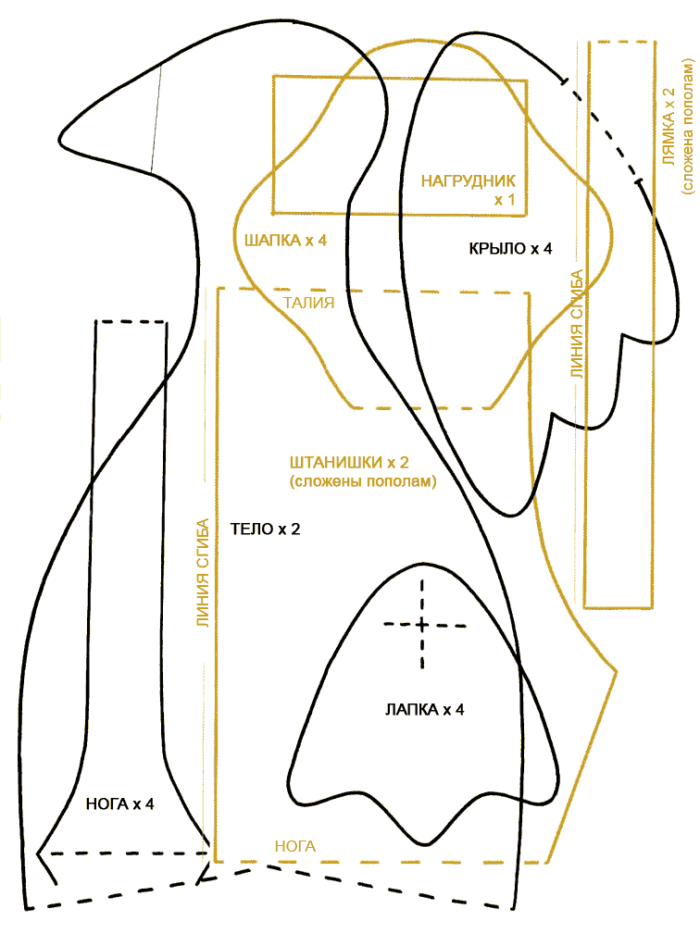
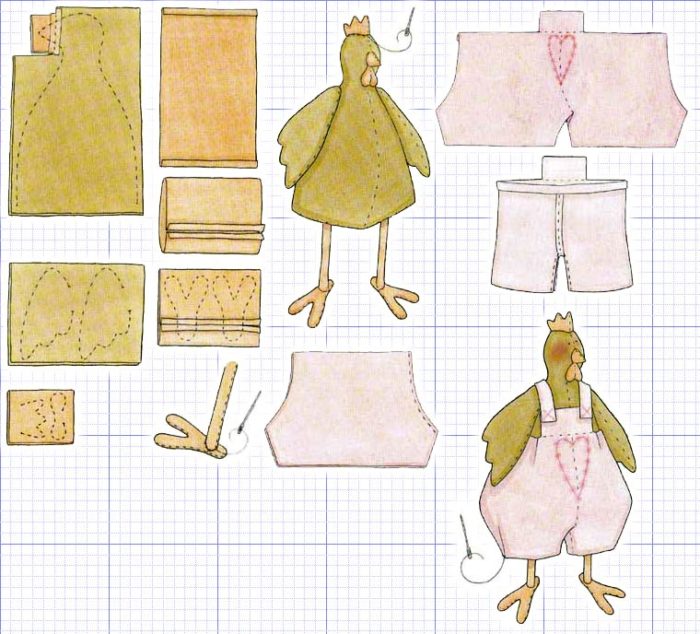
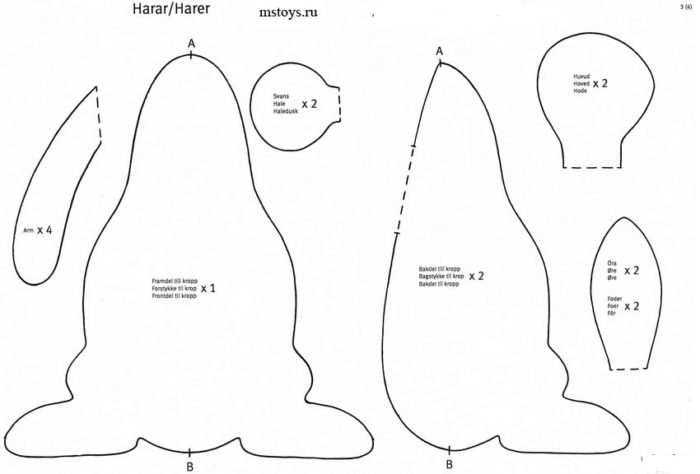
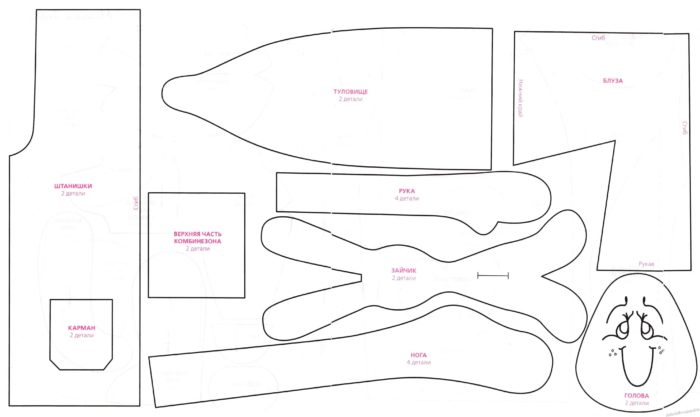
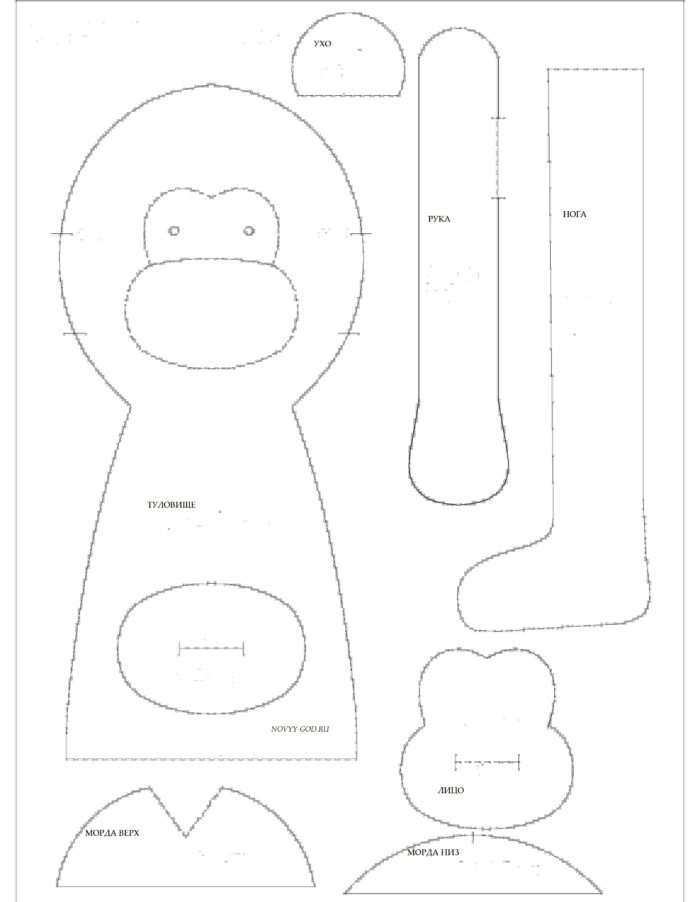
Below we add a number of patterns for growth dolls.
patterns of growth puppet for manufacturing from fabric with your own hands, example 1
patterns of growth puppet for manufacturing from fabric with your own hands, example 2
patterns of growth dolls for manufacturing from fabric with your own hands, example 3
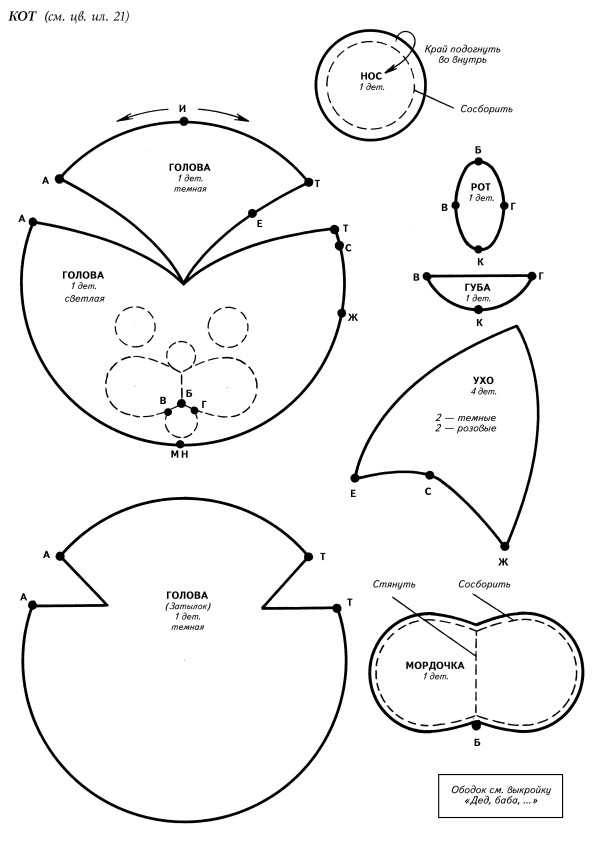
patterns of growth dolls for manufacturing from fabric with your own hands, example 4
patterns of growth dolls for manufacturing from fabric with your own hands, example 5
And photos of finished products from fabric.

ready -made growth dolls with your own hands from fabric, model 1
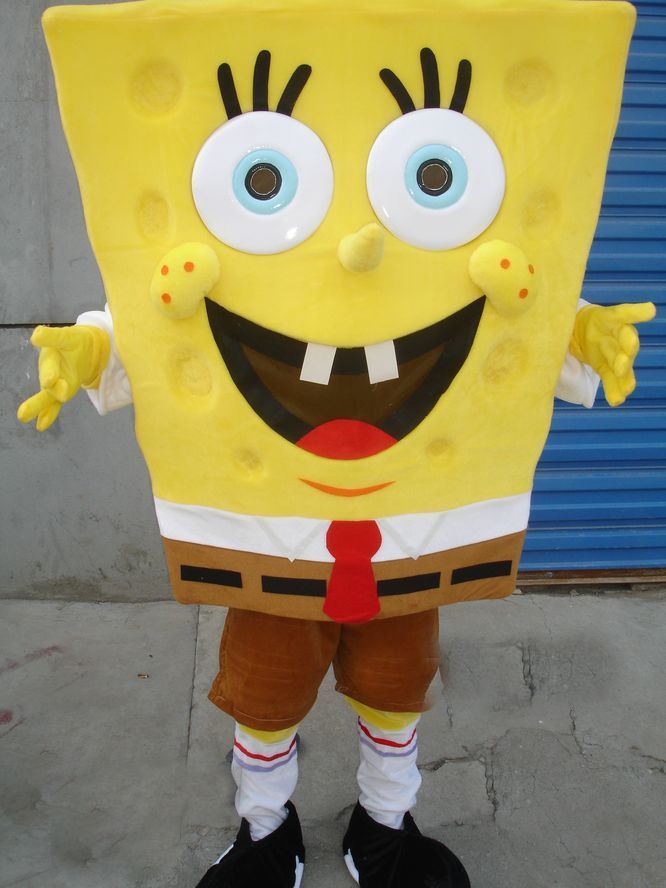
ready -made growth dolls with your own hands from fabric, model 2
ready -made growth dolls with your own hands from fabric, model 3
ready -made growth dolls with your own hands from fabric, model 4

ready -made growth dolls with your own hands from fabric, model 5

ready -made growth dolls with your own hands from fabric, model 6
ready -made growth dolls with your own hands from fabric, model 7
ready -made growth dolls with your own hands from fabric, model 8
ready -made growth dolls with your own hands from fabric, model 9

ready -made growth dolls with your own hands from fabric, model 10
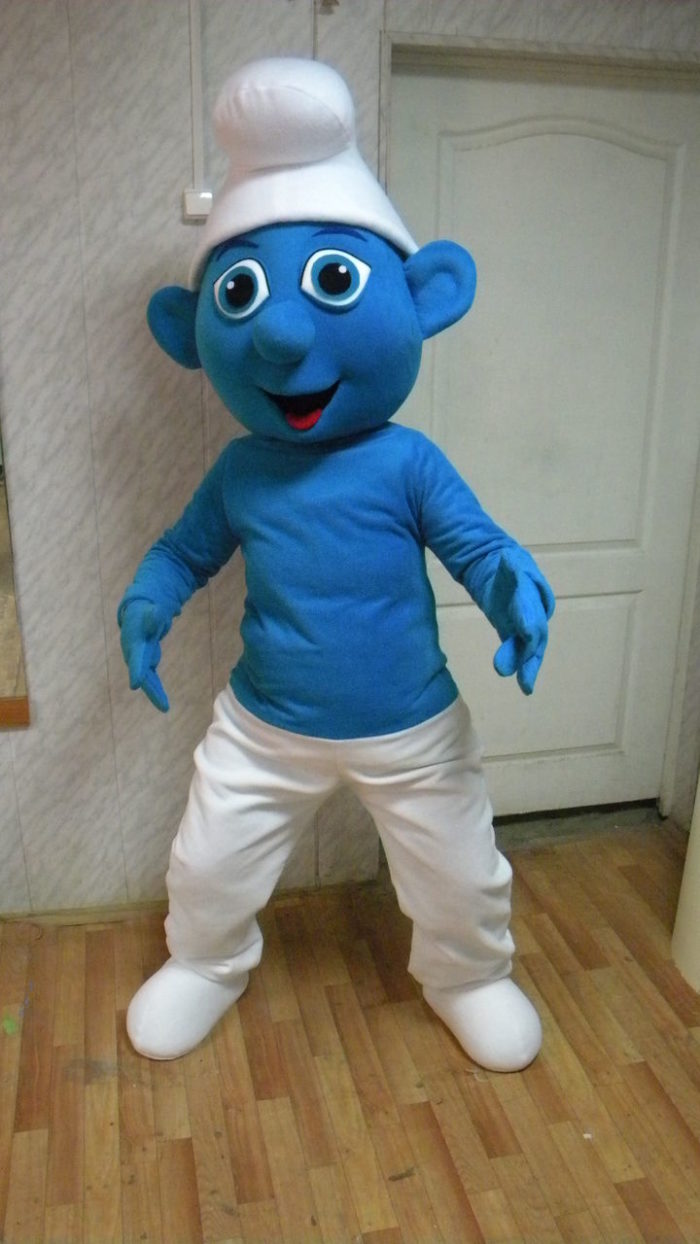
ready -made growth dolls with your own hands from fabric, model 11
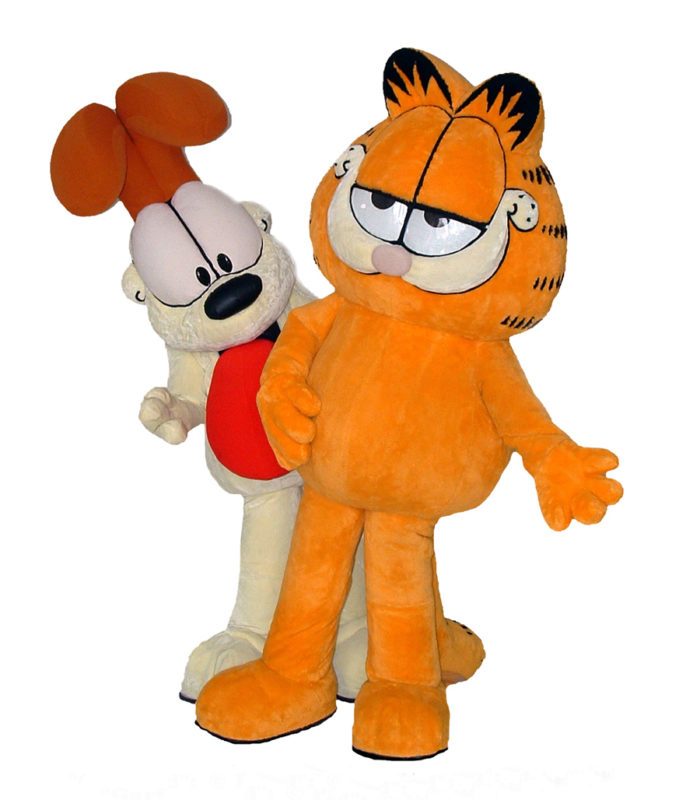
ready -made growth dolls with your own hands from fabric, model 12
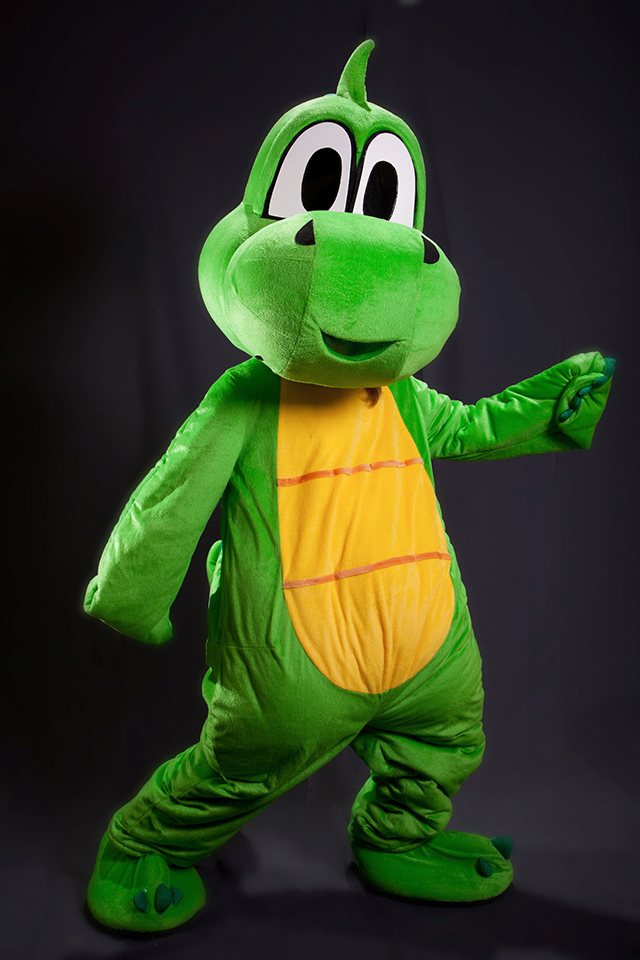
ready -made growth dolls with your own hands from fabric, model 13

ready -made growth dolls with your own hands from fabric, model 14
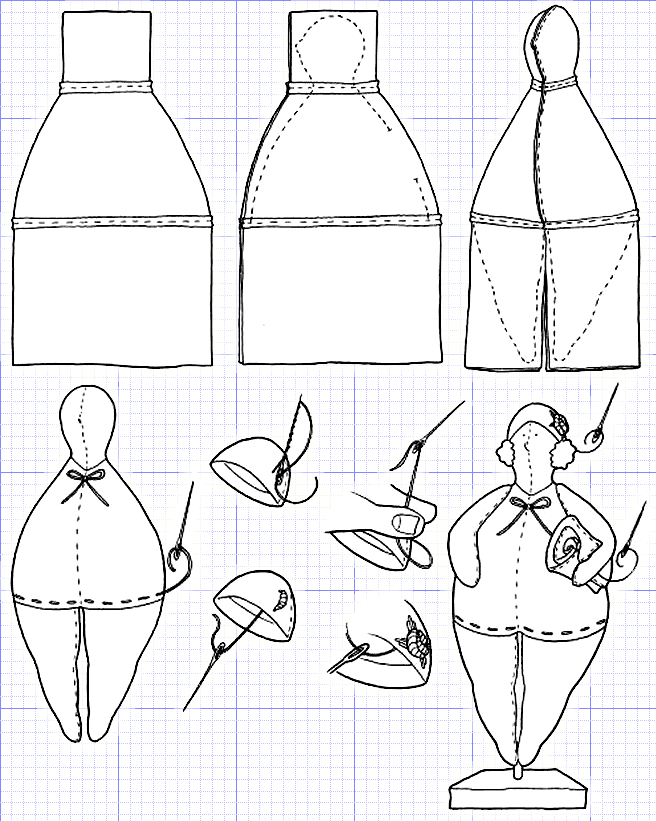
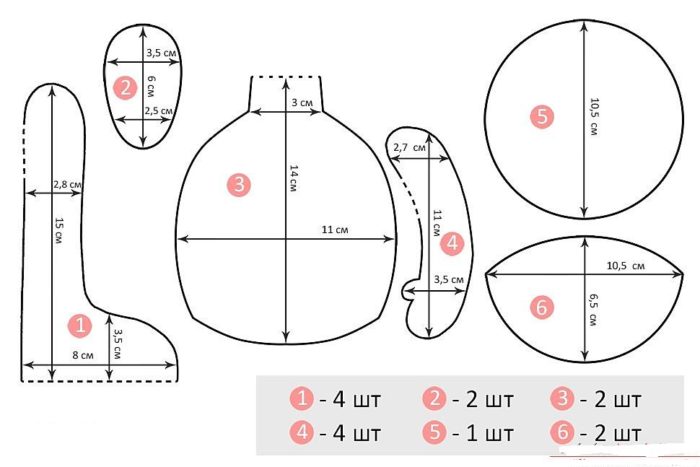
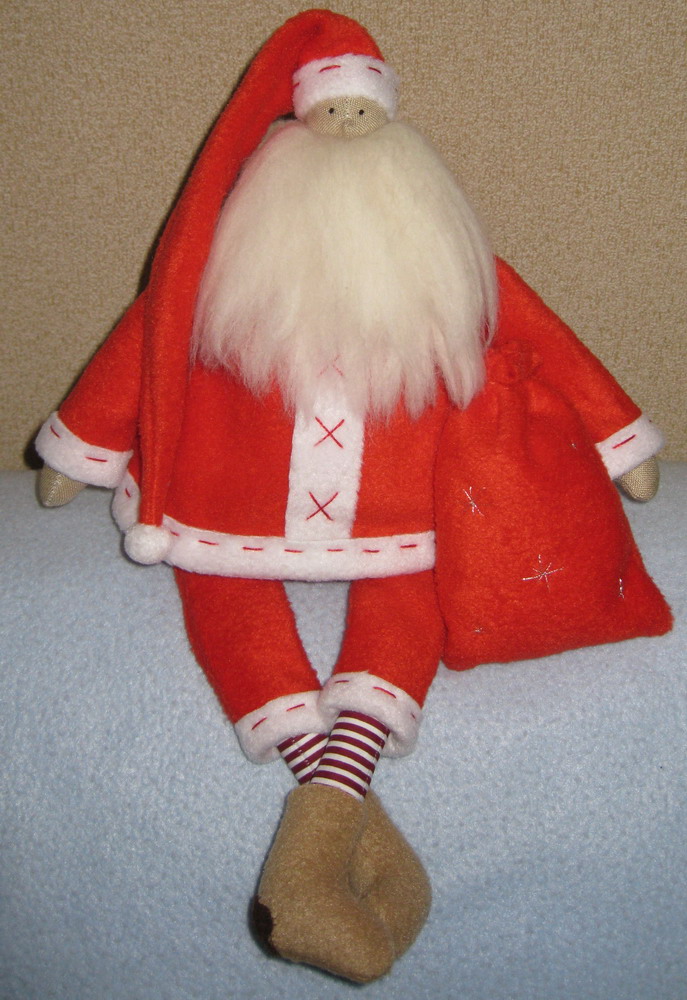
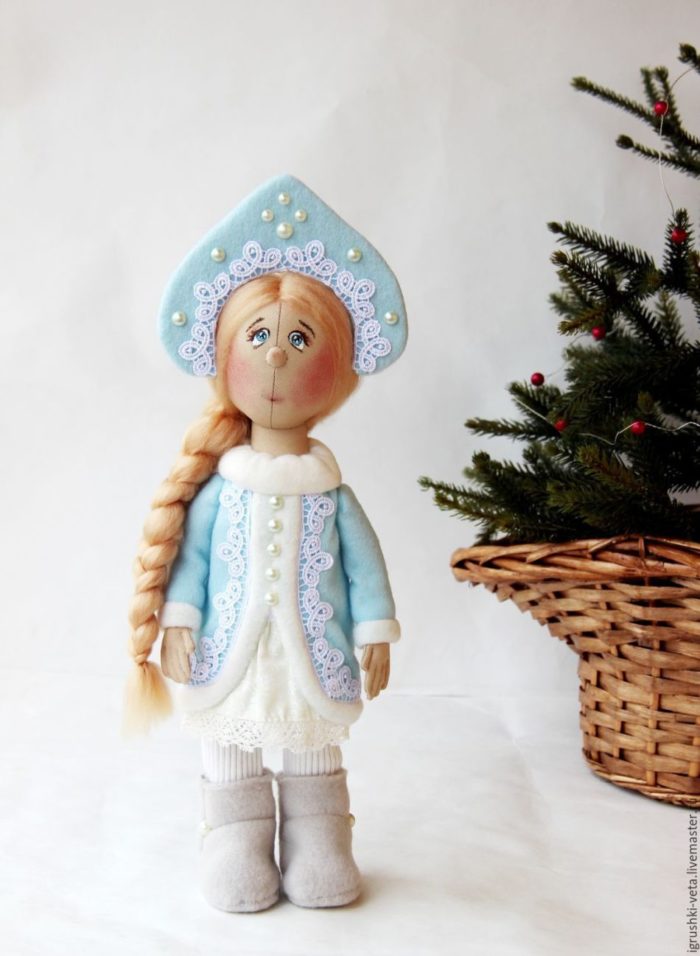
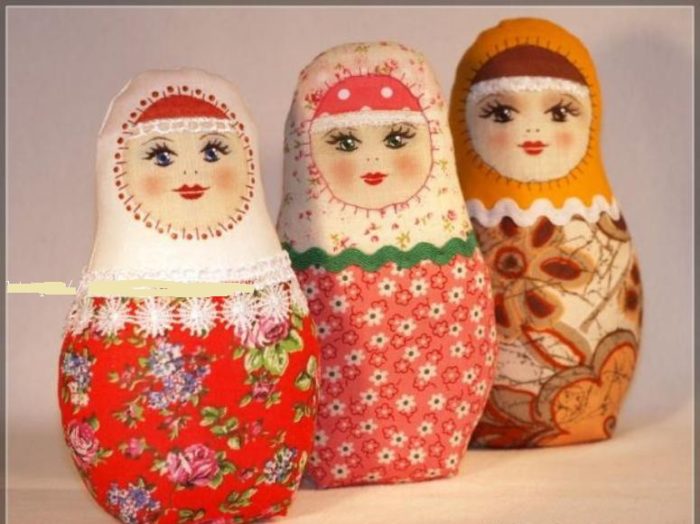
How to sew a New Year's doll Snegurochka with your own hands from fabric: patterns, photo
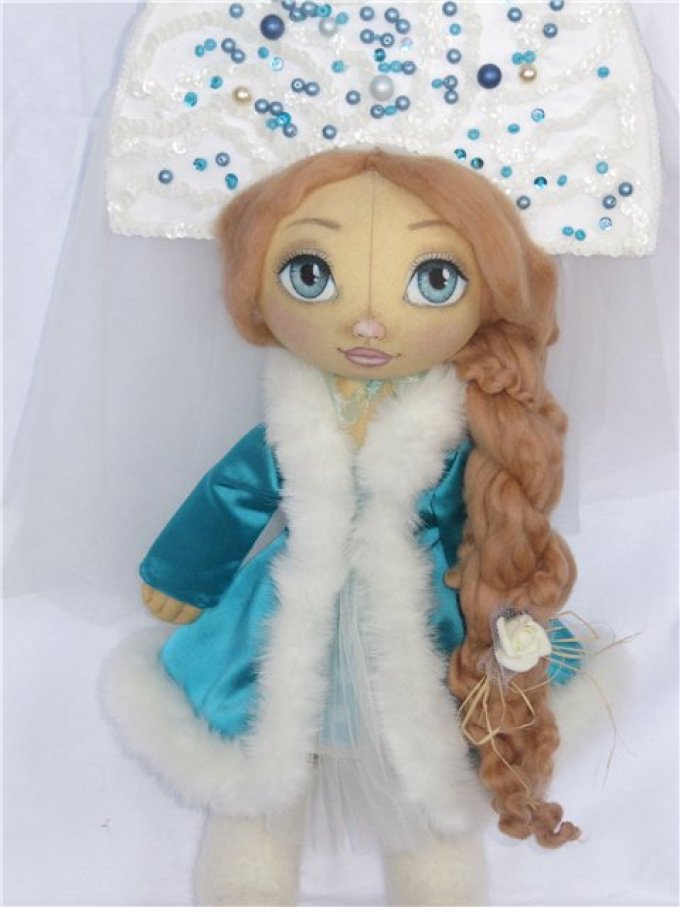
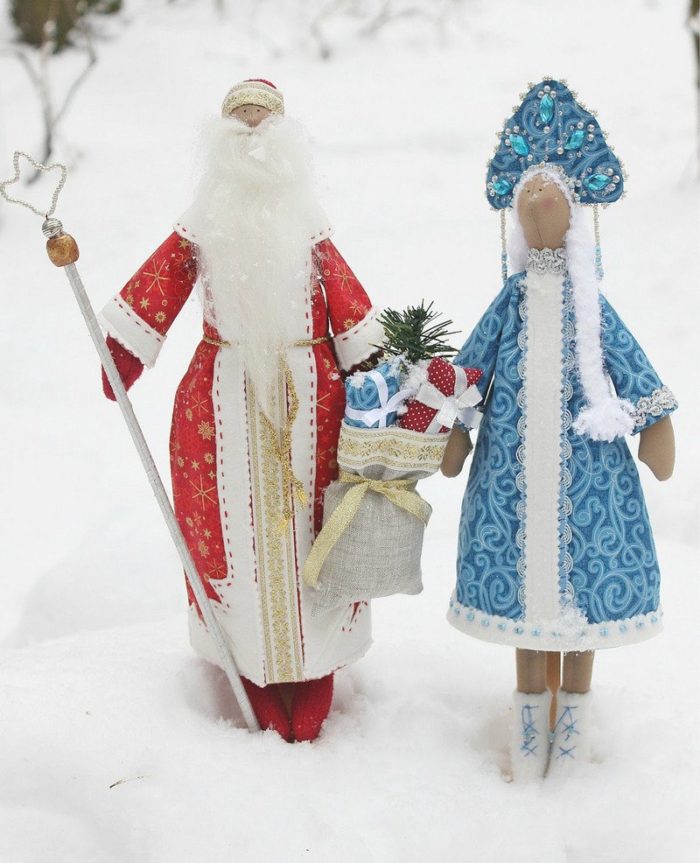
do -it -yourself New Year's doll Snegurochka from fabric
Consider the option of creating the Snow Maiden Tilda from fabric.
You need:
- pattern
- pencil
- wand for filling the parts of the doll filler
- fabrics - beige cotton for the body and blue felt for a fur coat
- a segment of a white fleece for felt boots and decor of a fur coat
- beads
- beige thread for knitting
- studs for sewing
- white satin ribbon
- sinetipon or cotton wool to fill the body of the doll
Operating procedure:
- fold the beige fabric in half, leaving one end free
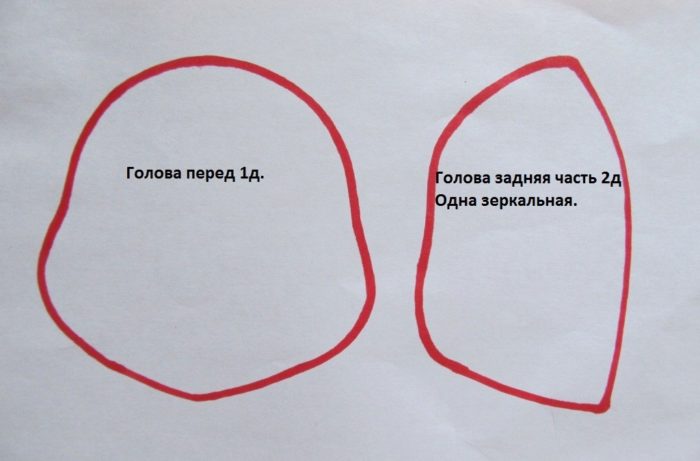
- attach the cut out the doll's body patterns and circle with a pencil
- keep in mind that the back will consist of 1 part
- stitch the seams on the typewriter, leaving the narrow side of the parts open for turning
- connect the details only from the side of the face of the future Snow Maiden
- cut each with an allowance of 0.5 cm in a circle
- with a step of 1.5-2 cm, make oblique cuts with scissors according to the allowances
- turn out the details
- fill your arms and legs with synthetic winterizer
- attach the back with hairpins to the details of the transmit, sign and stitch the seam
- perform oblique cuts on the allowance and turn out
- fill in with synthetic winterizer
- open edge and hem with hairpins
- sew the holes on the arms and legs of the doll and connect with the body hidden seam
- cut the details of the clothing, attaching patterns with hairpins to fabrics
- to decorate the fur coat in front and along the edge of the hem, use the strips of white fleece
- make boots from it
- attach white satin tape to the edge of the cap
- garnish with a brilliant beads a fur coat, hat and boots
- sew the sections of the yarn of the desired length to the head and braid 2 braids
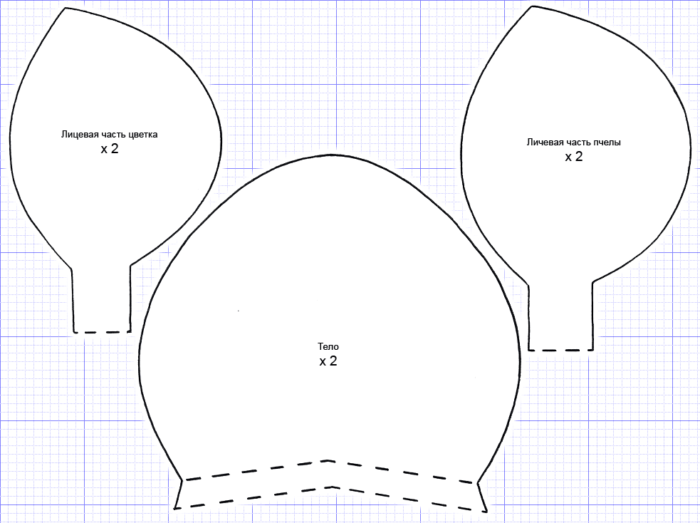
Add a few ready -made patterns for Snow Maiden from fabric.
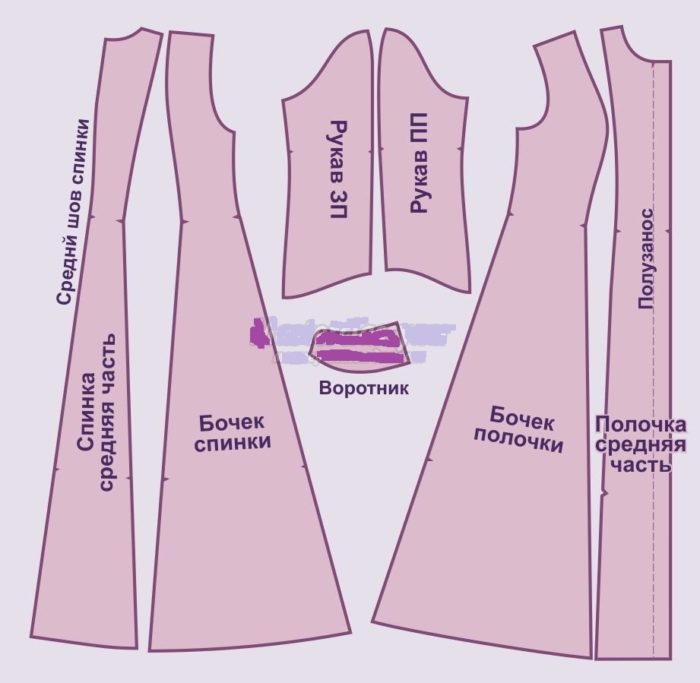
pattern for the New Year doll of the Snow Maiden made of tissue with your own hands, example 1
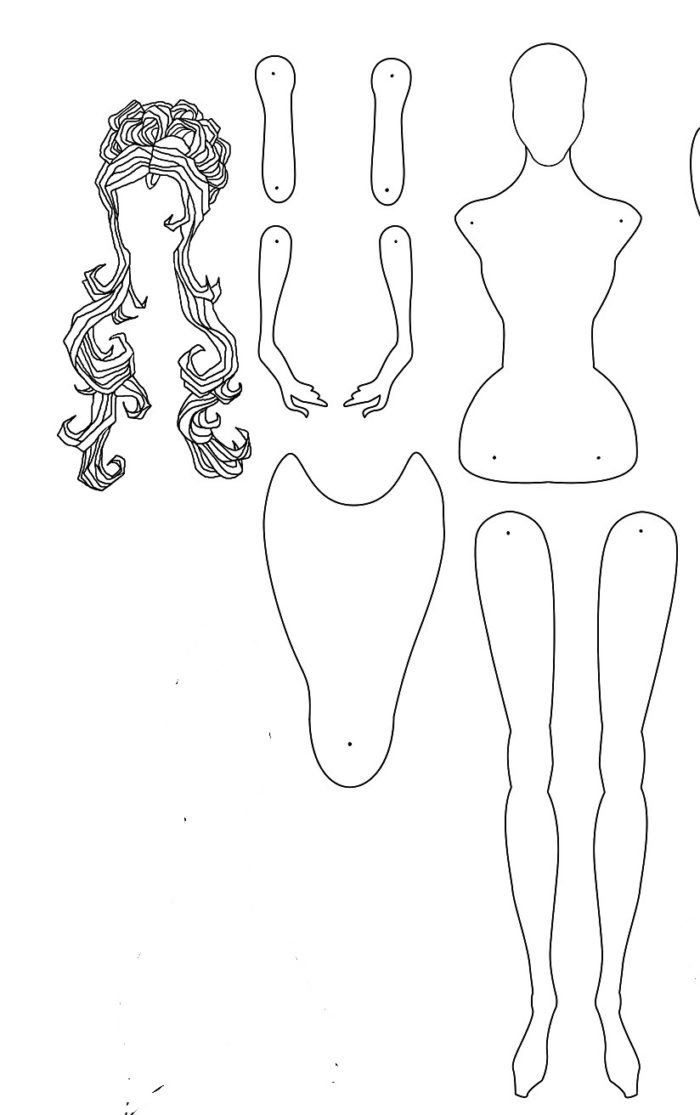
pattern for the New Year's doll of the Snow Maiden made of tissue with your own hands, example 2
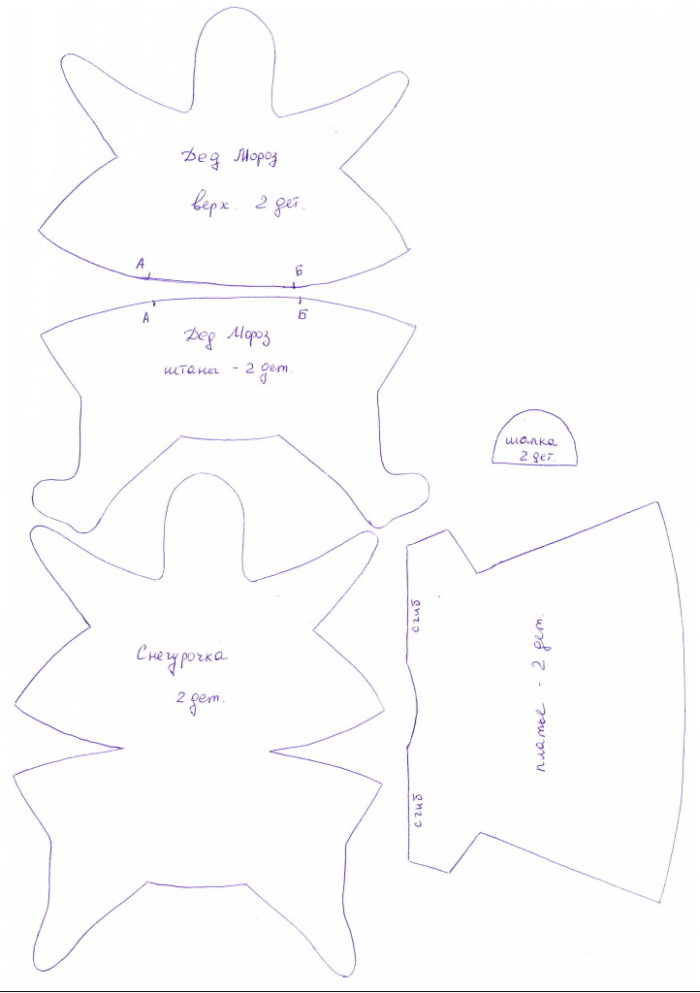
pattern for the New Year's doll of the Snow Maiden made of tissue with your own hands, example 3
And a selection of photos of ready -made New Year beauties.
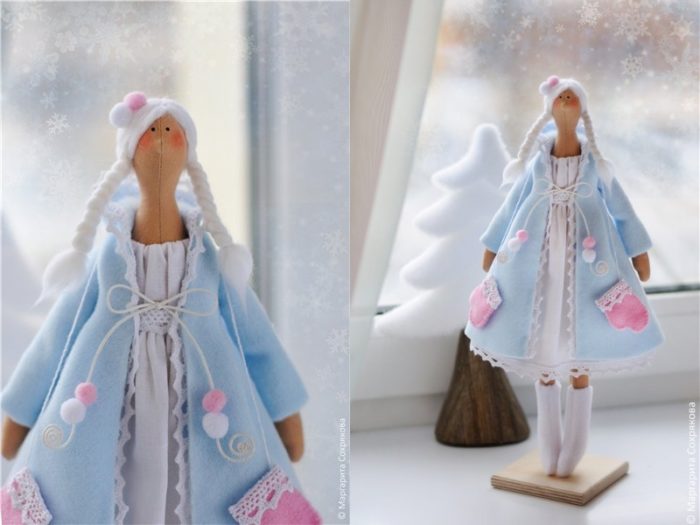
snegurochka dolls sewn from fabric, photo 1

snegurochka dolls sewn from fabric, photo 2
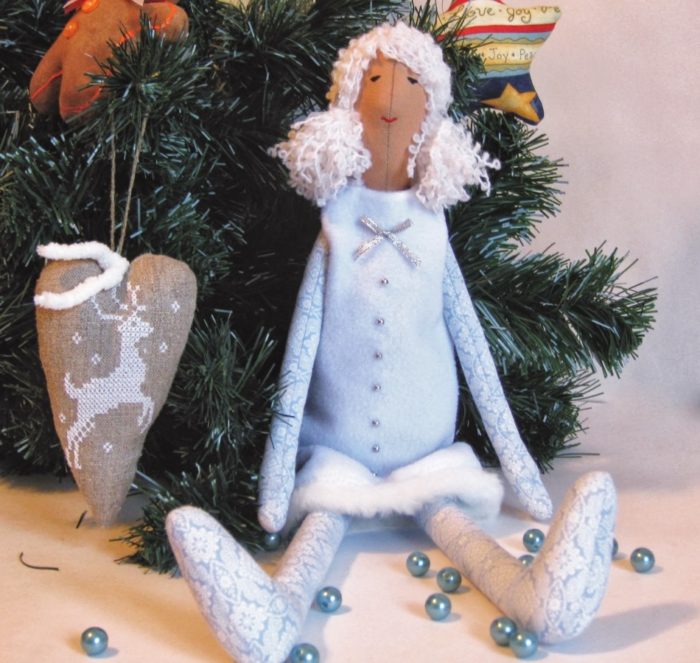
snegurochka dolls sewn from fabric, photo 3
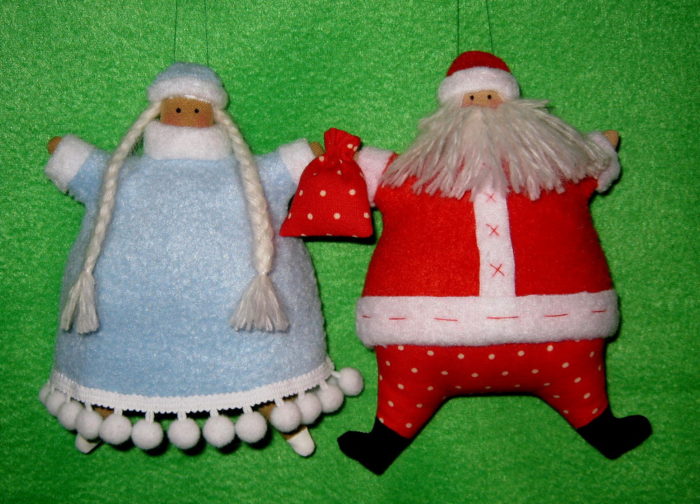
snegurochka dolls sewn from fabric, photo 4
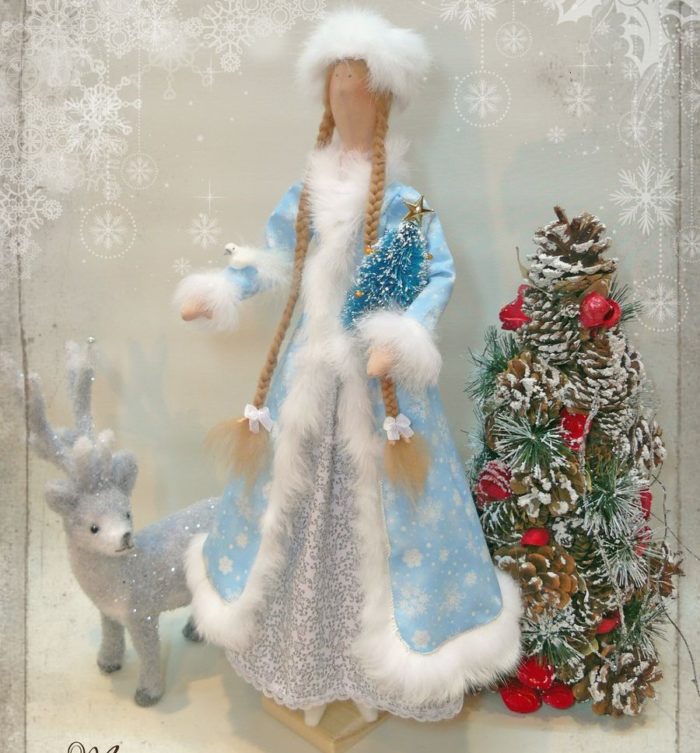
snegurochka dolls sewn from fabric, photo 5
snegurochka dolls sewn from fabric, photo 6
snegurochka dolls sewn from fabric, photo 7
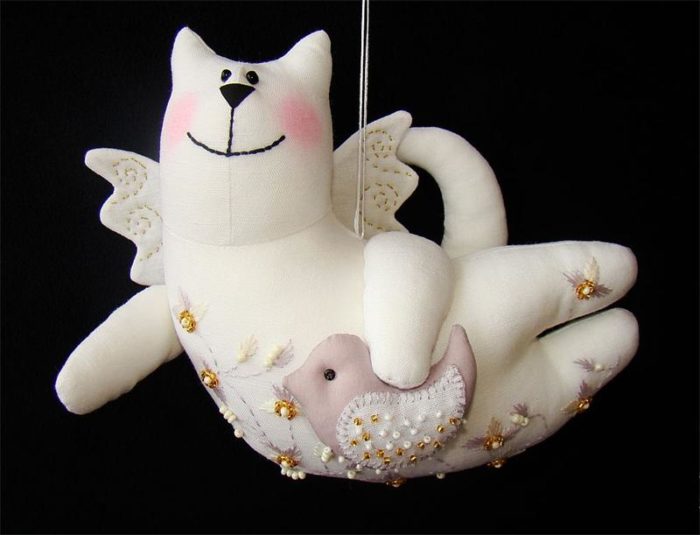
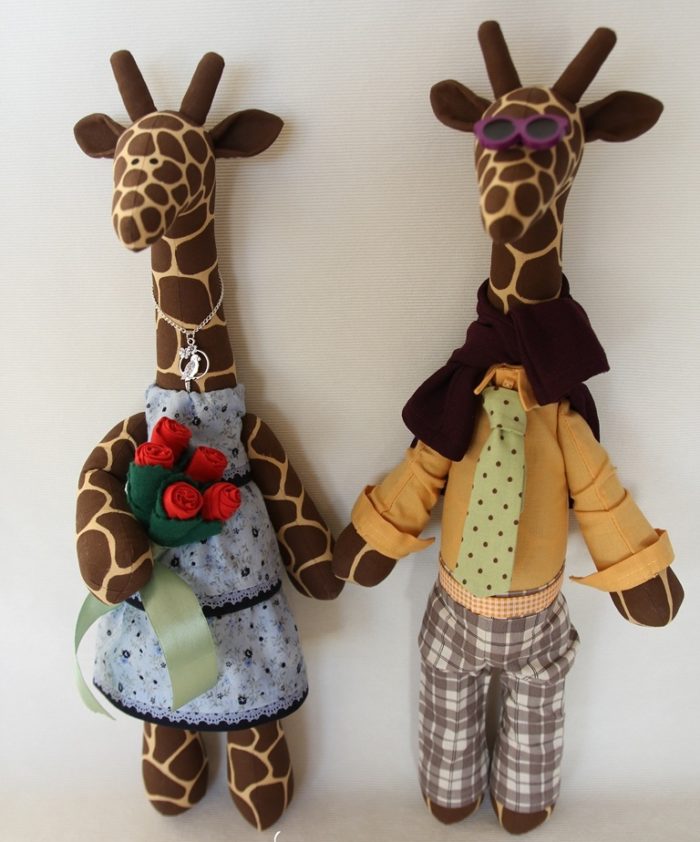
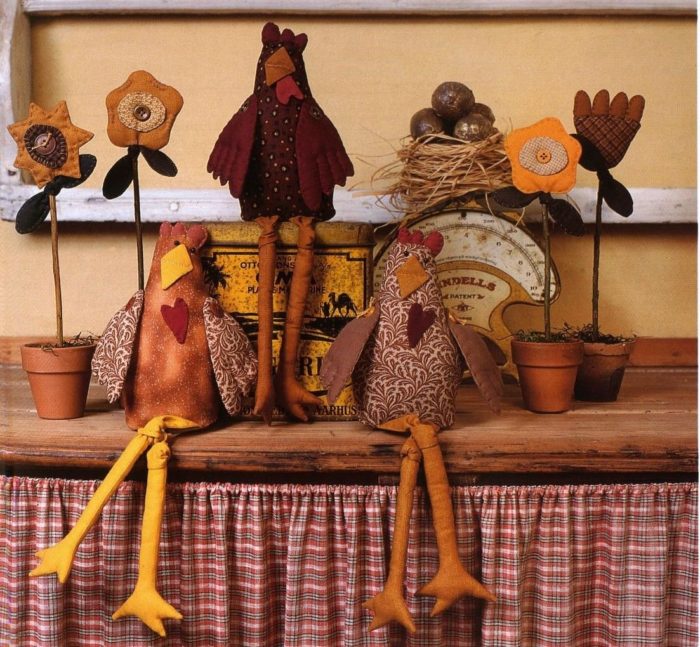
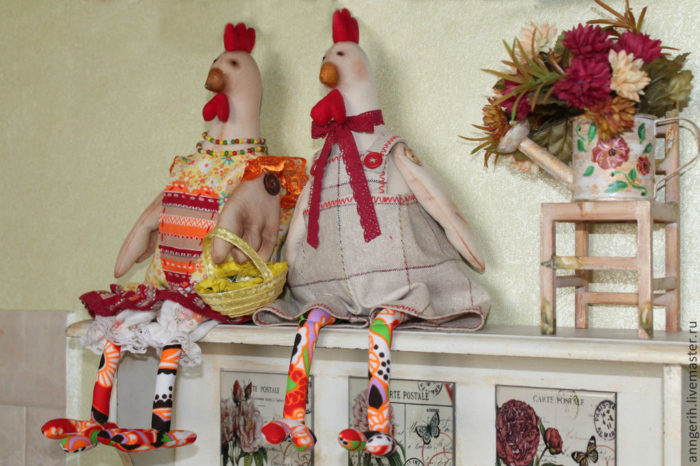
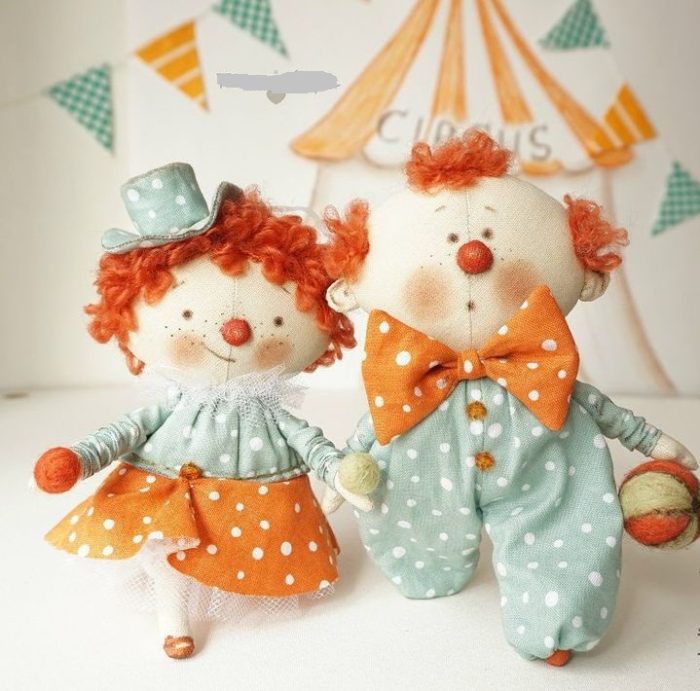
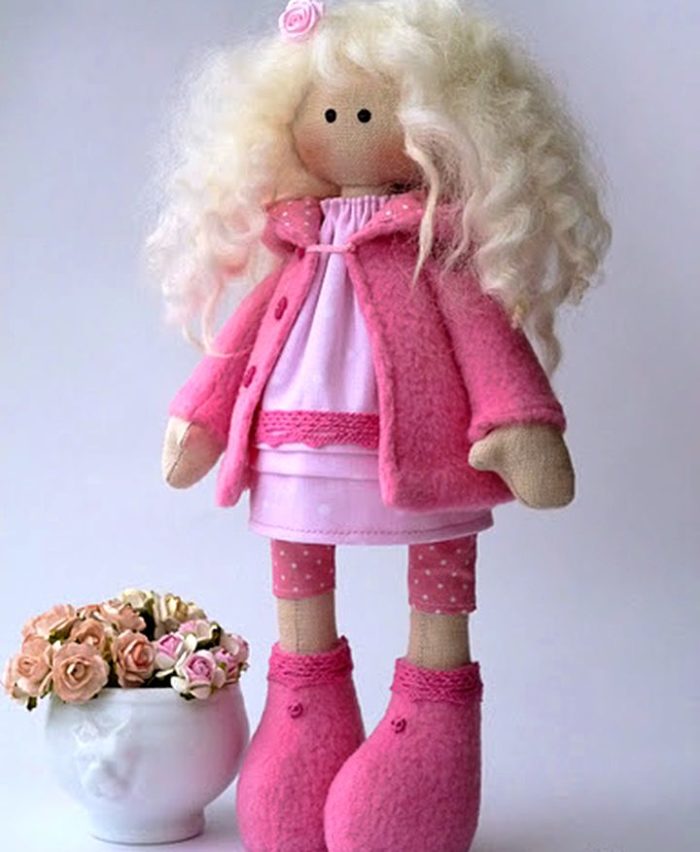
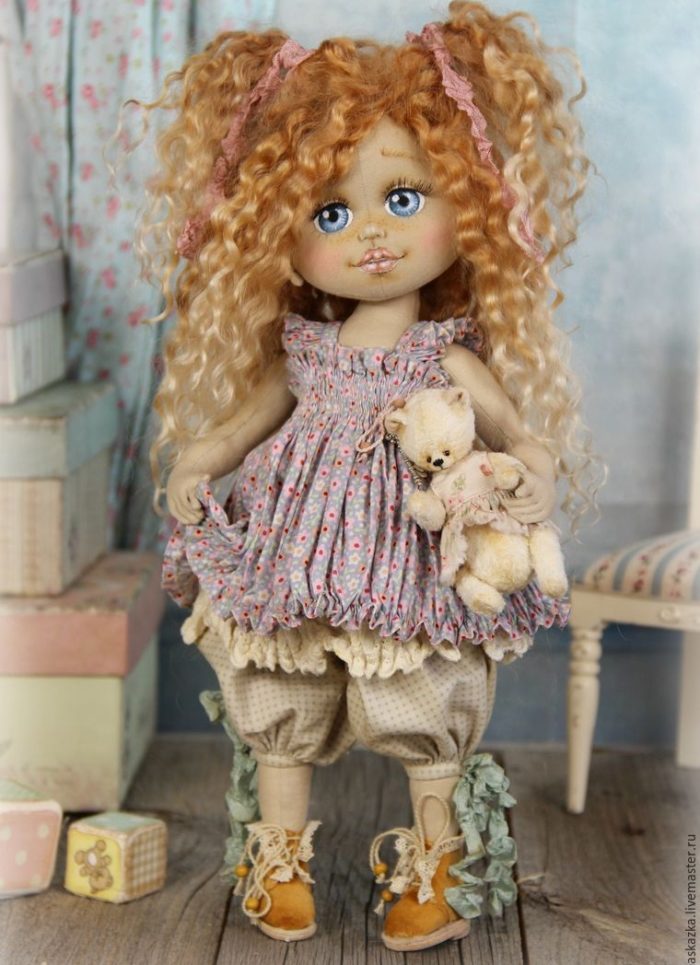
Fabric dolls: photo
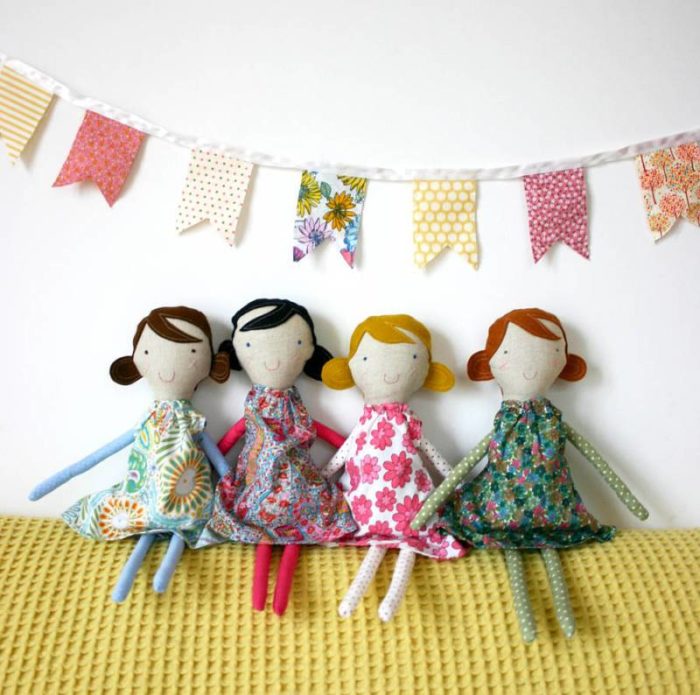
several ready -made fabric dolls sit on the couch under the flags
The needlewomen have such a lively imagination that they seized a lot of types of fabric dolls.
In addition to the above, there are also the following:
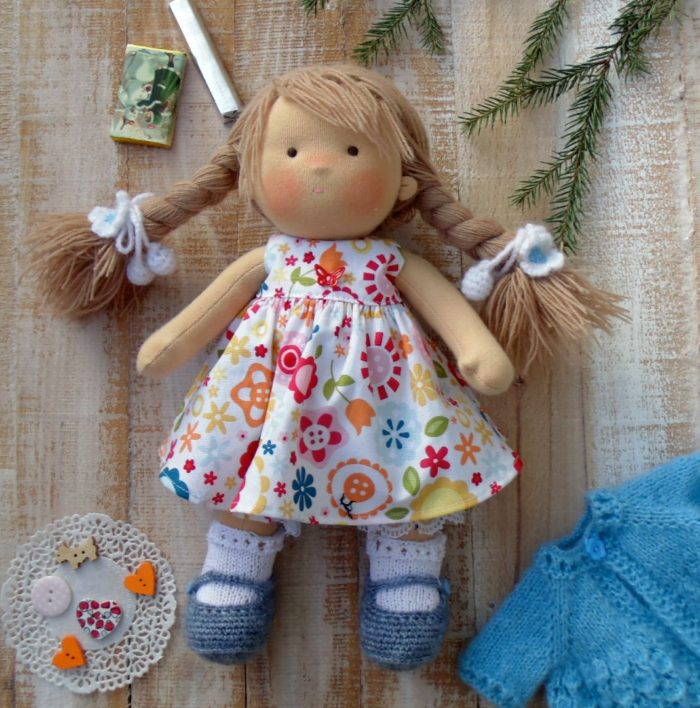
ready -made fabric dolls, photo 1
ready -made fabric dolls, photo 2
ready -made fabric dolls, photo 3
ready -made fabric dolls, photo 4
ready -made fabric dolls, photo 5

ready -made fabric dolls, photo 6
ready -made fabric dolls, photo 7
ready -made fabric dolls, photo 8
ready -made fabric dolls, photo 9
ready -made fabric dolls, photo 10
ready -made fabric dolls, photo 11
So, we examined the features of sewing dolls from fabric, patterns for them. Inspired from viewing the finished dolls of different sizes.
Catch the muse and stock up on fabric and fittings to create your masterpieces.
Small stitches and joy from the creative process!