Options of simple drawings for Easter with children.
The content of the article
- What to draw on Easter with children?
- Video: How to draw an Easter egg?
- How to draw a drawing on Easter in stages and easily with a pencil for beginners and children?
- Video: How to draw a wader to Easter - drawing lesson for children from 4 years old, gouache, draw at home in stages?
- Video: Easter basket
- DISCOUNT PASHA DISCOSS WITH School and Kindergarten with your own hands
- Pisces on Easter with paints for the competition
- Easter drawings for sketching
- Video: Video lesson draw a watercolor Easter still life
- Video: Video lesson draw a gouache of Easter rabbit
Simple beautiful drawings with children on Easter: from simple to complex ways, drawings with simple pencil or paints.
What to draw on Easter with children?
The end of the Great Lent and the expectation of the brightest and joyful holiday cause an extraordinary state in the hearts of Orthodox Christians, which cannot be given an explanation.
Enthusiastic feelings, an exalted feeling of grace in bright Easter days emphasize special holiday rituals.
Preparation for Easter begins in advance. Christians pray, are cleansed spiritually and physically. You can congratulate the family with this important event and convey sincere warm congratulations using your own drawing, made in Easter topics.
What to draw on Easter with children
Children are also looking forward to Easter, during which days are filled with special fun, games, entertainment and gifts.
Some of these symbolic gifts can make children with their own hands: for example, draw beautiful drawings with cakes, painted eggs and twigs.
Let's try to draw a drawing on Easter. With the help of step -by -step photographs, you will master the basics of the drawing to Easter, and you can give the result of your work to relatives and friends.
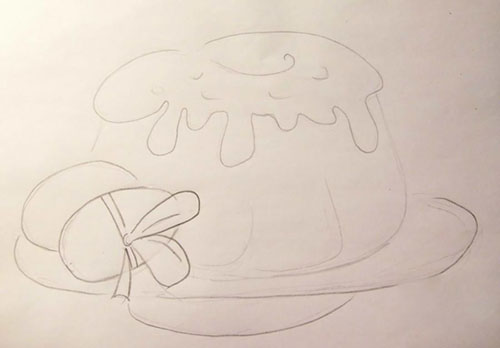
We will draw a cake - The traditional Easter pastry, which is a symbol of the presence of God in this world and His concerns of all people.
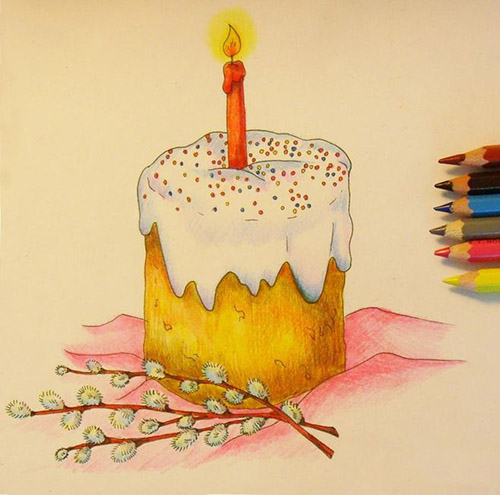
Here we will draw such a curtain
For the picture you will need:
- clean sheet of paper
- simple pencil
- colour pencils
- eraser
- black gel pen or felt -tip pen

What will be needed for drawing
We start creating an Easter picture:
- We denote on a sheet of paper straight lines of the borders of the cake resembling a square in shape. You need to do this without pressure on a pencil, otherwise the picture will look sloppy after all unnecessary lines are erased with an eraser.
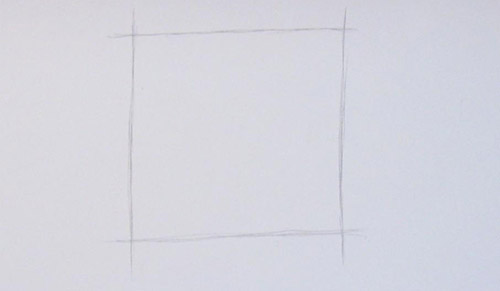
We enter a square on a sheet of paper
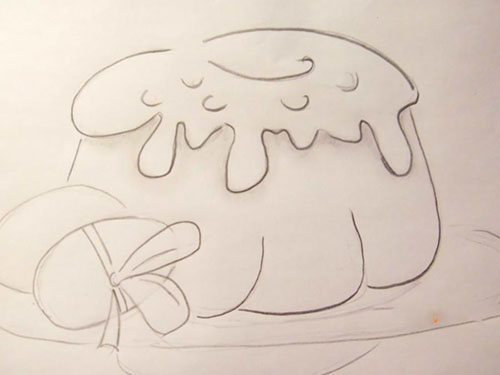
- We draw the upper and lower parts of the cake: draw rounded lines above the square and under it.
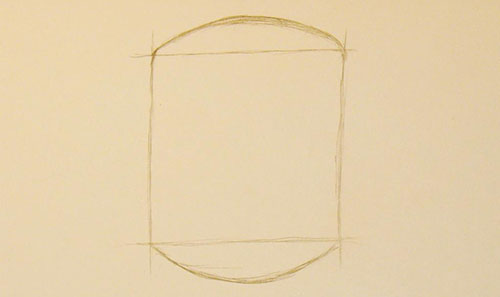
Draw the top and bottom of the cake
- We carry out another arc - under the upper curved line, connecting them into the oval. The top of the future cake is almost ready.
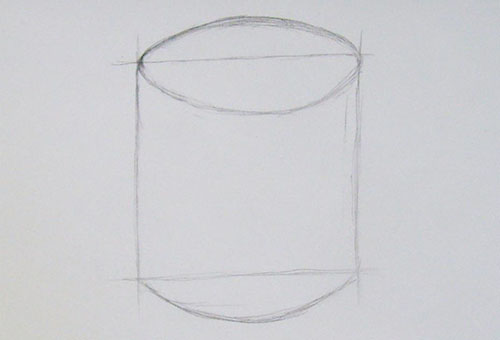
Add another line at the top of the cake
- We draw a candle, determining the center of the oval and add the folds of the napkin, on which the cake is standing - we will draw several curved lines right under the base of the cake.
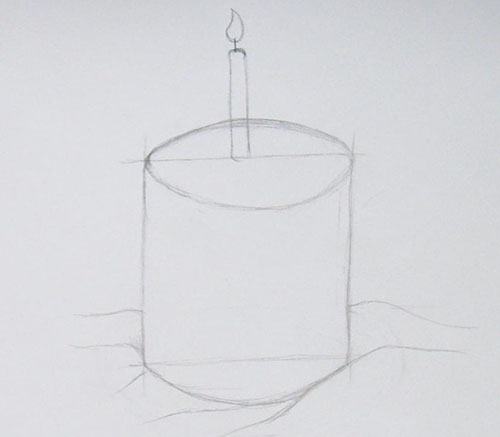
We draw a candle
- We depict the recruitment branches: we will draw several curved lines for the stems, and then we will finish the oval buds. Please note: closer to the top of the kidneys are small, and along the rest of the stem are large.
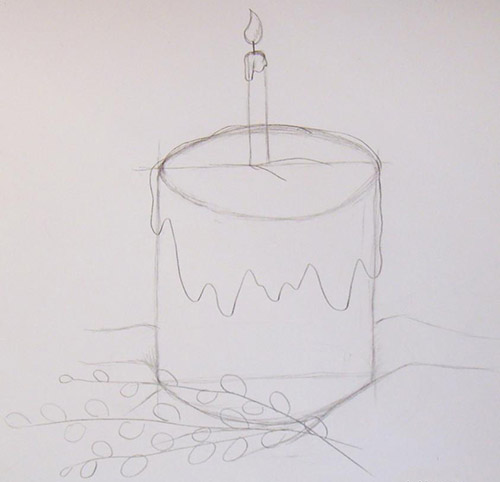
Add the twigs
- We “apply” the icing to the cake: draw smooth winding lines along the walls of the Easter cake, which go into drop -shaped outgrowths. Show the volumetric glaze under the candle with a small line.

We draw a glaze
- We draw in more detail the pits on the baking, draw a round “powder” in the form of tiny circles. We draw the hairs on the kidneys of the vertebra and draw one more line on the stems.
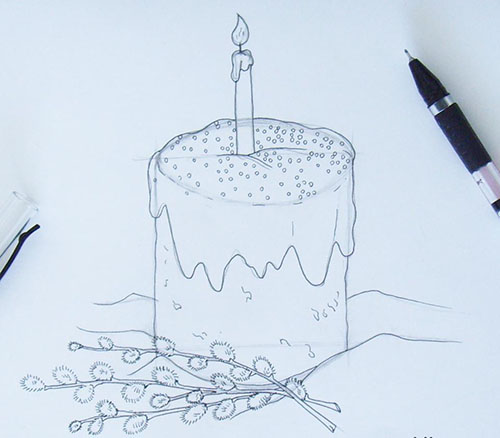
Add the powder
- We lead a darker color circuit of the drawing. To do this, you can use a gel pen or felt -tip pen.
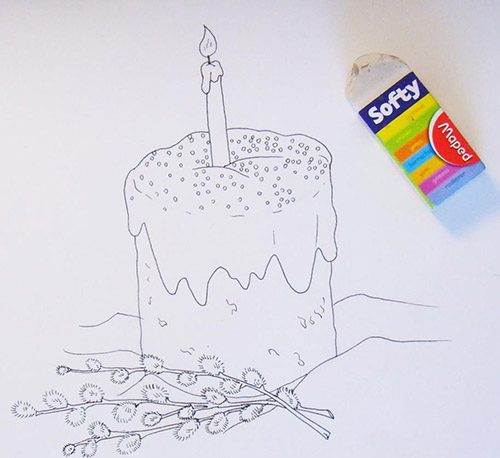
We remove the extra lines
- We remove the auxiliary lines.
- We decorate Easter cake using colored pencils or felt -tip pens.
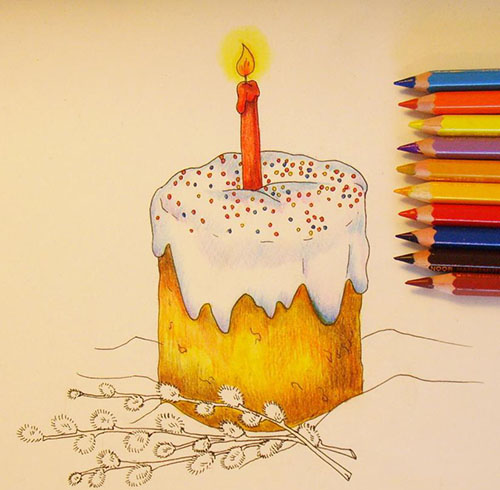
We decorate
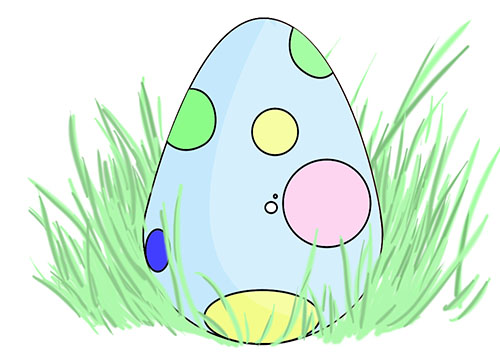
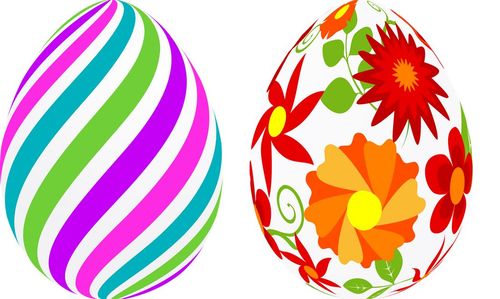
What else to draw with children on Easter? For example, these are bright painted eggs that are the main Easter attributes:
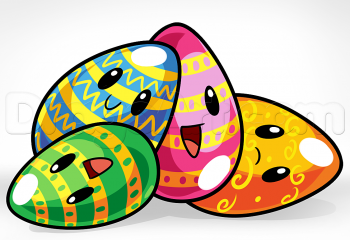
Easter eggs: drawing for children
How to draw Easter eggs
- Before you start drawing, you can explain to the child the meaning of Easter eggs: for Christians, this ritual festive food means the beginning of a new life.
- The eggs are associated with the hope of revival and restoration. One of the festive rituals is to exchange krashanks with friends and acquaintances.
- A child can paint a painted Easter egg with bright colors, decorate with ornaments and funny figures. Fantasy and perseverance will help him in this.
- Thanks to our step-by-step master classes, the child will easily prepare a beautiful colorful pattern on Easter. The options proposed here will help your child take a worthy place in the competition of children's creativity in a school or kindergarten.
- It is only necessary to carefully follow the phased photographs and repeat all the lines exactly. And you can decorate the finished sketch as the soul will wish
For work you will need:
- album sheet
- simple pencil
- color pencils or felt -tip pens
- eraser
We will try to exactly convey the shape of the egg. To do this, put a regular chicken egg in front of us. It will serve us as a "visual aid."
- We start with a circle that will need to be “crowned” by the top: draw a figure over the circle, resembling a triangle, but with a very rounded medium angle. The side sides of the triangle are the contours of the circle.
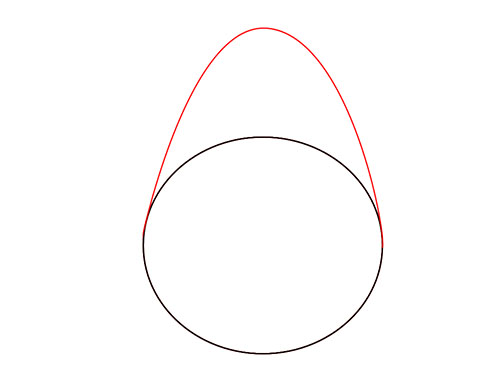
We draw a circle and top of the egg
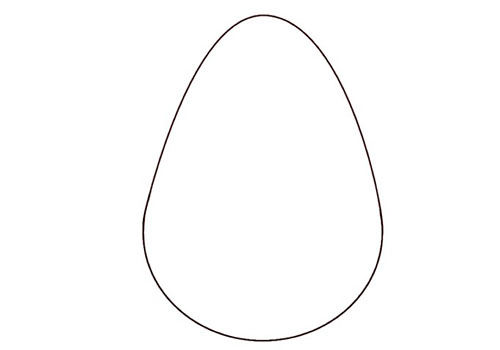
We remove the extra line
- Remove the line with an eraser that separates the circle and triangle. We got an egg of the correct shape.
- We decorate the Easter egg: draw wavy lines, geometric figures. You can depict wide stripes that expand from the top to the sides, covering the egg and forming a funny “striped” pattern.
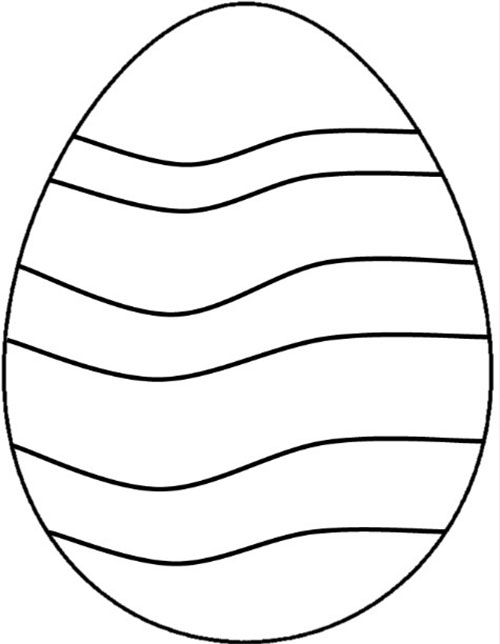
What patterns to draw on Easter egg
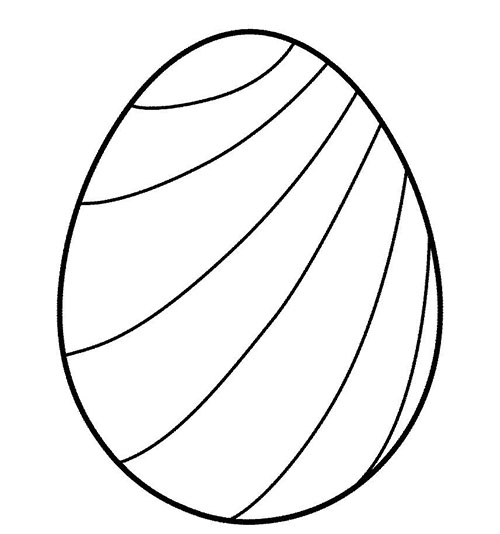
- We apply bright colors on the Easter egg with colored pencils or felt -tip pens. The unique author's creation is ready!

Brill the finished egg with bright colors
- How else to paint an Easter egg? To decorate it with one color, and then finish it with contrasting flowers on its surface, circles, strips.
Video: How to draw an Easter egg?
How to draw a drawing on Easter in stages and easily with a pencil for beginners and children?
Such a drawing can also draw a child of preschool age if the lesson is under the leadership of an adult.
For work you will need:
- clean sheet of paper
- simple pencil
- color pencils, paints or felt -tip pens
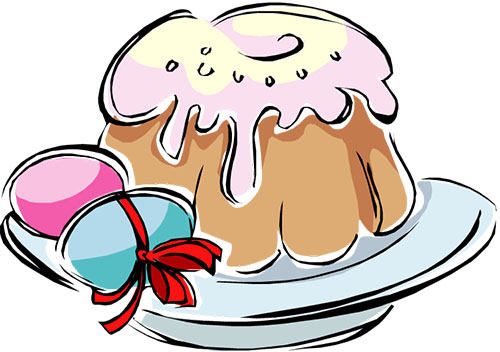
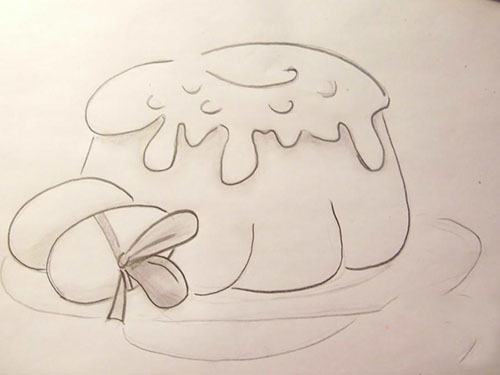
We draw Easter cake on a plate
- We apply the original lines on the sheet: it will be the cake of the cake covered with glaze.
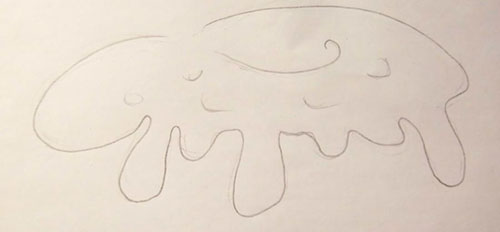
We depict the top of the cake
- We draw without pressing a pencil. Add the hollows and fossa of the frozen glaze.
Detail the form of blurry glaze
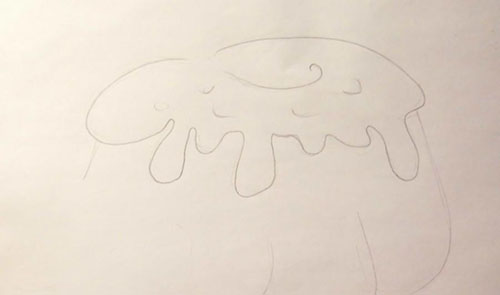
- Now we will finish the waders under the "hat" of the glaze.
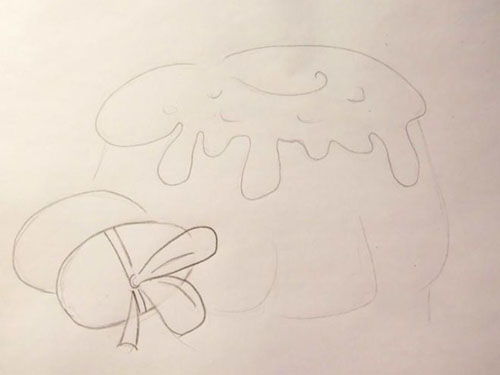
Draw a cake under a hat of glaze and eggs
- In the left corner we draw Easter eggs. To give the drawing a festive look, we will “tie” one egg with a ribbon.
We draw the edges of the plate
- We draw with smooth lines a plate on which the cake stands.
- We clarify the contours of the picture and point them with a darker color. Add shadows under the icing.
Draw the contours of the picture and add the shadows under the icing
- We draw the contours of Easter eggs and shade some areas on the bow.
Add shadows on a bang
- We circle the plate with a dark color. We decorate the drawing with bright colors.
Video: How to draw a wader to Easter - drawing lesson for children from 4 years old, gouache, draw at home in stages?
We continue to draw on an Easter topic. Fortunately, the scope for imagination and creativity is truly limitless here.
A child can draw a basket with Easter eggs and decorate his work with bright cheerful colors. It turns out a beautiful gift for Easter, thanks to which the house is filled with an atmosphere of celebration.
- We will begin to draw a basket with an image of a circle in the middle of the sheet.
- We circle the rim from above, complementing the curved lines on the one hand - weaving a basket.
- Let's draw grass.
- In the basket we draw three Easter eggs.
- Two curved lines are basket pens.
- We decorate the drawing with bright colors.
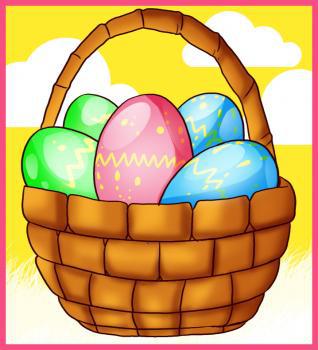
How to draw an Easter basket
After watching the video, you will learn how to draw an Easter basket. The drawing is not complicated, because it can be used in class in kindergarten or elementary school.
Video: Easter basket
DISCOUNT PASHA DISCOSS WITH School and Kindergarten with your own hands
If, in the eve of the bright of Christ, Sunday in kindergarten or school, an exhibition of drawings on Easter topics is held, then preparing a picture or a postcard for the holiday with parents will not be difficult.
Your child can imagine your vision of this bright holiday or make a drawing using a step -by -step description below.
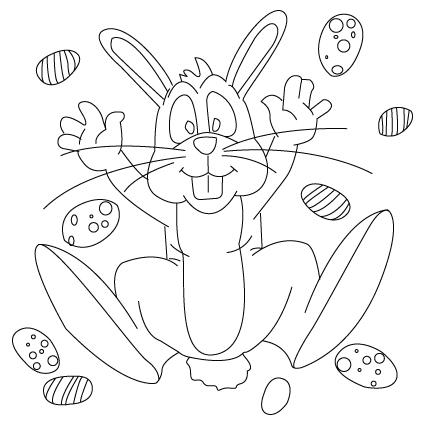
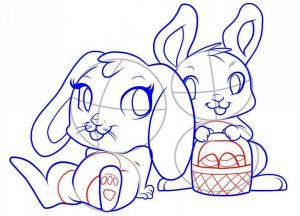
We draw with children of Easter rabbits:
- We depict four circles on a sheet of paper, located in pairs one on the other.
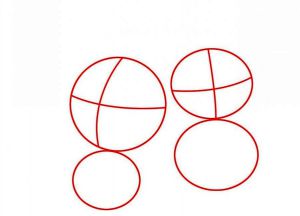
Draw circles and intersecting lines inside
- Circles drawn from above are the heads of rabbits, which should be more than a circle for the body. On the head we draw two intersecting lines.
We clarify the contours of the heads
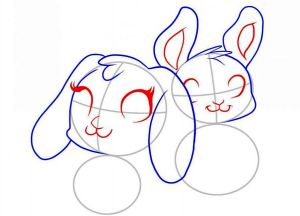
- We draw in more detail the contours of the heads of rabbits. Add ears, perky bangs and muzzle details.
Add the muzzle and pupils
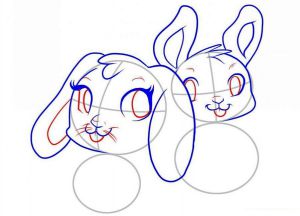
- We finish the pupils, the inner lines of the ears, antennae, eyebrows.
We draw the front paws and contours of the animals. - Now add the hind legs. The rabbit on the right holds a basket in his paws. We draw it, starting with a circle and clarifying its shape.
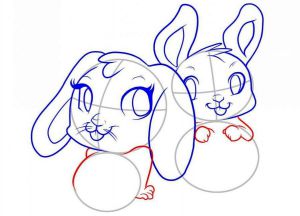
We draw the front paws
- Add the missing details: eggs in a basket, the heels of the rabbit that lies on the left.
Add the missing parts
- The finished sketch is easy to “turn” into a card made with your own hands, if you beautifully decorate it and sign it.
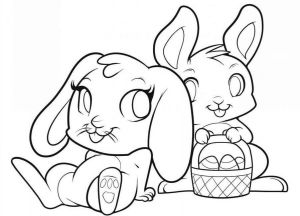
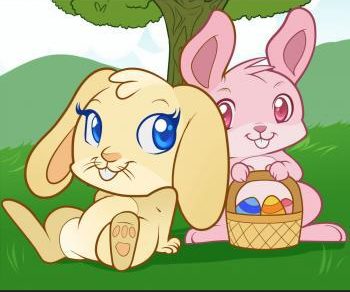
How to decorate Easter rabbits
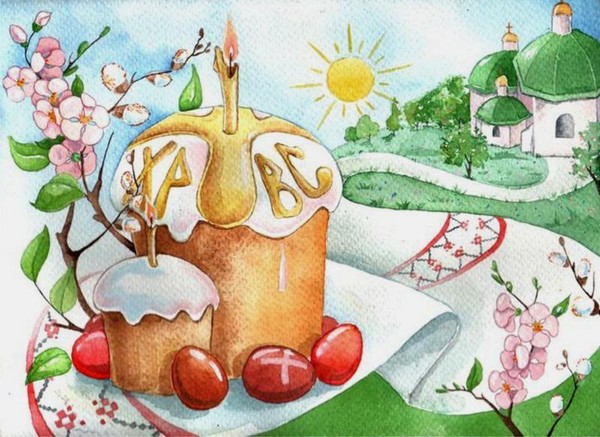
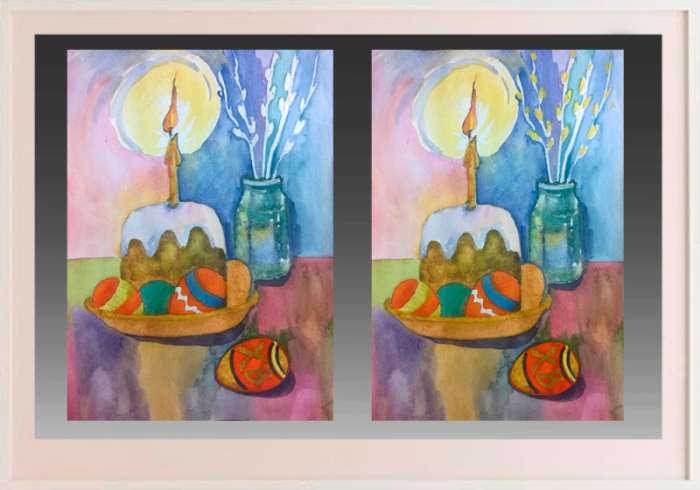
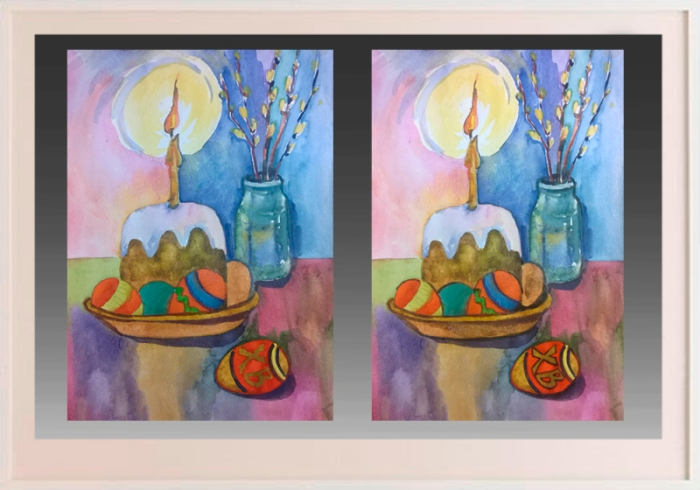
Pisces on Easter with paints for the competition
You can convey the atmosphere of the feast of an resurrect life with the help of Easter still lifesh painted.
We will draw cakes, multi -colored eggs and twigs.
For work you will need:
- watercolor paper sheet
- simple pencil (b or b2)
- eraser
- gouache or watercolor
- brushes
- palette or any other flat white surface (saucer or ordinary sheet of paper)
- maular tape
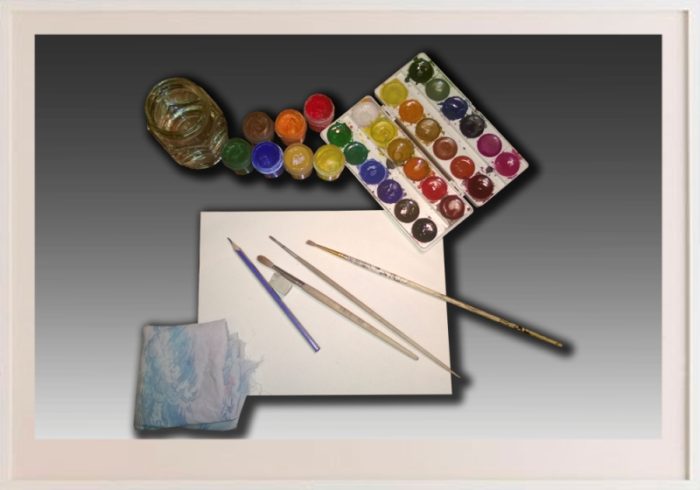
What will be needed for drawing
We fix the sheet of paper with a vertically painting ribbon. We approximately outline with a simple pencil (without pressure) the location of the cake, vases for willow and painted eggs.
- Divide the sheet into the upper and lower parts and draw a horizontal line just below the midline of the sheet. It will be the edge of the table. We draw a rectangle on the table, placing it not in the center, but slightly moving to the left side.
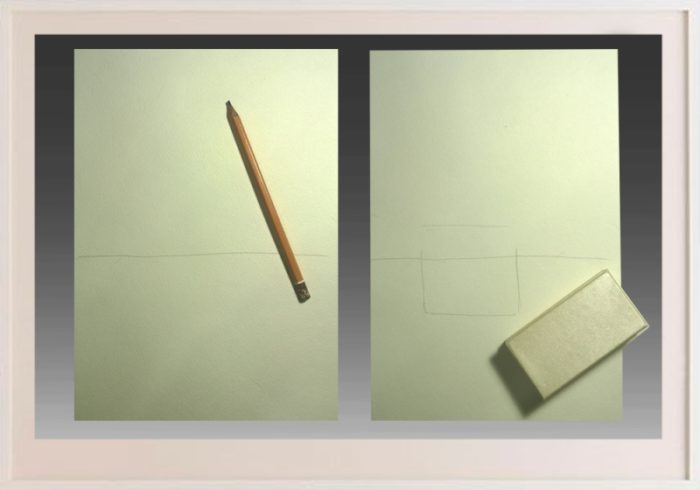
We have the contours of the cake, vases and eggs on the sheet
- We draw in the right half of the sheet and a little higher another rectangle: narrow and small. We draw the edge of the plate with a cake. We remove excess pencil lines (table and lines inside the objects) so that they do not interfere with us when drawing.
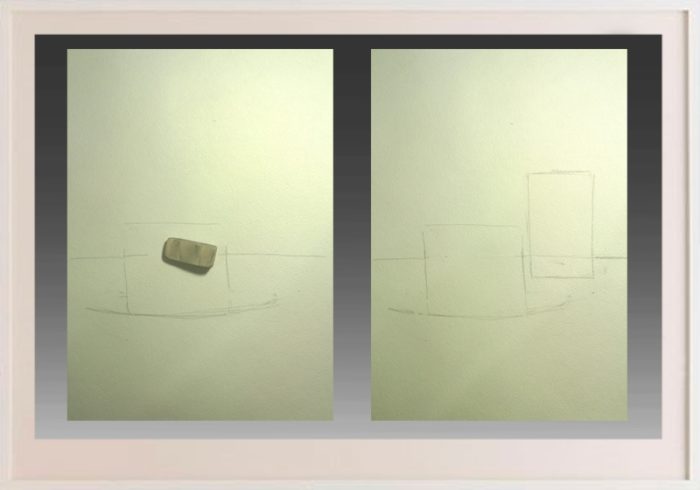
Draw the table line and the edge of the plate
- We remove the upper corners of the rectangles with an eraser and specify the contours of the cake and vases.
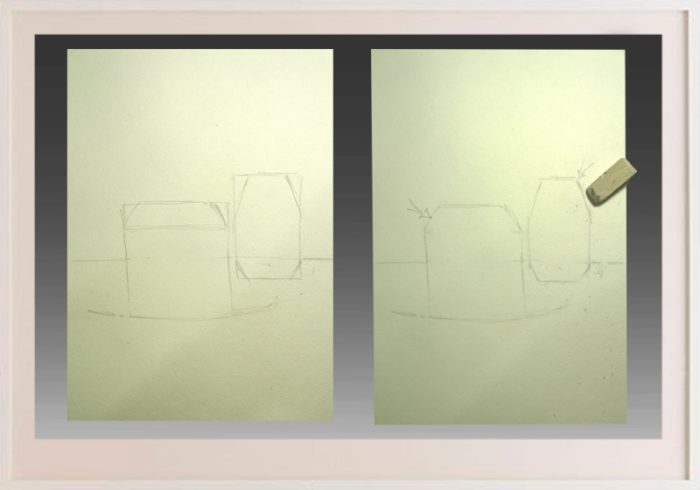
We draw the circuit of the eggs
- We take round objects of a suitable size and begin to draw eggs located around the cake. We depict the near Easter eggs more in size than distant ones.
- We draw the contours of the eggs, the edges on the vase and add the glaze on the cake.
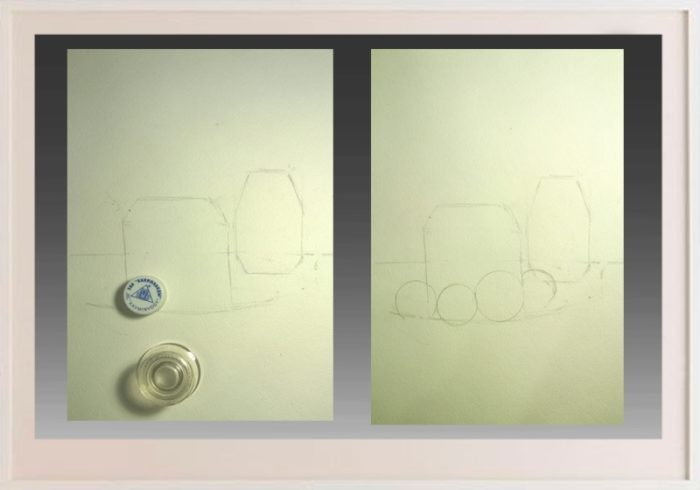
We draw the edges on a vase, glaze
- Now you need to draw a candle. In order not to complicate the task for yourself, we just attach a simple pencil to the top of the cake and circle it, adding a small light from above.
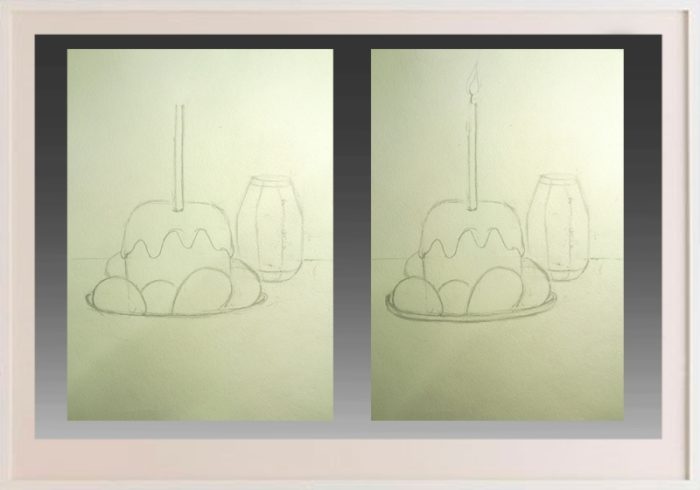
We draw a candle
- We draw a plate under the cake. We fill in the empty space of the lower right side of the sheet with a large Easter egg.

Draw the contour of another egg in the foreground
- We finish the recording branches, correcting or shortening the top of the candle if necessary.
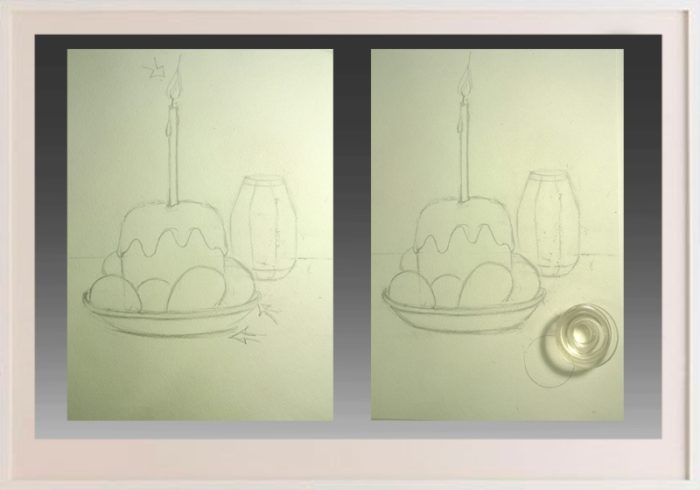
We draw the twigs of the verb
- Add the kidney torture on the twigs.
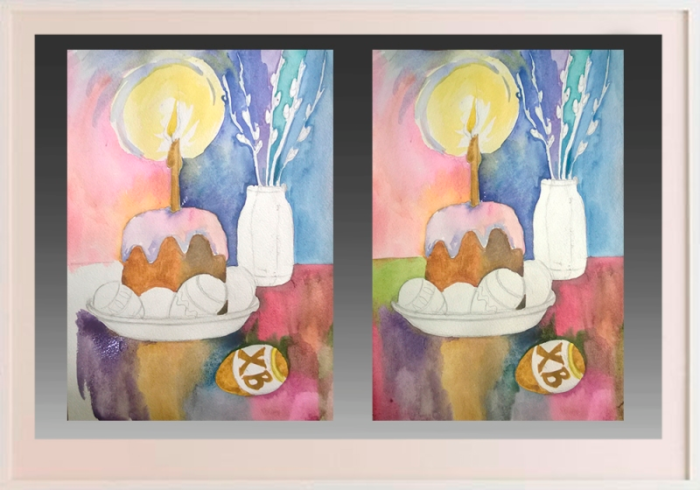
- We write two letters “XV” on the nearby egg, the meaning of Christ is risen.
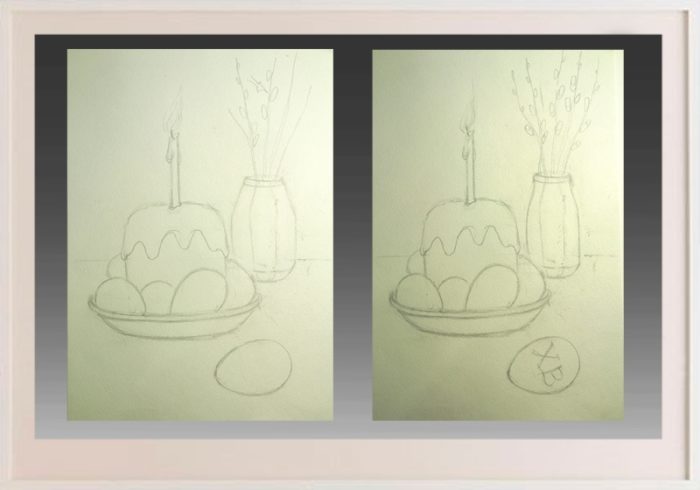
Add the kidneys on the recruitment branches
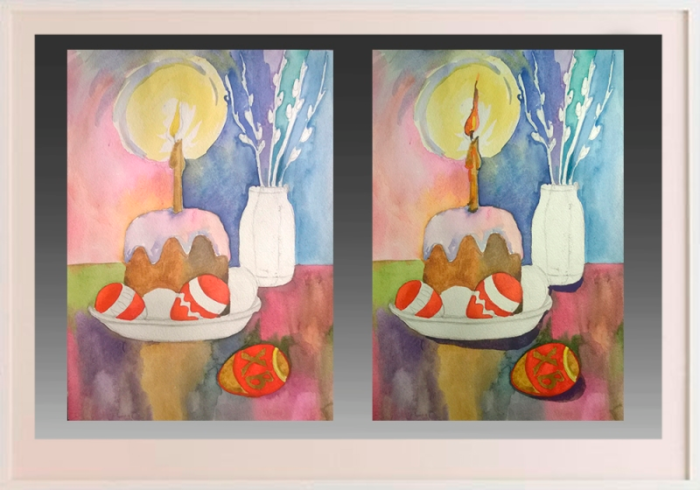
- We draw a pattern on Easter eggs.
We begin to decorate the picture
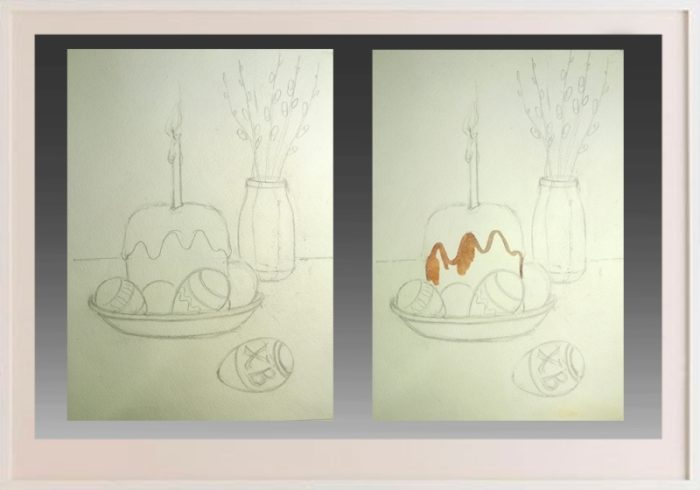
- We take paints and begin to decorate our Easter picture.
- We paint over the cake with light beige with the addition of a sandy yellow shade.
- Add a little blue to the shade of the cake.
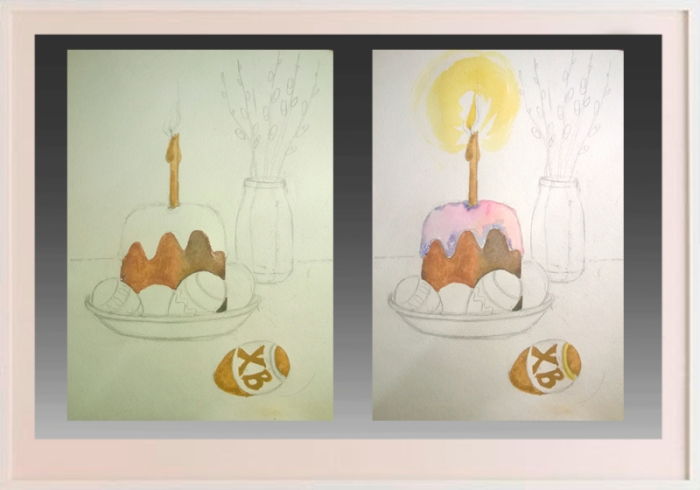
Prescribe icing and add the yellow light of the candle
- We prepare a suitable shade for painting a candle and partially - eggs. It can be a safety paint.
We paint over the background
- Add a little pink and blue to the icing. We paint in yellow with a candle light. We draw in circular movements of light.
Draw a circle lit by a candle
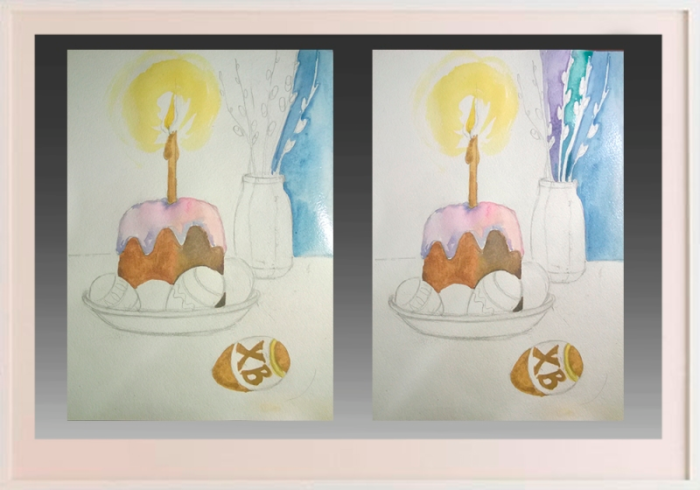
- We draw the background with gently blue and turquoise colors.
We finish the background on the left
- Let's go through the same color along the contour of the twigs of the vertebral.
We begin to paint the surface of the table
- Add the yellow color to the candle light.
- We collect pink paint diluted with water, orange and fill the background on the left.
- We paint over the surface of the table, allowing the paints to mix.
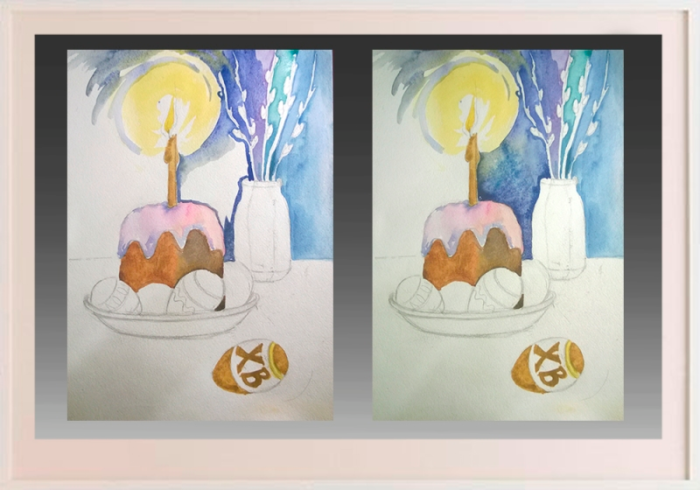
- Preteen Easter eggs. To make the picture a picturesque, we use red color for some eggs, red-orange and red-brown tones.
We paint over Easter eggs
- We paint one Easter egg with green. Add the pattern on the eggs.
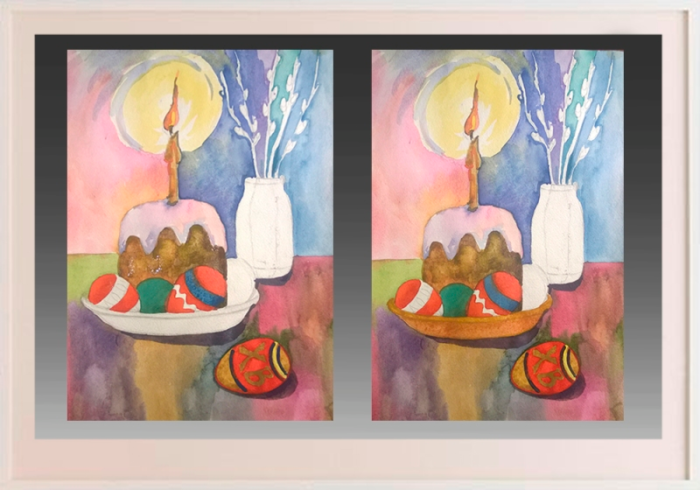
Draw a pattern on Easter eggs, add shadows
- We draw purple shadows on the table, under the egg and under the verba.
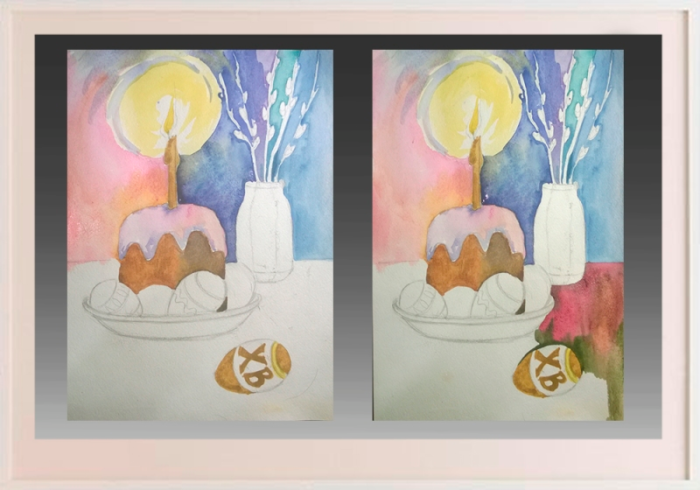
- We begin to paint a vase with a neutral blue color. Add a little yellow.
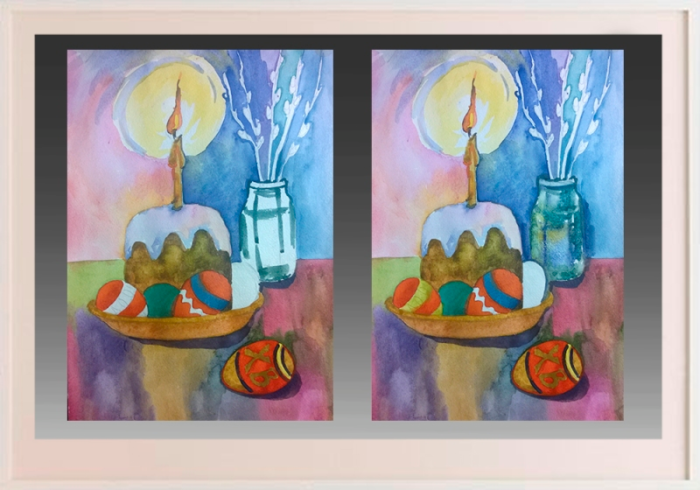
We paint over a vase
- We decorate the Verob, showing the disheveled small fluffy inflorescences.
Apply a little yellow paint on the kidneys of willow and on a vase
Draw the twigs of the vertebra
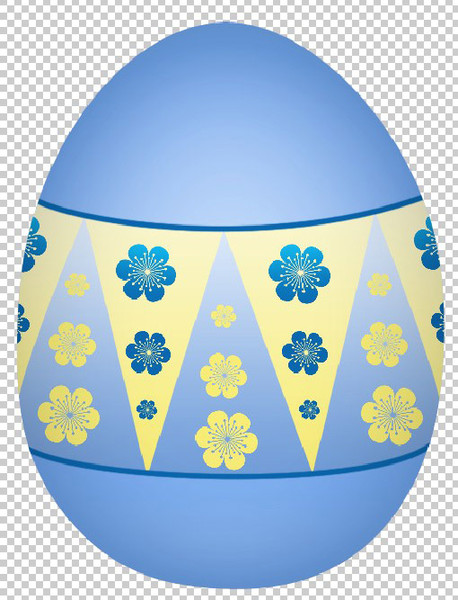
Easter drawings for sketching
Easter drawings for sketching